We may earn revenue from the products available on this page and participate in affiliate programs. Learn More ›
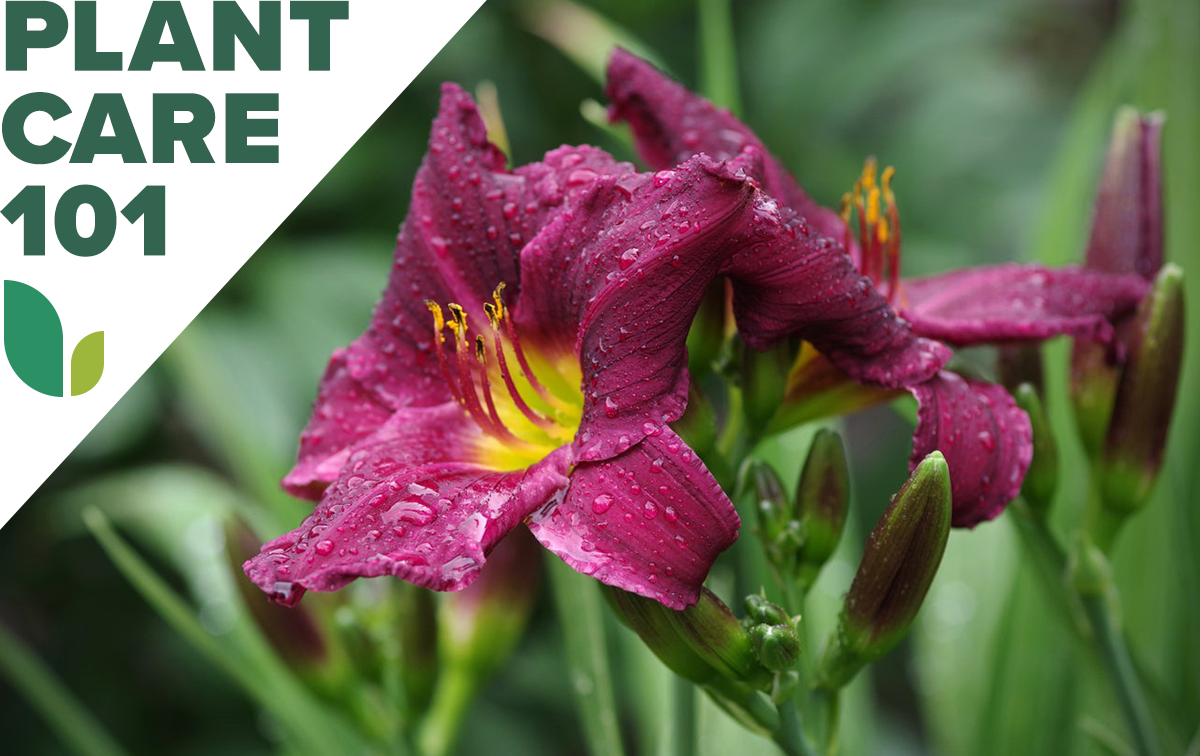
Even though daylilies (Hemerocallis spp.) technically aren’t lilies, they resemble lilies in the shape of their flowers. Keep in mind, however, that references to “daylily bulbs” are incorrect, since daylilies don’t grow from bulbs—as Lilium species do—but from tuberous roots.
Although each daylily flower typically lasts only for a single day, the plants can produce several scapes (leafless stalks) per plant and up to nine buds on a single scape. The butterfly-attracting flowers are accompanied by rabbit-resistant foliage. And daylily care is easy, so easy that at least one naturalized species grows wild in berms and ditches.
Growing Daylily at a Glance
Common Name: Daylily
Scientific Name: Hemerocallis spp.
Hardiness Zone: Varies from USDA Zones 3 to 11
Soil: Fertile, well-draining soil; pH 6.0 to 6.5
Light: Full to partial sun
Water: Medium
Food: High-nitrogen fertilizer
Propagation: Division or seed
Safety: Toxic to pets, not people
Daylily Characteristics
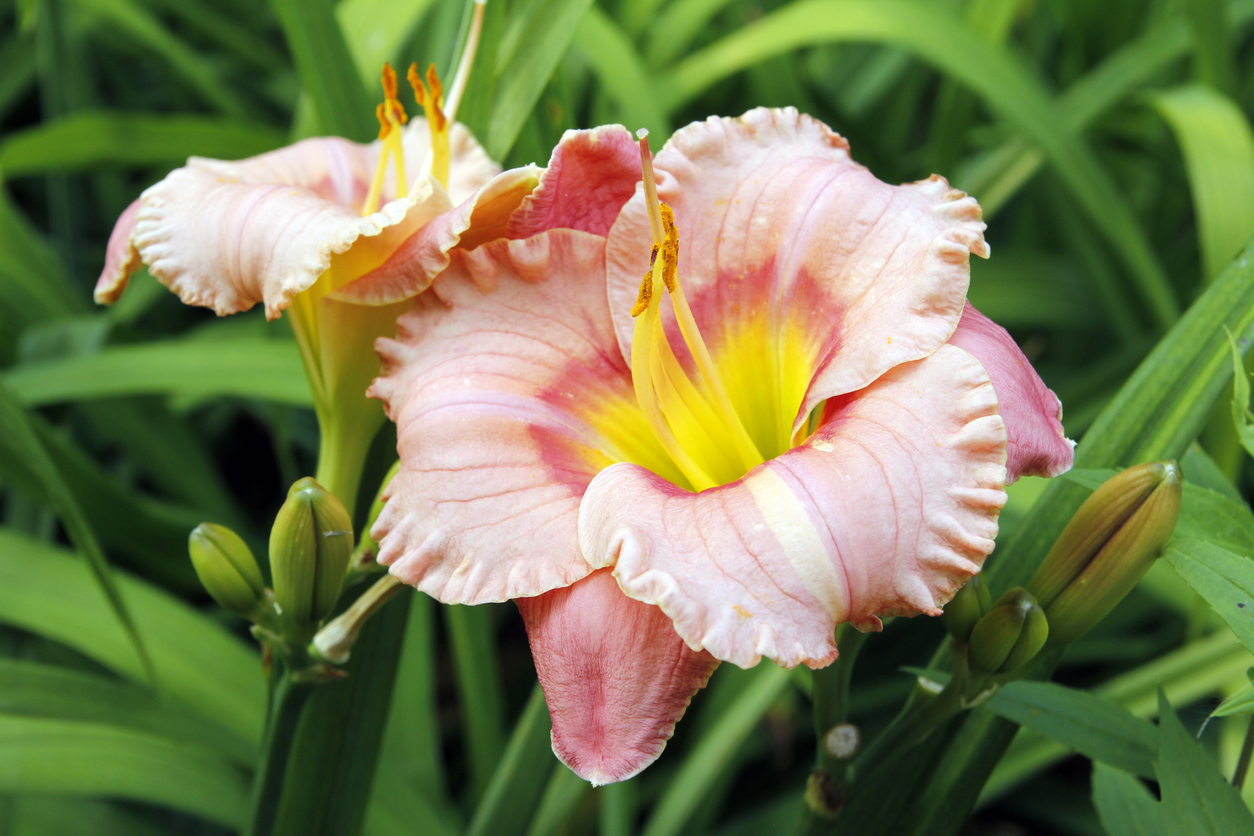
According to the American Daylily Society, daylilies’ strappy leaves “vary considerably from slender and grass-like to husky, wide, and nearly corn-like.” The plants’ height also varies drastically, from 1 to 6 feet, and their blooms range from the 1½-inch-wide flowers on some dwarf types to “monsters” that measure 8 inches across.
Daylily flowering may begin as early as mid-spring in southern climates, but usually not until midsummer in northern zones. A typical plant blooms for 4 to 6 weeks, but reblooming types can persist longer.
Deciduous cultivars die down to the ground during winter (dormant), while evergreen varieties often remain green in the South but are likely to freeze back in northern zones. Oakes Daylilies notes that “if you live in an area that doesn’t get freezing weather in the winter, dormant varieties won’t work for you; you need to choose evergreen or semi-evergreen varieties.”
RELATED: 20 Plants That Thrive Even When Temperatures Rise
Recommended Daylily Varieties
- Hemerocallis citrina: The daylily for night owls, the citron type grows to 4 feet with 6-inch fragrant yellow blooms that open near sunset and close not long after the sun rises.
- Hemerocallis fulva ‘Kwanso’: A double form of the naturalized ditch lily, Kwanso can reach 4 feet with 4-inch double orange flowers.
- Hemerocallis lilioasphodelus: Also called yellow daylily or lemon lily, this spring-blooming species grows to 3 feet with 4-inch yellow, heavily scented blooms.
- Hemerocallis ‘Ed Murray’: This dark lily tops out at 30 inches with 4-inch burgundy flowers.
- Hemerocallis ‘Siloam Double Classic’: A girly lily, this frilly double grows to 16 inches high with 5-inch ruffly pink blooms.
- Hemerocallis ‘Stella de Oro’: This highly popular miniature reblooming cultivar grows to only 1 foot tall with yellow flowers almost 3 inches across that continue to appear all summer.
Planting Daylilies
Consider planting daylilies interspersed with clumps of daffodils in a cottage garden, since the lilies’ summer growth can cover up the daffodils’ yellowing foliage. They also can look natural in nearly any landscape and are excellent plants near the borders of beds or along paths.
When is the best time to plant daylilies?
In the North, set out daylilies in late spring after the danger of hard frosts has passed or in summer at least 6 weeks before the first expected autumn frost. In the South, opt for early spring or late autumn to allow the plants a head start before sizzling temperatures set in.
Where can daylilies grow?
For the best results, choose a location with fertile, well-draining soil with a pH between 6 and 6.5 in full sun or partial shade. Daylilies prefer at least 6 hours of rays per day but reportedly can get by and bloom with 4 hours of sun. They also can handle less-than-ideal soil conditions if necessary. In the South and hotter Southwestern zones, plant daylilies where they receive morning sun and afternoon shade.
How do you plant daylilies?
If your plant’s roots appear dry, soak them overnight before you set out the plant.
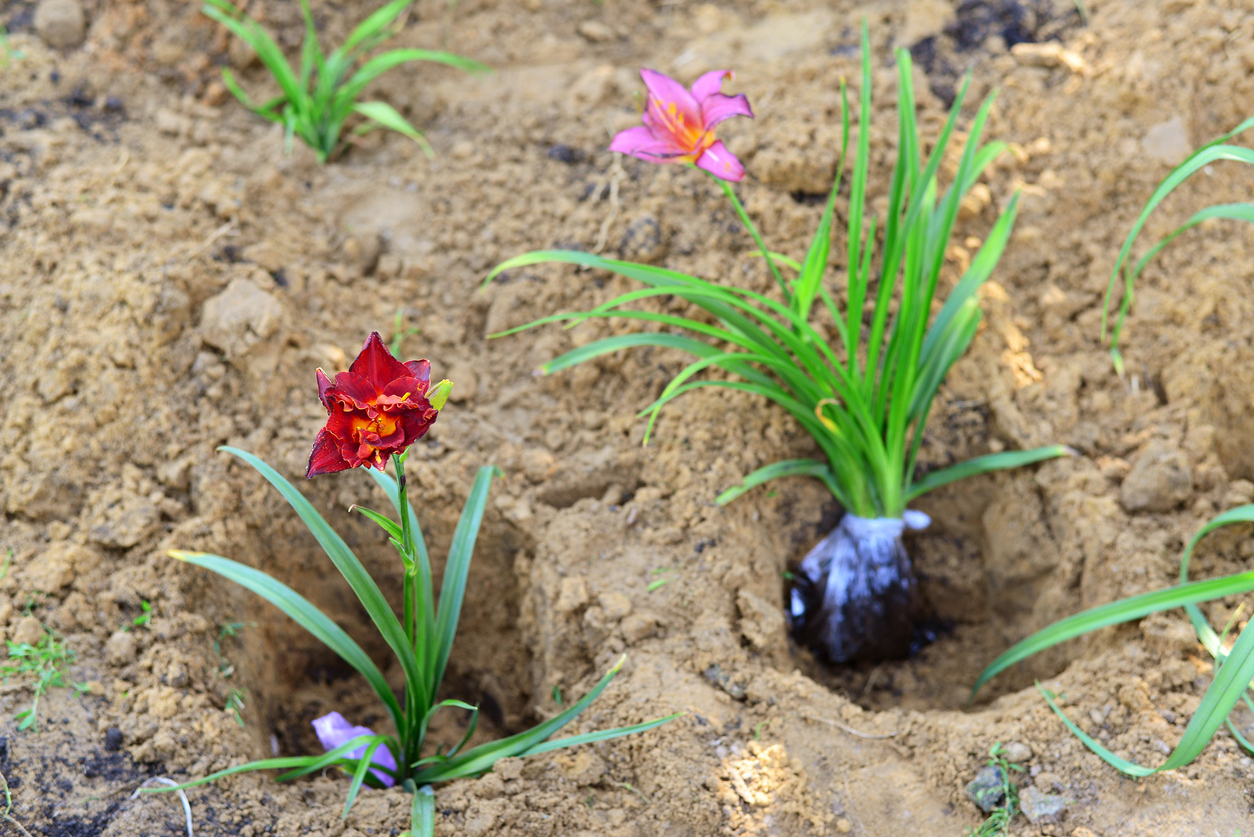
- Dig a hole at least as deep as your lily’s tuberous roots.
- Place a mound of soil in the middle of the hole and set the plant on top of it, with its roots trailing down on all sides.
- Backfill soil into the hole until the crown of the plant (the point where the roots meet the foliage) is either at ground level or no more than 1 inch below ground level.
- Set the plants 18 to 24 inches apart, depending on their ultimate size.
Can you grow daylilies in containers?
To grow daylilies in containers, choose miniature or dwarf types, such as Stella de Oro and Little Grapette, and place them in large pots that are at least 12 to 18 inches in diameter. When growing plants in pots, they’ll require more frequent watering than those in the ground, so for optimal daylily care in these conditions, the containers should have drainage holes sufficient enough to keep water from building up inside them.
In USDA Hardiness Zones lower than 8, move pots containing daylilies to a chilly but protected location over winter, such as an unheated garage or shed. It’s a good idea to place plant caddies beneath the pots before you fill them to make moving the containers easier.
RELATED: 30 Gorgeous Plants That Attract Hummingbirds to Your Garden
Watering Daylilies
Daylilies require the equivalent of an inch of water per week, whether from rainfall or from other means of irrigation. Those growing in sandy soil might need more frequent watering. Water in the morning if possible, and avoid overhead watering from a hose, since the spray can cause spots on the flowers. Instead opt for drip irrigation or a watering can. Even though some wild daylilies grow in ditches and often are recommended as rain garden plants, don’t allow most types to actually sit in water for extended periods of time; this can cause rotting of their tubers.
Fertilizing Daylilies
Naturally vigorous plants such as daylilies don’t require much feeding. An annual dose of compost will do, or apply a nitrogen-rich organic fertilizer such as 5-3-3 once in spring, using about 1 cup per plant. When preparing a daylily bed in advance, work 4 pounds of this fertilizer per 100 square feet into the growing space.
Avoid applying nitrogen in late summer when overfertilization can encourage tender new growth at the wrong time of year. For potted plants, use 1 teaspoon of the above fertilizer for each 3 inches of the container’s diameter.
Pruning Daylily Plants
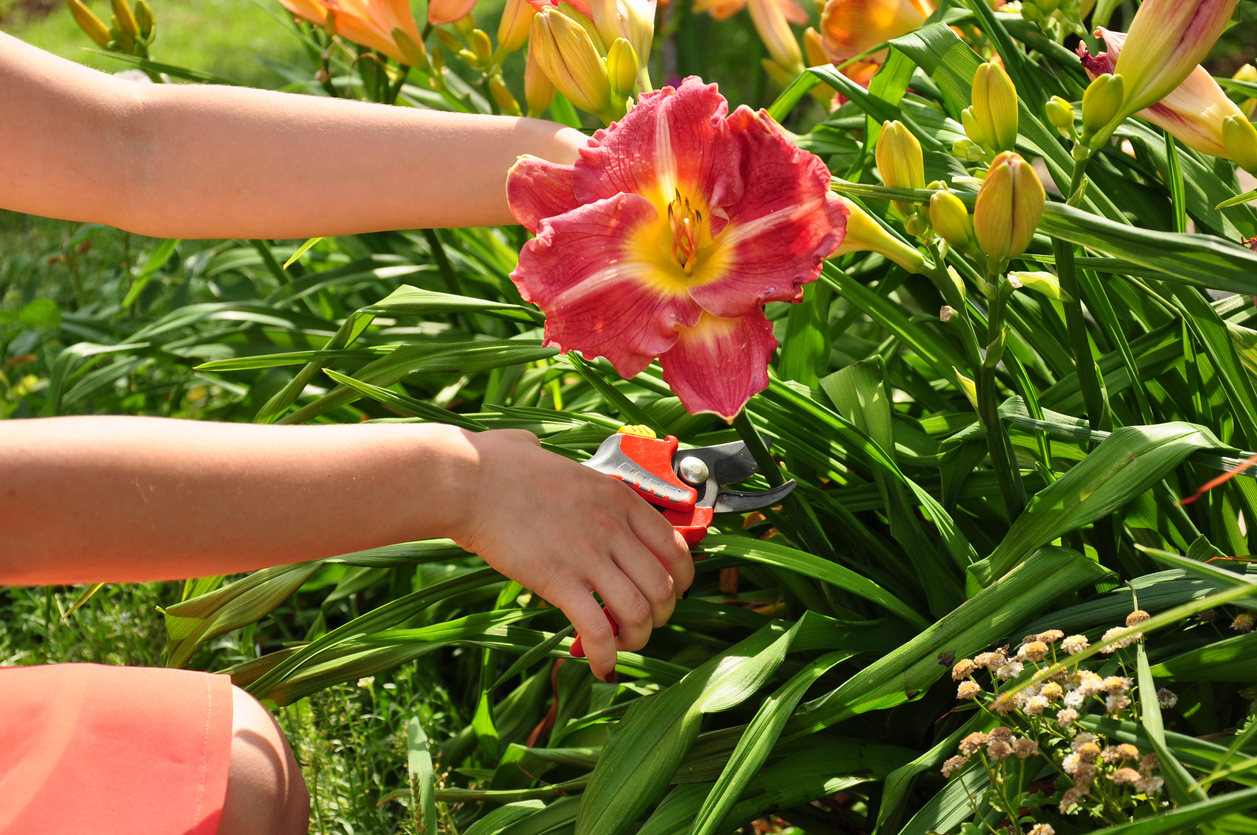
Since seed pods on lilies divert the plants’ attention from blooming to seed production, it is a good idea to deadhead your lilies every morning. That means to cut off or snap off with your fingers all of the shriveled flowers from the previous day. You’ll want to wear gloves for this process, since some of the colors can stain hands.
Once all the buds on a scape have bloomed, snip the scape off close to ground level. As for when to cut back daylilies, they don’t require that unless you are dividing and transplanting them, as detailed below.
Propagating Daylilies
When transplanting daylilies, do so immediately after they finish blooming. Dig them up and pull their roots apart with your fingers or a garden fork, keeping three fans of leaves on each division. After cutting the fans back to a height of 5 to 6 inches, replant the divisions according to the directions under “Planting Daylilies” above.
Hybrid daylilies won’t come true from seed. To sow species types, plant the seeds ¼ inch deep in damp and sterile seed-starting mix and keep them at 70 degrees until they sprout—usually within 10 to 14 days.
Safety Considerations
The University of Florida Extension notes that daylily “flower buds and petals are edible raw, boiled, stir-fried, steamed, stuffed, or battered and fried. Dried daylily petals, called ‘golden needles,’ are used in numerous Chinese dishes.”
However, what applies to people does not apply to pets in this instance. North Carolina State Extension warns that daylilies “are toxic to cats, which may show signs of vomiting, inappetence, lethargy, kidney failure, and even death after eating.” Although dogs can be affected too, the ASPCA specifies that “the effects are much more severe in cats.”
RELATED: 35 Plants That Are Toxic to Cats and Dogs
Potential Pests and Diseases
Watch for leaf streak disease, initially indicated by a spattering of green spots along the center of a leaf. Those spots eventually turn brown before the leaf yellows. To prevent your plants from being reinfected the following spring, remove all dead leaves in the fall and avoid any irrigation that sprays water on the foliage. Avoiding overhead spraying also helps prevent daylily rust.
If you see notches or holes in your daylilies’ foliage accompanied by slimy streaks, suspect slugs. You can control them by applying slug bait such as iron phosphate around the bases of the plants.
Preparing Daylilies for Winter
No winter preparation is required for most daylilies since they typically go completely dormant in winter. According to the Sunset Western Garden Book, most varieties can survive “without protection to about -35 degrees Fahrenheit.” The book does specify, however, that evergreen daylilies “need a protective mulch…where temperatures dip below -20 degrees Fahrenheit.” If you decide to apply mulch, pull it off the crowns of the plants in spring.
Looking for more beginner-friendly perennials? Check out our guides on growing bee balm, butterfly bush, and hardy hibiscus.
