We may earn revenue from the products available on this page and participate in affiliate programs. Learn More ›
Enjoying the ambiance of a backyard deck on a warm evening is a summer highlight for many families. With proper maintenance, a wooden deck can last for years. To keep a deck sturdy and weatherproof year-round, it’s important to do an annual inspection for damage and apply a fresh coat of deck sealer and stain after prepping the deck. Staying up to date on deck waterproofing helps maintain the integrity of the deck surface and structure.
Need deck waterproofing?
Call in a pro. Get free, no-commitment project estimates from deck waterproofing services near you.
Time required: 2 to 4 days
Difficulty: Beginner
Estimated cost: $50 to $300
Tools & Materials
Bobvila.com may earn a commission from purchases made through these links.
- Garden hose or pressure washer
- Thin stick or tool
- Drop cloth (optional)
- Belt sander (optional)
- Orbital sander (optional)
- Rubber gloves
- Safety goggles
Before You Begin…
Tips for Deck Waterproofing
- Know the difference between paint, sealer, and stain so you can choose the appropriate option for your deck.
- Expect to spend some time fully cleaning and prepping the deck before applying the stain or sealant.
- Avoid applying deck sealer on a hot, sunny day as it may evaporate before the wood fully absorbs it.
Safety Considerations
- If your deck is in poor condition, the foundation may need to be repaired professionally before preparing and applying a protective coating to the surface.
- If mold is detected, consider hiring a mold removal service to safely prepare the deck.
- Deck waterproofing materials can cause skin irritation, so be sure to wear protective clothing, safety goggles, and even rubber boots.
- Consider wearing a mask to prevent breathing in any debris.
Other Considerations
- Consider covering any nearby plants with a drop cloth to protect them from any deck cleaner or sealer.
- Plan to complete a deck waterproofing project over a couple of warm, dry days to avoid accidentally trapping moisture on the wood surfaces.
STEP 1: Test your deck.
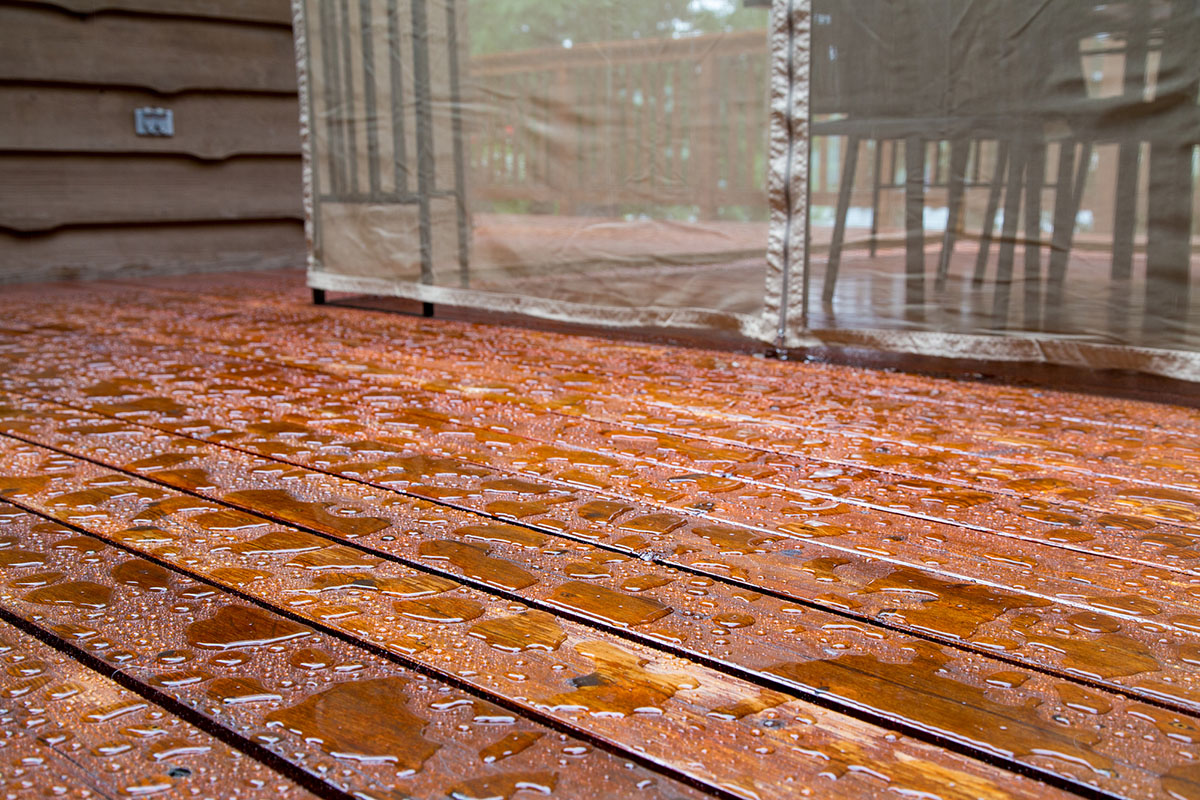
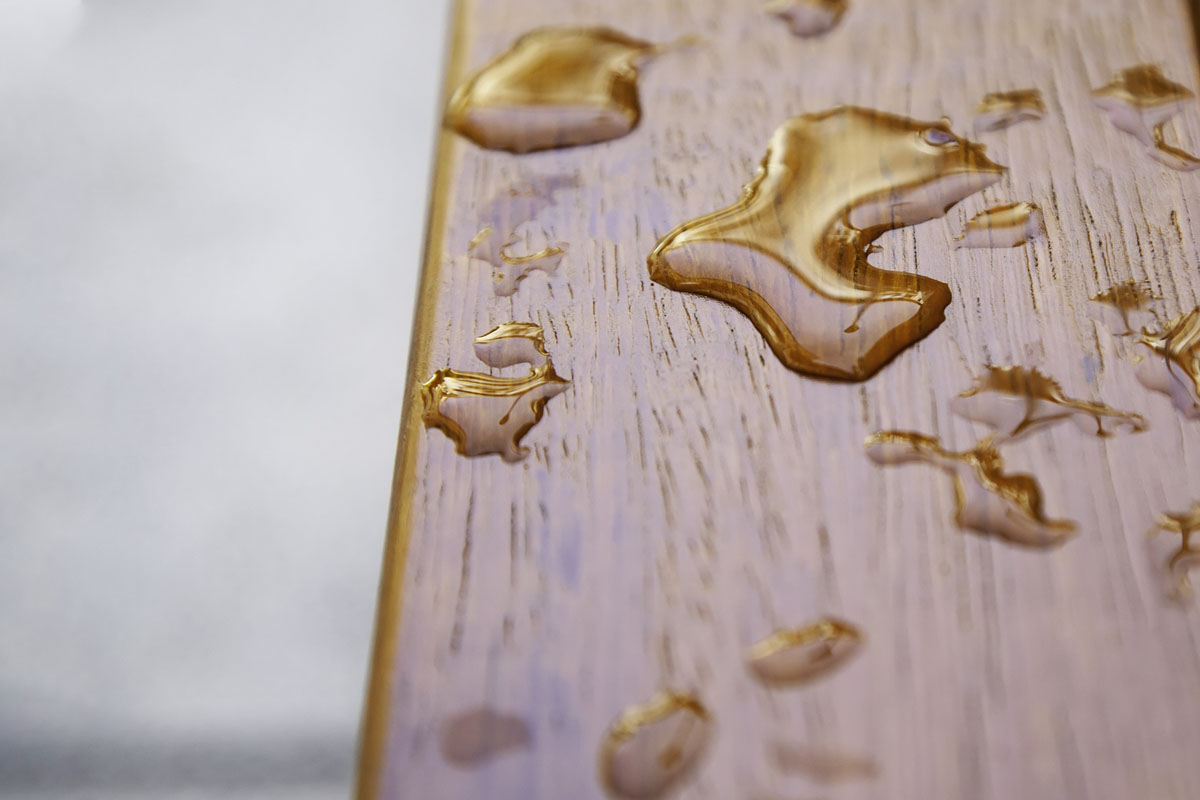
An easy method to test whether a deck is ready for a new coat of waterproofing is to drop some water on it. If the water bubbles and remains on top of the wood, the old sealant is still protecting the deck. However, if the water absorbs into the wood, it’s time to add a fresh coat. Alternatively, try placing a piece of tape on a weathered piece of wood. When you lift the tape to inspect it, the presence of wood fibers will indicate the need to refinish the deck. Now is also the time to replace any boards or structural pieces that need repair.
STEP 2: Prepare the deck for waterproofing.
Properly preparing the deck is a key factor to a successful waterproofing project. Large decks might require several days to complete this task, but a local deck company has the manpower and equipment to get the job done quickly if time is an issue. It’s important to sand all the wood surfaces to remove any remaining stain, smooth down the grain for better absorption, and restore the luster of the original wood. Then use a garden hose or a pressure washer to thoroughly spray off every surface. Be sure to spray in between wood planks, and use a stick or thin tool to push out any stubborn debris. A deck cleaning solution can scrub the grime away as well.
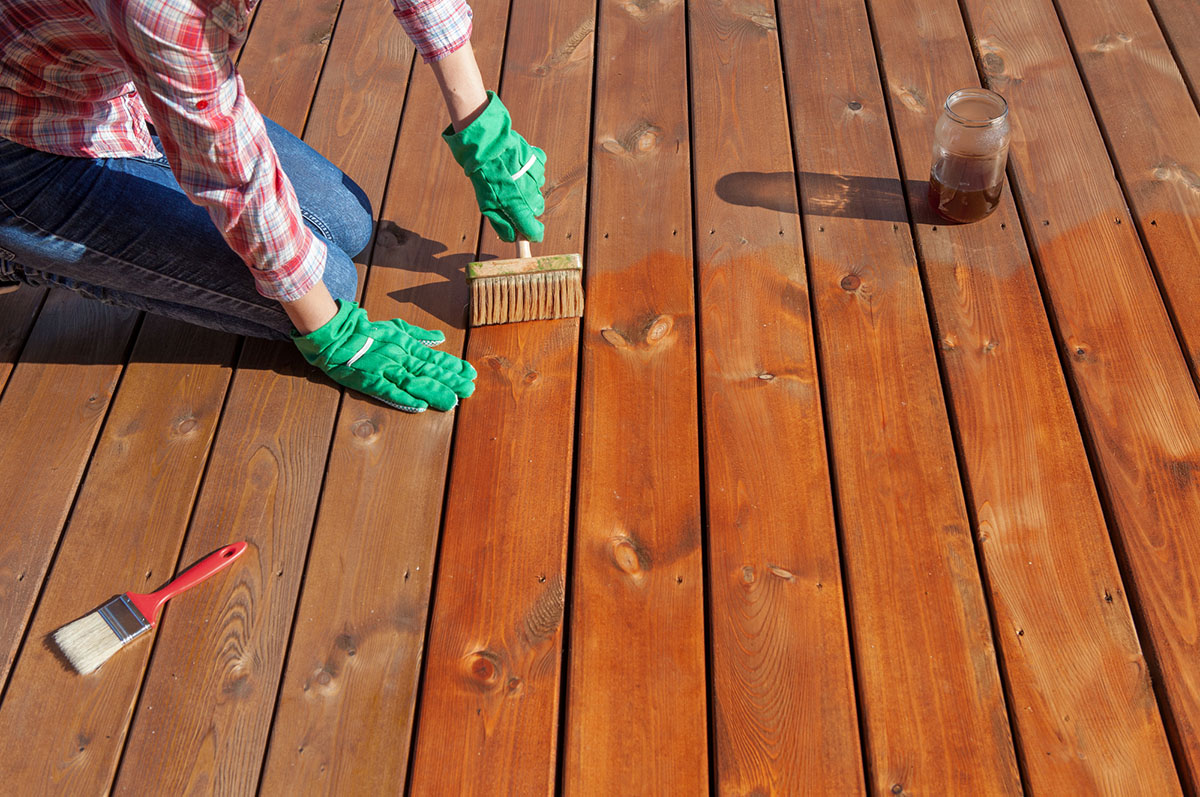
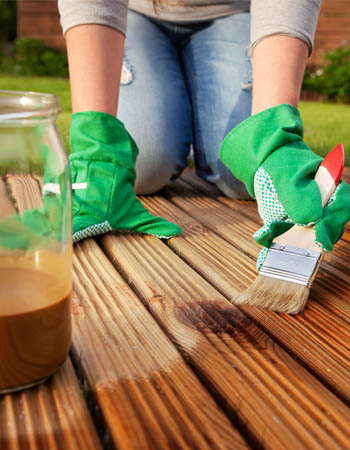
STEP 3: Apply sealant.
After the deck has dried for 24 hours, it’s time to apply your preferred sealant. With a paintbrush, apply a moderate coat of sealer or stain to the sides, railings, and edges of the deck, taking care not to over-apply, since a second thin coat works better than a thick first coat. A paint roller is useful for rolling sealant on the floor of the deck. Start at one end and work your way to the deck exit while applying sealant in the direction of the wood grain.
Don't want to do it yourself?
Call in a pro. Get free, no-commitment project estimates from deck waterproofing services near you.
STEP 4: Let the sealant dry for a minimum of 48 hours.
The sealant will appear dry within a few hours of application, but it still needs time to fully cure. Avoid using the deck or replacing furniture for at least 48 hours. Placing a rope or caution tape across the entrance of the deck can help remind family members to stay off it while the sealant cures.
STEP 5: Prepare your deck for enjoyment.
Once the sealant has dried and the deck waterproofing job is done, it’s time to enjoy the fruits of your labor. If you placed drop cloths on any nearby plants to protect them, they can be removed. Furniture can be replaced as well as flower pots, barbecues, or any other deck items.
Deck waterproofing is a necessary task for homeowners who enjoy using their decks for parties and barbecues. With fair weather on your side, some spare time, and a little elbow grease, you can prep and seal your deck in a matter of a few days. If the task seems overwhelming or there are foundational problems that need to be addressed, seeking the help of a local professional can alleviate the burden. The sooner the job is done, the sooner you’ll be back to enjoying your days on a well-maintained deck.
