We may earn revenue from the products available on this page and participate in affiliate programs. Learn More ›
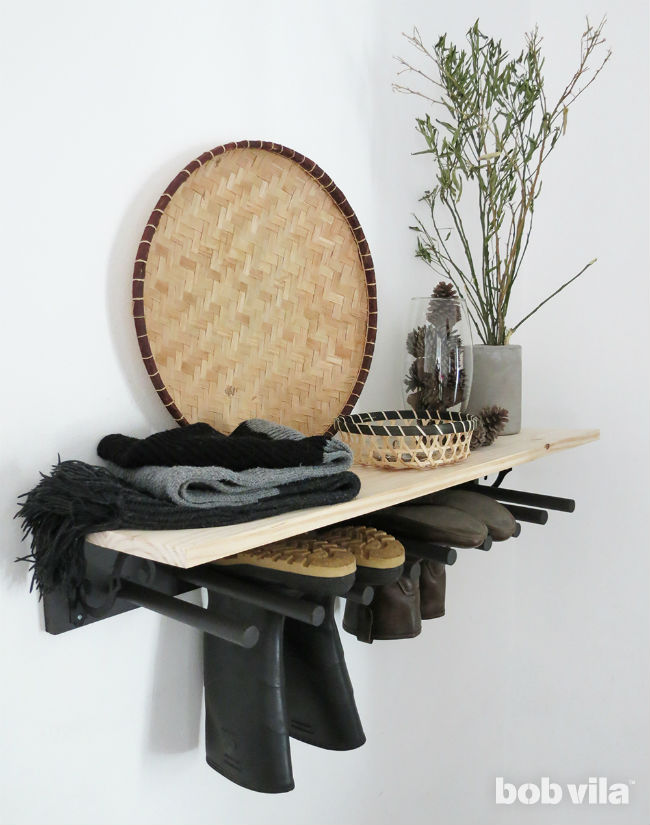
Keeping an organized home is no small task. Entryway clutter alone can be particularly overwhelming, as the space by the front door becomes one large catchall for mail, keys, bags, shoes, and more. And, in the winter, that footwear pile grows! Baskets that held flats and sneakers for three-quarters of the year simply cannot contain tall boots as easily. Considering that a family of four may have as many if not more pairs lying by the door—sometimes drying from snow and rain—a better storage solution is in order.
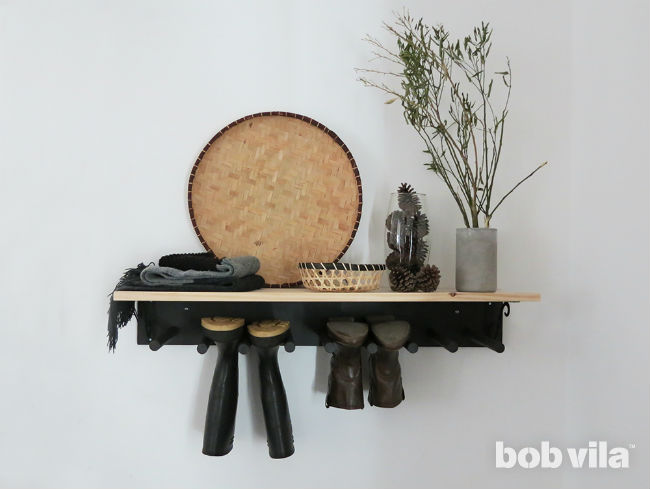
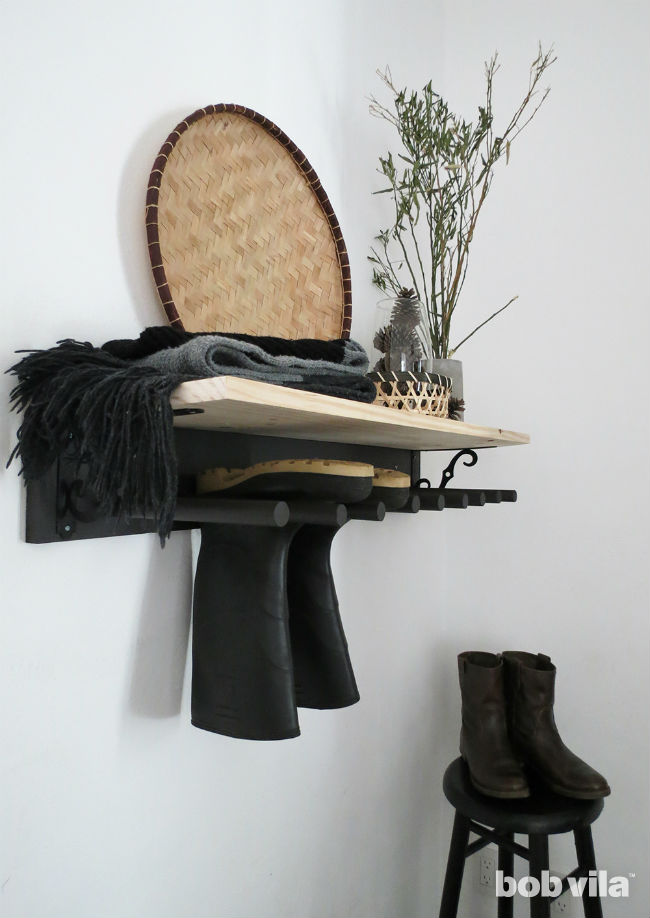
As is often helpful in storage conundrums, it’s best to think vertically! Building a wall-mounted boot rack lifts your boots off the ground to remove tripping hazards (and save space!). Plus, this design even includes a tabletop that’s perfect for gloves and contents from your pockets. The best part: This boot rack is a cinch to make and even easier to customize to your own space and needs. Ours measures one yard long and fits four pairs of boots, but you can adapt the dimensions to store more or less.
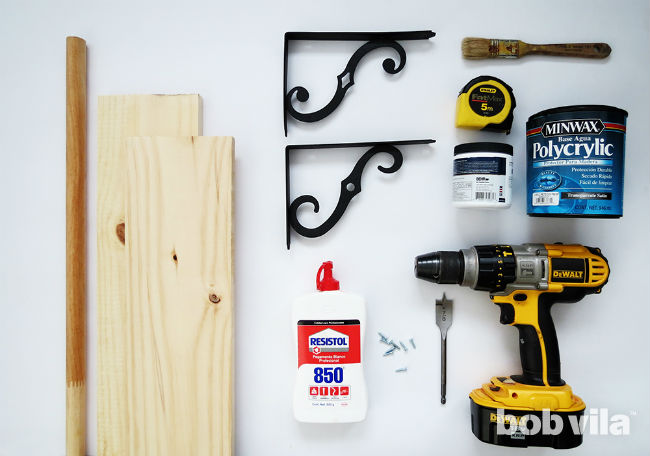
MATERIALS AND TOOLS
– 1×6 lumber (16 feet, or two 8-foot boards)
– Tape measure
– Handsaw
– Wood glue
– Trigger clamps
– 1-inch dowel (16 feet, or two 8-foot dowels)
– Sanding machine
– 60-grit sandpaper
– 120-grit sandpaper
– Pencil
– 1-inch flat wood-boring bit
– Cordless drill/driver
– Scrap wood
– Tack cloth
– Paint
– Varnish
– Paintbrush
– 5-inch-by-8-inch shelf brackets (2)
– ¾-inch screws (8)
– 1-½-inch finishing nails (6)
– Hammer
– Stud finder (optional)
– Wall anchors (optional)
STEP 1
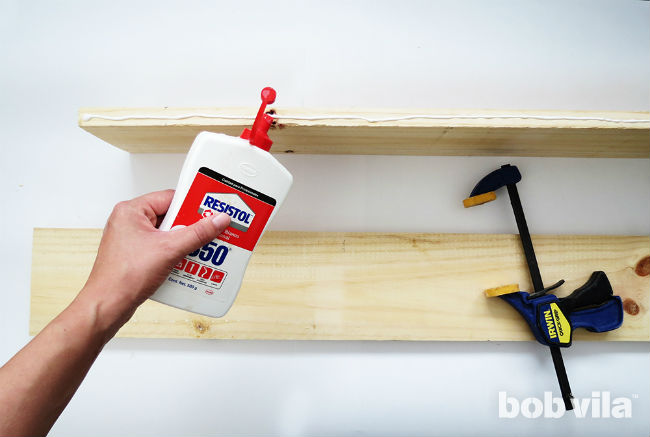
Cut three pieces from the 1×6 lumber, each 1 yard long. You will use one to make the boot rack and two pieces to build the shelf that hangs over it.
Pro tip: Do you need to store more than four pairs of boots? Just add 7 extra inches for every additional pair of boots you want to hang.
Start by connecting the two planks to make the shelf. Apply wood glue to the long edge each, press together, and hold them with trigger clamps. After the glue has dried for the full amount of time recommended by the manufacturer, remove the clamps.
STEP 2
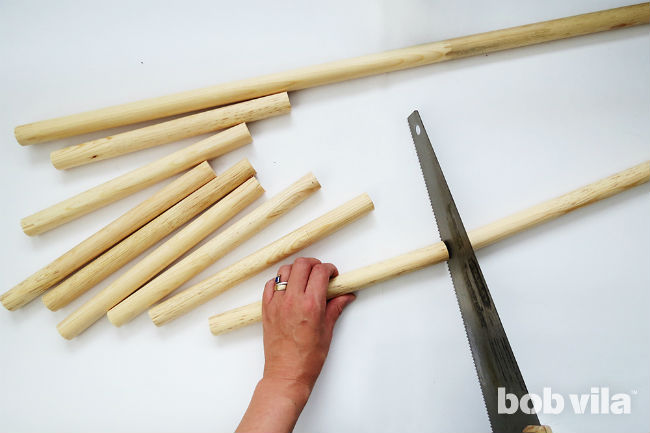
Grab the 1-inch dowels, and cut nine 11″-long pieces. Sand the edges to remove the splinters.
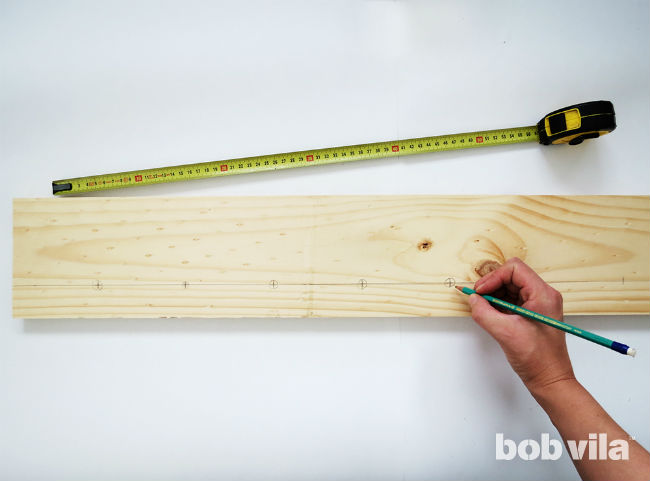
STEP 3
Take the third plank, measure 1-½ inches from the bottom edge, and trace a line across its full length. Then, along this line, make marks every 3-½ inches. Each one of the nine marks will indicate where you have to drill.

STEP 4
Use the 1-inch flat wood-boring bit with your cordless drill to make holes in the plank. Place a piece of scrap wood beneath the board to prevent from drilling into your work table, then hold the drill vertically and drill through the board at each mark.
Sand the inside of the holes.
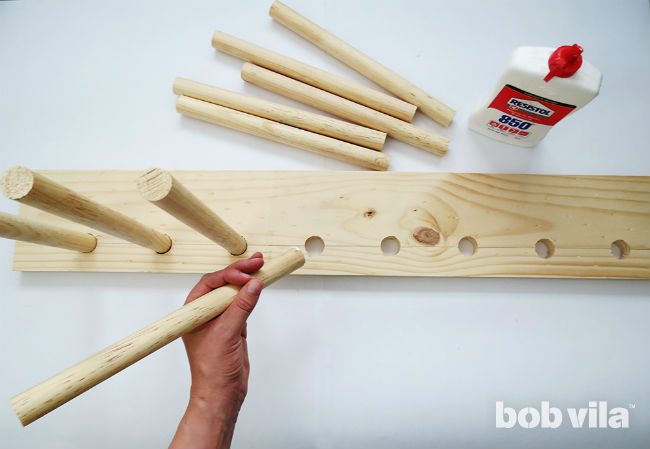
STEP 5
Position the dowels in the fresh-cut holes in your board. Though the 1″-wide dowel should feel snug in the 1-inch hole, you’ll want to line the holes with wood glue before sticking them in place.
Once all nine are standing upright, check that they are all perfectly vertical and in line with one another. Let the wood glue dry for the full time recommended on its packaging.
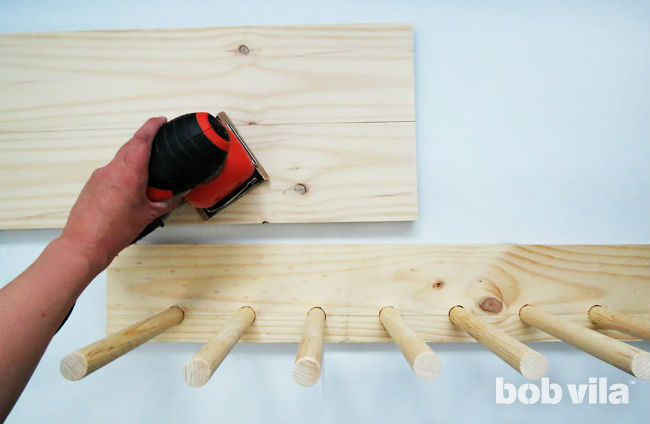
STEP 6
For a smooth finish, completely sand down the shelf (from Step 1) and the boot support. Use a rougher 60-grit paper in your first pass, then follow with 120-grit.
Once you are done sanding, remove the dust with a tack cloth.
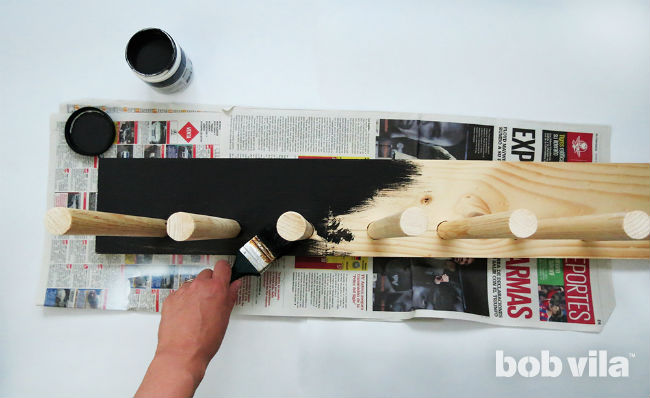
STEP 7
As the boots are usually wet and muddy, it’s essential to treat the wood so that it resists water—we’ll want the boot rack to hold up for more than one season. Paint can help, especially if it has some sheen to its finish, like a satin or semi-gloss paint.
We covered the boot rack portion with dowels with two coats of black paint. Then, we chose to keep the natural appeal of the very bleached wood for contrast and only brushed two coats of transparent varnish onto the shelf. After the paint finished drying, we applied one final coat of clear varnish onto the rack.
STEP 8
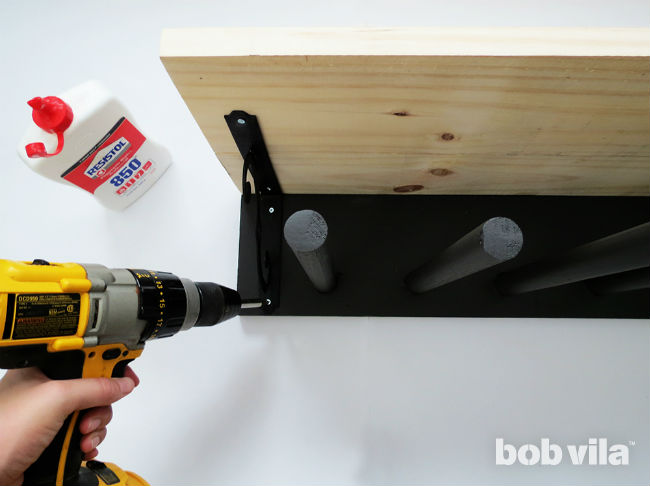
Once the top coats have dried, assemble the boot rack using two shelf brackets and screws.
First, position a 5-inch-by-8-inch shelf bracket 1 inch from each end of the shelf, and push each so that the top aligns with the top edge of the rack. (Likely, the bottom of it won’t meet the bottom of the 1×6 but fall ½-inch short.) Fasten the 5-inch side of the shelf bracket to the 1×6 board with ¾-inch screws.
Then position the shelf on the top edge of boot rack so that it completely overlaps the 1×6 piece that is the back of the boot rack. Finish screwing the 8-inch side of the shelf bracket into the bottom of the shelf.
Reinforce the shelf brackets by tapping a few 1-½-inch finishing nails along the back of the shelf into the back of the boot rack.

STEP 9
Finally, mount your boot rack on the wall.
To secure it and the weight of all of your footwear, it’s best to find wall studs to screw into. You can use a stud finder to do so or skip the tools with a few tricks, which we’ve covered here. Drill two holes in the back of the boot rack and screw it into the wall. If you’re not planning on locating wall studs, consider using wall anchors instead.
Depending on where you want to hang the boots storage, you can choose to fix it low enough so that the shelf becomes a super slim entryway table. Or, hang it a little higher and you’ll still have clearance to place another storage unit under it. When you’re ready to fill, simply turn your boots upside down and squeeze each shaft so that it can fit between a pair of dowels—the foot at the top will prevent the boot from slipping through. Go ahead and fill ‘er up!
Ama is a DIY addict and the creative mind behind Ohoh Blog. She likes home decor, lighting, and furniture projects that may involve painting, sewing, drilling…no matter the technique! Whatever she has on hand is inspiration to create, and fodder for her serious addiction to upcycling.
