We may earn revenue from the products available on this page and participate in affiliate programs. Learn More ›
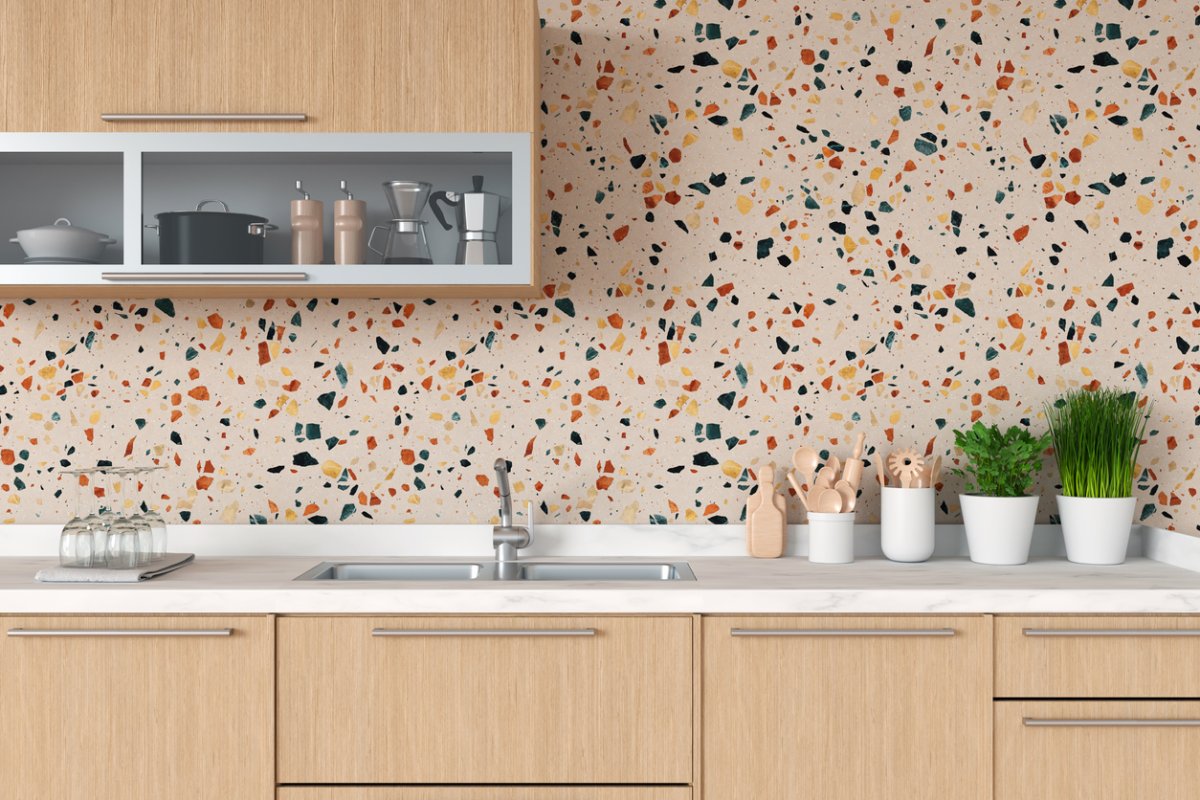
Terrazzo is everywhere in home decor, from coffee tables to wallpaper to pet food bowls. But the price tags for these items are rarely budget-friendly. Plus, it can be hard to find the right color palette to suit your tastes.
Luckily, you can DIY this trendy design all on your own—and if you’re a veteran crafter, you may already have a lot of the materials you need. But don’t worry if you’re not: This method is quick, straightforward, and easy. Plus, buying the supplies won’t break the bank. Since there’s some drying time involved, save this terrazzo DIY for an easy weekend project.
Tools & Materials
Bobvila.com may earn a commission from purchases made through these links.
- Sanding block
- Random orbital sander (optional)
- 2-inch wide paintbrush
- Scissors
- Round foam sponge brushes
RELATED: 30 DIY Home Projects Absolutely Anyone Can Do
BEFORE YOU BEGIN
When using spray paint, make sure you’re in a well-ventilated area and follow any manufacturer instructions about outdoor temperatures or humidity levels.
STEP 1: Prepare the surface, making sure it’s smooth and ready for paint.
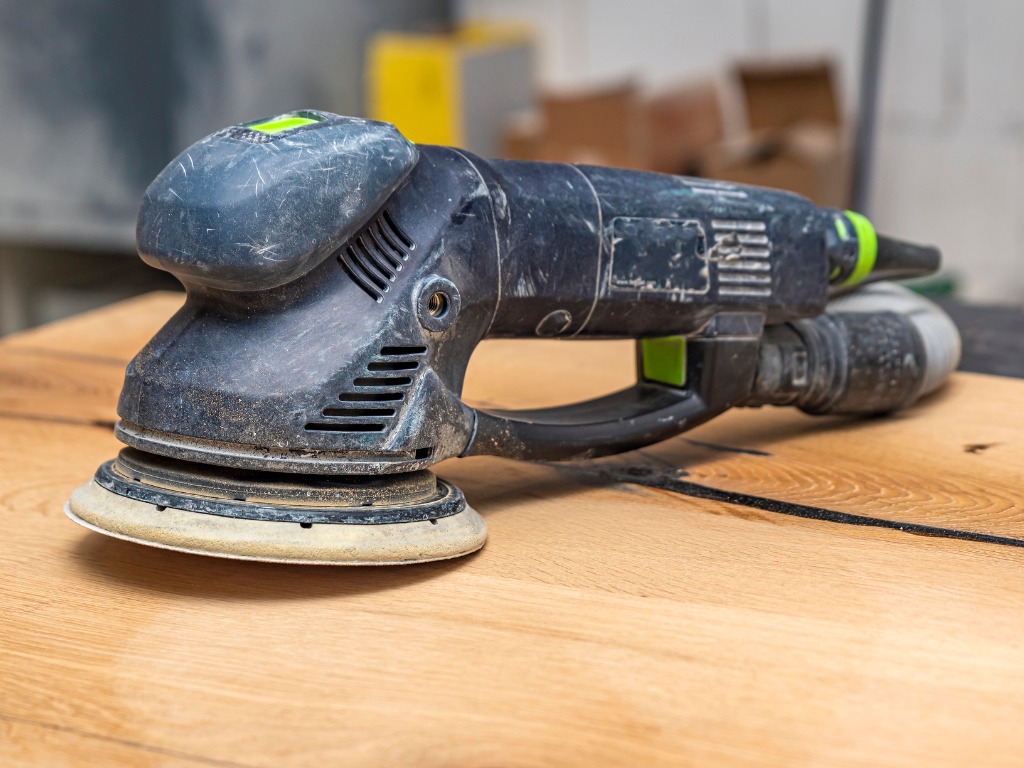
While this paint technique is great for coffee tables, serving trays, and planters, unfinished wood or unglazed ceramic will require some minimal prep work. If your piece of wood has visible grain, smooth it out with a sanding block and medium-grit sandpaper. A random orbital sander will speed up the process when working on a larger surface area.
You can use this method on glazed ceramic or tile, too, but you may need to work more slowly or allow plenty of time for the paint to dry. If you’re working on a wood surface that already has a shiny sealant, it’s a good idea to remove some of it with a coarse- or medium-grit sandpaper so the paint will adhere best.
STEP 2: Paint your background color and choose your color palette.
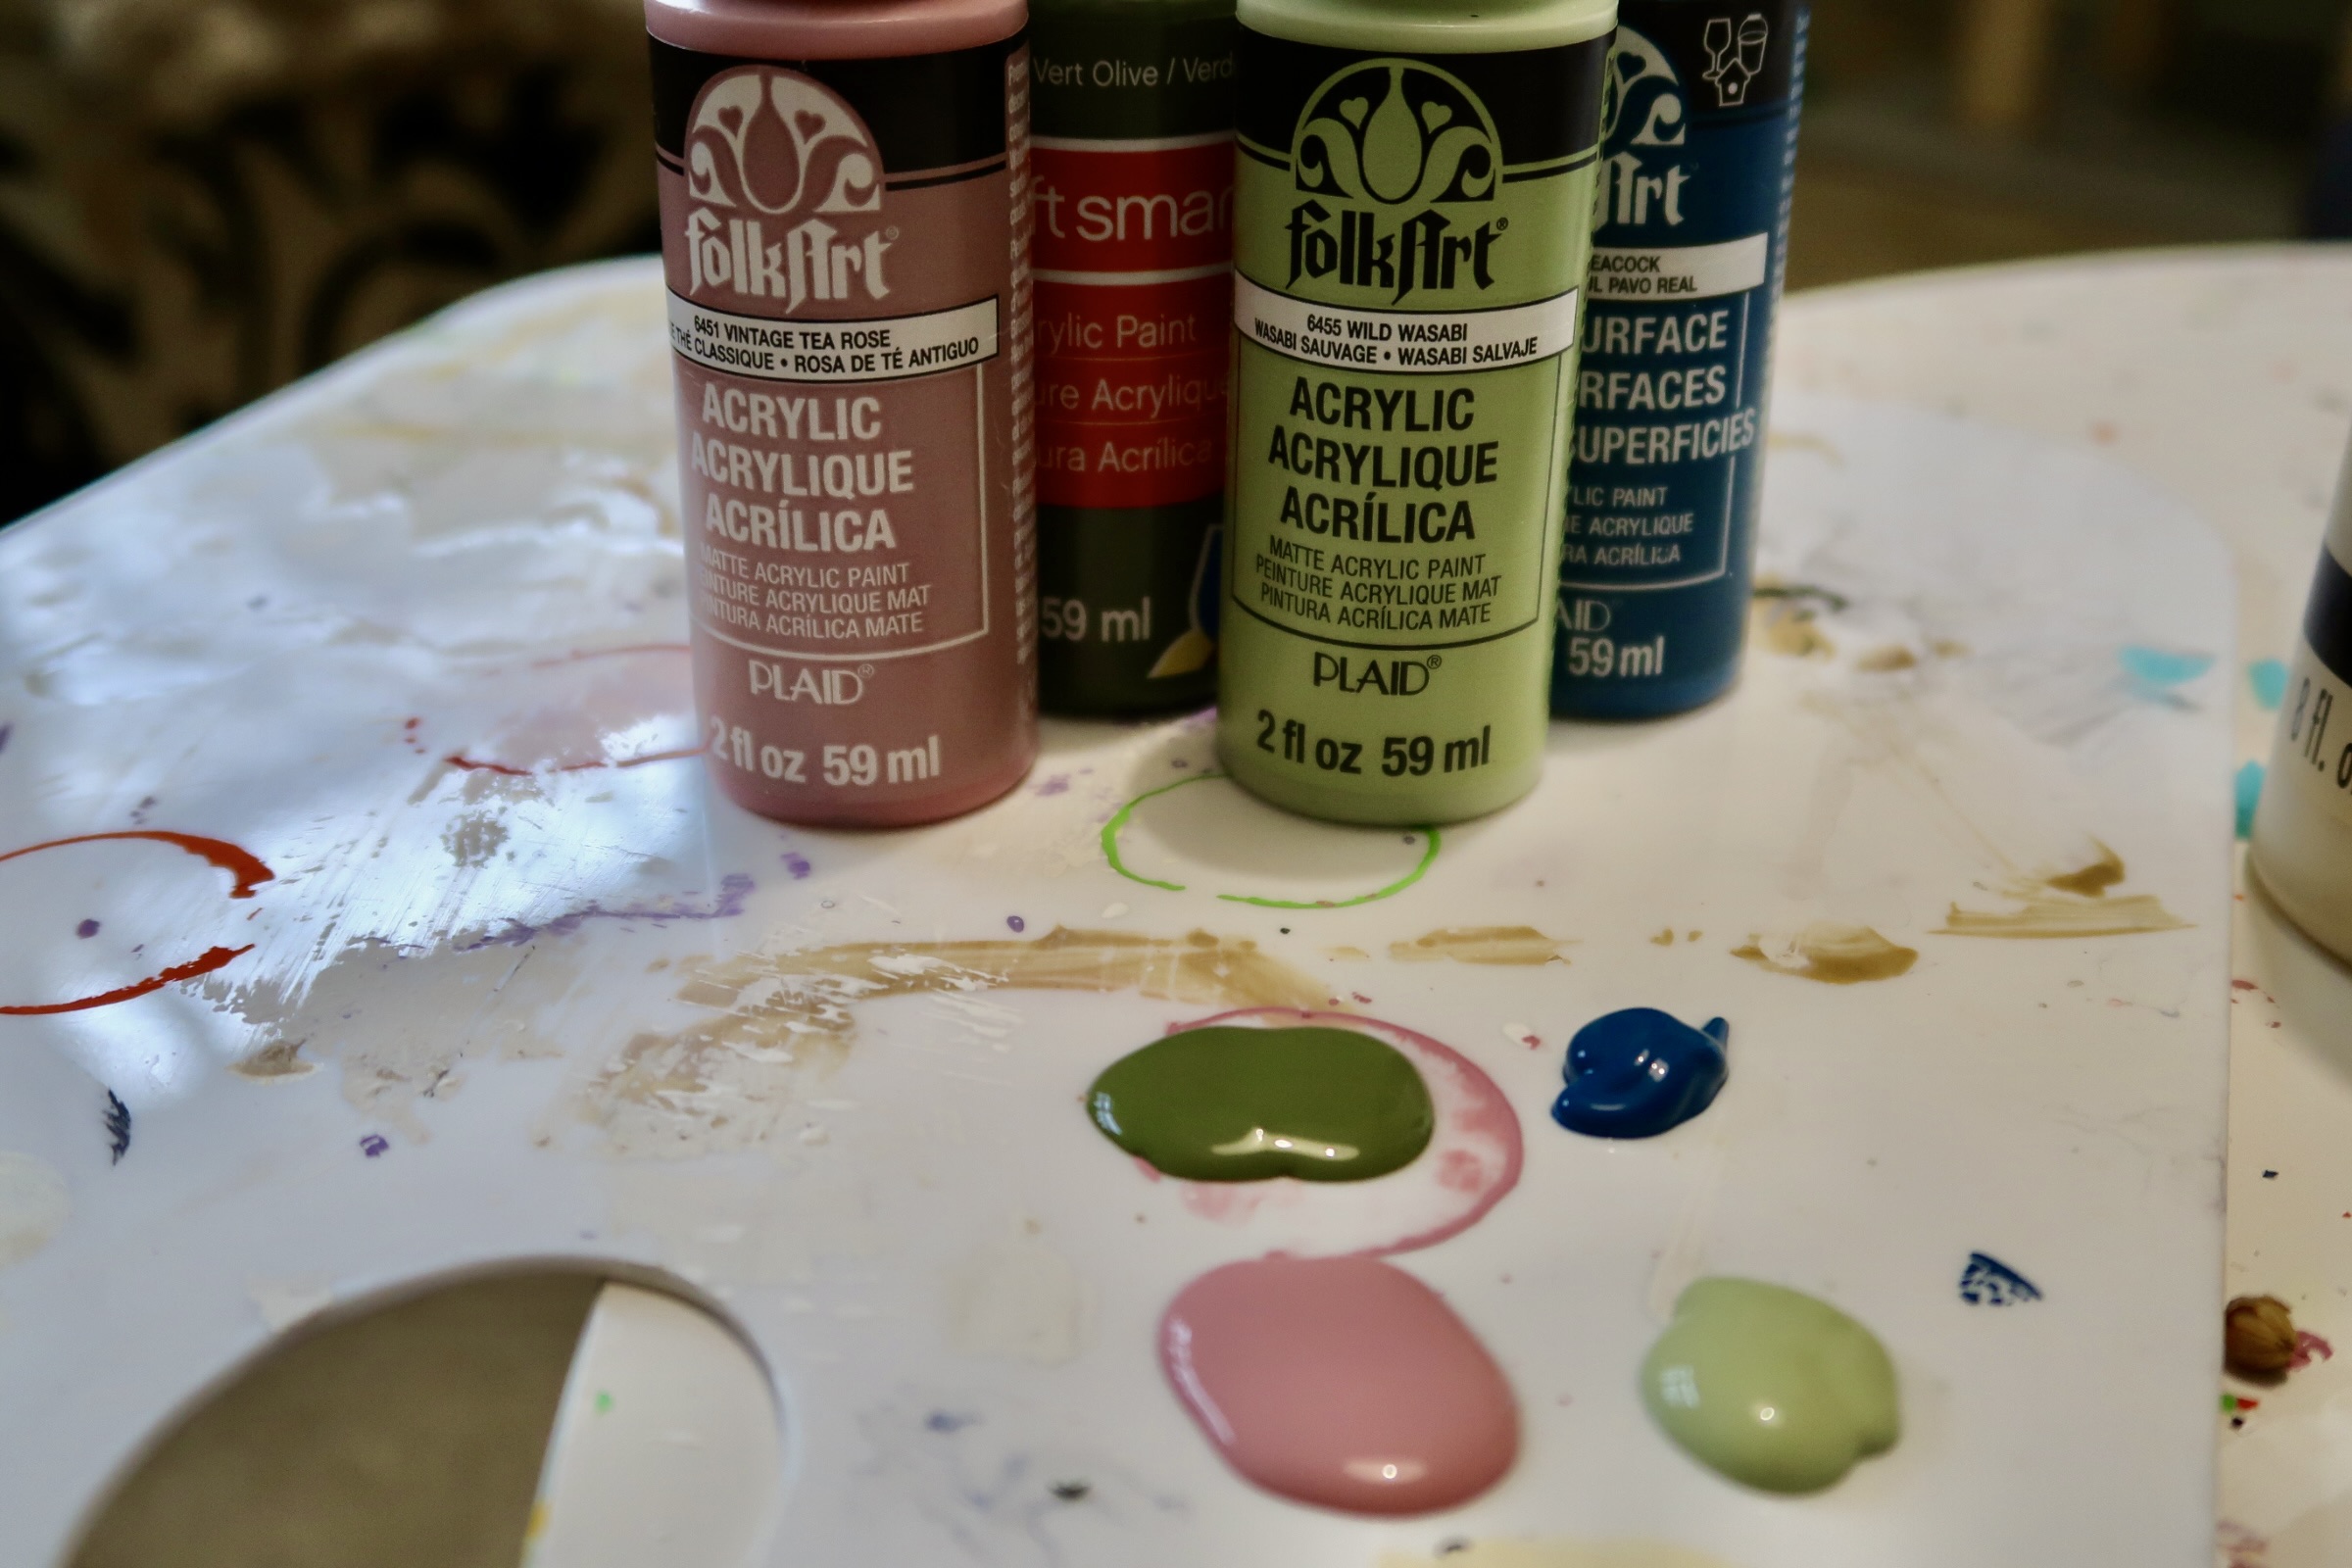
Select the background color of the design. Cream, white, and gray tend to be the most popular terrazzo backgrounds, but choose the color that will go best with your vision and existing decor. This is also an excellent time to select the other paints you’ll use to create the terrazzo pattern. Four to five colors are ideal, and you can make these colors as similar or as different as you’d like. Colors in the same family will create more of a subdued effect, while contrasting colors will be bolder and more of a feature.
Use a 2-inch paint brush, and paint as many coats of your background paint as required to get an opaque finish. Even after sanding unfinished wood, some of the texture may show through the paint. So you might want to add another coat or two to even out the surface as much as possible. Wait until the surface is completely dry before moving on to the next step.
RELATED: How to Make Chalk Paint: 4 Super-Simple DIY Recipes
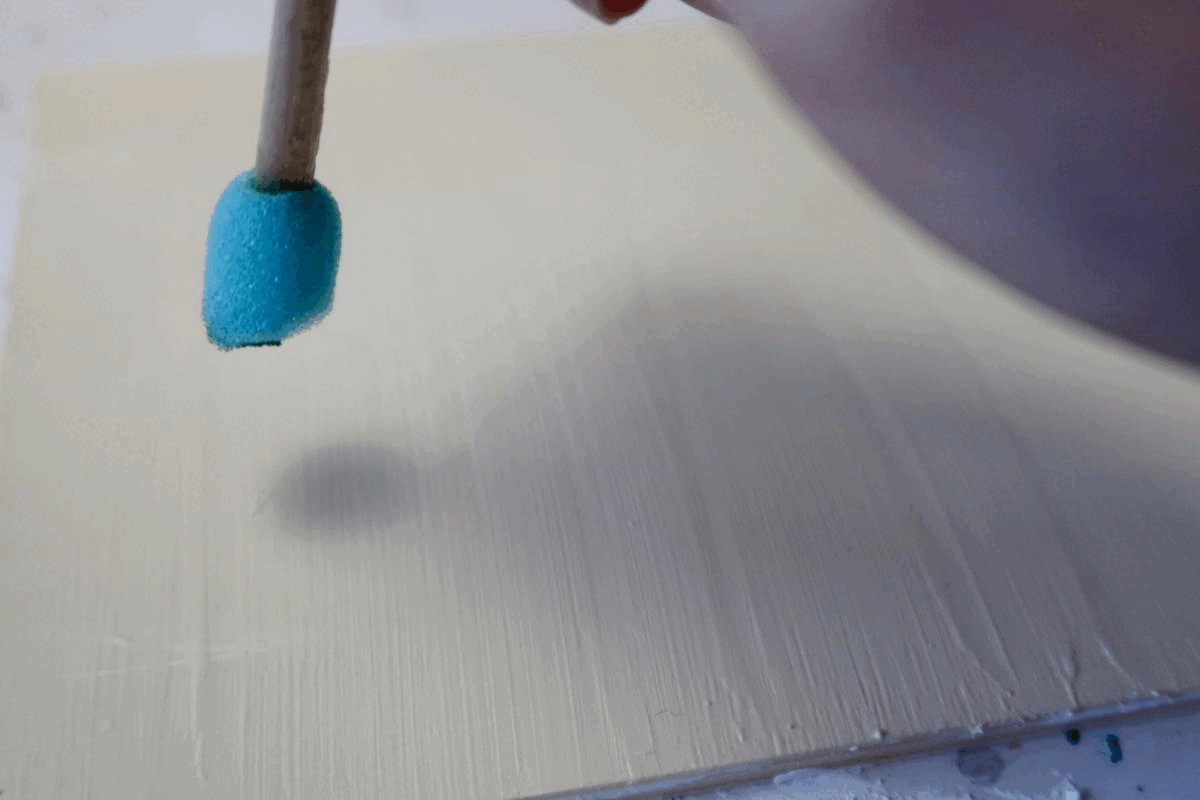
STEP 3: Cut round foam sponge brushes into irregular shapes.
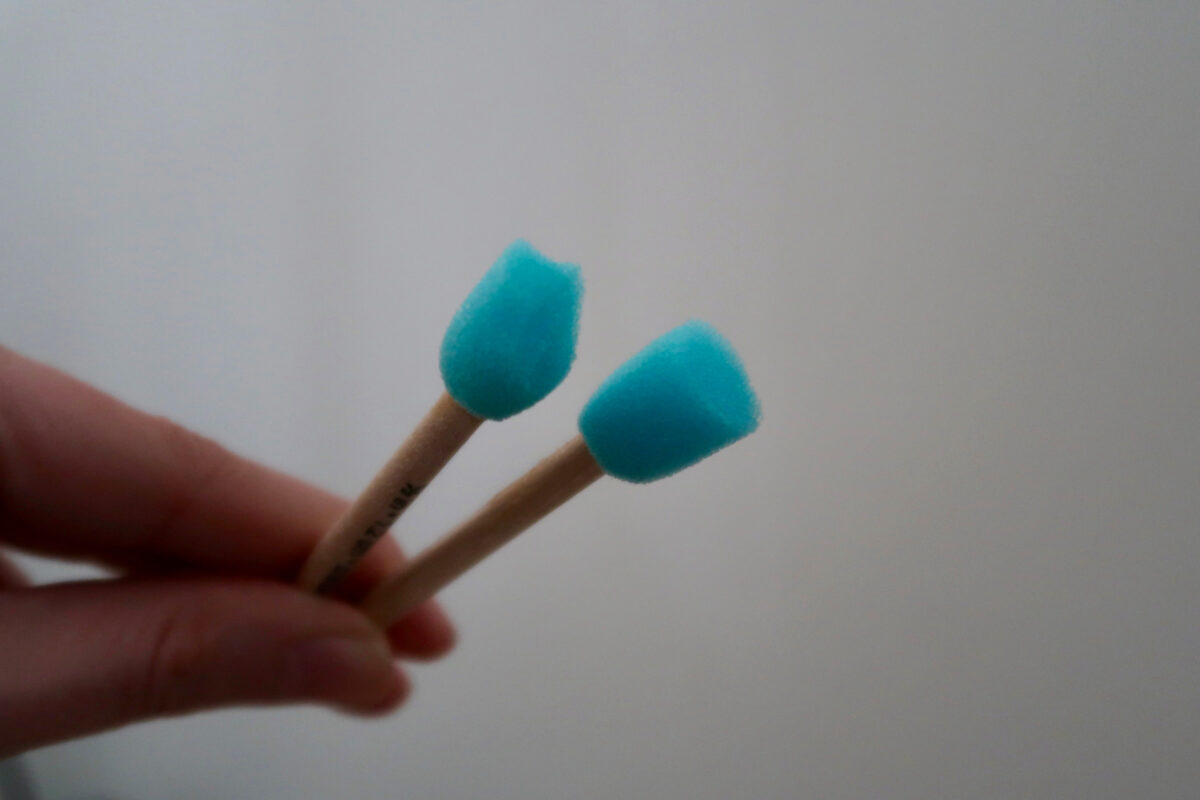
Using scissors, cut off the edges from several round foam sponge brushes to create a set of irregular polygons. You’ll be using these brushes as stamps to create the terrazzo pattern. Vary the angles and number of sides on each brush.
The finished shapes should be about a half-centimeter across, but you’ll want some brushes to be larger and some to be smaller to create a realistic look. Make at least as many shapes as the number of paint colors you’ve selected.
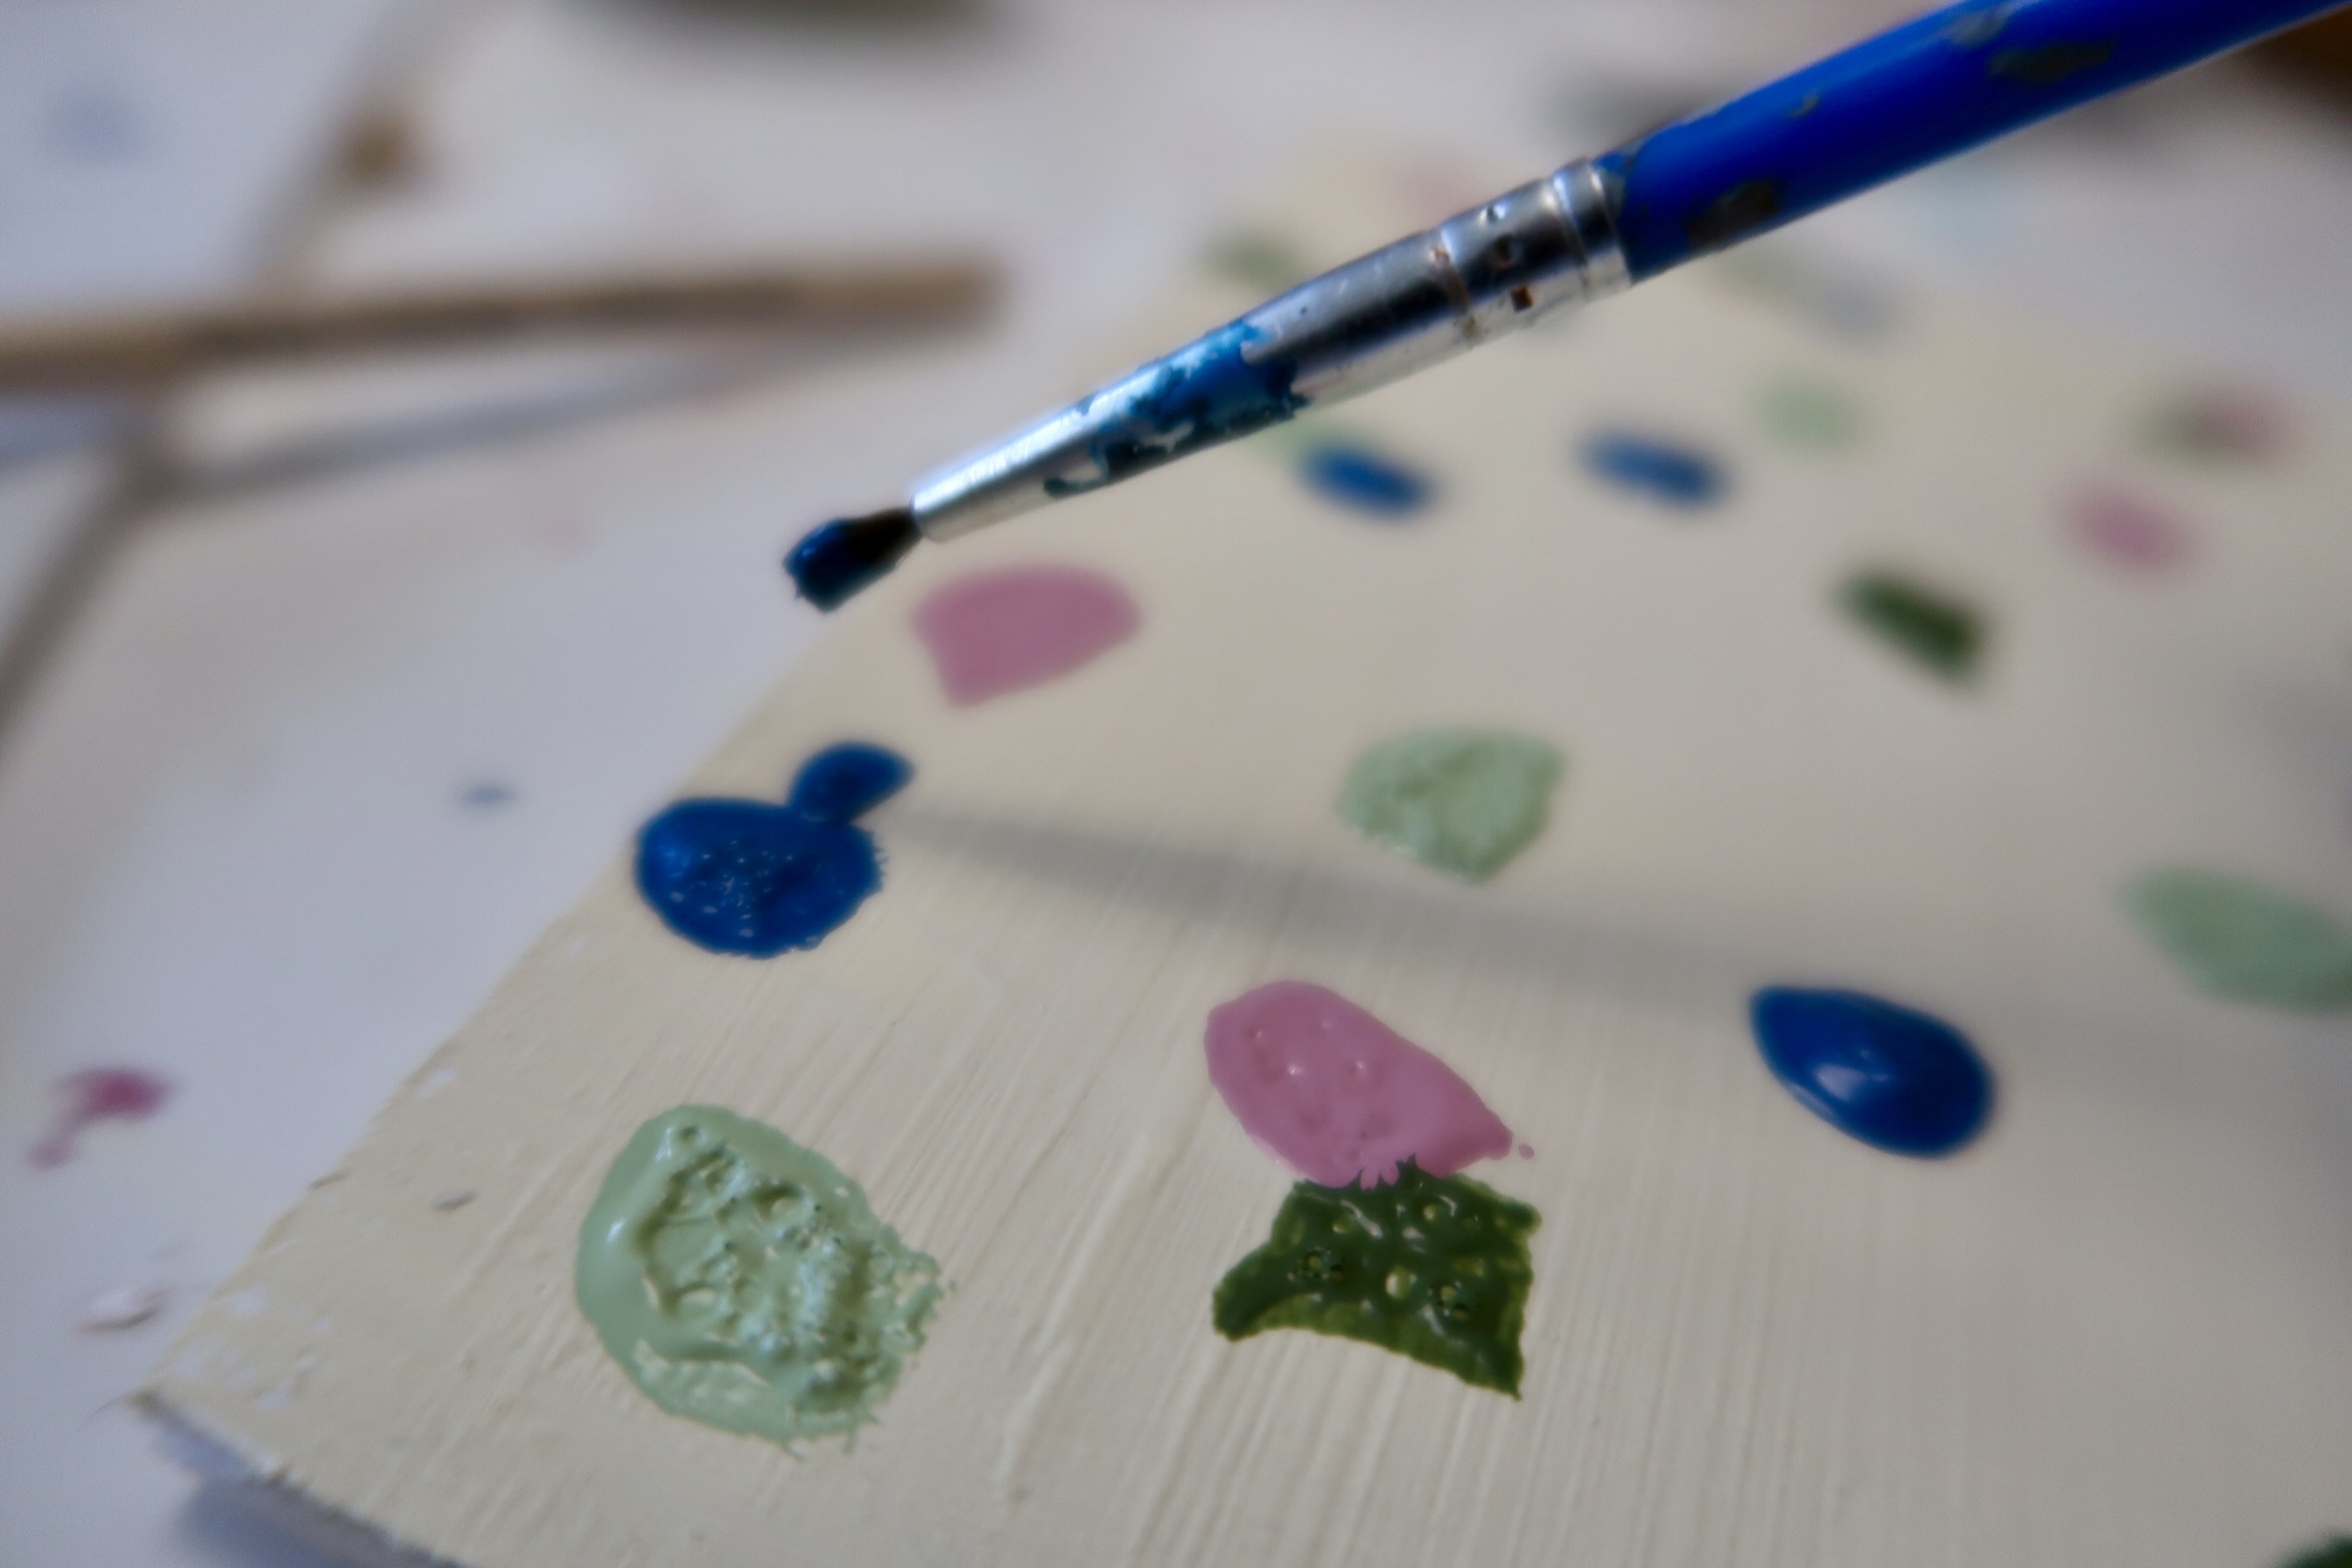
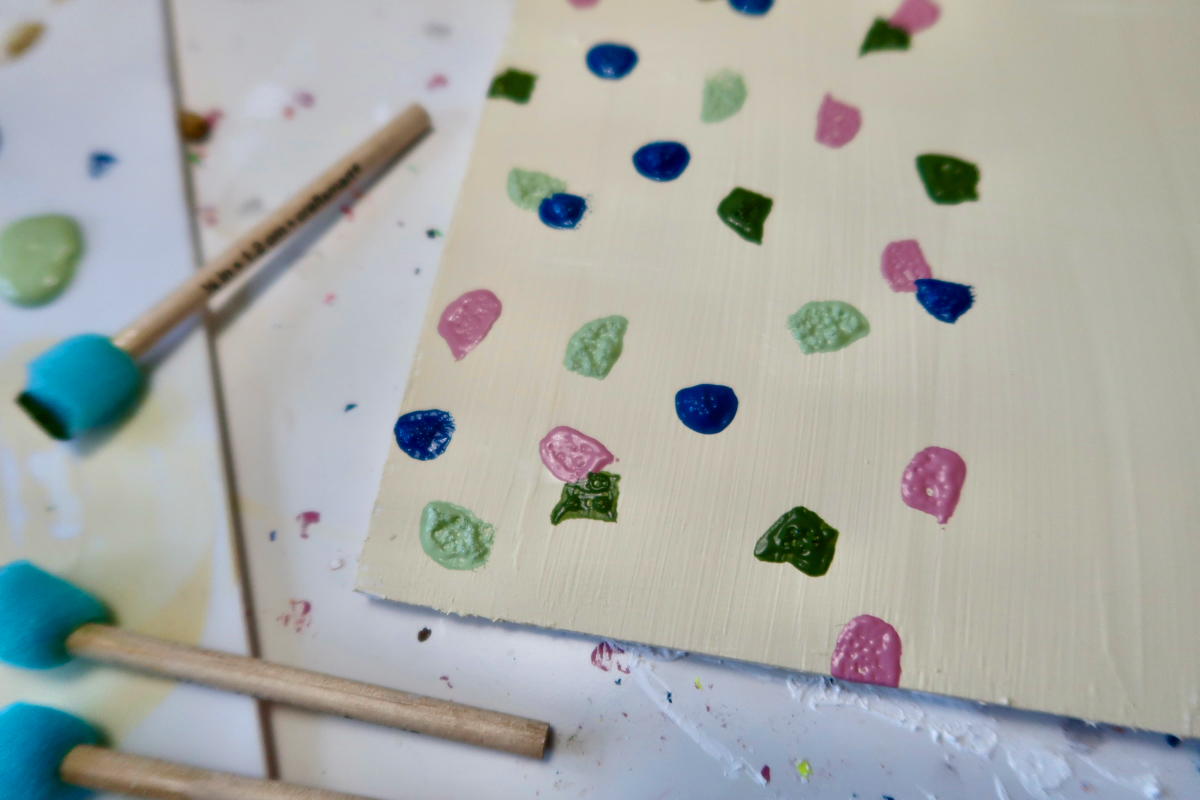
STEP 4: Stamp shapes onto your painted surface.
Pour small amounts of your chosen paint colors onto a reusable paint palette. Dip the sponge into the paint, ensuring you get a thin, even coat. Stamp the sponge onto your surface using light pressure. It may be easiest to use one sponge per color.
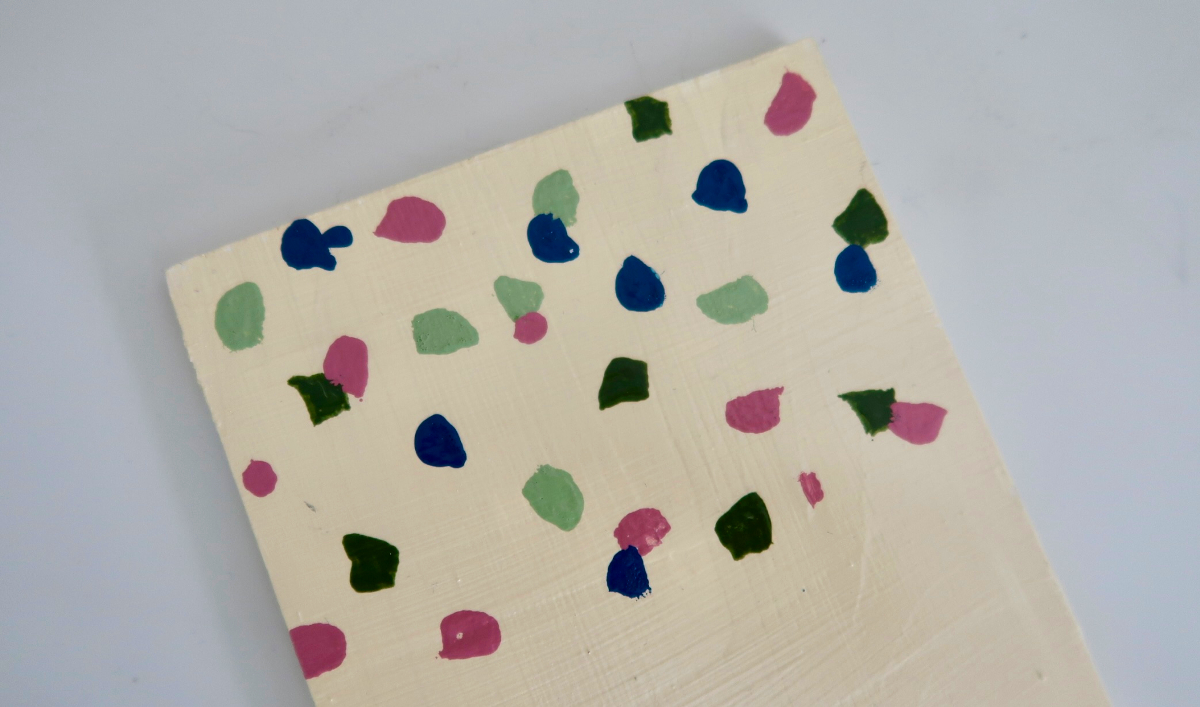
Continue stamping with the same color, evenly distributing the stamps on the surface, before changing to the next color and stamp. Overlapping stamps and turning the brushes each time can help to create a more dynamic effect. Continue stamping until you’ve achieved your desired density of the pattern.
STEP 5: Add details and finishing touches with a small paintbrush.
Depending on your sponge’s density, stamping the shapes may create small air bubbles in the paint. Use a fine detail paint brush to pop these bubbles and use the small brush to touch up any blank spots the bubbles have made.
You can also alter some of the stamped shapes, giving them an extra corner or tail with the paintbrush. Or you can paint some small, irregular triangles or rectangles for added depth in between the larger stamps. Wait until the surface is completely dry (preferably overnight) before moving on to the next step.
STEP 6: Preserve your surface with a spray sealer.
Dried craft paint is not the most durable surface, so it’s best to seal your creation. A spray sealer works best—brushing on liquid sealers can cause the craft paint to flake, depending on the paint and brush used.
Take your project outside to a well-ventilated area and follow the manufacturer’s instructions when applying the spray sealer. Allow it to dry completely before using your project for its intended purpose. Many spray sealers have a 24-hour curing time, but check your product’s details.
Final Thoughts
Being on-trend doesn’t have to break the bank. This DIY terrazzo paint method is fast and simple, and it requires supplies that you may already have at home. You have full control over the piece, colors, size, and spacing. Plus, you’ll save money instead of buying an expensive home decor piece.

Loading comments…
Comments couldn’t be loaded. Please refresh the page.