We may earn revenue from the products available on this page and participate in affiliate programs. Learn More ›
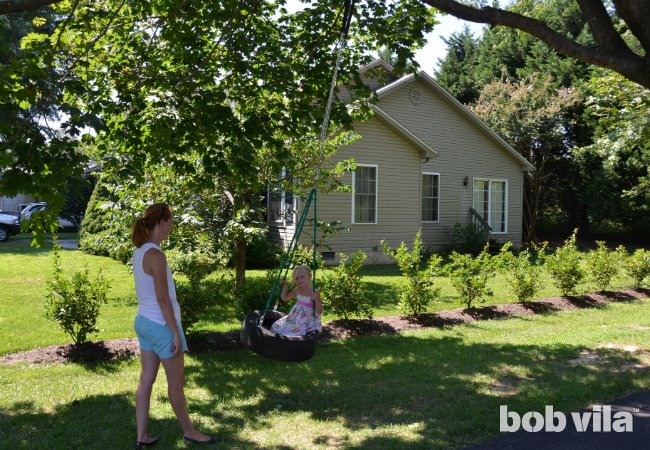
There’s something so incredibly appealing about a simple tire swing. Whether it’s the freeing feeling of soaring through the air or the satisfaction of transforming an old, utilitarian hunk of rubber into backyard fun, kids and adults alike can’t help but be drawn to it. So then why not involve your little ones when setting up your own version? Materials for this project total somewhere between $60 to $100, depending on the length of chain you need and the type of hardware you buy, but rest assured: The many seasons of enjoyment to come will be well worth the cost.

SKILL LEVEL: EASY
This tire swing is a simple assembly project, so kids of all ages can help! The hardest part is ensuring all the hardware fits together properly: that the quick connector links you choose can accommodate the chains and swivel hardware that you want, and so on. If you buy pieces at more than one store, take whatever you can with you to test out how it connects with other supplies before purchasing—or be prepared to possibly exchange parts later for different sizes.
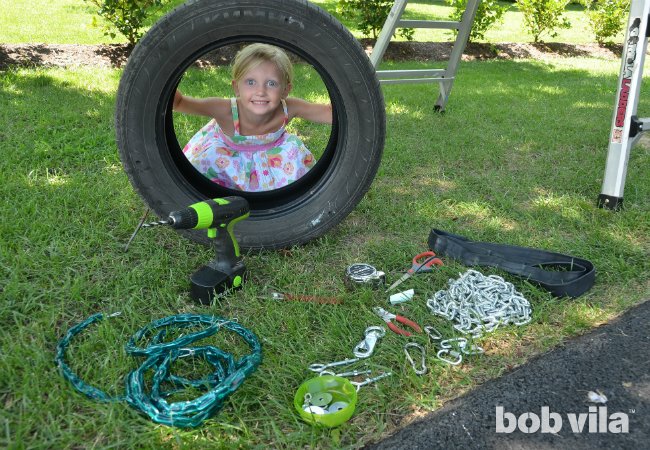
TOOLS AND MATERIALS
– Sturdy tree branch
– Tire
– Drill with a bit that matches your eye bolt size (we used 5/16ths)
– Tape measure
– Chalk
– 3 eye bolts
– 6 nuts
– 6 lock washers
– 6 fender washers
– Pliers
– Adjustable wrench
– 3 4-foot lengths of swing set chain, vinyl coated to keep little fingers safe
– 4 quick connector links
– 1 swivel hook
– 1 steel snap
– 26-inch bicycle inner tube
– Scissors
– 12-foot steel-hardened chain (or less, depending on your tree height)
A note about hardware: Make sure all of your steel hardware is grade 5 or higher and has an appropriate working load limit (WLL). The hardware and chain we used were rated for between 260 and 1,700 pounds. To determine the load your hanging chain and hardware need to bear, add the total weight of the entire swing assembly (tire, eyebolts, swing set chain, and connectors) and the estimated weight of the children who will be using it.
STEP 1
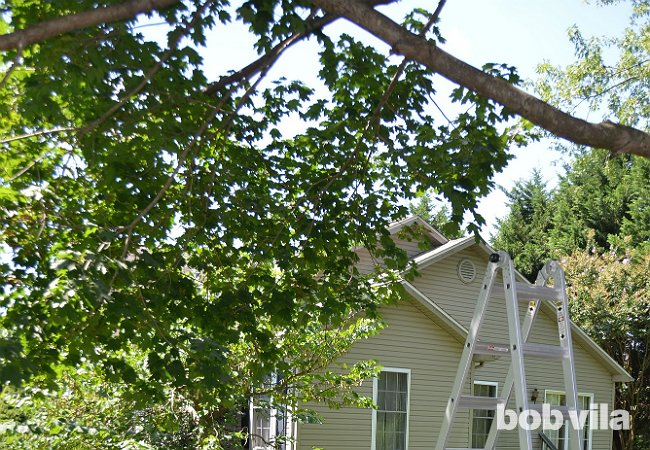
Plan to hang your swing on a sturdy tree branch that is, ideally, 8 to 12 feet off of the ground. The higher the branch, the higher the swing can go—and the further it will travel. Walk the space to make sure the swing, at its highest arc, has at least a 30-inch clearance from both the tree trunk and any other obstructions.
STEP 2
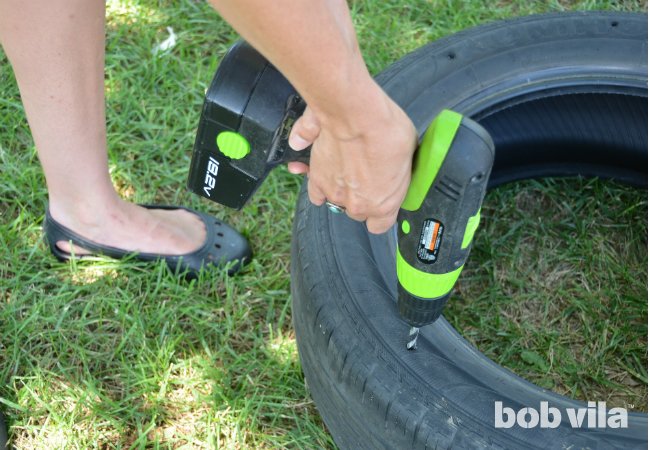
Drill several drainage holes in one of the tire’s sidewalls (this will be the swing’s bottom) in order to allow rainwater to escape—you don’t want to create a breeding ground for mosquitoes after a storm or shower. Then flip the tire over to work with the swing’s top. Measure and mark with chalk three equidistant points in the sidewall where you will attach the eye bolts. Drill a hole in each of those chalk marks.
STEP 3
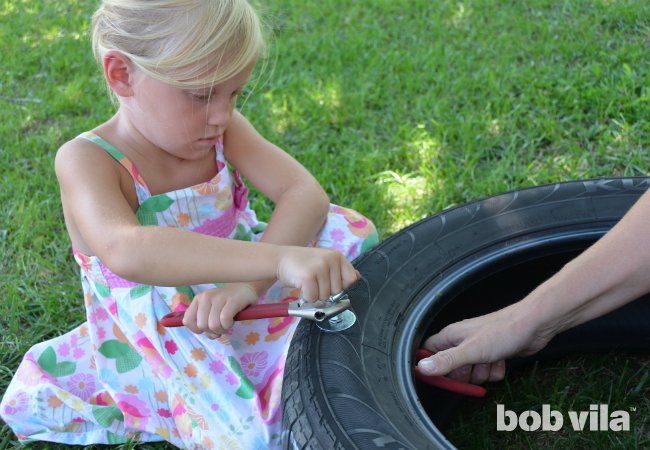
In each of the three holes, insert an eye bolt with a nut, lock washer, and fender washer through the top of the tire sidewall. Thread a fender washer, lock washer, and nut onto the bottom half of the bolt (where it comes out inside the tire), and tighten it all up using pliers and an adjustable wrench.
STEP 4
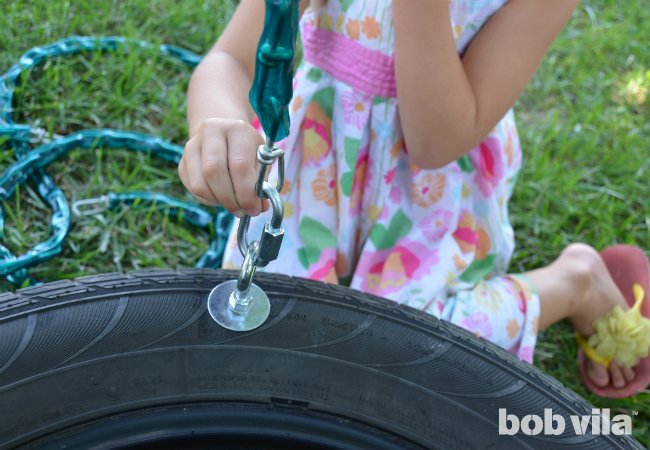
Now, attach each of the three swing set chains to an eye bolt using a quick connector link.
STEP 5
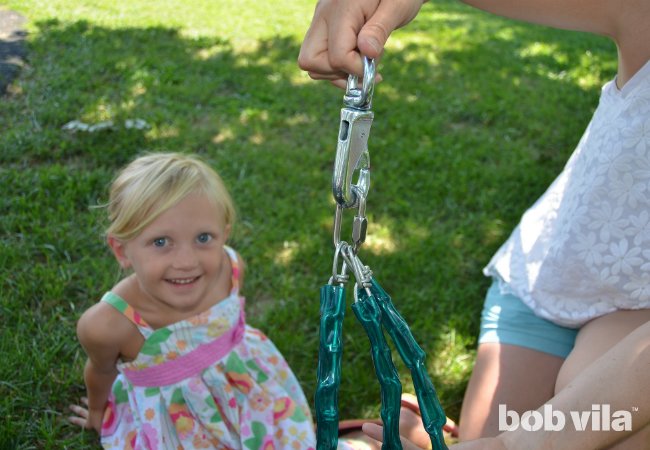
Connect the top of those three chains together with another quick connector link, and then attach the swivel hook. By including a hook here, this swing assembly can be easily taken down and hung up for use only when there is adult supervision.
My connector links did not open up far enough to accommodate the swivel hook I chose, and the swivel hook was too large to accommodate the links of the hanging chain on its own, so I needed to add a snap hook to the top of the assembly—you may or may not need this. This part of the assembly is a bit of a puzzle that will be informed by the size of your chains and steel hardware (which further depend on the weight you want them to carry).
STEP 6
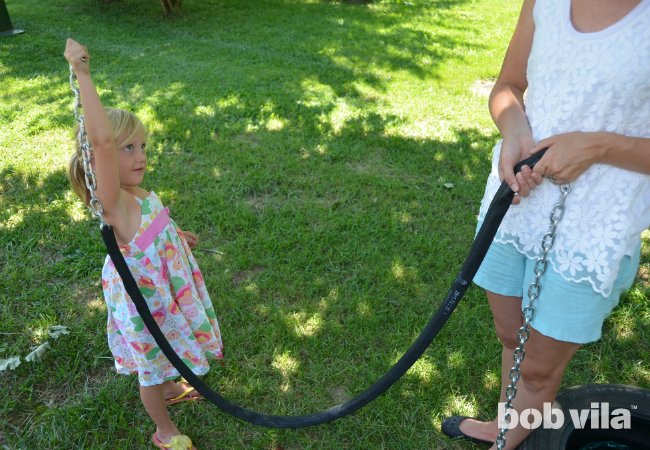
Cut open the bicycle inner tube at the valve (which can be chopped off completely) so that it is one long piece. Then, thread the chain through the inner tube. This sheathing will serve to protect the tree branch once you hang it.
STEP 7
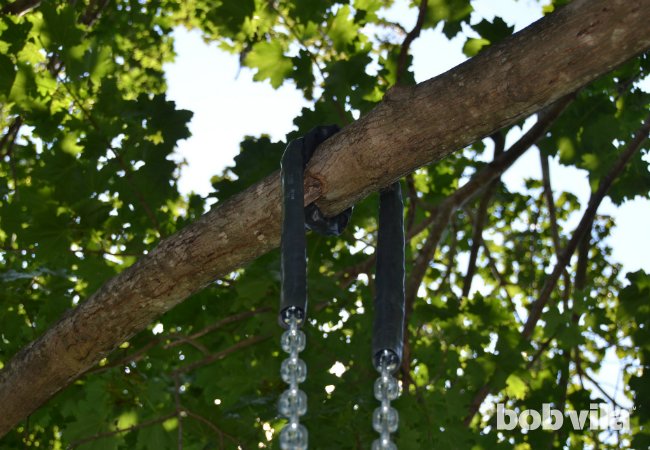
Hang the chain over the tree branch, utilizing any knots in the branch to help it stay in place. You may also want to wrap the chain around the branch once, as we did. Be sure the chain hangs down exactly the same length on each side.
STEP 8
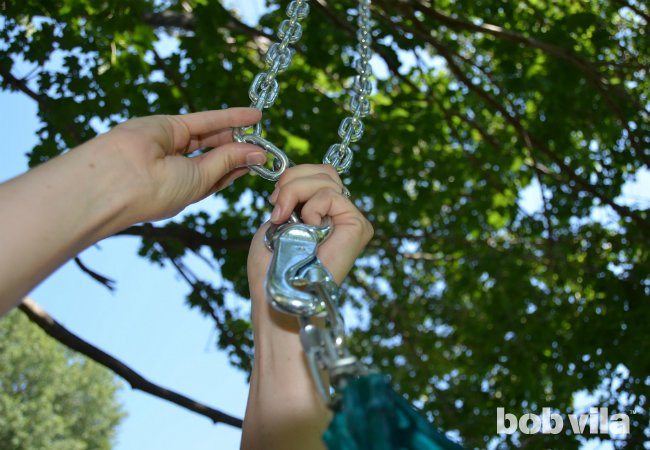
Finally, attach the swing assembly to two ends of the hanging chain. In under an hour, it’s ready for a test drive! As they swing off into the sunset, your kids will love it all the more knowing that they had a hand in making it.
