
We may earn revenue from the products available on this page and participate in affiliate programs. Learn More ›
Q: When I returned from work today, I pushed the button on my remote garage door opener but the door didn’t budge. Even after I put new batteries in the remote, my garage door won’t open. What are the chances that I can fix it myself without having to call a repair person?
A: So sorry to hear your garage door stopped working! Garage door openers are great when they work, which is most of the time. But it sure can be frustrating when they go on the fritz. Replacing the remote’s batteries was a smart first step, but since that didn’t solve the problem, it only makes sense to troubleshoot some other common issues that could be preventing the door from opening. Odds are, you can probably remedy the issue yourself. Ahead, learn how to fix a garage door that refuses to open.
RELATED: The 10 Best Things You Can Do for Your Garage
While garage door openers function similarly, they vary in style from brand to brand. For some of the fixes below, you’ll need to consult your owner’s manual; if you can’t locate the manual, you can usually download a new one from the manufacturer’s website.
Make sure the opener is plugged in.
While this may seem like a no-brainer, one of the most common causes of garage door opener failure is simply a power cord that has worked loose from the electrical outlet.
Check the circuit breaker that powers the opener.
An electrical surge, even a small one, can cause a breaker to trip. Check your home’s breaker panel (service panel) to see if the breaker that powers your garage (it should be labeled) is no longer in the “on” position. If so, flip the breaker switch to the “off” position and then back to the “on” position to reset the breaker before trying the garage door opener again.
Did someone lock the door from the inside?
Some garage doors have manual locks with a garage door latch that prevents the garage door from opening when engaged. If the garage door is locked from the inside, it won’t open. While you’ve likely already checked this out, we sometimes overlook the simplest things, so it’s worth mentioning and inspecting before you move on.
RELATED: The 9 Best Garage Door Openers, Vetted
Consult a pro
Get free, no-commitment project estimates from garage door repair specialists near you.
Check to see if the trolley has been disconnected.
If the garage door doesn’t open, check to make sure it’s attached to the trolley. The trolley moves along the chain drive (the long track attached to the ceiling) when the garage door is opening or closing. It’s attached via a metal bar to the inside top of the garage door. Of course, all garage door openers come with a pull cord or switch that disengages the trolley whenever you’d like to open the door by hand. With that in mind, check to make sure that the cord was not inadvertently pulled and the trolley disconnected. If it was, reconnect the trolley according to the instructions in your owner’s manual, and you’ll be back in business.
Try resetting the remote control.
Is the garage door remote not working? If the door opens when you press the button on the wall-mounted control keypad but not when you use the remote, you might have just pinpointed the source of the problem. Try resetting the remote. Because the procedure to reset the remote varies by manufacturer, you’ll need your owner’s manual. It is, however, a relatively quick fix that involves pushing the buttons on the remote and on the keypad in a specific sequence. If your garage door opener won’t work even after resetting the remote, you may need to replace it.
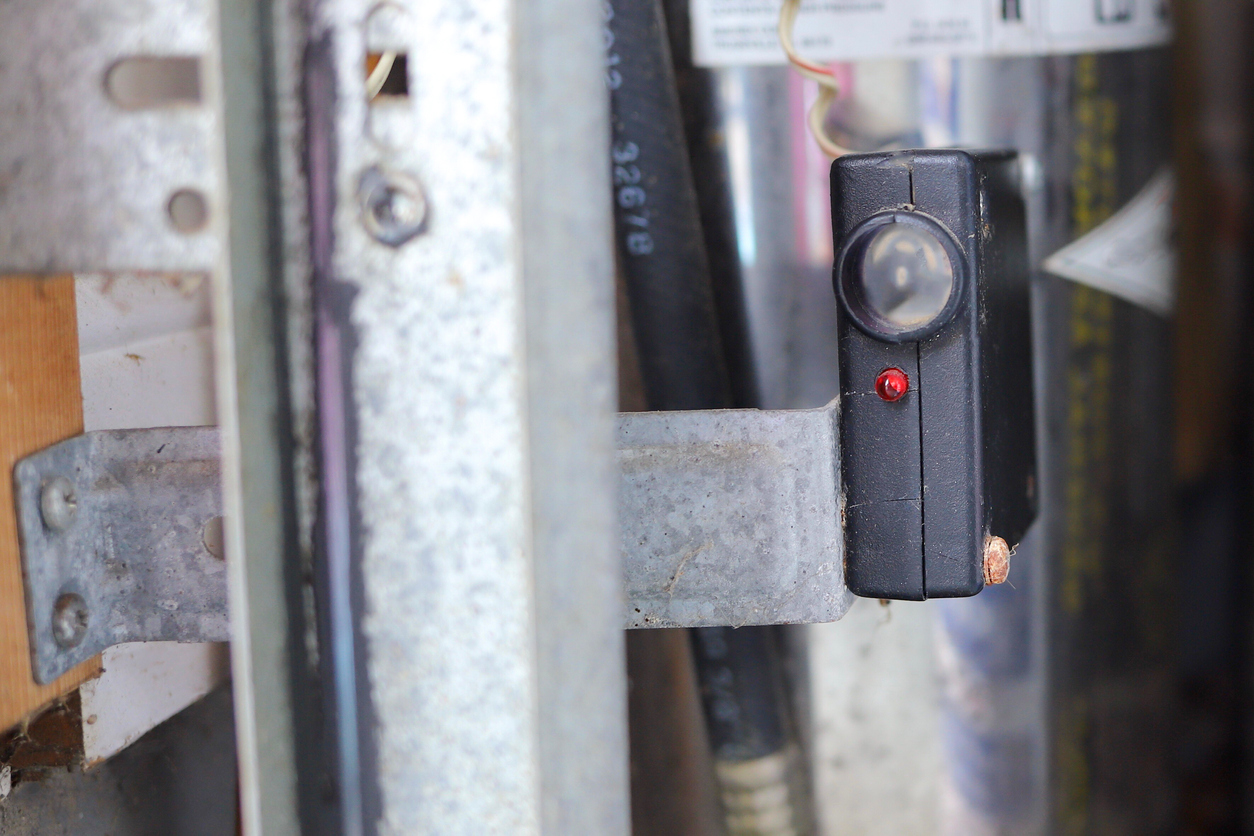
Clean the photo eye.
The photo eye, a small sensor, hovers 4 to 8 inches above the floor on the inside of the garage door track to detect objects in the path of the garage door. If it senses something, it signals the door to stop closing—a wonderful safety feature that prevents the door from closing on pets or small children. The caveat: A dirty photo eye can keep the door from moving in either direction. Wipe off the photo eye (it looks like a small lens about ¼ inch in diameter) with a soft rag, and then try to open the door again.
Adjust the opener’s pulling force.
If your opener is more than 5 years old, it was most likely programmed to exert the specific amount of force needed to pull the garage door up. Over time, that amount of force needs to be increased to compensate for damage to the rollers or the door tracks, either of which makes it difficult for the opener to lift the door. A nut located on the opener—check your owner’s manual for the location, which varies by brand—can be turned with a wrench to increase the opener’s pulling power. By increasing the pulling force, the opener may be able to open the door again. Newer models, on the other hand, have done away with the adjustment nut and adjust the pulling force automatically.
Check that the garage door is set in its track.
If your garage door opens a little then stops, the problem may lie with the garage door track. The opener won’t be able to lift the door if a roller on the garage door has come off one of the side tracks. This can happen if a track is accidentally struck by a heavy object and bent outward, allowing the door rollers to slip out. Still, you may be able to disconnect the opener (using the disconnect switch mentioned above) and raise the door by hand while maneuvering the rollers back into the tracks. It helps to have at least two people to do this. When the door is fully open, use a mallet to lightly tap the bent side of the track back into alignment. The door should then lower easily, and you can reconnect the opener.
A torsion spring has broken.

Many garage doors have a powerful torsion spring located horizontally above the door. When the door is lowered, the spring winds up tightly, creating a pulling force that helps lift the door up when you next open it. Over time, torsion springs wear out and break, making the door too heavy for the opener to raise. Installing a new torsion spring is a job for a qualified garage door technician, though—if the spring snaps off during installation, it can severely injure anyone near the door.
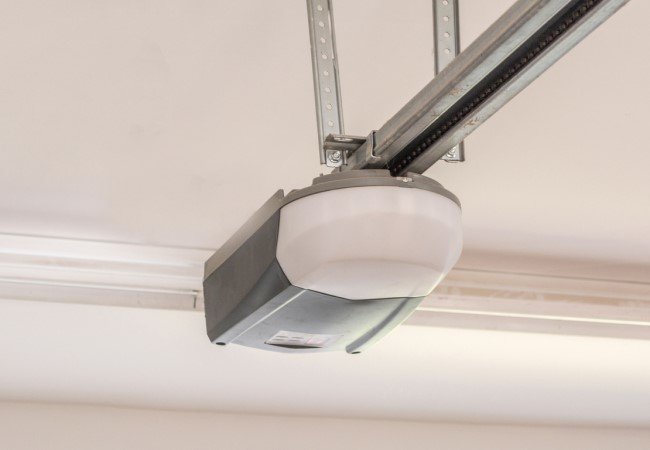
If your door is more than 15 years old, the garage door motor may be kaput.
Generally speaking, you can expect to get 10 to 15 years out of a garage door opener, depending on how well it’s maintained and how often you open and close the garage door. You can extend the life of a garage door opener by lubricating the door’s moving parts to reduce resistance so the opener doesn’t have to work as hard to open the door. You should also inspect the pulleys, spring, cables, and track regularly to ensure that the garage door opens and closes smoothly. If your garage door is not opening and is more than 10 years old, it’s probably time to replace it.
The suspension cables may have snapped.
The suspension cables on your garage door attach to the torsion spring that runs horizontally above the door. This spring creates tension that helps to lift the door, and because a garage door can weigh hundreds of pounds, this additional help is necessary. If the suspension cables have snapped, the spring is no longer able to assist with opening the door, and the garage door will not open. The power of the garage door opener itself won’t be sufficient to lift the door on its own. Check the cables to make sure both are intact, and replace them if one has snapped.
Something is blocking the remote signal.
Garage door opener remotes use radio signals to communicate with the garage door opener. Unfortunately, electromagnetic interference from a variety of sources, including electrical transformers, home appliances, airports, and even military bases, can interfere with these radio signals, preventing them from reaching the garage door opener, especially if the opener uses only a single frequency. If this is the problem, you may need to upgrade your garage door opener to one that uses dual frequencies. A dual-frequency garage door opener will switch from one frequency to the other in the event that it senses too much interference.
You’ve misadjusted the limit setting on the garage door motion detector.
If your garage door won’t open all the way, the culprit may be the limit adjustment screw. This screw limits how far the garage door can travel when it opens or closes. An incorrectly set limit switch can prevent the door from closing fully or cause it to reverse itself when you attempt to close it. The limit screw is located on the garage door opener. To adjust it, use a flathead screwdriver to turn the screw counterclockwise to increase the down travel.
Something is stuck in the track.
When a garage door opens and closes, wheels attached to the door travel along curved tracks on either side. If an object becomes wedged in that track, it can halt your garage door in its…well…tracks, preventing it from opening. Inspect both tracks to make sure they are clear of any obstructions that might be preventing the door from opening. Remove them, and then test the door to make sure it can open and close properly.
The keypad might be out of sync.
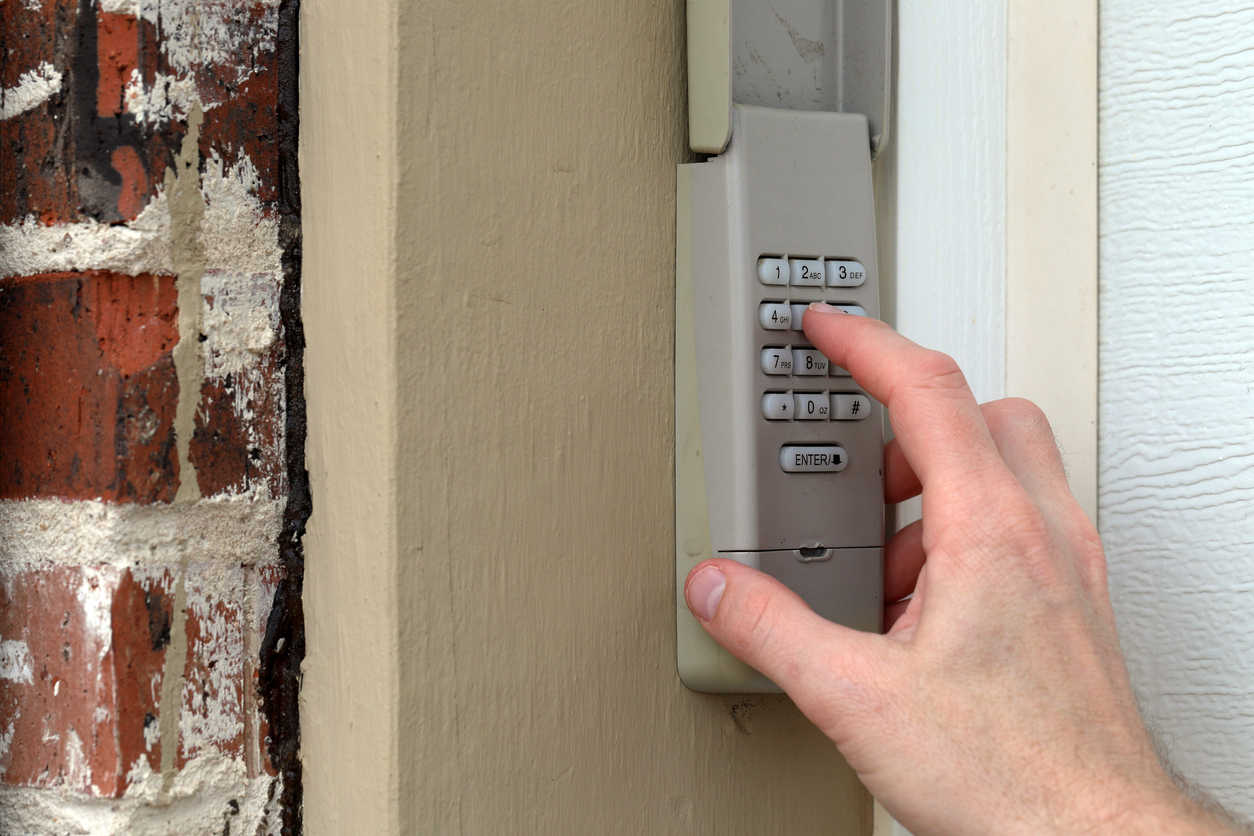
If you use a wireless keypad to enter your garage, it may not be communicating with the garage door opener. A wireless garage door keypad mounted just outside the door has a transmitter that sends a radio wave on a specific frequency that the receiver on the garage door opener picks up to operate the door. If the keypad isn’t sending the right frequency to the receiver, you won’t be able to use it to control the garage door opener. Syncing the two is a simple process: Find the “Learn” button on the opener and press it until it begins to blink. With the light flashing, press the “Open” button on the keypad within 30 seconds to sync it with the opener. (Note that the names of the buttons may vary by manufacturer; check your owner’s manual.)
Need help?
Garage door experts in your area are available to assist—get free, no-commitment estimates today!
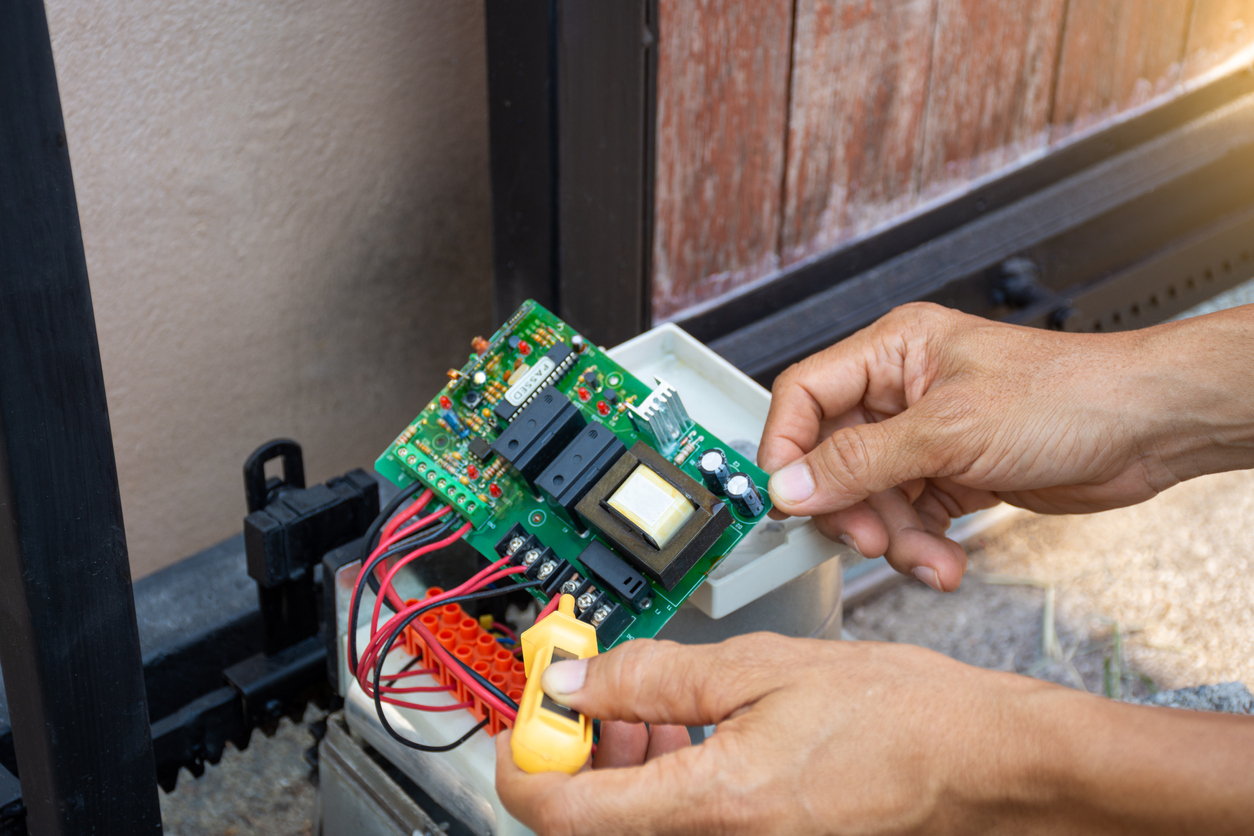
If the above remedies didn’t fix the door, it’s time to call a garage door repair person.
Problems within the opener itself should be inspected and repaired by a professional. A circuit board or logic board might have failed and now needs replacing, or gears within the unit might have worn out. Before you do move forward with a repair, though, consider the age of your opener. These units have an average lifespan of 10 to 15 years, so if yours is entering the later part of its life, you may be better off installing a new one rather than paying to fix an older model.
