
We may earn revenue from the products available on this page and participate in affiliate programs. Learn More ›
No matter how hard you work to keep your kitchen and bathroom clean, they’ll always look dingy if they’re plagued by dirty grout, whether it’s lurking between tiles in the shower or along your backsplash. But before you spend a small fortune on cleaning products, consider this: You can mix up your own homemade grout cleaner, less toxic and less expensive than the store-bought variety, using just a handful of ingredients that may already be sitting beneath your kitchen sink. To get started, you’ll need to put on some protective gloves—but after that, this cleanser takes just under 10 minutes to make. Here’s our handy how-to, which will help you make all the grout in your house look brand-new!
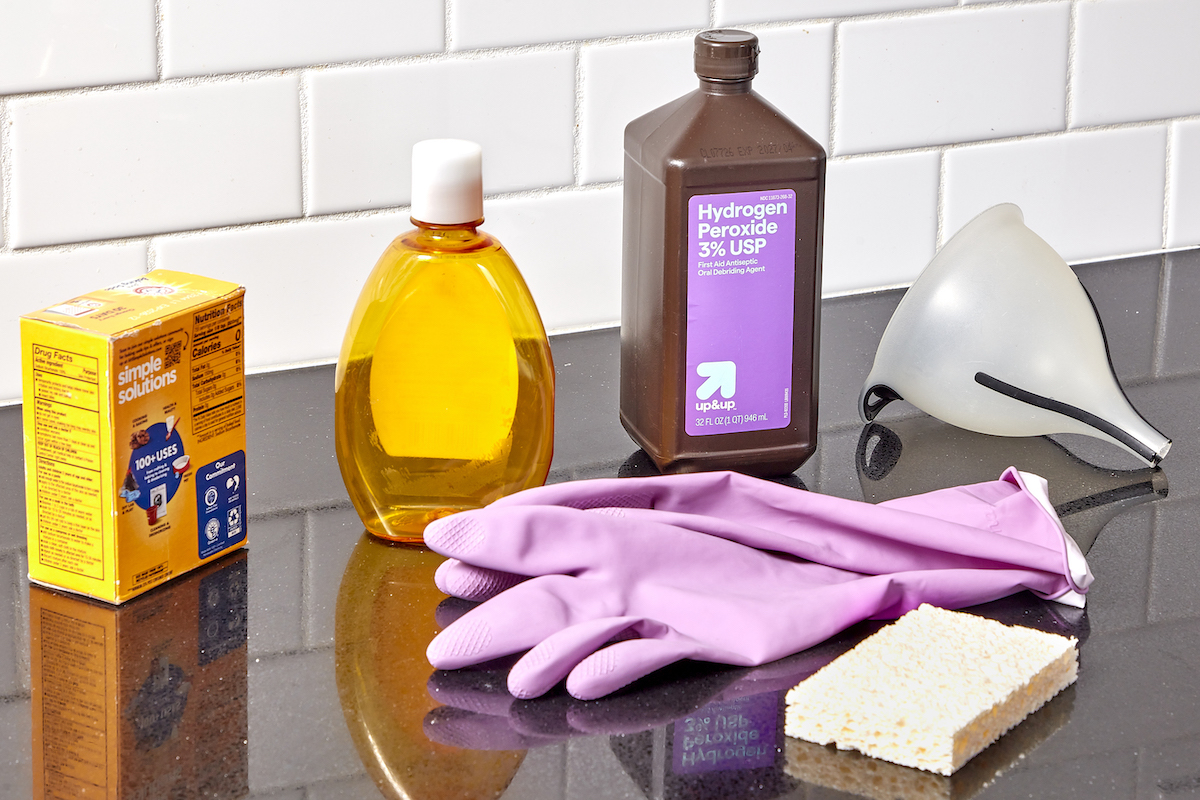
Tools & Materials
Bobvila.com may earn a commission from purchases made through these links.
Step 1: Put on protective gear.
It’s a good idea to don some protective gear before you gather the materials to make your homemade grout cleaner. Remember to be extra cautious when you’re working with hydrogen peroxide. Pull on your rubber gloves before you get to work. (While hydrogen peroxide is generally safe for topical use, it can sting if it gets in any cuts.) Also, be sure not to splash any in your eyes—rinse immediately if you do.
Step 2: Create a mixture of baking soda and hydrogen peroxide.
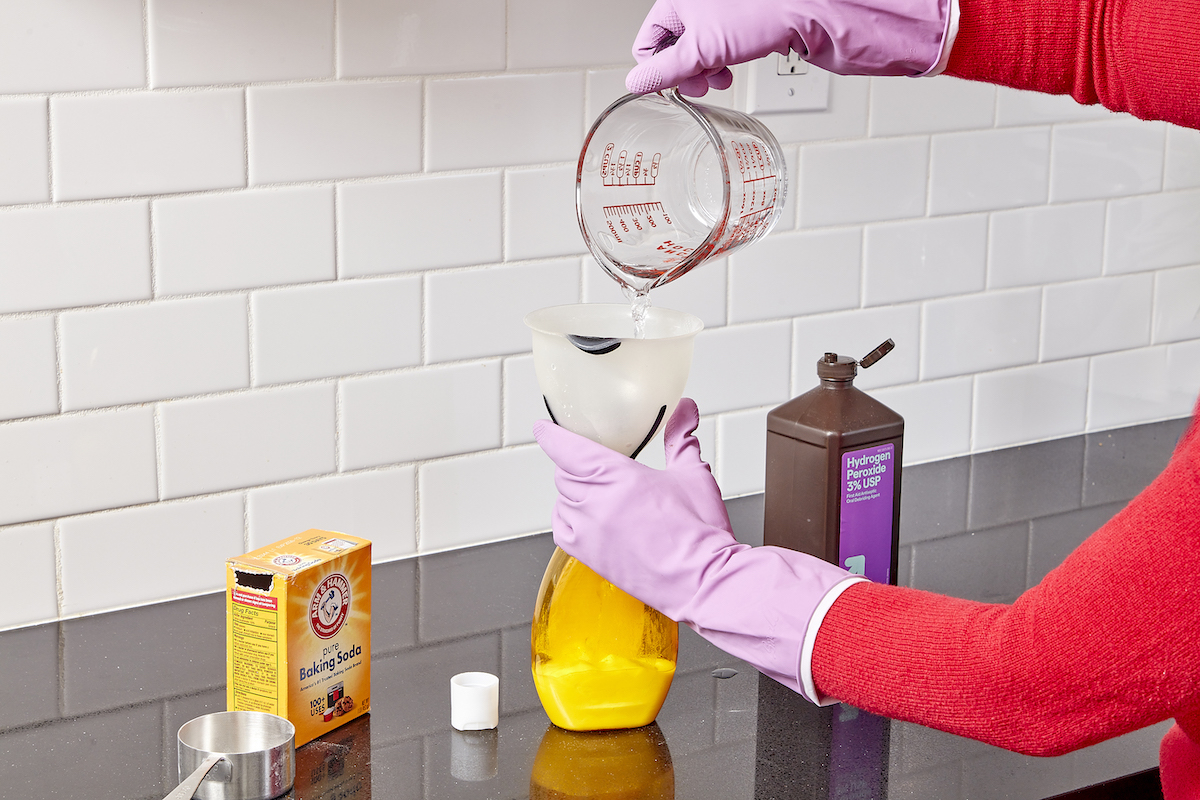
Unscrew the lid of a small squeeze-top container. (These flip cap squeezable bottles from MoYo Natural Labs Store is a good option.) Pour 1/2 cup of baking soda into the bottle, then mix in 1/4 cup of hydrogen peroxide. The baking soda will help remove tough stains and hard water buildup, while the hydrogen peroxide will clean and brighten, cutting through residue on the grout to remove discolorations.
Step 3: Add dish soap and shake to combine.
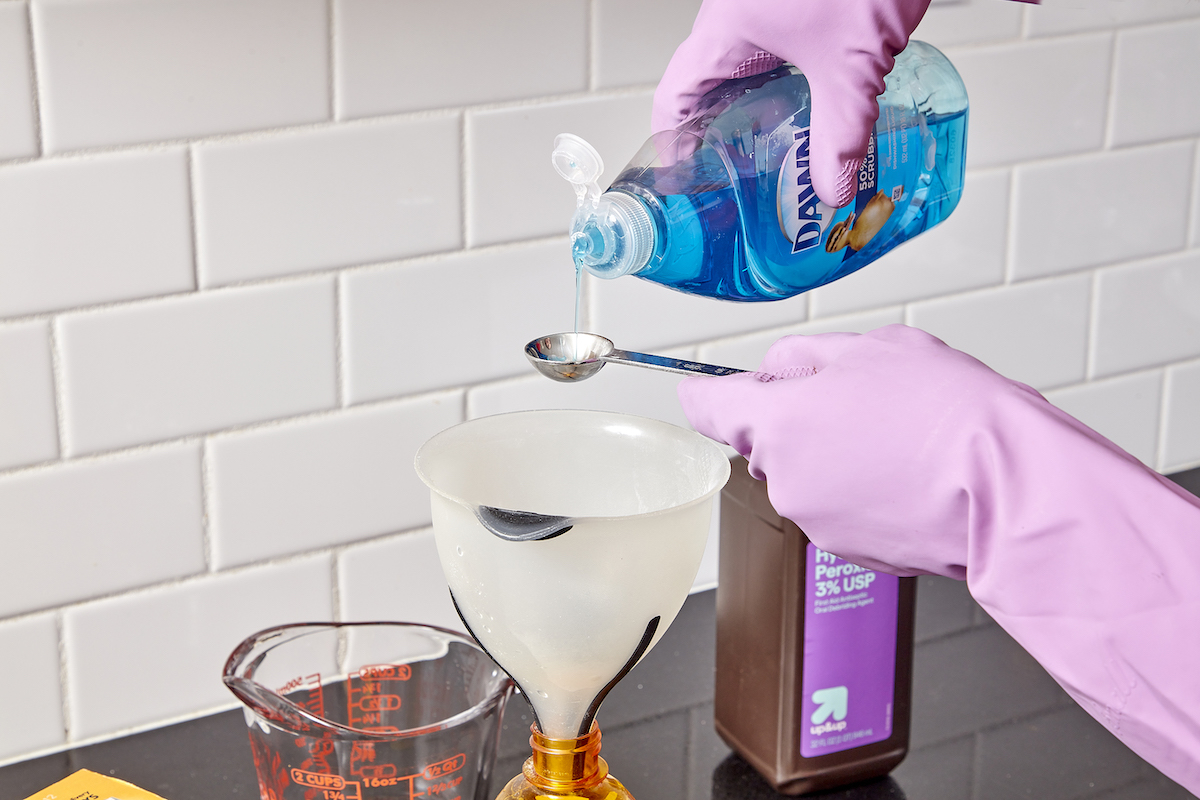
Add 1 teaspoon of liquid dish soap, then replace the lid and shake the mixture to make sure the ingredients in your homemade grout cleaner are well combined.
Step 4: Apply grout cleaner, let sit, and wipe away.
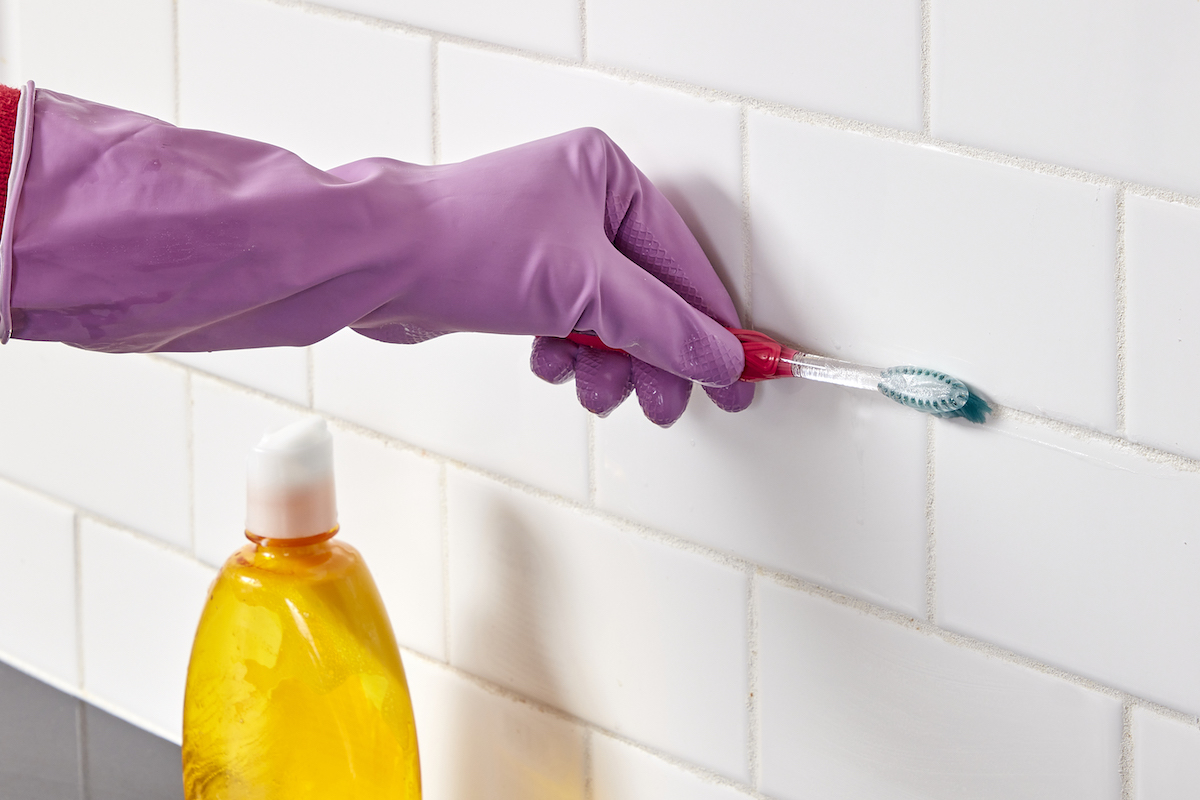
Use the squeeze-top bottle to apply the homemade grout cleaner in a fine line to any areas in need of a good scrub. Let the mixture sit on the grout for about 5 minutes so it can really work its way into the stain, then wipe the mixture off with a sponge or paper towel. Rinse with water to remove any residue. If stains remain, repeat as needed until the grout is clean.
As wonderful as it is to see your grout clean again, wouldn’t it have been better if there had been no stains to deal with in the first place? In the future, make housework even easier by regularly cleaning grout before it gets out of control. Here are a few simple methods for keeping dirt and grime at bay:
- Prevent discoloration by sealing your grout once a year. Sealant creates a barrier that protects against unsightly stains and dirt buildup, so you won’t have to break out your homemade grout cleaner. (Read our tutorial for sealing grout if you have never done it, or need a refresher.)
- Regularly vacuum grouted tile floors. Your machine can pick up excess dirt before you break out the mop and specialized cleaners so that you’re not just pushing it around.
- Mop tile floors once a week with water and suds, but go easy on the detergent. Use too much and the residue left behind will attract more dirt after the floor dries.
