
We may earn revenue from the products available on this page and participate in affiliate programs. Learn More ›
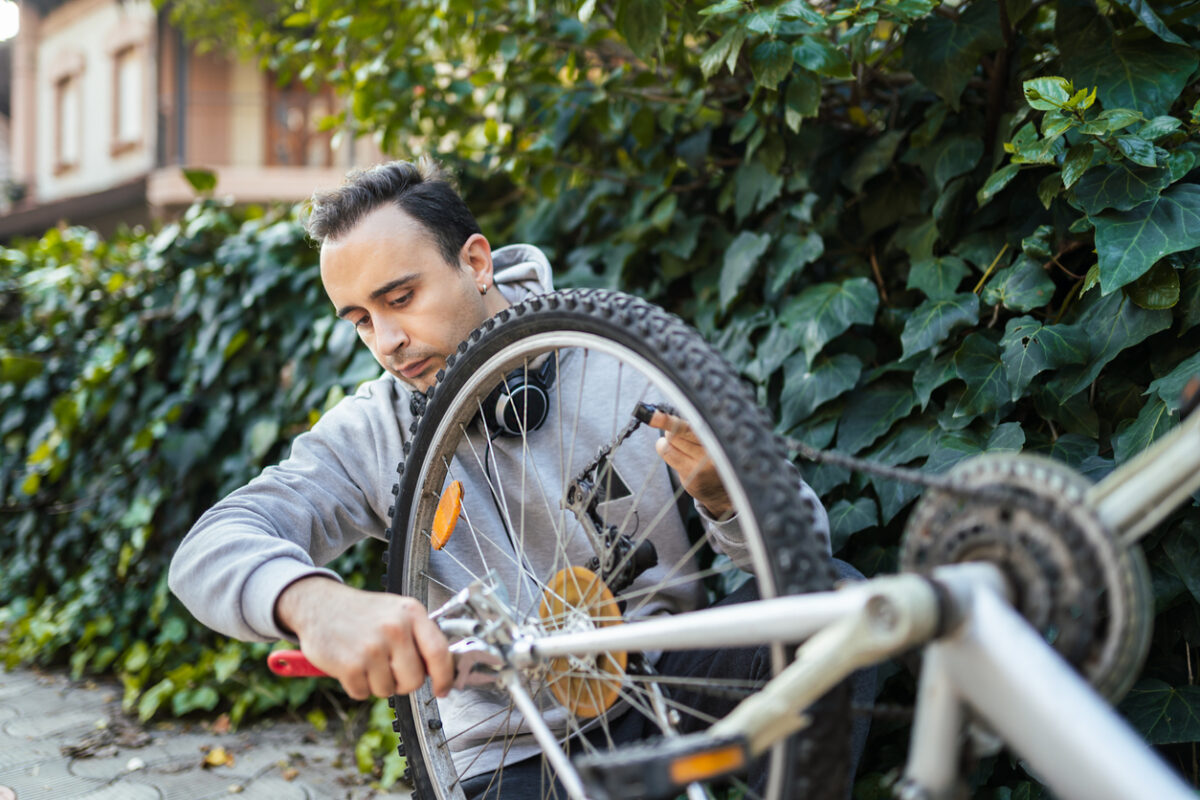
Experienced cyclists know punctures occur frequently, so it’s important to learn how to change a bike tire even if you are a more casual cyclist. When your bike tire is punctured, you may be able to repair it yourself. But if the damage is too extensive or if the tire is already severely worn, then replacing the tire may be necessary.
Typically, bike owners cannot repair large breaks, splits, or punctures with a tire patch kit. Similarly, any significant signs of tire wear, strain, or cracks can indicate that it’s time to replace a bike tire. Most cyclists learn how to fix a bike tire so they can deal with minor punctures and know how to replace one after more severe damage has occurred. If you need a refresher, are new to cycling, or are getting into bike maintenance, then follow the steps below to learn how to change a bicycle tire.
Tools & Materials
Bobvila.com may earn a commission from purchases made through these links.
BEFORE YOU BEGIN
To access the bike tire, either put the bike on its side or stand it upside down, resting on the handlebars. However, some cyclists avoid placing the bicycle upside down because this position could damage the handlebars or seat. Another option is to invest in an upright bike stand that can position the bicycle off the ground while you work. If you are laying the bike on its side, make sure the chain side faces up. Choose the position with which you feel the most comfortable.
If you are replacing the back tire, then it’s important to adjust the gears to the smallest ring beforehand to make it easier to remove the tire. The smallest ring is the outer gear of the bike.
Tool Tip
Supported by Craftsman
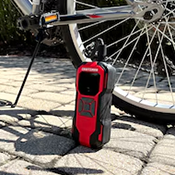
Easily air up low bike tires at home or on the go with the Craftsman Mini Digital Inflator. The portable 12-volt tool features five presets, including one for precisely inflating bicycle tires, and a large digital display for monitoring air pressure from 1 to 150 PSI. Bonus: The mini inflator can charge your cell phone in a pinch while you’re out riding.
Get the Craftsman Mini Digital Inflator on sale at Lowe’s for $29.98 (save $20)
STEP 1: Remove the quick-release lever or wheel nut.
If the bike includes a quick-release lever, it will be located in the center of the bicycle wheel. Loosen and remove the lever by pulling up and turning the lever 180 degrees. Then set it aside for reinstallation. This should free the wheel to allow the damaged tire to be replaced. However, many bikes don’t come with a quick-release lever. If this is the case, then a wrench is needed to loosen the nut in the center of the wheel.
Typically, a 15 millimeter wrench will be the correct size to loosen and remove the wheel nut. Keep in mind that you can also check the bicycle manual or the manufacturer’s website for details on how to remove your specific bicycle tire. Additionally, if the nut is seized, WD-40 or a similar lubricant can be used to help loosen the threads and remove the nut.
STEP 2: Disconnect the brake cables and take off the tire.
If you attempt to remove the wheel without detaching the brake cables, the force can damage the cables. On some bikes, the brake cables will disconnect automatically when the quick-release lever is removed, but the brake calipers must be squeezed in order to release the cables in most cases.
You will also need to lift the chain off of the gears when replacing the rear wheel on a bike. Once the chain and brake cables are disconnected and the wheel nut or quick-release lever has been removed, you can lift or pull the tire out of the forked slot where it usually sits on a bicycle.
STEP 3: Deflate the tire and loosen the valve retaining nut.
To remove the rubber tire from the metal wheel, the tire needs to be deflated completely. Take off the air valve cap and set it aside for reinstallation. Release the air from the tire using one of these methods:
- Schrader valve: Use a wrench to press down on the plunger inside the air valve.
- Presta valve or a Dunlop valve: Alternatively, your bike may have a Presta valve or a Dunlop valve; these need to be pulled up to release the air.
If the air valve has a retaining nut or lock ring securing it to the wheel’s rim, then loosen and remove the part, placing it with the air valve cap for reinstallation at a later stage in the process.
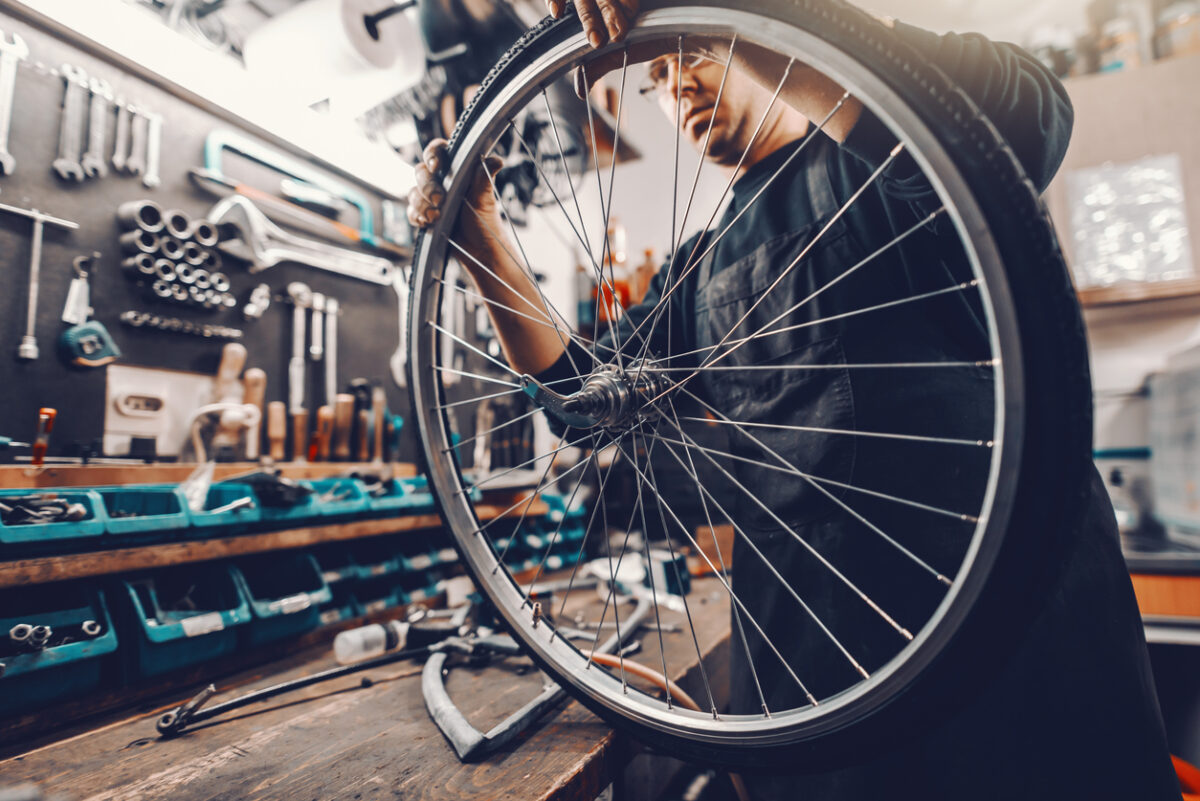
STEP 4: Unhook the tire from the wheel with tire levers.
The deflated tire will still be difficult to remove from the rim of the wheel, so it’s time to reach for the tire levers:
- Start by sliding a tire lever between the rim and the tire, then use leverage to pop the edge of the tire up out of the rim.
- Secure the tire lever to the spokes of the wheel and use a second tire lever on another section of the tire.
- Work the second tire lever around the rim of the wheel until the entire side is free. This should give you enough space to reach inside the tire and pull out the inner tube.
Once you have removed the inner tube, you should be able to take the tire off the metal wheel by rolling or twisting the tire over the edge of the rim with your hands. Work your way around the outside of the wheel until the tire is free, and inspect it for any serious damage. In many cases, only a new inner tube is needed, but a severely damaged outer tire will also need to be replaced.
RELATED: 15 Clever Bicycle Storage Ideas for Any Space
STEP 5: Add air to the new tire tube.
Take the new tube out of the packaging, making sure to remove the dust cap, lock ring, and valve cover. Put any small parts in a safe spot to make sure that they are not misplaced. Unfold the tube and check to make sure it has no pre-existing damage, then connect it to a bike pump or tire inflator to add some air to the new tire tube. Do not fill the tube all the way just yet.
The purpose of adding air at this stage is to help the tube hold its shape and avoid damage caused by pinching, bending, or twisting the tube while reinstalling it.
STEP 6: Inspect and refit the tire.
Whether installing a new tire or refitting an old tire with a new inner tube, inspect the inside and outside walls of the tire for any existing damage, severe wear and tear, or sharp objects that could cause additional damage before installing the inner tube. Refit one side of the tire on the rim of the wheel, ensuring the tread is pointed in the correct direction. To do so:
- Slide the air valve through the valve hole and feed the inner tube into the hollow space inside the tire and wheel rim.
- With the tube in place, twist the outer edge of the tire so that it slips into the wheel rim.
- Try to start near the valve and finish across from it—the tire will be looser in this position. If the tire resists too much, you may need to let some air out of the inner tube or use a tire lever to help position the last section, where the tire is the tightest.
- Remember to reinstall the lock ring or valve retaining nut if your bike has one.
RELATED: 15 Clever Bicycle Storage Ideas for Any Space
STEP 7: Fully inflate the inner tube and reinstall the wheel.
Use a bike pump or home air compressor to fully inflate the inner tube. If the PSI is not written on the tire, you can refer to the bicycle manual or the manufacturer’s website for the appropriate air pressure. Don’t forget to put the cap back on the air valve to prevent accidental tire deflation during use.
- Slide the wheel back onto the bike and secure it with the quick-release lever or wheel nut, as applicable.
- If you replaced the rear tire, reattach the brake cables and lift the chain back onto the gears.
- Rotate the wheel to ensure it spins freely, then place the bicycle upright and test the repair with a short ride.
- Make sure to clean up any old parts and dispose of old tires through local recycling facilities. Some bike and car shops also have programs for accepting old tubes and bike tires.
Final Thoughts
Regular bicycle maintenance and proper storage can help keep a bike in top condition over years of ownership. Always replace or repair any tire damage as soon as possible to avoid bending a bike’s wheel. Also, during the repair or replacement process, make sure to keep track of all small parts, like nuts, lock rings, or valve caps. While small in size, their purpose is essential to the bicycle’s function. Losing one during a repair can create another problem that needs to be resolved before the bike can be used again.
