We may earn revenue from the products available on this page and participate in affiliate programs. Learn More ›
While repairs can ideally be completed while the sun is out to avoid any unnecessary damage to a home from inclement weather, this isn’t always the case. It’s important to know how to tarp a roof in order to prevent leaks.
Putting a tarp on a roof without nails may seem like an easy solution, and it can be done with sandbags as a temporary method for holding down the tarp. However, it is only useful for short periods of mild weather. This option isn’t always the best because the sandbags can shift, move, and even fall off the roof.
For a more secure solution, it’s helpful to learn how to secure a tarp to a roof using 2x4s that have been nailed down to hold the tarp in position. Before you can start nailing down a tarp you need to know how to put a tarp on a roof safely, without putting yourself or others in danger.
Follow these simple steps if you are interested in learning how to put a tarp on a leaking roof and to find out how long you can leave a tarp on a roof.
Tools & Materials
Bobvila.com may earn a commission from purchases made through these links.
BEFORE YOU BEGIN
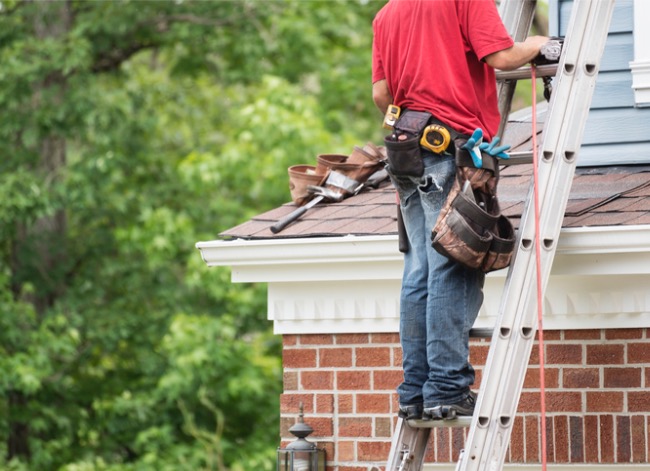
Do not jump into roof repairs or even roof tarping without taking serious safety precautions to avoid injury or death. Never forget that while there is a surface to stand on, you are still working at a height that can be fatal with one misstep.
When you are working on a ladder or on the roof, it’s necessary to have at least one spotter to help support the ladder and watch for any emergencies. It’s also a good idea to wear a harness fastened to a lanyard, and secured with a fall arrester in order to prevent falling to the ground from the roof.
STEP 1: Assess the damage to the roof.
Make sure that you have at least one helper available before starting this job, then put on appropriate safety equipment including suitable work boots, long pants, a long-sleeve shirt, gloves, safety glasses, and fall protection gear. After taking the proper safety precautions, set up the ladder. Climb up to assess any damage to the roof, but do not climb on to any area of the roof that appears to be damaged.
Use a tape measure to determine the amount of roof that needs to be tarped, then climb down and get an appropriately sized tarp as well as 2×4 boards to hold the tarp in place. Note that the 2x4s need to be long enough to extend out from the edges of the tarp about 2 feet.
STEP 2: Clear debris and prepare the tarp.
After gathering the tarp and 2x4s, grab a broom and head back up to the roof. Clear away any debris, like broken shingles, that can tear or otherwise damage the tarp during or after installation.
Next, ask a helper to come up to the roof to help safely spread out the tarp over the affected area, ensuring that the tarp extends about 4 feet over the peak of the roof to prevent water from running underneath the tarp.
While tarping can be done by one person, it isn’t recommended because the tarp can be caught in the wind and potentially pull a person off the roof or into a dangerous position. It’s also much easier to keep an entire tarp flat when there is more than one person to help hold it down.
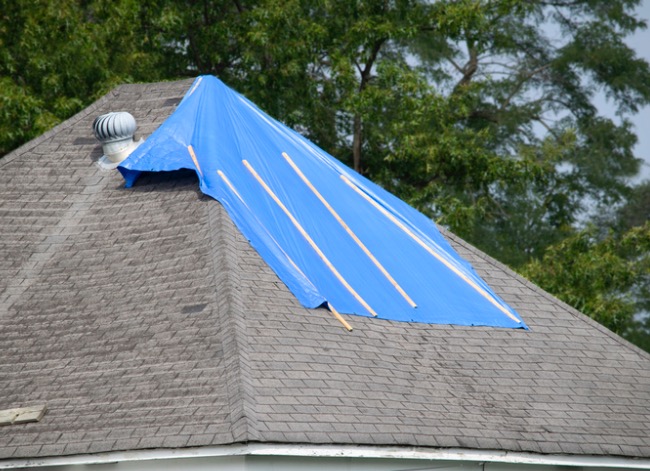
STEP 3: Install the tarp with 2×4 anchor boards.
Lay a 2×4 on the peak edge of the tarp, making sure that it extends out about 2 feet from the tarp. Use a hammer and nails to secure the tarp to the 2×4, then roll the 2×4 360 degrees so that the tarp wraps once fully around the piece of wood. Wrapping it helps prevent the nails from tearing through the tarp in heavy winds.
Place the 2×4 in the desired location and spread out the tarp so that it is pulled taut. Use a drill and screws to secure the 2×4 to the roof. Make sure that the screws are long enough to penetrate the 2×4, shingles, and decking. Repeat this process with the opposite side of the tarp, ensuring that the 2×4 is properly lined up, nailed, wrapped, and secured. Position additional 2x4s on top of the two unsecured edges of the tarp and fasten them to the roof with screws in order to secure all four sides of the tarp.
STEP 4: Fasten the tarp overhang under the eaves.
Not all tarps will extend over the edge of the roof. If your tarp does, then make sure that the tarp has a tight fit underneath the eaves by nailing a 2×4 board to the edge of the tarp that will hang over the side of the roof. Ask a helper to lower it down so that you can line it up properly underneath the eaves, then wrap the 2×4 in the tarp until there isn’t any slack remaining.
Although screws can cause damage to both shingles and siding that will need to be repaired, it’s necessary to properly secure the tarp. And these repairs aren’t as extensive as the serious water damage that could occur without tarping the roof.
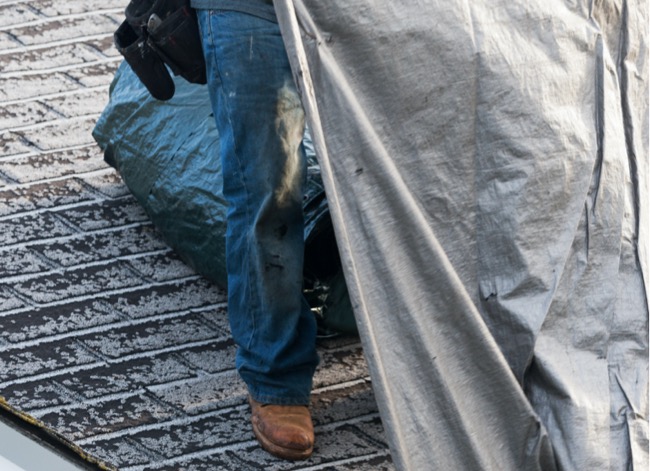
STEP 5: Secure the tarp with additional 2x4s.
While the initial installation of 2x4s will keep the tarp in place during mild weather, it’s advised to add additional 2x4s to sandwich the tarp between the new and existing 2x4s so that this temporary fix holds up in heavy rain and wind. Place another 2×4 on top of the existing tarp-wrapped anchor board and screw it into the board. Repeat this process with the two wrapped sides of the tarp so that it remains taut and securely fastened to the roof, even in poor weather.
It’s especially a good idea to sandwich the tarp on the overhang anchor board. This overhang is often the first to tear off in heavy winds if it is not kept as tight to the roof and side of the home as possible. Keep in mind that you can add more 2×4 boards if you feel like the tarp is still loose. Just make sure to space out the boards appropriately so that they add even support across the top of the tarp.

Roof Tarping Durations and Conditions
Tarping a roof is a temporary solution that can help protect a home for a short period of time. Even when a tarp is installed perfectly it shouldn’t be left on the home for longer than the tarp makers recommend, which is usually about 90 days. Ideally, you can remove the tarp long before the conclusion of this 3-month time period by having the damage to the boards and shingles repaired to prevent future leaks.
Keep in mind that the longer a tarp is secured to the roof, the more likely the tarp may tear or rip off entirely during powerful wind, heavy rain, or freezing snow and ice. Instead of waiting for a tarp to fail, take the necessary steps to repair the damage to the roof so that the tarp can be removed as soon as possible.
