
We may earn revenue from the products available on this page and participate in affiliate programs. Learn More ›
Learning how to measure a roof for shingles is important for any DIYer who wants to tackle roof repairs, as that information is necessary to ensure you have the right amount of shingles needed to complete the project. A roof square footage calculator, roofing square calculator, or shingle calculator may be able to help out. However, if you don’t know how to measure a roof, then the measurements you enter into the roof shingles calculator may be incorrect, which could cause you to purchase too many shingles or not nearly enough.
The best method for getting accurate roof measurements is to climb up to the roof with a measuring tape, notepad, and a pencil to manually measure each plane before calculating the square footage, squares of roofing, and the number of shingle bundles the job will require. Just make sure to take proper safety precautions and follow these steps to learn how to measure a roof for shingles.
Tools & Materials
Bobvila.com may earn a commission from purchases made through these links.
BEFORE YOU BEGIN
Don’t climb onto the roof without taking some time to draw an overhead view of the roof in your notepad so the measurements can be recorded on the correct roofing planes. Each area of the roof is a separate plane, which means that when you are drawing these areas, they should be represented by clear, distinct 2D shapes, like a rectangle or square.
Your sketch does not need to be drawn to scale—it’s just a basic depiction of your roof to aid you in labeling the length and width of each plane as you take measurements. Don’t worry about adding perspective to the drawing to account for roof pitch; simply draw the roof how it would appear from an overhead view.
RELATED: 7 Signs You Need a New Roof

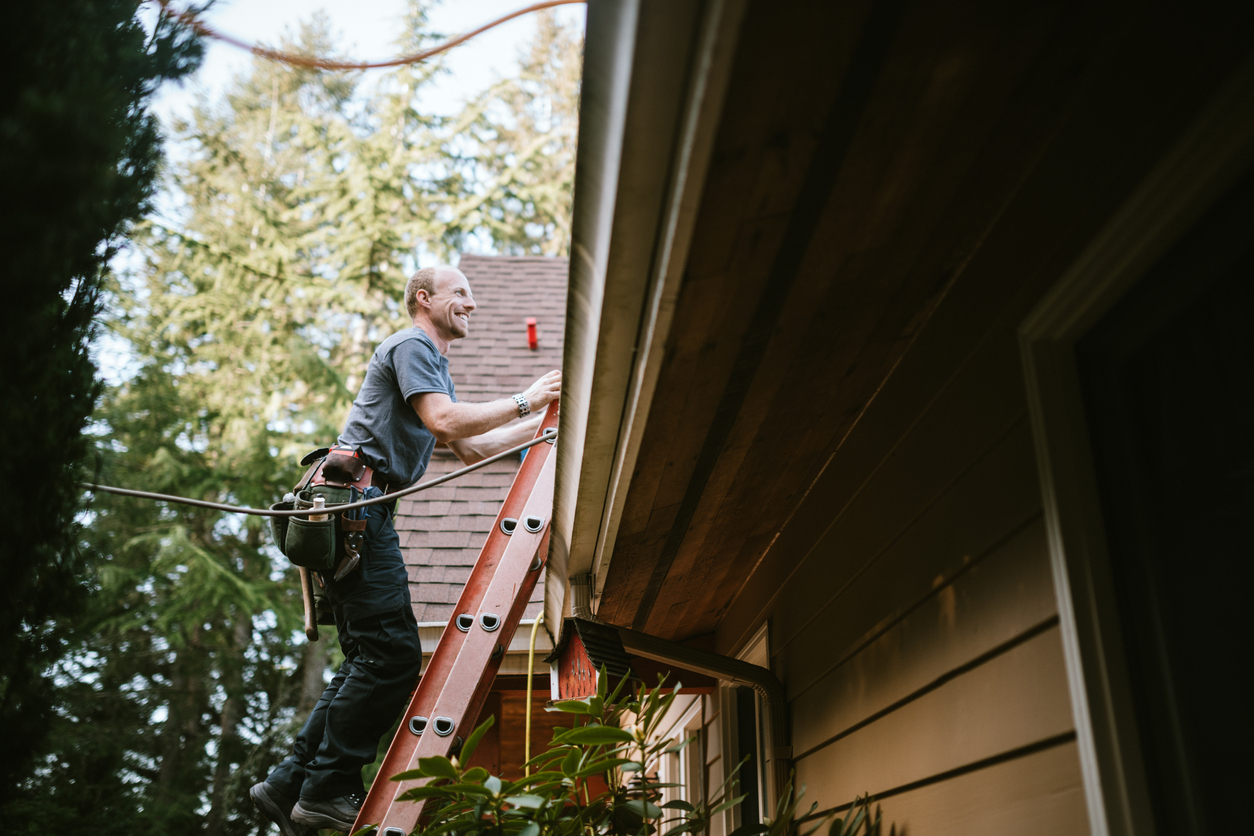
STEP 1: Set up the ladder and take appropriate safety precautions.
Safety is the top concern when it comes to working at heights. Before you start, make sure to set up the ladder on level ground with the base extending out at least 3 feet (or 0.91 meters) from the edge of the roof. This will create a stable support for you to climb up. Additionally, it’s necessary to have a second person hold the ladder steady from the ground, and they will also be responsible for calling emergency services in the event of an accident.
To avoid any slips, trips, or falls that could result in injury or death, it’s advised to use fall arrest equipment like a harness, shock absorption lanyard, and braided rope lifeline. Secure your notepad, pencil, and tape measure in a pocket while climbing the ladder to ensure that you always have at least three points of contact. It’s also recommended to wear closed-toe footwear with good grip to help improve traction while on the roof.
STEP 2: Measure and calculate the square footage of each plane.
Walk up to the peak of the roof to get an idea of the layout and make sure to orient the overhead sketch in the notepad to your current position. This will help ensure that you’re labeling each plane accurately. Choose the first section of the roof to be measured and lay your measuring tape out along the length of the plane. Write down the first measurement in the corresponding location in your notepad, then lay the tape out along the width of the plane to find the corresponding measurement.
If you are measuring from the peak of the roof (perpendicular to the peak), you will need to plant your feet on one side of the roof and feed the measuring tape down to the bottom edge. Measure from the edge to the exact peak and record the measurements.
If you are measuring along the peak (parallel with the peak), place the tape measure at the edge of the roof on one side of the peak and run it across to the other edge of the plane along the peak.
Repeat the process of measuring both the length and width of each roof plane, then climb down from the roof using the ladder (with a partner holding it steady). Use these measurements to calculate the square footage of each plane. Keep in mind that some roof planes may not be square or rectangular. Common alternatives are trapezoids and triangles. The formulas for calculating the surface area of rectangles, squares, trapezoids, and triangles are listed below.
Area of a rectangle or square:
A = L x W
Area = Length x Width
Example: 20 feet x 10 feet = 200 square feet
Area of a trapezoid:
A = [(B1 + B2) x H] / 2
Area = [(Top + Bottom) x Height] / 2
Example: [(5 feet + 10 feet) x 6 feet] / 2 = 45 square feet
Area of a triangle:
A = (B x H) / 2
Area = (Base x Height) / 2
Example: (5 feet x 4 feet) / 2 = 10 square feet
When you have finished calculating the area of each plane, use this information to find your roof’s total square footage. Add the area of each plane together, and the sum will be the total square footage of the roof.
RELATED: 5 Foolproof Steps to Hiring the Right Roofer for Your Project
STEP 3: Use the square footage to calculate the roofing squares.
After taking measurements and calculating the square footage of your roof, you need to convert the square footage into roofing squares because shingle bundles are listed as typically covering about ⅓ of a square. So, how much is a square of shingles? In roofing, a “square” is equal to exactly 100 square feet (or 9.3 square meters).
You can use a square calculator for roofing to convert the square footage to roofing squares, or you can simply divide the total square footage by 100. A roof measuring 1,987 square feet would be equal to 19.87 squares, or 20 squares when rounding up.
STEP 4: Determine the number of shingle bundles required.
Determining the number of shingle bundles that you will need is the next step in the process. Usually, a bundle of shingles contains enough material to cover ⅓ of a roofing square. This makes it relatively easy to figure out how many shingle bundles your roof requires: simply multiply the number of roofing squares by three. If your roof’s area were equivalent to about 20 roofing squares, then you would need about 60 bundles of shingles.
Similarly, you can use your roofing square measurement to calculate the amount of roofing felt required for the project. This material is laid underneath roof shingles and comes in 15-pound or 30-pound rolls. A 15-pound roll covers about 4 squares, while a 30-pound roll is enough for 2 squares. This means that if you are using a 15-pound roofing felt then you can determine the number of rolls required by dividing the number of roofing squares by four. Alternatively, if you are using a 30-pound roofing felt, you calculate how many rolls you’ll need by dividing the number of roofing squares by two.
STEP 5: Add an additional 15 percent to account for waste.
You’ll likely encounter odd roof angles that require the shingles to be modified in order to fill the gap. You may also buy one or more packages with bent or cracked shingles that cannot be used. Additionally, DIYers should plan to make a few mistakes, because not every cut is going to be perfect. It’s advised to have approximately 15 percent more material than previously calculated to account for these possibilities. This means that if you need 50 bundles of shingles to cover your roof’s total surface, then you would multiply 50 by 1.15 for a new total of 57.5 bundles. Rounding up to the nearest whole number, that would mean you would need a total of 58 shingle bundles for your roof.
Final Thoughts
Anytime you climb up to the roof—even when only taking a few quick measurements—you are at risk of falling and other hazards. Injuries and deaths caused by accidental falls are one of the most common accidents at home and on the job, so even if you have years of experience, it’s crucial to take your time, use necessary personal protective equipment, and always have at least one other person on site to call for help in case of emergency. Safety should never be assumed when you are working at heights.
