We may earn revenue from the products available on this page and participate in affiliate programs. Learn More ›
Brick is the primary exterior wall material on 14 percent of the new 641,000 single-family homes sold in 2022, and decorative interior brick is often used to add warmth and beauty to a home. However, it’s not as easy to hang your artwork, curio cabinet, shelving, or a flat-panel TV on a masonry wall as on a wood stud wall with drywall on top. Still, you don’t even have to call in a professional to hang your TV. You just need the proper tools and you need to know the right technique for how to drill into brick.
Why drill into brick?
From hanging interior artwork to mounting a garden hose reel on the exterior, there are many reasons you might want to drill into brick. Some projects may involve just one hole and others, like building a deck or mounting a floating shelf, can involve drilling multiple holes.
While the reasons for drilling may be varied, the methods you use are essentially the same. The biggest variables have to do with the weight of the item that you plan to attach to the brick, and the condition of the mortar or brick into which you want to attach said item. Always make sure to choose a mounting method that is rated for the weight.
Some common reasons for drilling into brick:
- Hanging artwork or a TV
- Mounting a garden hose holder
- Attaching a deck ledger board
- Installing a window planter box
- Securing a floating shelf
The Right Tools
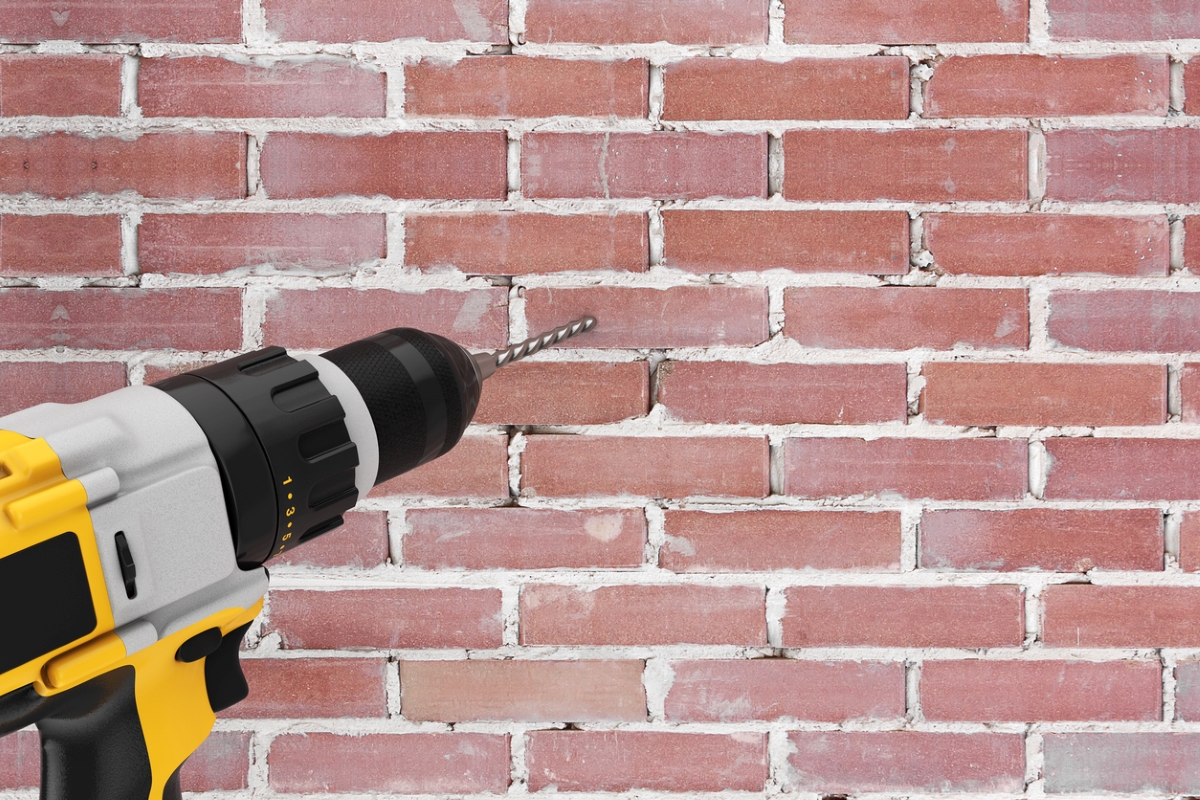
A drill/hammer drill or rotary hammer are the right tools to drill into brick. Typically, a drill/hammer drill is for small holes and a rotary hammer is for larger holes that are more than ⅜- inch in diameter.
”Selecting the right tools for the task will enable you to drill effectively into bricks,” says Matt DiBara, fourth-generation mason contractor at DiBara Masonry in Los Angeles, California, and co-founder of The Contractor Consultants. He suggests using a hammer drill and a tungsten carbide masonry bit.
Best Cordless Hammer Drill
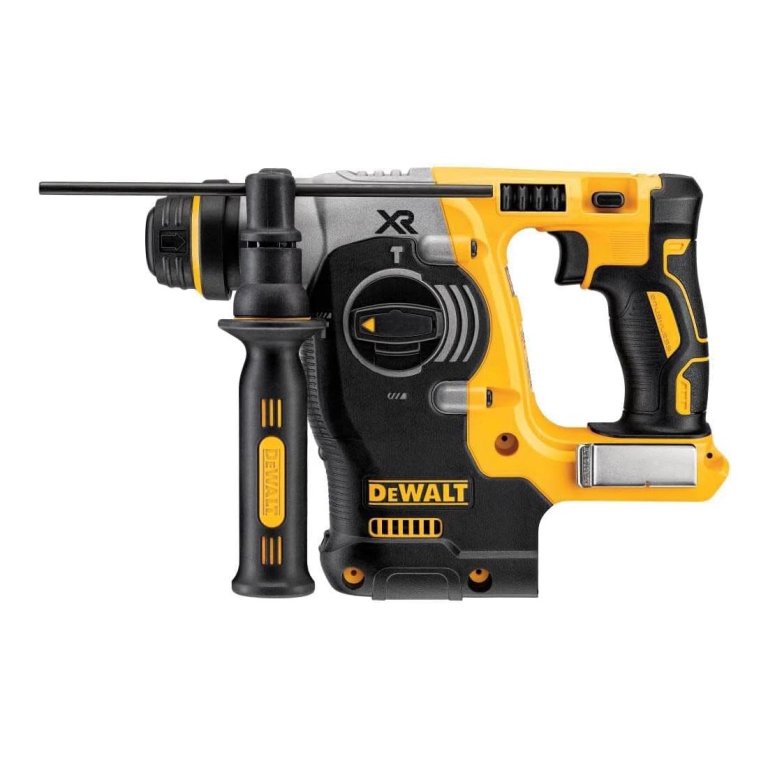
DeWalt 20V MAX Brushless 1-Inch Rotary Hammer
The DeWalt 20V MAX is easy to grasp and control, and powers through brick and masonry easily. Read our full review.
Buy at AmazonDrill/hammer drill bits have carbide tips and a smooth shank that can be chucked into a typical three-jawed chuck. While rotary hammer bits are also carbide-tipped, they have a shank that is inserted into a bit holder called SDS max. Of the two tools, the drill/hammer drill is much louder and less powerful. It’s more for DIY applications. A rotary hammer is a more expensive and far more robust tool, and is typically for professional use.
The terms “drill/hammer drill” and “rotary hammer” are often used interchangeably, even among industry pros. While both tools do, in fact, “hammer” and they both pulverize masonry and concrete while evacuating dust out of the hole being drilled by the flutes in the bit, they do it differently.
- A drill/hammer drill generates its percussive force by means of a gubbins gear. Think of two poker chips rotating against each other on their edges. As the ridges ride over each other, the bit follows the up and down motion. This pulverizes the brick in front of it as the bit pounds into the hole. The metal-on-metal gubbins action is loud, so be sure to wear ear protection.
- A rotary hammer action is more like that of a jack hammer. A ram pounds the back of the bit as it spins. This action is quieter, seems to generate less heat and is much quieter.
If it’s an option, consider renting a rotary hammer and the carbide masonry drill bits instead of buying them. You’ll need two to drill larger holes: a smaller bit for drilling a pilot hole and a larger one that’s the recommended size to finish the job.
Where to Drill: Brick vs. Mortar
As you position the object on the wall and lay out the required holes, your next decision will be whether to drill into the brick or the mortar. You’ll find lots of conflicting opinions on which option is better, but the correct answer really depends on a number of factors: the type and age of the brick, the depth and diameter of the holes, the type of anchor you use, and the weight you’re placing on the fasteners.
In addition to weighing which material makes the stronger bond, take a minute to consider how you’ll handle patching and hiding the holes if you drill in the wrong spot or remove the item later on. You can patch mortar holes with a tube of mortar repair, but it’s much harder to match brick color and texture when it comes time to fill those holes using mortar compound that you might have to mix yourself
Drill into mortar if you are hanging something light.
It’s generally easy to drill into mortar. The mortar joint is probably suitable for attaching lighter-duty items like lightweight wall art. However, keep in mind that there are often unknown or unpredictable voids in mortar that you can’t see, which can make it difficult for the fastener to attach.

Tried-and-True Advice
“I’ve drilled enough holes into brick and masonry to have learned a few things that help me with future projects, namely whether to drill into mortar or brick. There are so many voids in mortar joints, I’ve sworn them off. Sure, it’s easier and works sometimes, but sometimes isn’t good enough.
Second, the fastener. The typical go-to is often a blue screw that [sometimes works]. I need [one that works] all the time. For small holes, I choose a Spax #10 Multi-Material screw. It’s the same screw I use for wood-to-wood connections and it works all the time in brick. And, it’s rotary hammer all day for me.”
—Mark Clement, Contributing Writer
Drill into brick if you are hanging something heavy.
Brick usually holds better and supports more weight than mortar. However, if you have old, fragile brick and you’re mounting a heavy object that requires deep holes and expansion-style anchors, deep holes weaken the brick, and expansion anchors can create enough circular stress to crack the brick.
If your bricks show signs of cracks or spalling, find another brick that is sound or attempt to drill into the mortar so the anchor’s circular expansion forces push against fully intact bricks. Another strategy is to attach a French cleat to sound bricks that will allow you to distribute heavy weight across multiple bricks.
Tools & Materials
Bobvila.com may earn a commission from purchases made through these links.
- Tape measure
- Protective eyewear
- Hearing protection
- N95 respirator
- Work gloves
- Drop cloth
- Pencil
- Ladder
Project Overview
Working Time: 5 minutes
Total Time: 20 minutes
Skill Level: Intermediate
Estimated Cost: $50 to $100
Before You Begin
Before you start drilling into brick, consider safety. Equip yourself with eye protection and gloves. Depending on the tool you plan to use, hearing protection can be a good idea. Also, an N95 respirator can help protect you from brick and mortar dust that contains crystalline silica, which will be airborne when you start to drill into brick. Inhaling just a small amount is enough to create a health hazard. Wearing an N95 respirator during the entire drilling and cleanup process can help prevent serious lung scarring and other damage, as this type of product will filter at least 95 percent of airborne particles.
Also, if there are plantings or other delicate areas underneath or around the area, lay down a drop cloth or tarp before you begin.
How to Drill Into Brick
Drilling into brick starts with selecting the right tool, marking the proper locations, and working steadily and carefully. Follow these steps to drill into brick.
Step 1: Mark the holes where you intend to drill.
Measure and mark the locations of the holes you’ll drill into brick or mortar using a pencil. Then, hold the TV mounting brackets, artwork, shelving unit, or template for whatever it is you intend to hang directly over the marks to double-check the hole locations.
Pro tip: “The most important thing to do is to mark the spot with a pencil and start drilling slowly to create a stable guide hole,” says DiBara.
Step 2: Set up a stop on your drill/hammer drill corresponding to the desired hole depth (optional).
Make sure to measure the depth that you need to achieve with the hole by measuring the fastener you intend to use. Refer to the product’s instruction sheet for recommended hole depth and set the stop guide on the hammer drill.
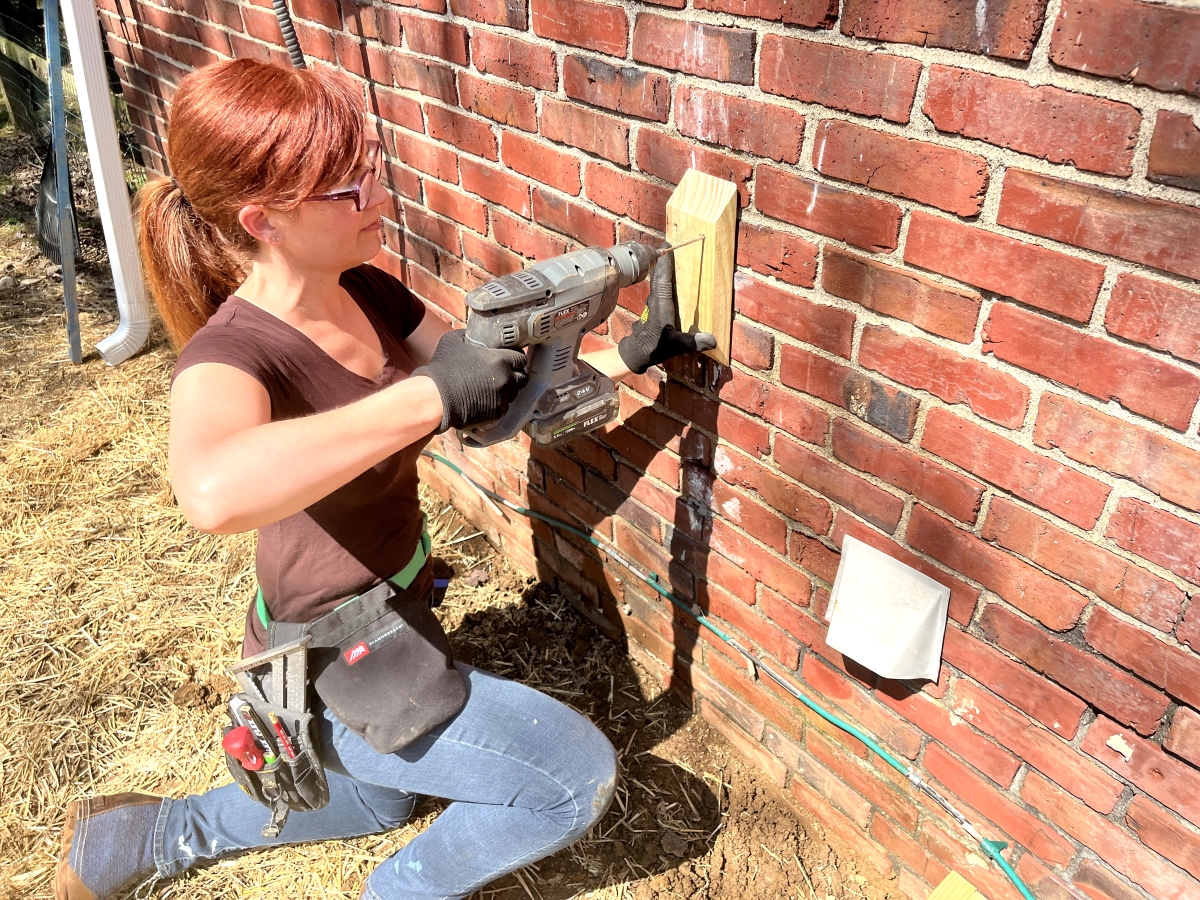
Step 3: Position the ladder.
If you’re using a ladder, make sure it’s level and the legs are on a solid surface. Then get into a position that’ll allow you to apply a significant pushing force to the end of the hammer drill while maintaining your stability.
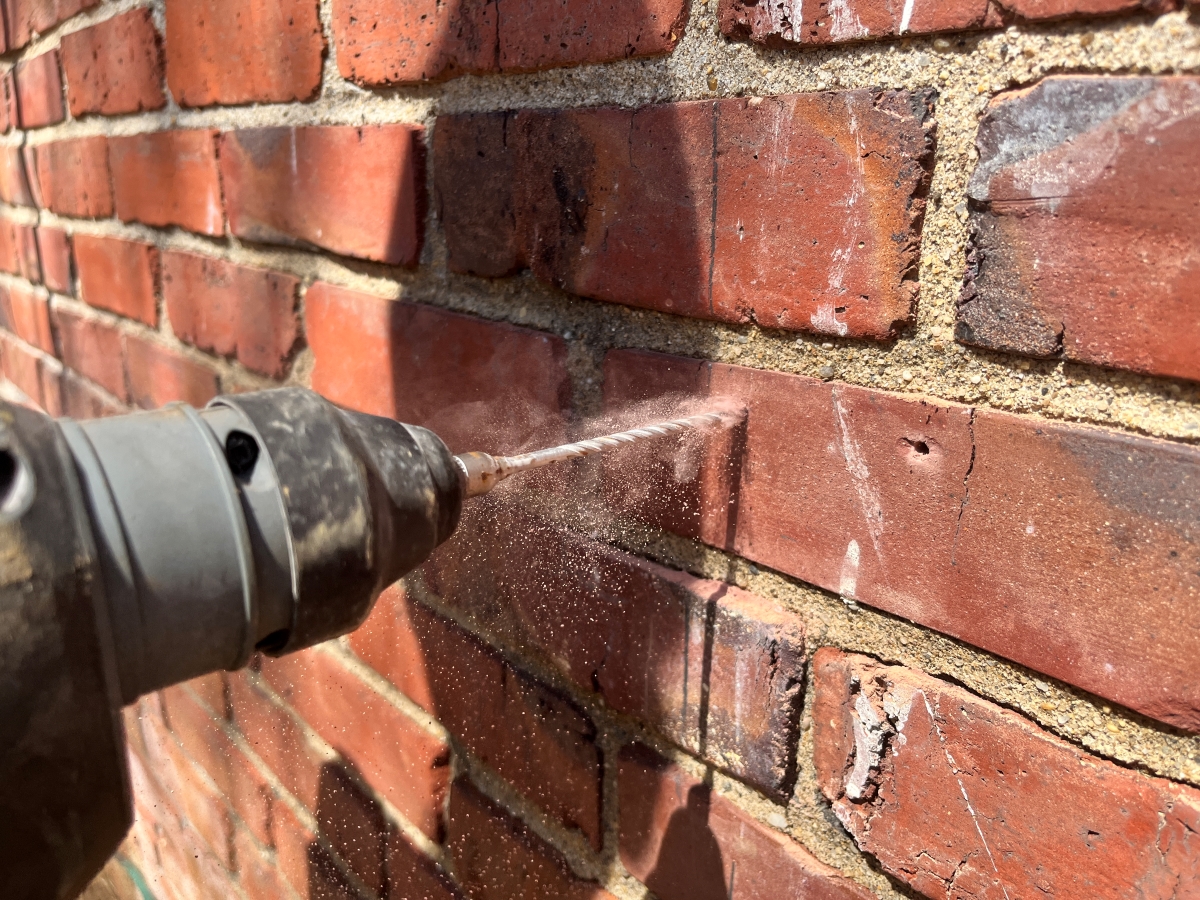
Step 4: Position the pilot drill bit perpendicular to the wall and drill on low speed.
Insert the ⅛-inch drill bit into the hammer drill to drill a pilot hole. Set the drill on low speed and hold the drill with two hands, one on the pistol grip and the other on the auxiliary handle. Make sure the drill is level and perfectly perpendicular to the wall. (Drilling at an angle will cause mounting alignment issues and can greatly reduce holding power.)
Start drilling the pilot hole using just enough force to start the drill bit. If the pilot bit starts to “walk” away from the marked location, use a nail set or steel punch—a nail might even work—with a hammer to tap a dimple into the brick so you can re-start in the right location.
Vary the pushing force until you find the point where the bit bites into the brick. Then drill the pilot hole to the recommended depth using a steady pushing force. Let the tool do the work. Hold the tool firmly. Don’t force it.
”If you are drilling into bricks, you must periodically wash the drill bit to clear away brick dust and prevent overheating,” says DiBara. “The speed should be increased gradually for a clean entry.”
Pro tip: If the drill/hammer drill has only one speed, drill in short bursts to prevent overheating the bit.
Step 5: With a larger masonry bit, drill into the pilot hole created in the previous step.
If you want to drill a larger hole with a drill/hammer drill, you need to drill a series of holes to prevent the bits from melting and to gradually make the hole larger. After drilling your pilot hole, swap in a larger bit. Again, check your drill/hammer drill to make sure it’s level and perpendicular, then place the drill bit into the pilot hole and continue drilling to the proper depth.
Step 6: Use compressed air to clear out the drilled hole.
Remove all traces of brick or mortar dust from the hole using compressed air. Leaving dust in the hole will reduce the holding power of the wall anchors and screws you insert.
Step 7: Install the wall anchor.
Insert wall anchors or other fasteners designed to support the full weight of the item, and mount the wall hanging or exterior fixture with screws.
Step 8: Carefully clean up the work area.
With your eye protection and respirator still in place, clean up any large mortar or brick chips with a broom and dustpan. Suck up the remaining dust with your shop vacuum fitted with a pre-filter. Or, mop the floor and rinse the mop.
After cleaning up the worksite, remove your shoes outside and use compressed air to blow off the dust. Then wash your clothes and shower to avoid spreading the silica dust through your house.
Final Thoughts
Drilling into brick isn’t difficult with the right tools. After successfully creating a hole in a brick wall, you can use this technique to drill into concrete block or concrete, as well. This skill opens up the opportunity to create the backyard oasis that may have seemed impossible before. So mount that outdoor TV and create that water fountain feature wall you’ve been dreaming about.
