
We may earn revenue from the products available on this page and participate in affiliate programs. Learn More ›
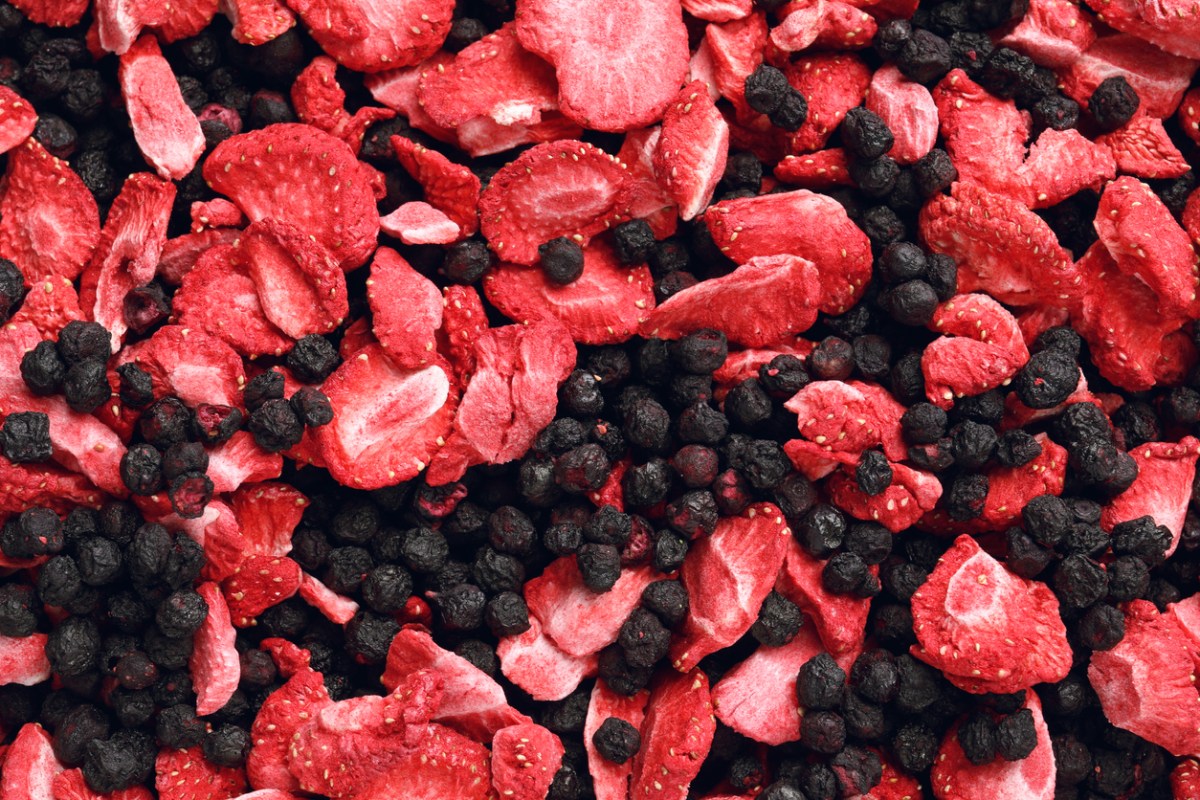
Freeze drying is a process for preserving different types of food, and the benefits of freeze-dried food are many. While dehydrated foods sometimes have a very different texture and taste from their fresh counterparts, freeze-dried foods retain their flavor, color, and structure. Moreover, they also retain their nutritional content. Freeze-dried food shelf life is significantly longer than that of other preservation methods. Foods, including meat and produce, can stay safe for up to 25 years.
Here’s why you should consider adding freeze drying to your kitchen skillset and how to freeze-dry food safely.
RELATED: 6 Foods You Should Never Vacuum Seal
What Is Freeze Drying?
Freeze drying, also called lyophilization, is a two-step process that preserves food. First, items are frozen to subzero temperatures. After this, a vacuum lowers the pressure, allowing sublimation to occur. Sublimation refers to the process where the ice from the frozen food items skips the liquid phase, turning from a solid directly into a gas. However, because the ice was still present when the foods were initially frozen, their original size, shape, and texture remains unchanged, even after the sublimation process is complete. The nutrients in freeze-dried foods are also not altered. Food can be cooked before or after freeze drying it. However, the process does not kill bacteria on food, so if you freeze dry raw meat or eggs, they will need to be cooked before eating.
The safest way to freeze dry foods at home is to use a freeze drying machine. While you might find other freeze drying methods online using dry ice or just a standard freezer, there is no research supporting the safety or efficacy of these options. According to Utah State University, in order for freeze-dried food to be safe, the freezing process must be quick, and only residual moisture should be left after the vacuuming process. Using a freeze drying appliance is the safest way to ensure that both of these criteria are met.
How to Freeze Dry Food the Right Way
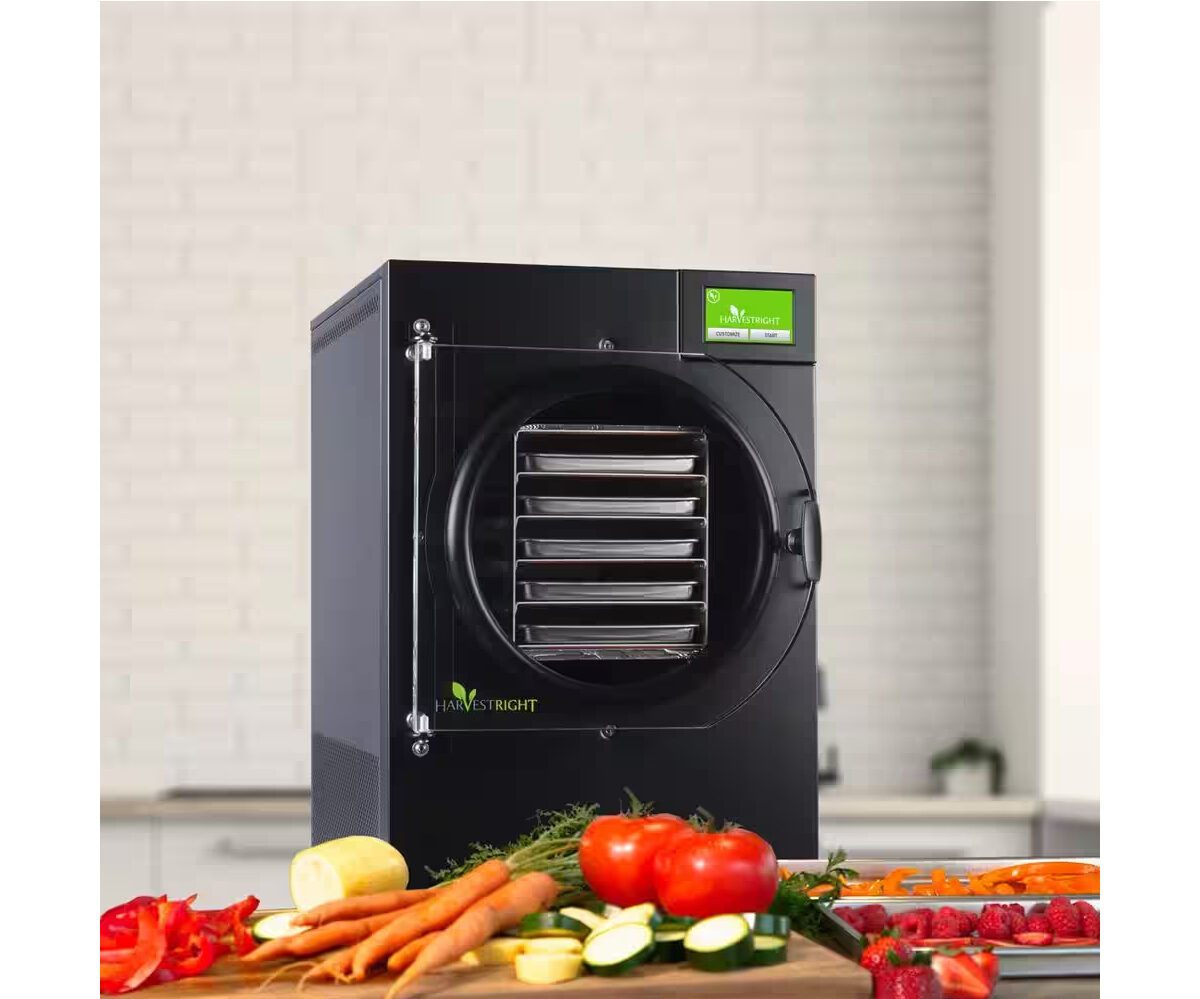
As mentioned above, using a freeze drying appliance is the safest way to freeze dry food at home. With a machine specifically designed for the process, you can be confident that the freezing and sublimation steps will occur as required to preserve your items.
Tools & Materials
Bobvila.com may earn a commission from purchases made through these links.
Project Overview
Working Time: 20 to 40 minutes
Total Time: 24 to 50 hours
Skill Level: Beginner
Estimated Cost: $2,300 to $3,500
Before You Begin
Most freeze drying machines are very easy to use and will do the majority of the work for you. The steps below provide an overview of the process required to make freeze-dried organic food and other items at home. However, you should still take time to read the directions for your specific model before proceeding.
STEP 1: Turn on the freezer dryer to cool it down before adding food items.
Before putting any food into the freeze drying machine, you will want to turn it on to start the cooling process. Doing this approximately half an hour before you’ll be ready to put the food trays in will ensure that the unit is cool and ready to work. Depending on the specific model that you have, you’ll also need to select whether the food you’ll be adding is liquid, pre-frozen, or not frozen to make sure the machine is set properly.
STEP 2: Add oil to the oil pump (optional).
Some home freeze dryers use an oil pump. If the model you have uses this type of system, ensure that the pump is filled with clean oil. If it contains old oil, properly dispose of the oil and replace it. To minimize spills and prevent creating a mess on your counter, use a funnel to help get the oil into the pump’s reservoir.
STEP 3: Prepare the food you wish to freeze dry and place it onto the trays.
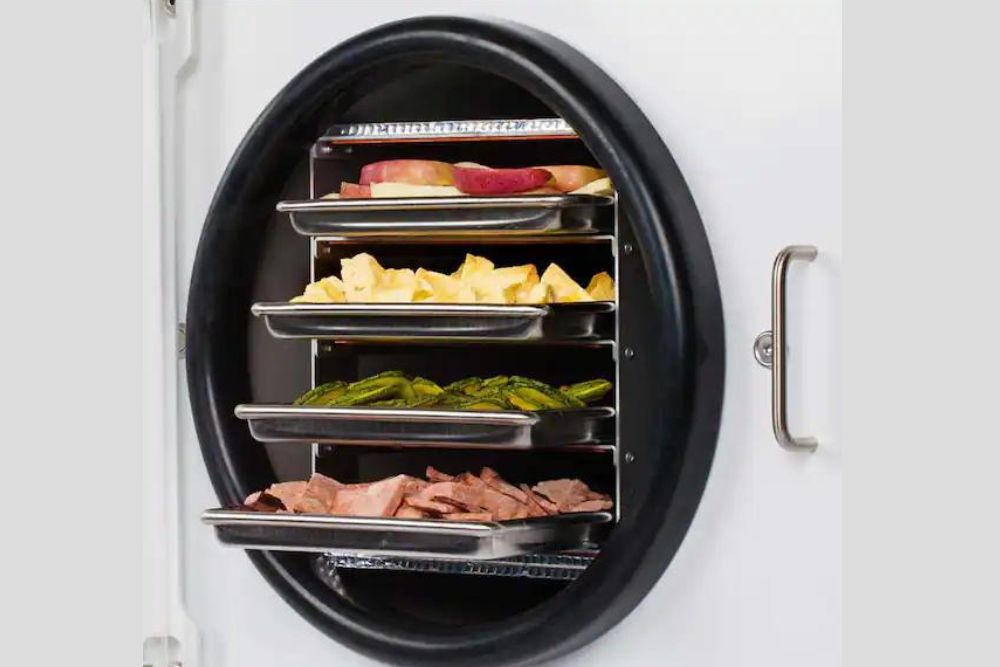
Next, prepare the food you are planning to freeze dry. For ideal results, you’ll want each piece of food to be medium-sized, so you likely need to cut or slice things before putting them on the tray. As a point of reference, make sure the cut pieces are not taller than the sides of the tray. Once prepared, place the food pieces on the freeze drying trays—mixing different items on the same tray is OK, but everything should be in a single layer.
STEP 4: Place the trays in the freeze dryer and latch the door.
Once the trays are ready, put them inside the freeze dryer and close and latch the door(s). Before starting the unit, confirm that the drain valve is not open.
STEP 5: Be patient while the freeze dryer works.
There is nothing you will need to do as the freeze dryer is working, other than being patient. The machine will monitor the progress of the items in it and alert you once they are ready. You can expect your food to be ready within 24 to 50 hours. Exactly where in this range the items you’re freeze drying will depend on the size, sugar content, structure, and other characteristics of individual foods.
STEP 6: Once complete, package the food for storage.
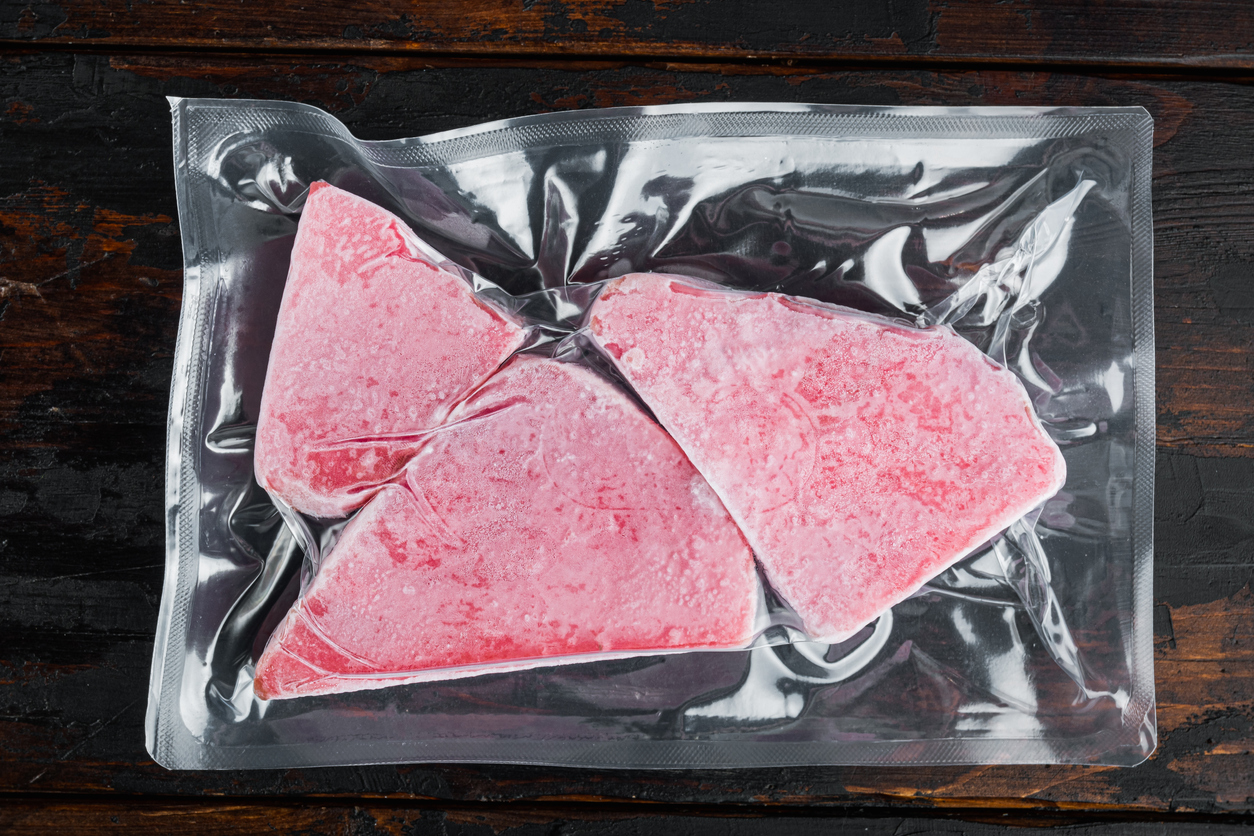
The appliance will beep or otherwise alert you once the freeze drying process is complete. You can check for doneness by breaking one of the items in half and checking for ice at the core (which would indicate that more time is needed). Assuming everything is ready, you’re ready to start preparing for freeze-dried food storage. Mylar bags are recommended for storing freeze-dried foods because of their ability to block light. You could also use mason jars, though they are bulkier and will need to be stored in a very dark area. After you’ve put the freeze-dried items in the airtight bags or jars you plan to use, add an oxygen absorber. If you’re using bags, seal them using a heat sealer.
Rehydrating Freeze-Dried Food
As shared above, the process of freeze drying food involves removing the moisture content from the items. Therefore, rehydrating freeze-dried food when you’re ready to eat it involves returning some moisture to it. For some items—such as vegetables—a light sprinkling of water will often do the trick. If you’re making a soup or stew, the freeze-dried vegetables can also simply be placed directly into the broth to rehydrate as they cook with the other ingredients. To rehydrate meat, place it in warm or hot liquid (water, broth, etc.), and let it sit for a few minutes. Freeze-dried foods (with the exception of raw meats or eggs) can also be eaten without rehydrating, if you’d like. However, you may prefer their texture once they’re rehydrated and back to their original state.
RELATED: 17 Pantry Foods That Never Expire
Final Thoughts
A freeze drying machine allows you to preserve foods at home while maintaining their nutrients, flavor, and texture. These appliances are very easy to use and do most of the work for you. While freeze drying machines are on the pricier side, DIY freeze drying methods, such as those using a standard freezer or dry ice, have not been studied and proven safe. With regular use, you can recoup your investment in a freeze dryer by extending the shelf life of your foods, preparing items to take on camping trips, and preparing for emergencies when you may not be able to cook at home.