We may earn revenue from the products available on this page and participate in affiliate programs. Learn More ›
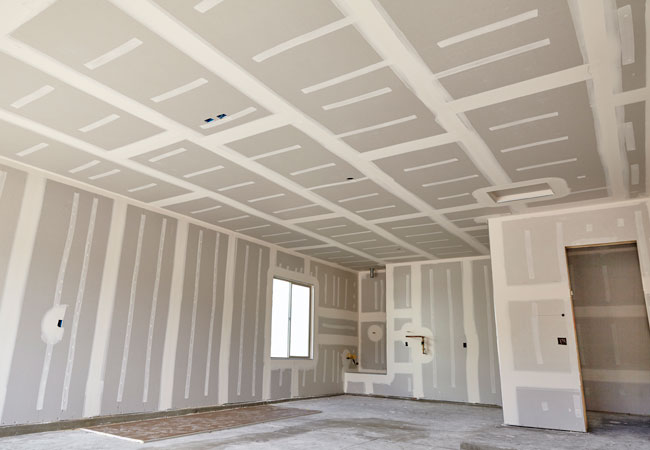
“Mudding,” the process of applying multiple thin coats of drywall compound to the joints and screw indentations in newly hung drywall, sounds messy, and it is. When done correctly, the result is a wall so flat that you cannot spot the seams.
While professional drywall tapers make mudding look easy, do-it-yourselfers find that it takes practice, skill, and—of course—the right gear (in this case, the mud itself and the tape that prevents cracks from appearing in the seams). This guide to how to mud drywall outlines the materials required for the job, and walks DIYers through the process step by step.
RELATED: Dos and Don’ts of Repairing Drywall
Types of Drywall Mud
There are two main types of drywall mud: premixed and powdered. There are variations on each type, too, which can make it tough to choose the right product for your job. Here’s the lowdown on the types of drywall mud you might find at the home improvement store:
Premixed
Premixed joint compound is just that: The mud has already been mixed with water to a smooth consistency and is ready to be applied. Within this category, you’ll find all-purpose mud, topping mud, and lightweight all-purpose mud.
- All-purpose mud goes on smoothly and usually begins to harden in a couple of hours, depending on the temperature and humidity in the room. It’s suitable for all mudding applications, and is the best drywall mud for beginners.
- Topping mud is used as a final top coating. It dries to a bright white and is easy to sand, making it a good choice for walls that will be painted a light color. Topping mud has fewer adhesion properties than all-purpose mud, so it’s not suitable for first and second coats.
- Lightweight all-purpose mud also dries to a lighter hue, which makes it suitable for walls that will be painted a light color. Some pros use all-purpose mud for the first mudding application and then switch to lightweight all-purpose mud for the second and third applications.
Powdered
Powdered drywall mud, also called “setting mud” or “hot mud,” contains chemicals that hasten hardening time when water is added to the powder. This type of mud tends to shrink less than all-purpose premixed mud, but it hardens very quickly. Quick-setting mud works well for pre-filling large gaps in walls, or smoothing over crushed drywall corners before starting the actual mudding process.
- Timed drywall mud: Setting mud is labeled by the maximum amount of time you have to work with it before it hardens. You can choose from 5-minute mud, 20-minute mud, or longer-hardening times, depending on your needs. If you use setting mud, mix only as much as you need, and wash your tools frequently as you work.
- Easy-to-sand setting mud: The chemicals in some types of hot mud harden into rock-like ridges on your walls, and you can spend hours trying to sand them smooth. Avoid this by choosing an easy-to-sand variety.
RELATED: How to Use Drywall Anchors
Types of Drywall Tape
During the mudding process, tape acts as a bond to keep the finished wall from developing cracks along the drywall seams. The different types of tape are paper, mesh, and preformed—and all three have their pros and cons.
- Paper tape is used almost exclusively by the pros because it’s very thin, which helps create imperceptibly smooth drywall joints. Paper tape comes with a crease down the center that allows you to bend it along the crease to form sharp wall corners. It takes practice, however, to correctly bed paper tape in the first coating of wet mud without creating bubbles underneath.
- Mesh tape is made from fiberglass threads in an open-weave pattern and comes with adhesive on the backside. While it’s fairly simple to position mesh tape over a dry joint and then apply your first coat of mud on top, mesh tape is thicker than paper tape and can result in more noticeable joints when the wall is painted.
- Preformed tape, also known as preformed “corners,” may be made from paper, plastic, thin metal, or a combination of materials. It’s used on outside wall corners to achieve a smooth, uniform look. Some preformed corners require nailing while others attach with adhesive. If you’re not confident that you can successfully tape outside corners with plain paper tape, try preformed tape.
How to Tape and Mud Drywall
Primed with an understanding of mudding materials, it’s time to familiarize yourself with the process as outlined here. Because paper tape offers the most professional results, we’ll detail how to mud sheetrock using paper tape. If you’re using mesh tape, you’ll find some tips below that will help you use it correctly.
Tools & Materials
Bobvila.com may earn a commission from purchases made through these links.
- Safety goggles
- Respirator mask
- Drill
- Paddle bit for drill
- Large plastic bucket
- Mud pan
- 6-inch drywall taping knife
- 10-inch drywall taping knife
- Inside-corner taping tool
- Drywall pole sander
- Power drywall sander
- Nylon bristle brush
- 5-gallon water bucket
- Canvas drop cloth
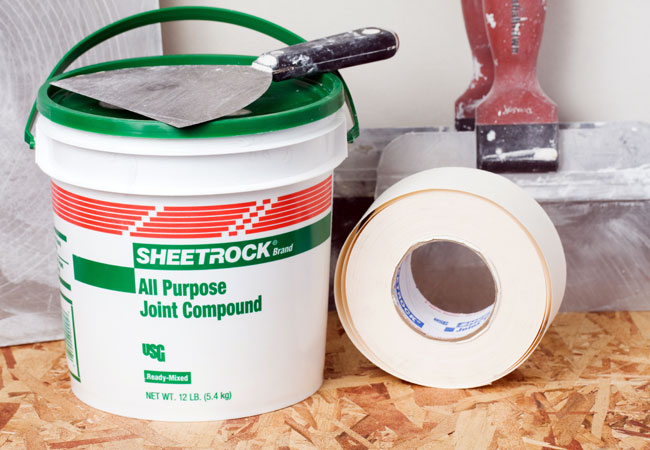
- Drywall mud
Step 1: Protect the floor and yourself from drywall mud splatter.
Cover the floor with a canvas drop cloth (plastic drop cloths can become dangerously slick) and don goggles and old clothing. Mudding is a messy process, and splatters can sting if they get in your eyes.
Step 2: If you’re not using premixed mud, mix the powdered setting mud.
Remove the lid from the bucket of premixed mud. If using powdered setting mud, mix as recommended by the manufacturer, beating until smooth with a heavy duty drill fitted with a paddle bit.
Step 3: Apply a first coat to the screw indentations and factory beveled joints.
Drywall panels come with slight bevels on both of their long sides. When the bevels are fitted together, they form a small indentation, about 2 inches wide, along the joints. Use the 6-inch taping knife to smooth and work the mud evenly into the joint, filling the entire indentation and wiping away excess mud.
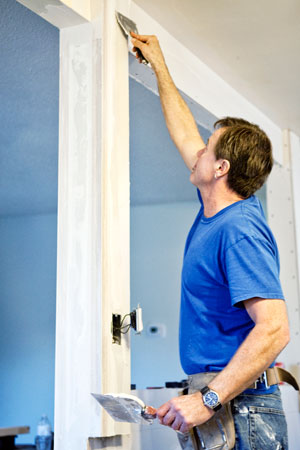
Step 4: Cover the mudded joint with a piece of tape.
Cut and fit a piece of paper tape over the joint while the mud is still wet for a process called “bedding.” Use the 6-inch taping knife to gently smooth the paper onto the wet mud, working out bubbles as you go. Wipe away excess mud with the knife.
Step 5: Tape the inside corners.
With the 6-inch knife, apply a thin coat of mud to both sides of an inside corner, making sure to work it all the way into the center. Cut, fold, and fit a strip of pre-creased paper tape in the corner over the wet mud. Smooth the paper tape carefully in the wet mud, using either a 6-inch taping knife or an inside-corner taping tool that features a preformed 90-degree shape for easy bedding. Use light stroking movements to bed the tape without dislodging it from the corner. Wipe excess mud from the walls.
Step 6: Apply drywall mud to outside corners.
If using preformed tape corners, attach them as recommended by the manufacturer, and then smooth mud over the corners, using long vertical strokes on both sides to form a sharp, uniform corner.
Step 7: Mud the butt joints last, if necessary.
You can avoid butt joints, which occur when un-tapered ends of a drywall panel are fitted together, by using sheets of drywall that span the entire room. But if dealing with ends that have no beveled indentations, it’s more challenging to get a smooth finish. Mud them as you did the beveled joints, taking care to use only as much mud as necessary to fill the joint and bed the tape.

Tried-and-True Advice
Mudding drywall can be messy, difficult, and time-consuming, especially without the right wall prep. Before I start mudding the walls, it’s important to cut away any tears or soft spots in the existing drywall, as well as ensuring nails or screws are properly driven into the wall. Corners that are uneven or have large gaps can also be a problem, but using a setting compound for deep fills and metal corner bead to finish doorways is a great way to address these issues.
—Timothy Dale, Contributing Writer
Step 8: Apply a second coat.
Let all the mud dry before applying the next coat. Apply a second coat of mud to the screw indentations, beveled joints, and inside and outside corners in the same order as the first coat—only this time, use only mud. No need to add more tape! Just apply a thin layer of mud and wipe off all excess.
Step 9: Apply a second coat of mud to the butt joints, too.
To do a second coat for butt joints, take the 10-inch taping knife, apply two swaths of mud, approximately 8 inches wide, along both sides of the first joint coat, but not on top of the original joint. This imperceptibly builds up the wall depth over a wider area to reduce the appearance of a bulky butt-joint seam. Feather out the edges of the swaths well with the knife for a smooth look.
Step 10: Apply a third coat of drywall mud.
Apply a third very thin coat of mud after the second coat dries. Use the 10-inch knife for all screw indentations, seams, and corners. The wider knife allows you to feather out the edges of the mud to a razor-thin application. Follow the same procedure for beveled joints and corners as before. On butt joints, apply a thin coat of mud over the previous swaths and the original mud joint. It’s not unusual for the mud swath on butt joints to be 2 feet wide or wider.
Step 11: Apply a final coat to the butt joints.
When the mud dries, apply one last thin coat only over the butt joints. Feather out the edges very well and let the mud dry. Before moving onto the final step, an important question to ask is, “How long does drywall mud take to dry?” Approximately 24 hours is the answer for most types of drywall mud, but refer to your product’s label for specifics on drying time.
Step 12: Sand the dried mud at the joints and indentations.
Don your respirator mask and goggles prior to sanding. Use a drywall pole sander or, if it’s important to keep airborne dust at a minimum, rent a power drywall sander from your local construction rental store. Sand all joints and nail indentations until the wall is perfectly smooth. Now you’re ready to paint or wallpaper!

How to Mud Drywall With Mesh Tape
Unlike paper tape that requires bedding in wet mud, self-adhesive mesh tape is applied over seams and then, when mud is applied, an adequate amount seeps through the mesh into the seam beneath. The order of taping is the same: Do screw indentations and beveled joints first, inside and outside corners next, and butt joints last. If you use mesh tape on flat joints, note that it’s not suitable for corners. Use pre-creased paper tape for inside corners and preformed tape for outside corners.
