We may earn revenue from the products available on this page and participate in affiliate programs. Learn More ›
Unlike other types of trim, such as crown molding and window casing, we ask a lot of our baseboards. Not only do baseboards create an attractive transition between the floor and walls, but they also have to contend with scuffs and dings from vacuum cleaners, toy trucks, and furniture. And while they’re protecting the walls from all these attacks, we expect our baseboards to look good, too—which is why baseboards often need more cleaning, attention, and coats of paint than the walls or other trim elements in a room.
Depending on how much repair work is necessary before you begin, painting baseboards can be completed in a day, and it’s a job that even new DIYers can tackle successfully. Read on for the step-by-step details on how to paint baseboards like a pro.
Choosing the Right Paint for Baseboards
Knowing what paint to use for baseboards is important. The type of paint you choose can affect the ease of the task and the look of the completed project.
First, decide what type of finish you want. Baseboards and other trim elements are usually painted in semi-gloss latex, which not only adds shine but is easy to clean and good at hiding little dings and dents. Flat finishes, in contrast, which are typically chosen for walls, reveal every little imperfection and can be tricky to keep clean.
Then, choose a color. While you can paint your baseboards any color, most people choose a variation of white. Some might opt for a white that has undertones that match the wall paint, while others might prefer a bright white to emphasize the trim. Painting the baseboards the same color as the walls is also a possibility.
Is Priming Necessary?
If your baseboards are new and pre-primed, or already painted a similar color to the one you have chosen, priming isn’t essential. However, if your baseboards are new and not primed, dingy and stained, or darker than your chosen color, primer will help seal the surface and make it easier and faster to paint. Stain-blocking primers are helpful if there is discoloration on the surface.
Tools & Materials
Bobvila.com may earn a commission from purchases made through these links.
- 2-inch angled trim paint brush
- Drop cloths or plastic sheeting
- Painter's tape
- Primer
- Semi-glass paint
- Spackle
- Sanding sponge or sandpaper
Before You Begin
Before you follow the steps for how to paint baseboard trim, move furniture away from the walls and thoroughly clean the baseboards. (If you have pets, make sure you have a way to keep them out of the room until the paint has dried.) After you clean the baseboards, examine them for imperfections that need to be addressed before paint is applied.
- Check if any fasteners are proud. Use a nail set and hammer to tap the fasteners beneath the surface of the baseboard.
- Fill nail holes, dents, and scratches with spackle or wood filler. After the areas are dry, sand them smooth.
- Caulk can crack over time, so you may need to replace the bead of caulk between the baseboard and wall.
After you’ve completed prep work, clean the area again to remove any lingering dust.
How to Paint Baseboards

Painting baseboards in one typical-sized room isn’t a complex DIY project, and it can be completed in less than a day. However, if you’ve never painted baseboards before, or if your baseboards are in rough shape and require extensive prep work, allow at least 2 days to complete the project. It’s always better to have extra time at the end than to be rushed or have to stop with a half-completed project. And don’t let pets back into the room while the primer or paint is drying.
Step 1: Protect the area.
It’s best to work in a well-ventilated area, so run a fan and open a window if possible. Protect the floor by laying a drop cloth or taping down a layer of plastic sheeting.
If you are a new painter, you may benefit from using painter’s tape or a paint guard to achieve a crisp paint line and avoid getting paint on the wall or floor.
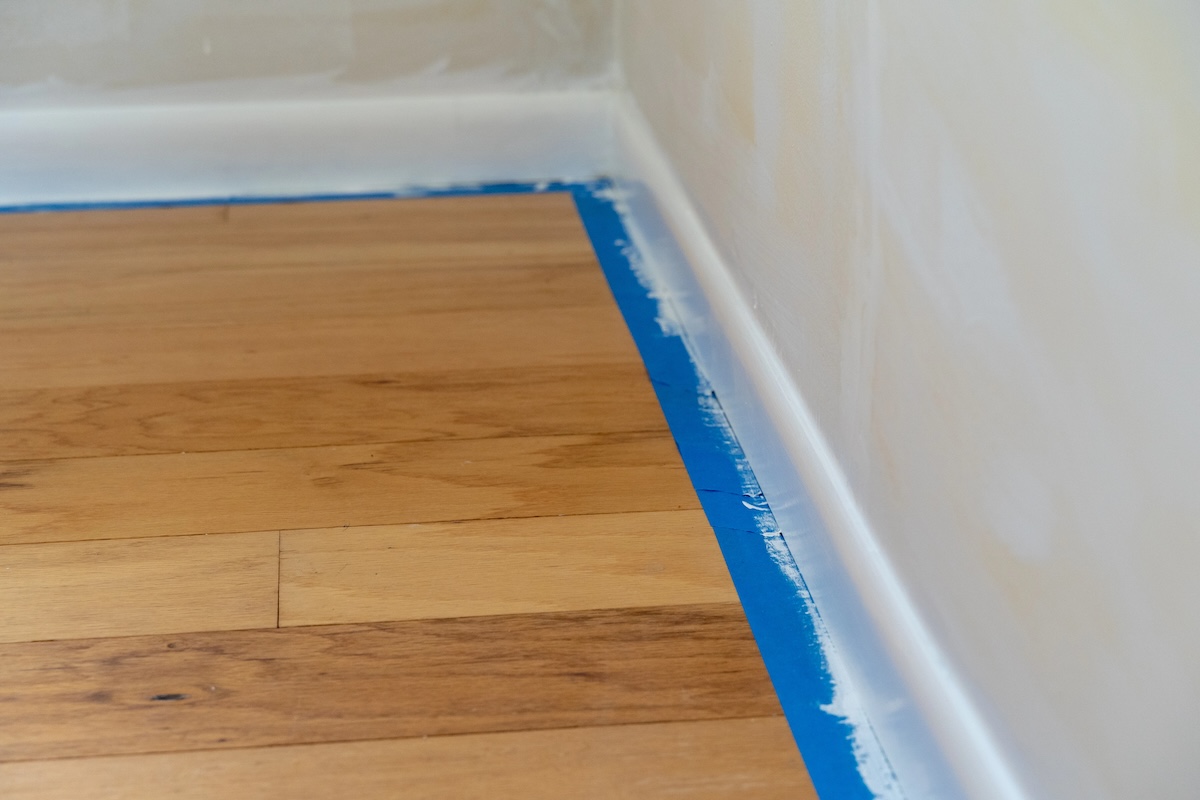
- Painter’s tape: Use painter’s tape to mask the wall and floor adjacent to the baseboard. Adhere strips of painter’s tape along those two seams—where the baseboard molding meets the wall, and where it meets the floor. Do your best to eliminate any space between the painter’s tape and the chosen floor protection, whether it’s a drop cloth or plastic sheet.
- Paint guard: Instead of using painter’s tape, you can achieve crisp lines along the edges with a specialty paint guard (or even a wide drywall taping knife), which you can hold where the molding meets the wall or floor to prevent any wayward strokes from landing beyond the baseboard itself. It’s important to make sure no paint touches the underside of the guard.
Step 2: Prime the baseboards (optional).
If your baseboards have never been painted, if they are currently painted a darker color than your chosen color, or if they are stained, priming is a good idea. A coat of primer will help seal any imperfections and prepare the surface of the baseboards so the coat of paint will apply more easily. You’ll also end up needing fewer coats of paint on a primed surface.
- First, shake the sealed paint can or stir the paint so it is thoroughly mixed before opening the can.
- Open the paint can with a painter’s multitool or paint key. Set the lid aside on a drop cloth.
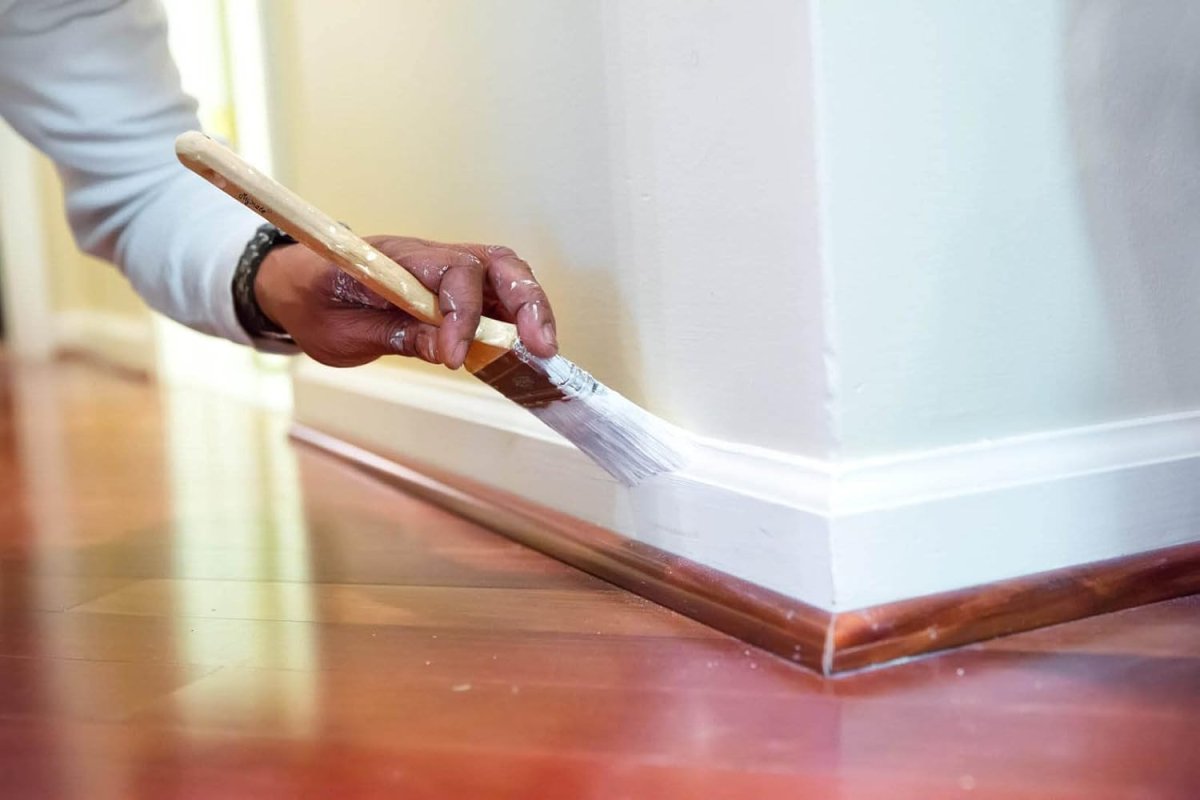
- Dip a 2-inch angled paint brush into the paint, about two-thirds of the way up the bristles. Then tap or slide the brush against the inside lip of the paint can to clear the excess away, not only from the sides of the brush, but from the tips of its bristles as well.
- Apply the paint parallel with the floor and check for any drips, especially if you have a detailed molding profile. Paint easily collects inside the ridges.
- Wait for the primer to dry before moving on to the next step.
Don’t worry if the primer looks slightly blotchy or imperfect. Primer isn’t the final coat.
Step 3: Paint the baseboards.
Leading with the short edge of the angled brush, start to apply paint to the baseboards. Work slowly, in 1-foot sections, and whenever possible, use long strokes in a single direction—don’t brush back and forth over the same area. Pay special attention to the contours and ridges of the molding, taking pains to push paint into the recessed portions of the molding without it collecting and pooling, which can lead to drips.
Plan on applying two coats. For the smoothest possible finish, lightly sand between coats and clean up any dust or debris created during the sanding process.
Step 4: Clean up paint drips.
If paint ends up anywhere you didn’t intend it to go, address the error immediately. Simply wipe up any drips or smudges with a damp cloth before the paint has the opportunity to dry.
- Paint on hard flooring: If you don’t notice drips before they are dry on a hard flooring surface like wood or tile, slide a putty knife under the dried paint to remove it from the floor.
- Paint on carpet: If you get paint on carpet, blot the area with a rag dipped in dish soap and water. Removing dried paint can be trickier. Scrape off any loose paint with a putty knife and then try to steam the rest of the dried paint so you can wipe it away.
Step 5: Remove any painter’s tape.
The best time to remove painter’s tape is when the paint is set but not completely dry. Always lift the tape and remove it at a low angle to the wall (or floor) and pull away from the surface. If you wait until the paint is cured, then you may actually remove some of the paint from the freshly coated surface when you peel away the tape.
Tip: It’s a good idea to practice the technique of removing painter’s tape from a wall before removing it from your paint project.
Do You Need to Remove Baseboards Before Painting Them?
You may have heard that it’s a good idea to remove baseboards to paint them. However, removing them can result in damage to the baseboard and the wall. Baseboards are typically caulked along the top edge to fill in gaps, which means you need to score the caulk before you can remove the baseboard, and you’re likely to damage the wall or wall paint in the removal process. If your baseboards are beyond repair and you intend to replace them, go ahead and take them off, and then replace them with a taller style to hide any wall damage.
Another argument against removing baseboards for painting is that after you reinstall them, you’ll need to fill nail holes, sand, and paint again. So, in the end, you’re not saving any steps.
Still, if you are painting new baseboards that haven’t been installed, it can be easier to prime them before nailing them to the walls. You can also buy baseboards preprimed.
FAQs
Q. What is the easiest way to paint baseboards?
The easiest and best way to paint baseboards is to use an angled paint brush, usually a 2-inch brush, and semi-gloss paint. Dip the paint brush into the paint, and then apply the paint parallel to the floor, using long strokes.
Q. Is it better to paint baseboards with a roller or a brush?
It is usually easier to paint baseboards with a paint brush than with a paint roller because baseboards are usually shorter than most rollers and often have ridges that can’t be accessed by a roller. If you have tall baseboards made from flat stock, you could cut in the paint along the wall and floor and then follow up with a mini-roller for the middle section.
Q. Do you paint the baseboard or walls first?
It’s largely a matter of personal preference whether you paint the baseboards or walls first. However, if you are choosing a version of white for the baseboards, it can be more efficient to paint the baseboards first. Essentially, you can slightly overpaint the baseboard and then cut in the wall color along the baseboard later, easily achieving a crisp line.
Q. Can you just paint over baseboards?
Yes, you can paint over baseboards. If you’re wondering how to repaint baseboards, the process is largely the same as painting new baseboards. However, you might need to spend more time repairing and sanding the baseboards before you start painting. Also, if you are painting them in a lighter color, a primer is recommended.
Q. How often should you paint your baseboards?
Since baseboards tend to show age faster than other surfaces, especially in busy households, you should paint them more often than walls or other trim elements. In some rooms, you may be able to wait 5 years before repainting baseboards, while in heavy-traffic spaces like a mudroom or entryway, you may need to paint them more frequently.