We may earn revenue from the products available on this page and participate in affiliate programs. Learn More ›
Q: When should I repot a plant? And how do I ensure success?
A: Plants don’t stay little for long, especially if they like the living situation in your home. All that TLC you show them—the right light exposure, fertilizer during the growing season, and a just-right watering schedule—could actually leave your beloved plant looking a little shoddy just a year or two later. It’s nothing to worry about because you’re doing all the right things, but you do have to take action when you see the signs. Here’s what to look for to determine when to repot a plant.
RELATED: 11 Things You Didn’t Know That Houseplants Love
Repot a plant when the soil is drying out faster than usual.
Watering is a touchy matter for most plants—even if you know your plant’s specific needs, the indoor humidity (which varies from home to home) plays a role in how quickly your plant becomes parched. Once you get into a routine, pay attention to unusual changes in the soil. If a once-a-week watering schedule becomes a twice- or three-times-a-week thing to keep the soil moist and temperatures are relatively consistent, your plant’s thirst could indicate that it’s growing and needs repotting.

Check if roots are growing through the drainage hole.
The growth you see above the soil is also occurring below where space is finite. A robust root system will outgrow the pot over time and try to expand but, with nowhere to go, the drainage hole is the only option. Simply put, the plant is searching for more real estate.
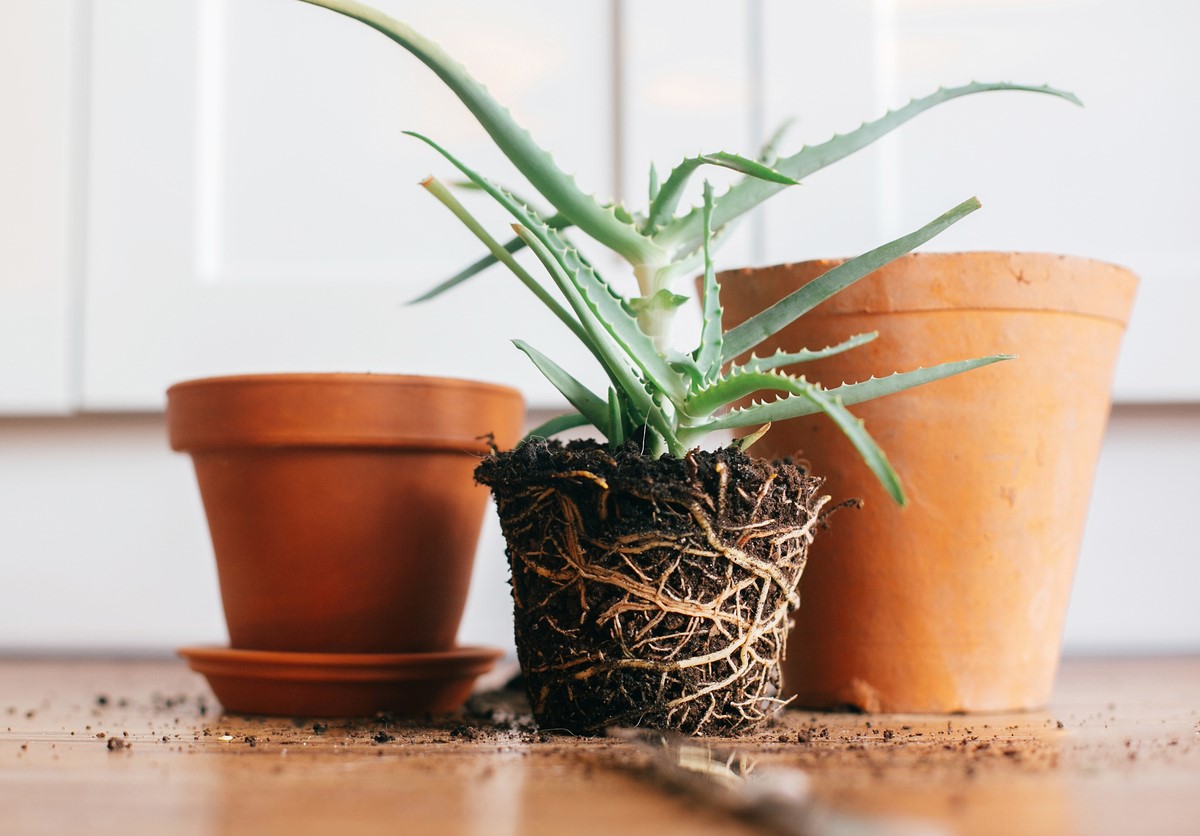
Roots wrapped tightly in the pot also signal that it needs more space.
Gently remove the plant, if possible, from its container by supporting the base of the plant with one hand and tipping the pot with the other, pulling up and away from the plant. Severely pot-bound plants may struggle to come out as their roots have filled in so tightly that absolutely no wiggle room remains. The root ball on a plant in need of a new, larger pot will be a dense mass of encircling white roots with very little soil visible.

When it’s time to repot, your plant may look limp or even stop growing.
Despite a regular fertilizing schedule during the spring and summer, your plant can still fail to put on new growth. Leaves may have lost their luster and a dullness that didn’t exist before has set in. The perkiness is gone. At this point, no amount of talking (or pleading) to it or breathing on it will trigger growth quite like repotting.
RELATED: 14 Symptoms of an Unhappy Houseplant (and How You Can Treat Them)
But looks can be deceiving.
Repotting an ailing plant is like adding insult to injury. A stressed plant won’t respond well to a new pot. That’s why it’s important to be certain your plant is struggling as a result of growth and not from something entirely different like under- or overwatering, too much fertilizer, or insufficient light.
Spring is the best time to repot.
In spring, the plant is coming out of its dormant period, anticipating the longer days and brighter light that tell it it’s time to grow. It’s ready for a fresh start in a larger pot and fresh soil. However, if you’ve bought a plant in the middle of winter and feel it’s absolutely in need of new accommodations, do it in a warm environment and be gentle. Don’t overwater it, and hold off on the fertilizer.

When it’s time to repot your plant, follow these tips for success.
The fun part! Here’s what you’ll need to do the job with as little shock to the plant as possible.
- Pick a container with proper drainage. If you’ll be using a plastic pot with no holes, drill several in the bottom to ensure the plant won’t be living (and eventually dying) with wet feet. The porous nature of a clay pot means you’ll be watering more frequently.
- Go up only one size in a pot. Ideally, the container should be one size bigger than the current pot. Go too big and the plant can struggle to establish. If you’ll be reusing an old pot, give it a good scrub using mild dish soap to prevent the spread of fungal or bacterial issues from previous owners.
- Choose your growing medium. Houseplants aren’t a one-size-fits-all lot, which means some will require very different growing mediums to thrive. While many will do well in a basic mix for houseplants, others like succulents will require sandier concoctions to meet their drainage needs. As long as you know what type of plant you have, plant-specific prepackaged mixes can take the guesswork out of what to use.
- Carefully remove the plant from its pot. This might take a little work and a good deal of patience, especially if the plant is pot bound. Check for damaged or mushy roots and cut them away. If the roots are tightly tangled, tease them out a bit to encourage growth into the new planting medium.
- Wet the potting mix to make sure it will absorb moisture evenly. Then, add some planting medium to the pot and place the plant inside, keeping at least an inch of space between the lip of the pot and the top of the soil to make watering easier and prevent overflow. When you’re happy with the placement, fill in around the plant, gently firming the soil. Water it well. Most prepackaged planting mixes come with fertilizer included so withhold feeding for six weeks while the plant adjusts.