We may earn revenue from the products available on this page and participate in affiliate programs. Learn More ›
At the start of growing season, part of the necessary prep every homeowner with hopes of a greener yard tacks (or should tack) onto the to-do list involves the cleaning and sharpening of lawn mower blades. If the blades are left dull, each afternoon spent mowing only rips and chews the grass. Coarsely cut grass doesn’t just look bad; it’s also more vulnerable to pests, disease, and drought. Read on for our step-by-step guide on how to care for your largest landscaping tool, and you’ll reap the benefits of a clean cut all season long.
Types of Mower Blades You Can Sharpen
If you own a walk-behind or ride-on mower, then you can remove and sharpen the blade yourself. Both types have a mowing deck that’s equipped with either one or two blades that spin horizontally around a vertical spindle. Remove each blade by loosening a single nut on the spindle. If you happen to own an old-fashioned reel mower, which uses multiple blades mounted to a cylinder, then you’ll need to take it to a lawn mower repair shop to have the blades sharpened.
Project Overview
Working Time: 1 hour
Total Time: 1 hour
Skill Level: Beginner
Estimated Cost: $0 to $12
Before You Begin
Since this job involves working with a large blade and filing or grinding metal, taking the right safety precautions to protect your hands and eyes is key. You’ll be either filing or grinding the lawn-mower blade to sharpen it, so be sure to wear safety glasses to protect your eyes from sparks and tiny shards of metal that might become airborne as you’re working the blade. Since you’ll be using your hands to hold the blade as you sharpen it, you’ll want to wear heavy work gloves to protect your hands.
Tools & Materials
Bobvila.com may earn a commission from purchases made through these links.
How To Tell If Your Lawn Mower Blade Needs To Be Sharpened
How often to sharpen lawn mower blades can vary based on use and other factors, but your lawn will tell you if your mower blade is in need of a good sharpening. All you need to do is look for a few telltale signs of a poor cut.
- Ragged cut: A sharp mower blade should slice cleanly through the grass. If it’s leaving a ragged edge, then the blade is tearing grass instead of cutting it.
- Uncut grass: Look carefully at your lawn after you mow it. If there are sections that appear to be pushed down instead of actually cut, then your mower blade is too dull.
- Uneven height: The grass blades should be at consistent height after you mow the yard. If they’re not, then the mower blade isn’t sharp enough to cut cleanly through the grass.
- Nicked blade: In addition to examining your lawn, you should assess the blade itself. If there are noticeable nicks and dents on the blade’s edge, then it needs to be sharpened.
How to Sharpen Lawn Mower Blades in Less Than an Hour
The type of lawn mower blade sharpener you have in your shed or garage will dictate the best way to sharpen a mower blade. Read on to learn about how to handle this lawn-mower maintenance job using a file, power drill, or bench grinder.
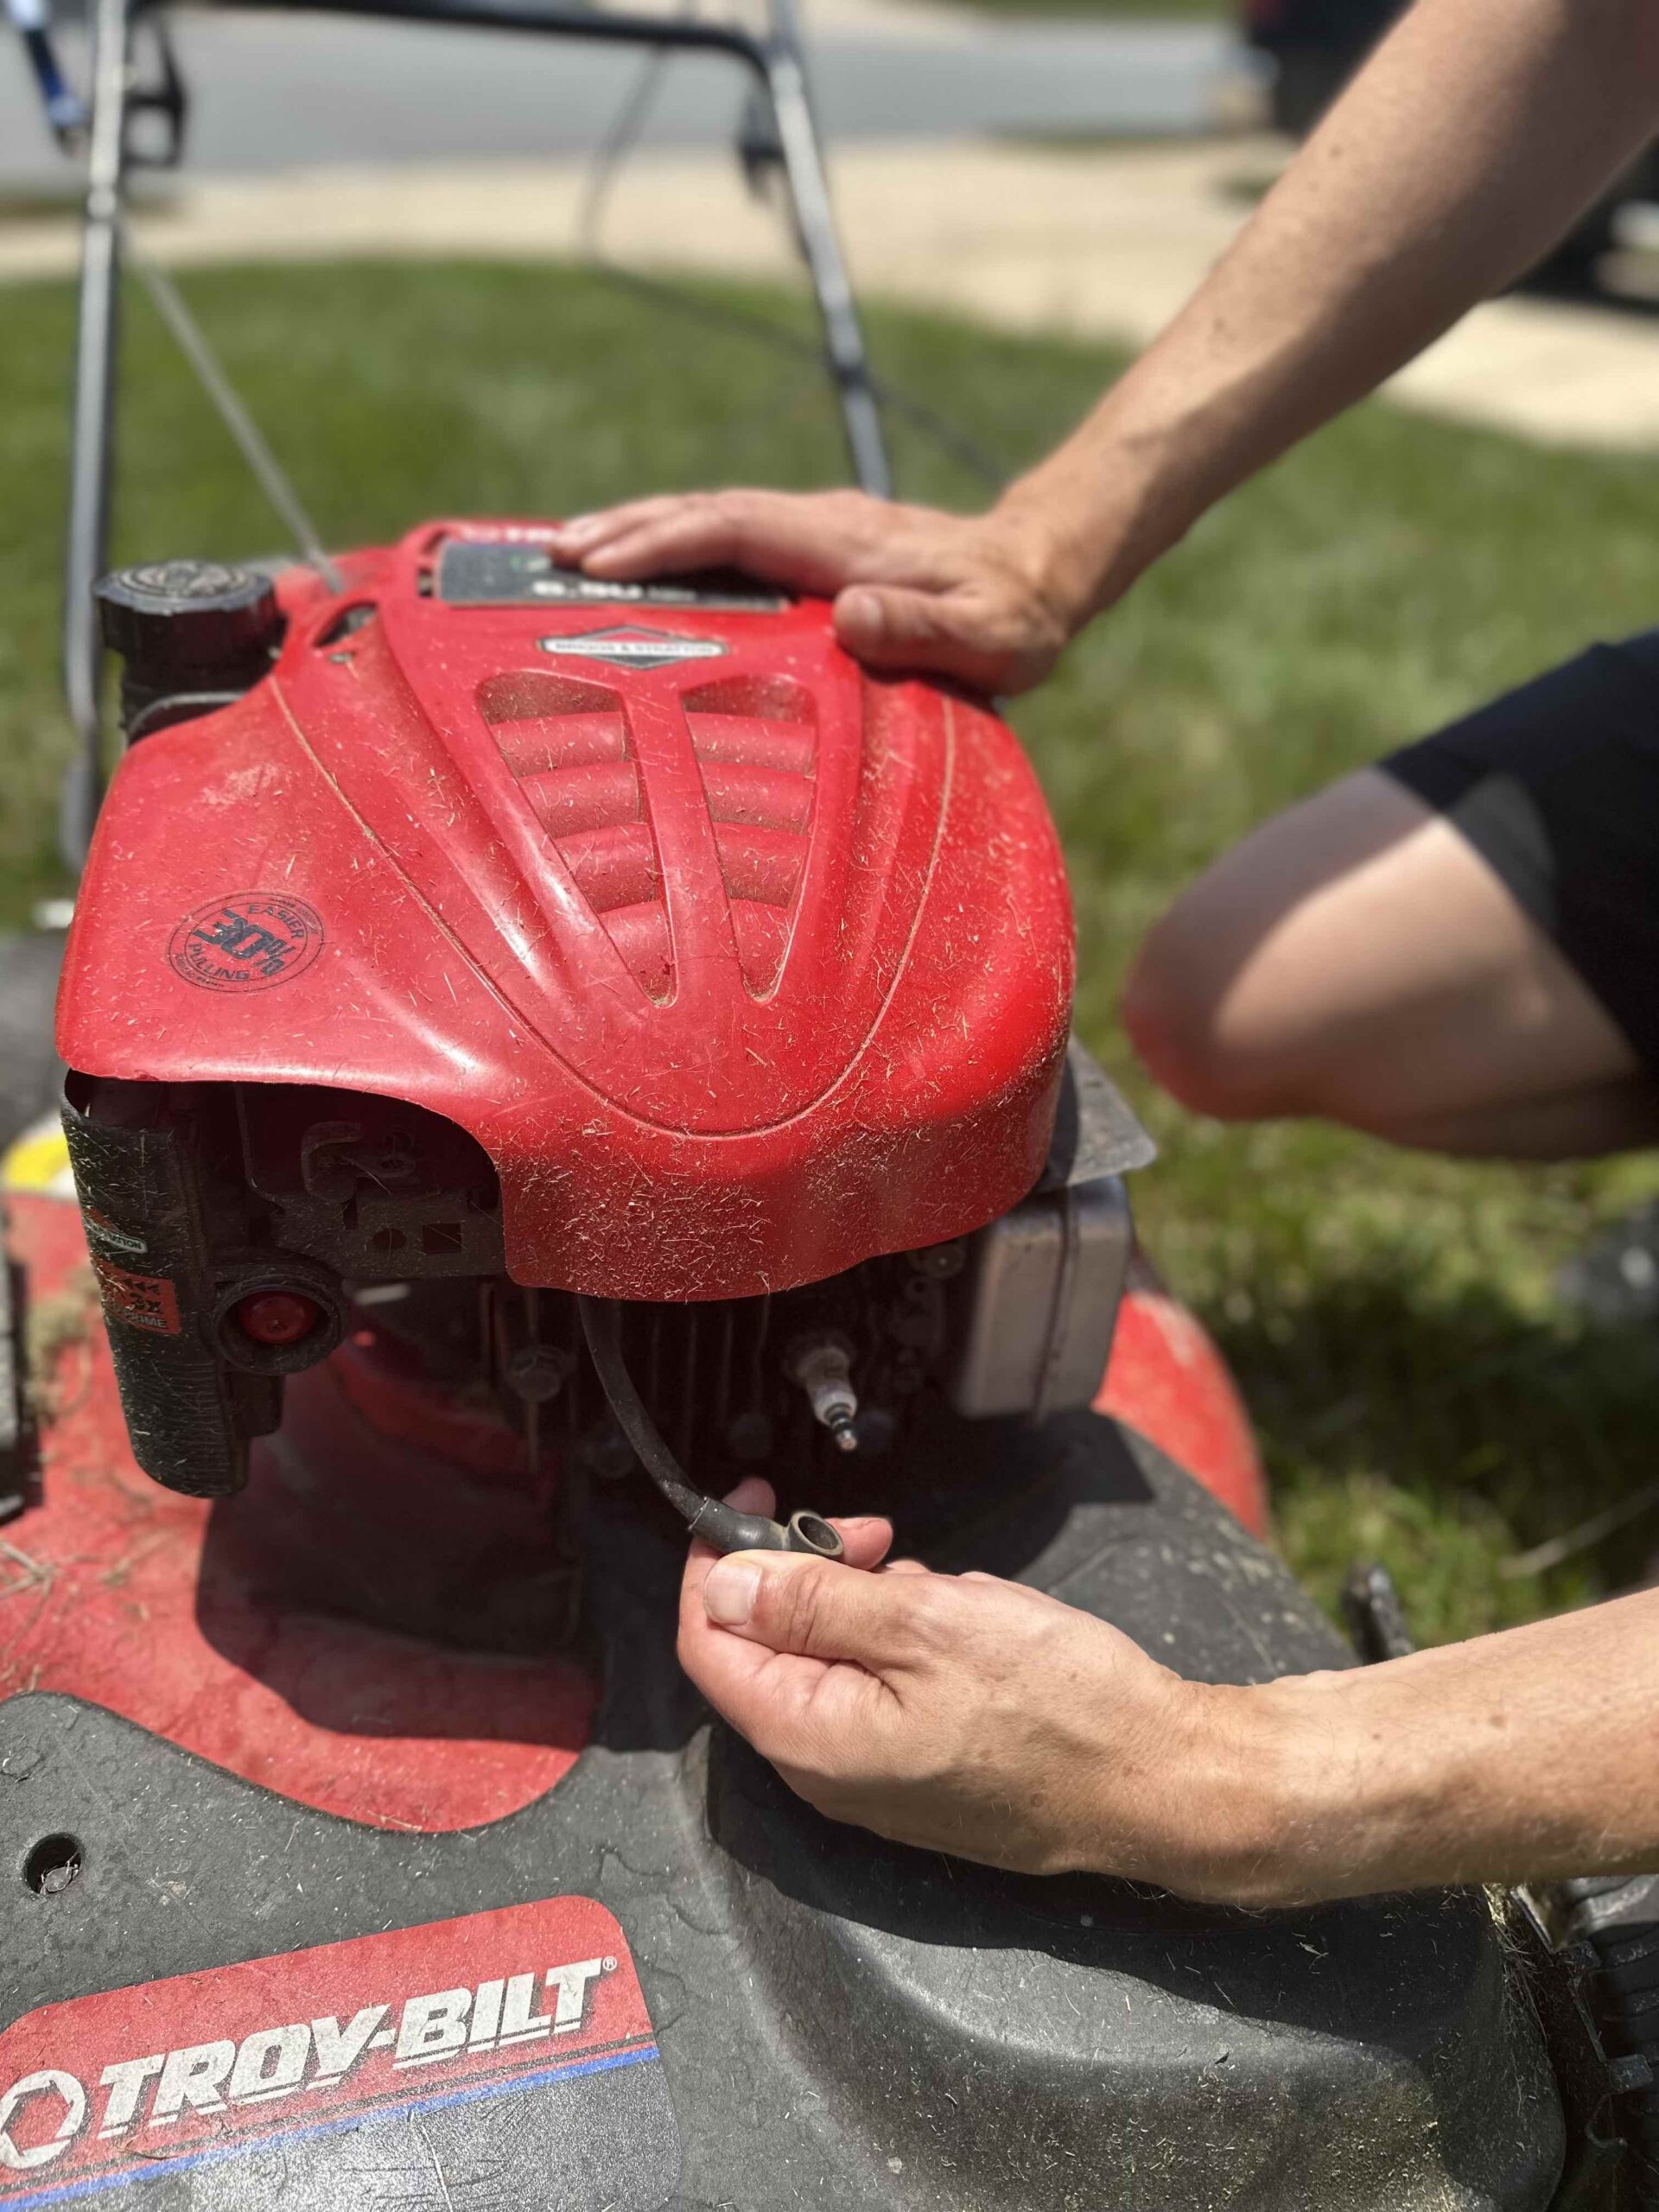
Step 1: Disconnect the spark plug (on a gas mower) or battery (on an electric mower).
This is the most important step in the entire process. Gas mowers start by using centrifugal force, which the user creates by pulling the starter cord. Though very unlikely, it is possible to create that same force by turning the blade. Eliminate any chance of the engine starting by disconnecting the spark plug, which is found on the front of the engine.Those with an electric mower should make sure to either unplug it from its power source or remove the battery if it’s cordless.
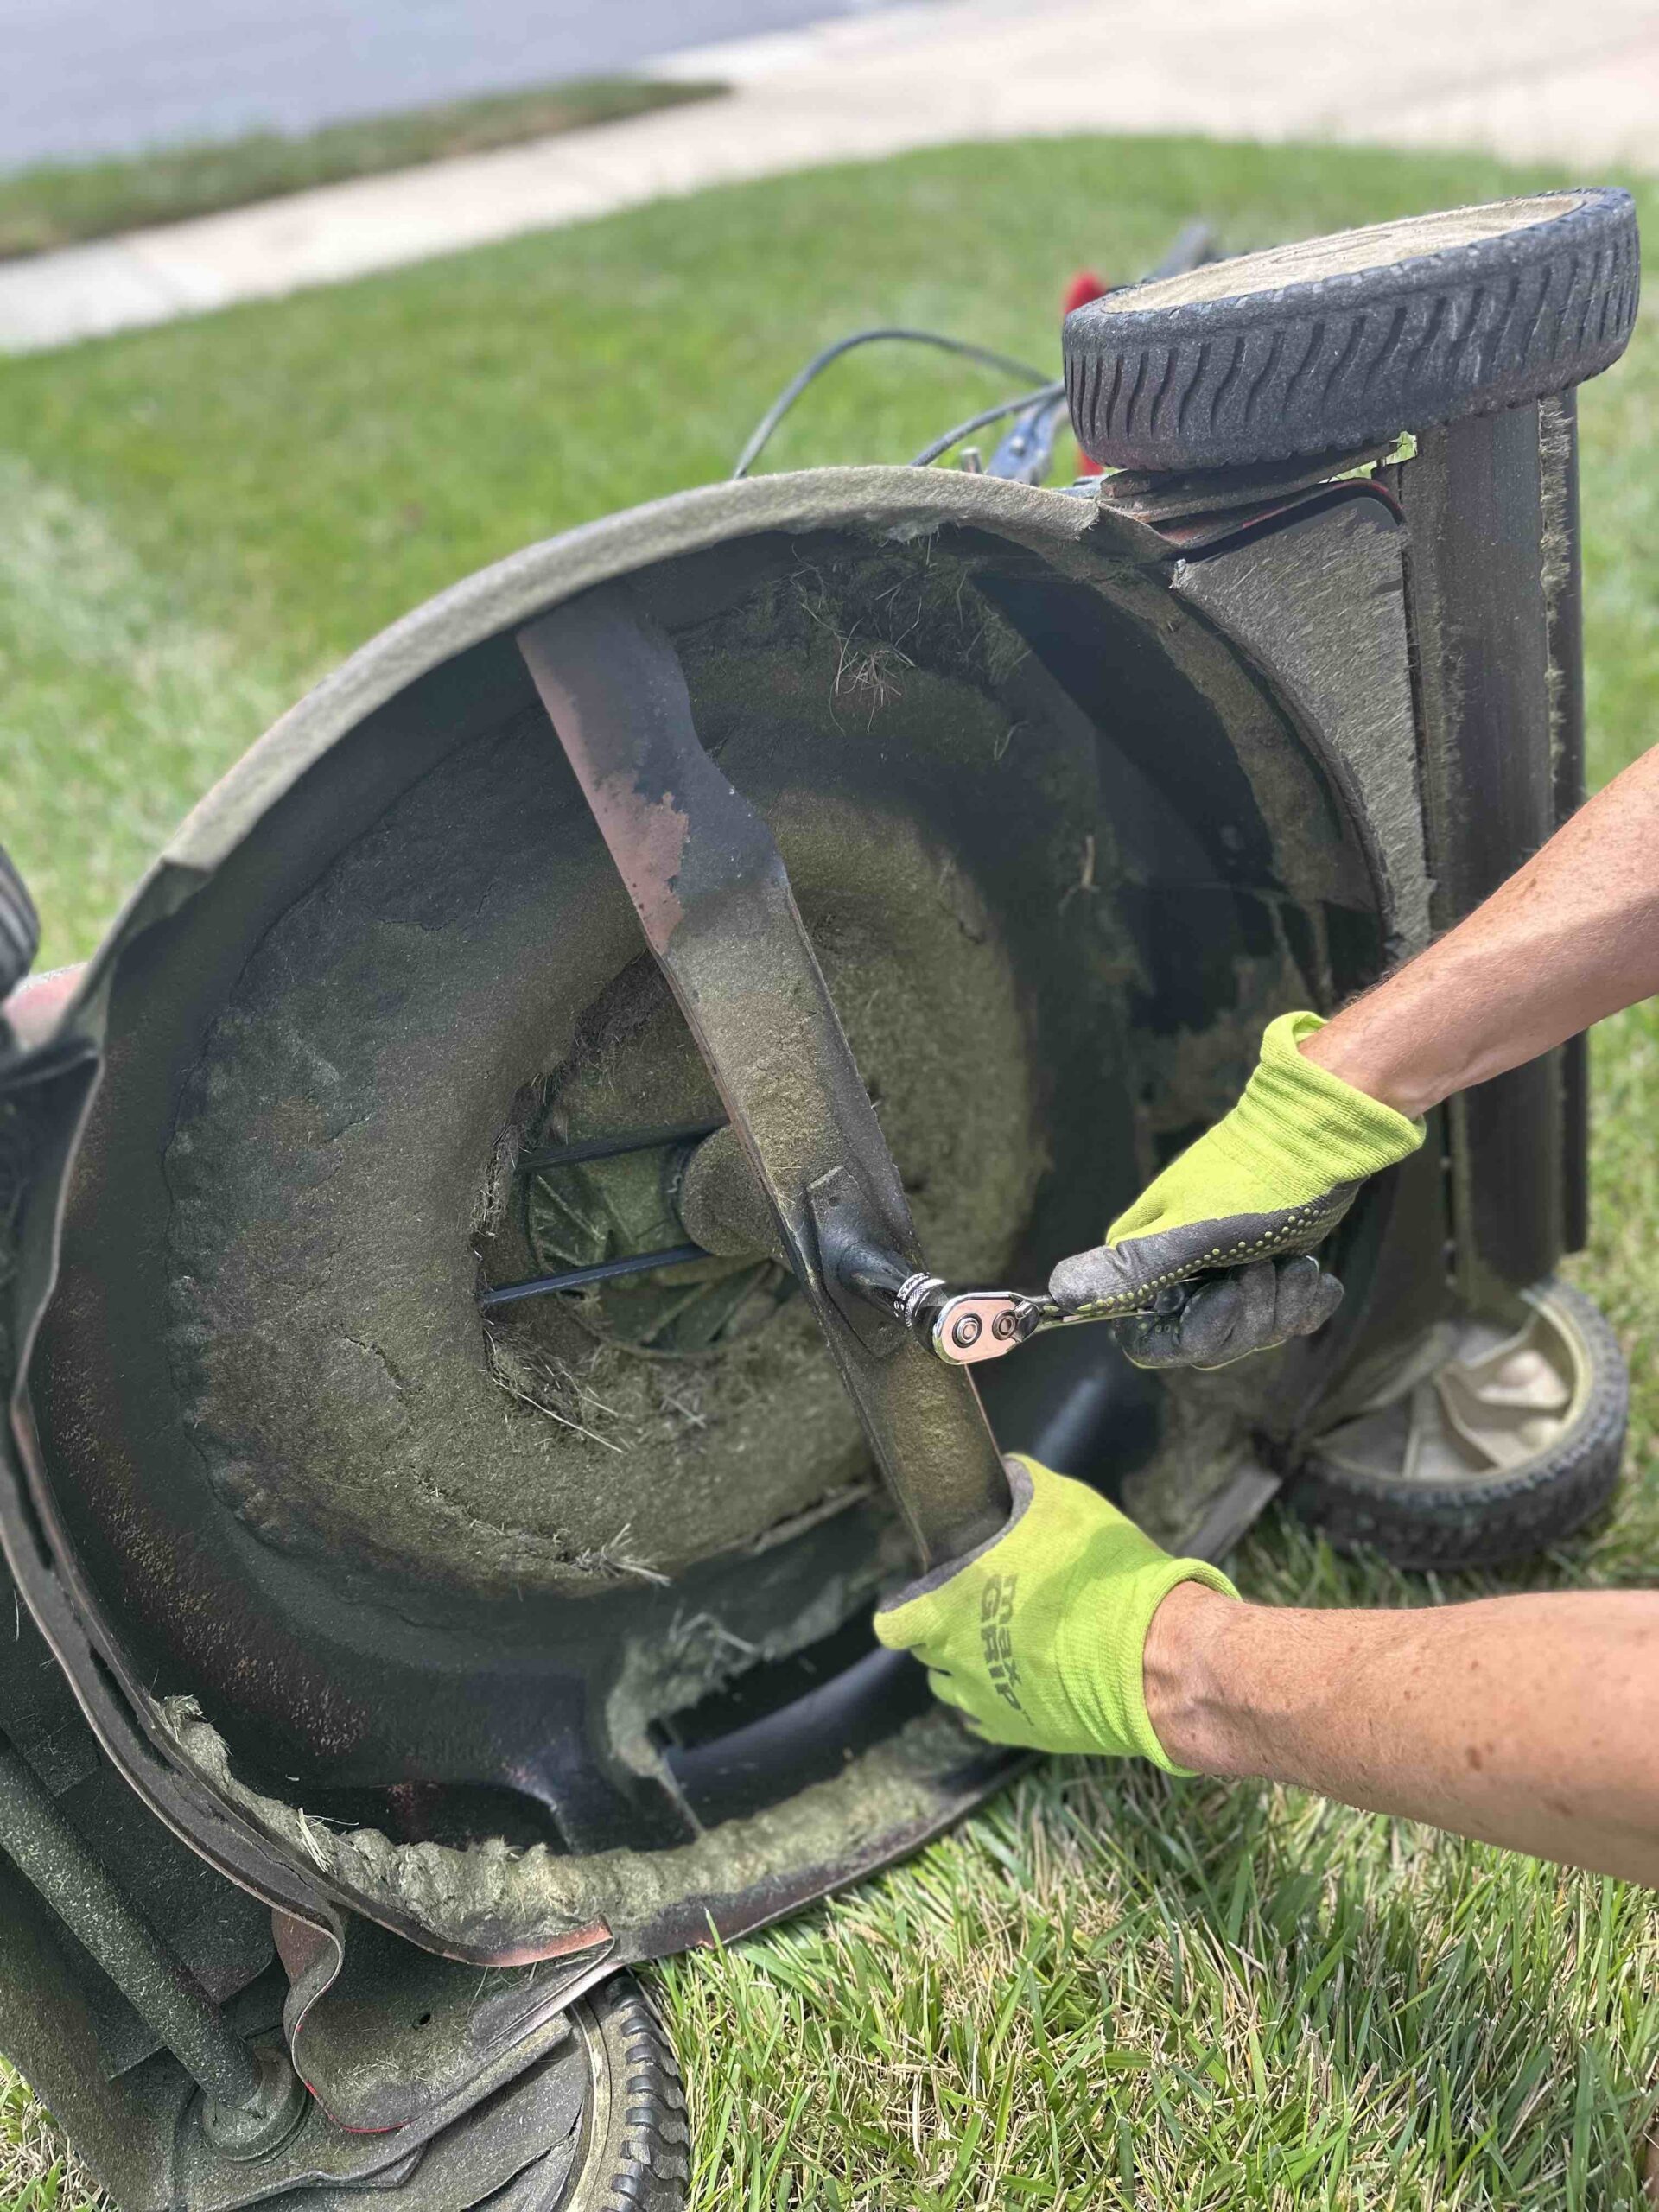
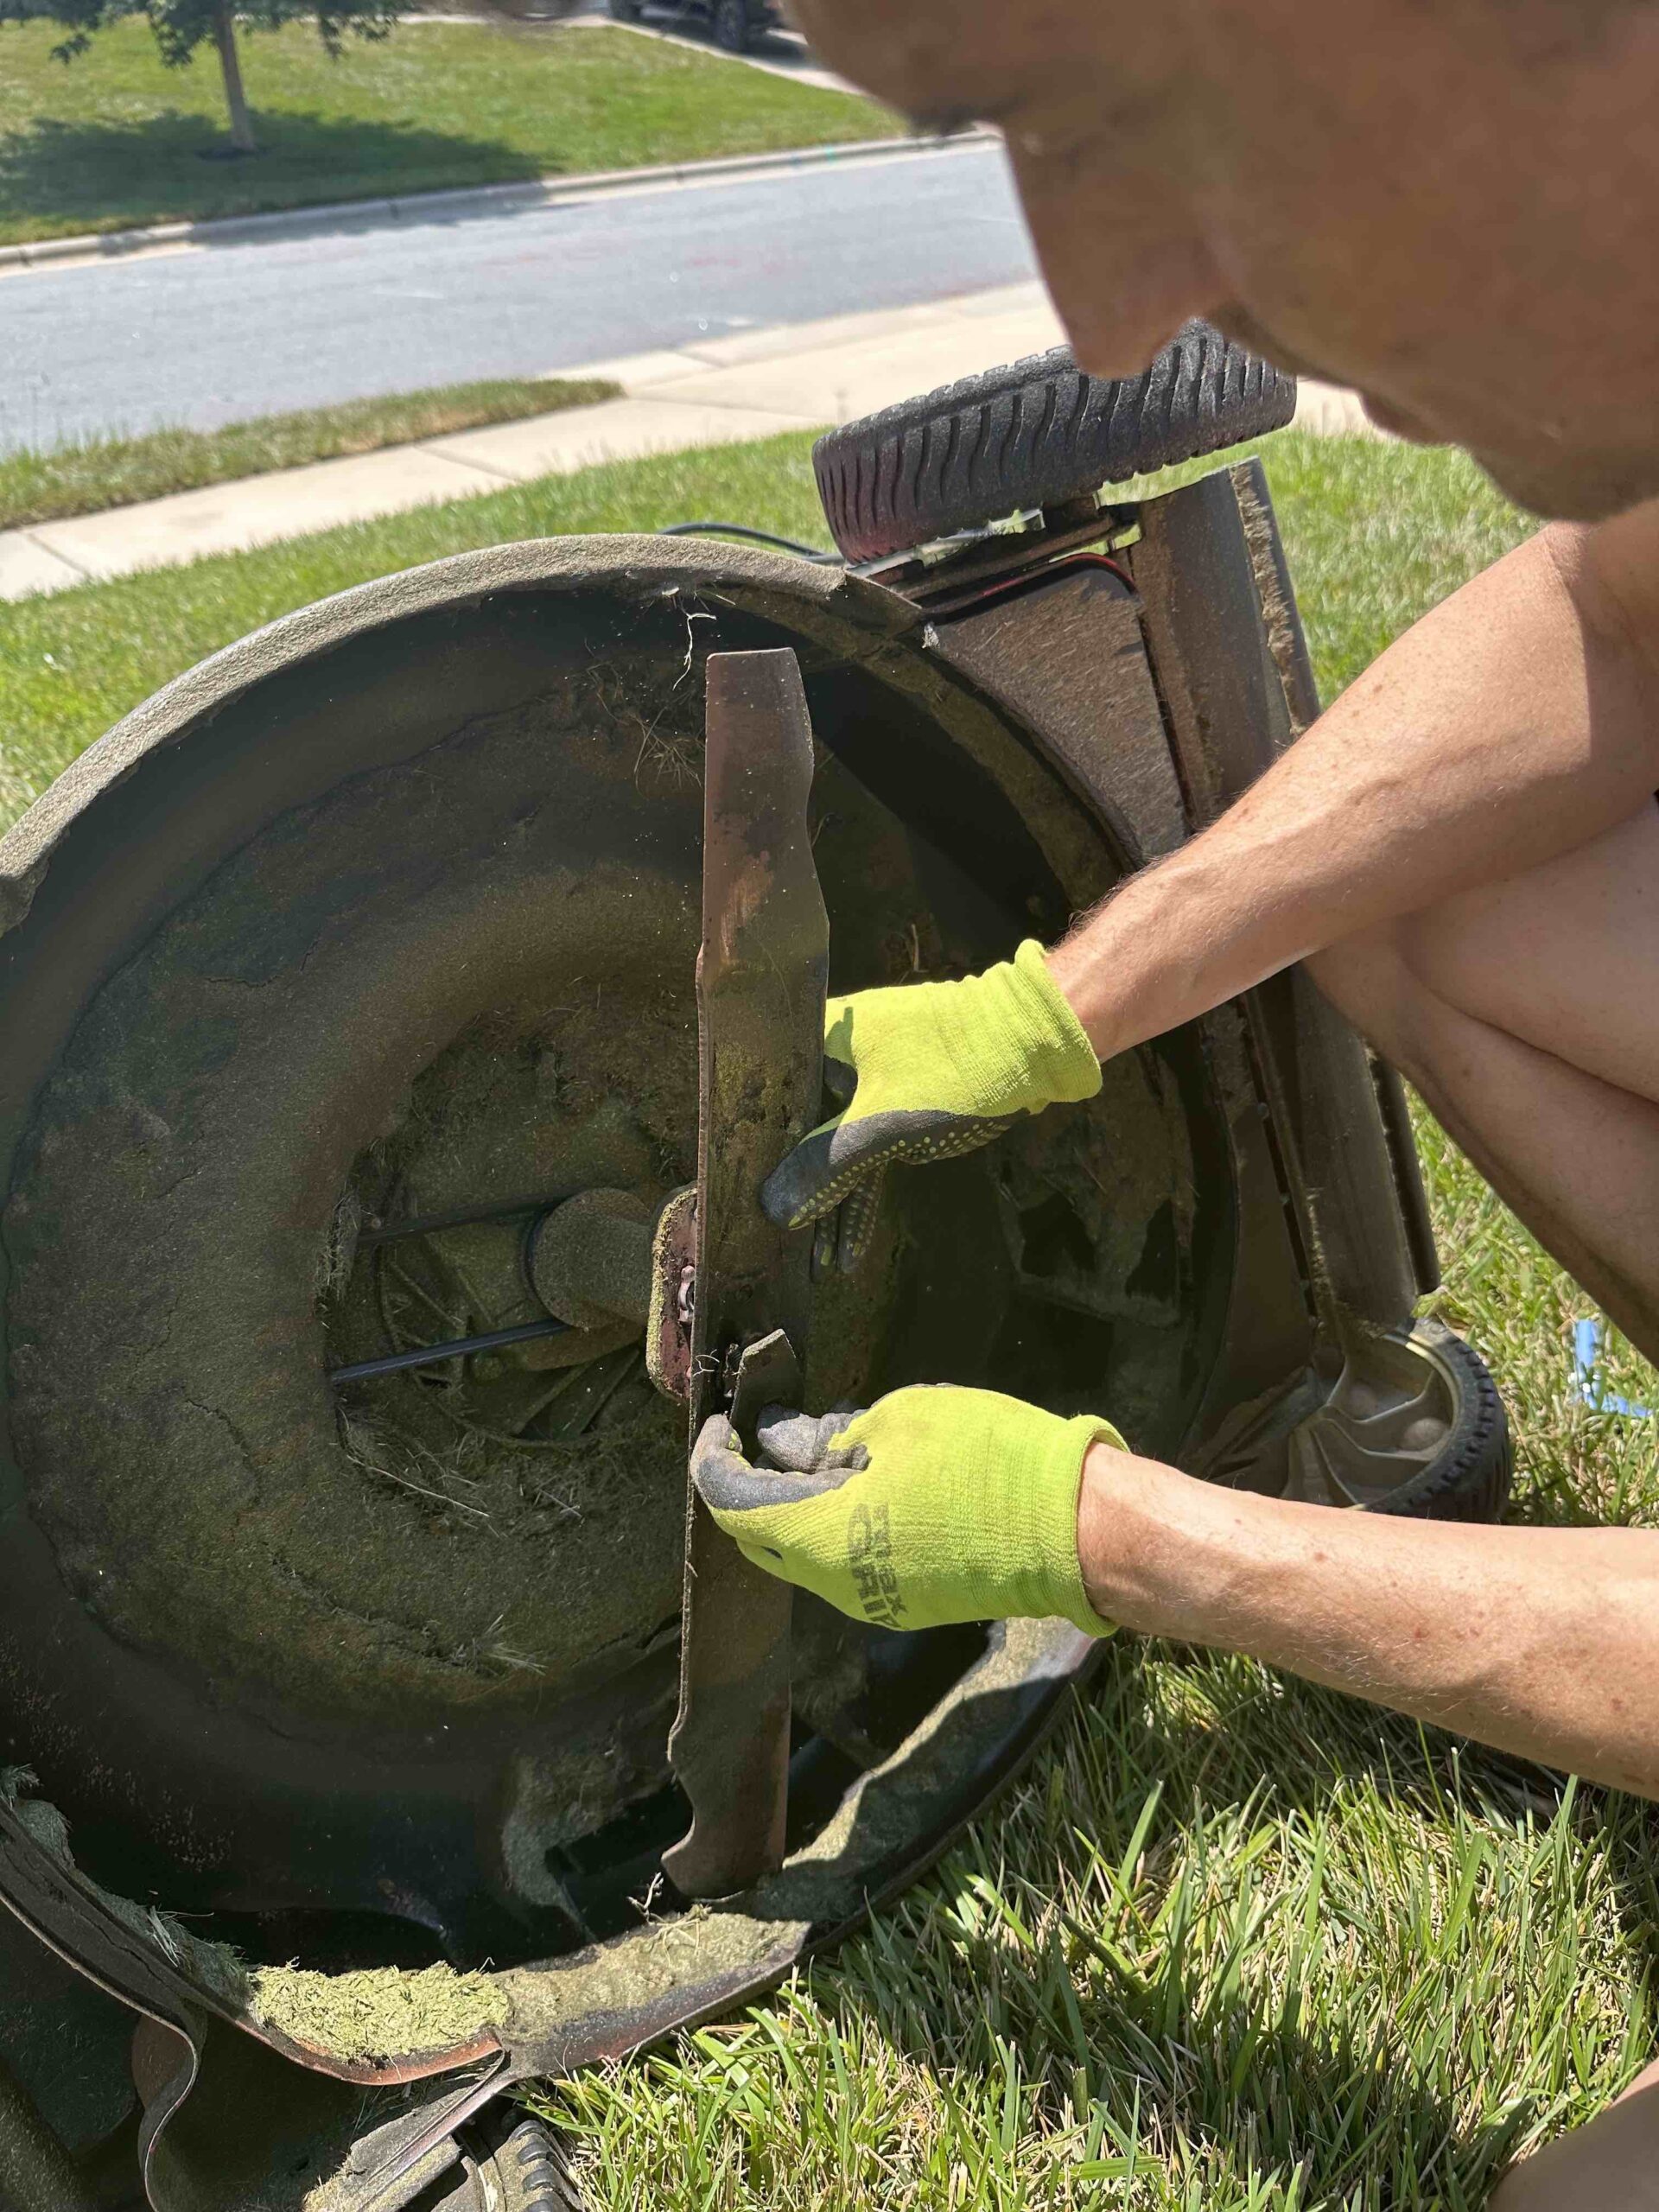
Step 2: Remove the blade.
Flip the mower over, so you can access the blade. Holding one side of the blade to keep it from moving, loosen the blade’s mounting nut using your socket wrench. If the nut is on tight or you don’t feel comfortable holding the blade, use a piece of scrap lumber to hold the blade in place so you can loosen the nut.
Step 3: Clean the blade with a metal scraper.
Clean the blade with a scraper and assess its condition. If rocks, branches, and other debris have inflicted deep nicks, you’ll want to replace it. Otherwise, gather the tools you need to sharpen it manually or mechanically.

Step 4: Sharpen the lawn mower blade.
At this point, you have a few options for how to proceed with sharpening, depending on the tools you have at hand.
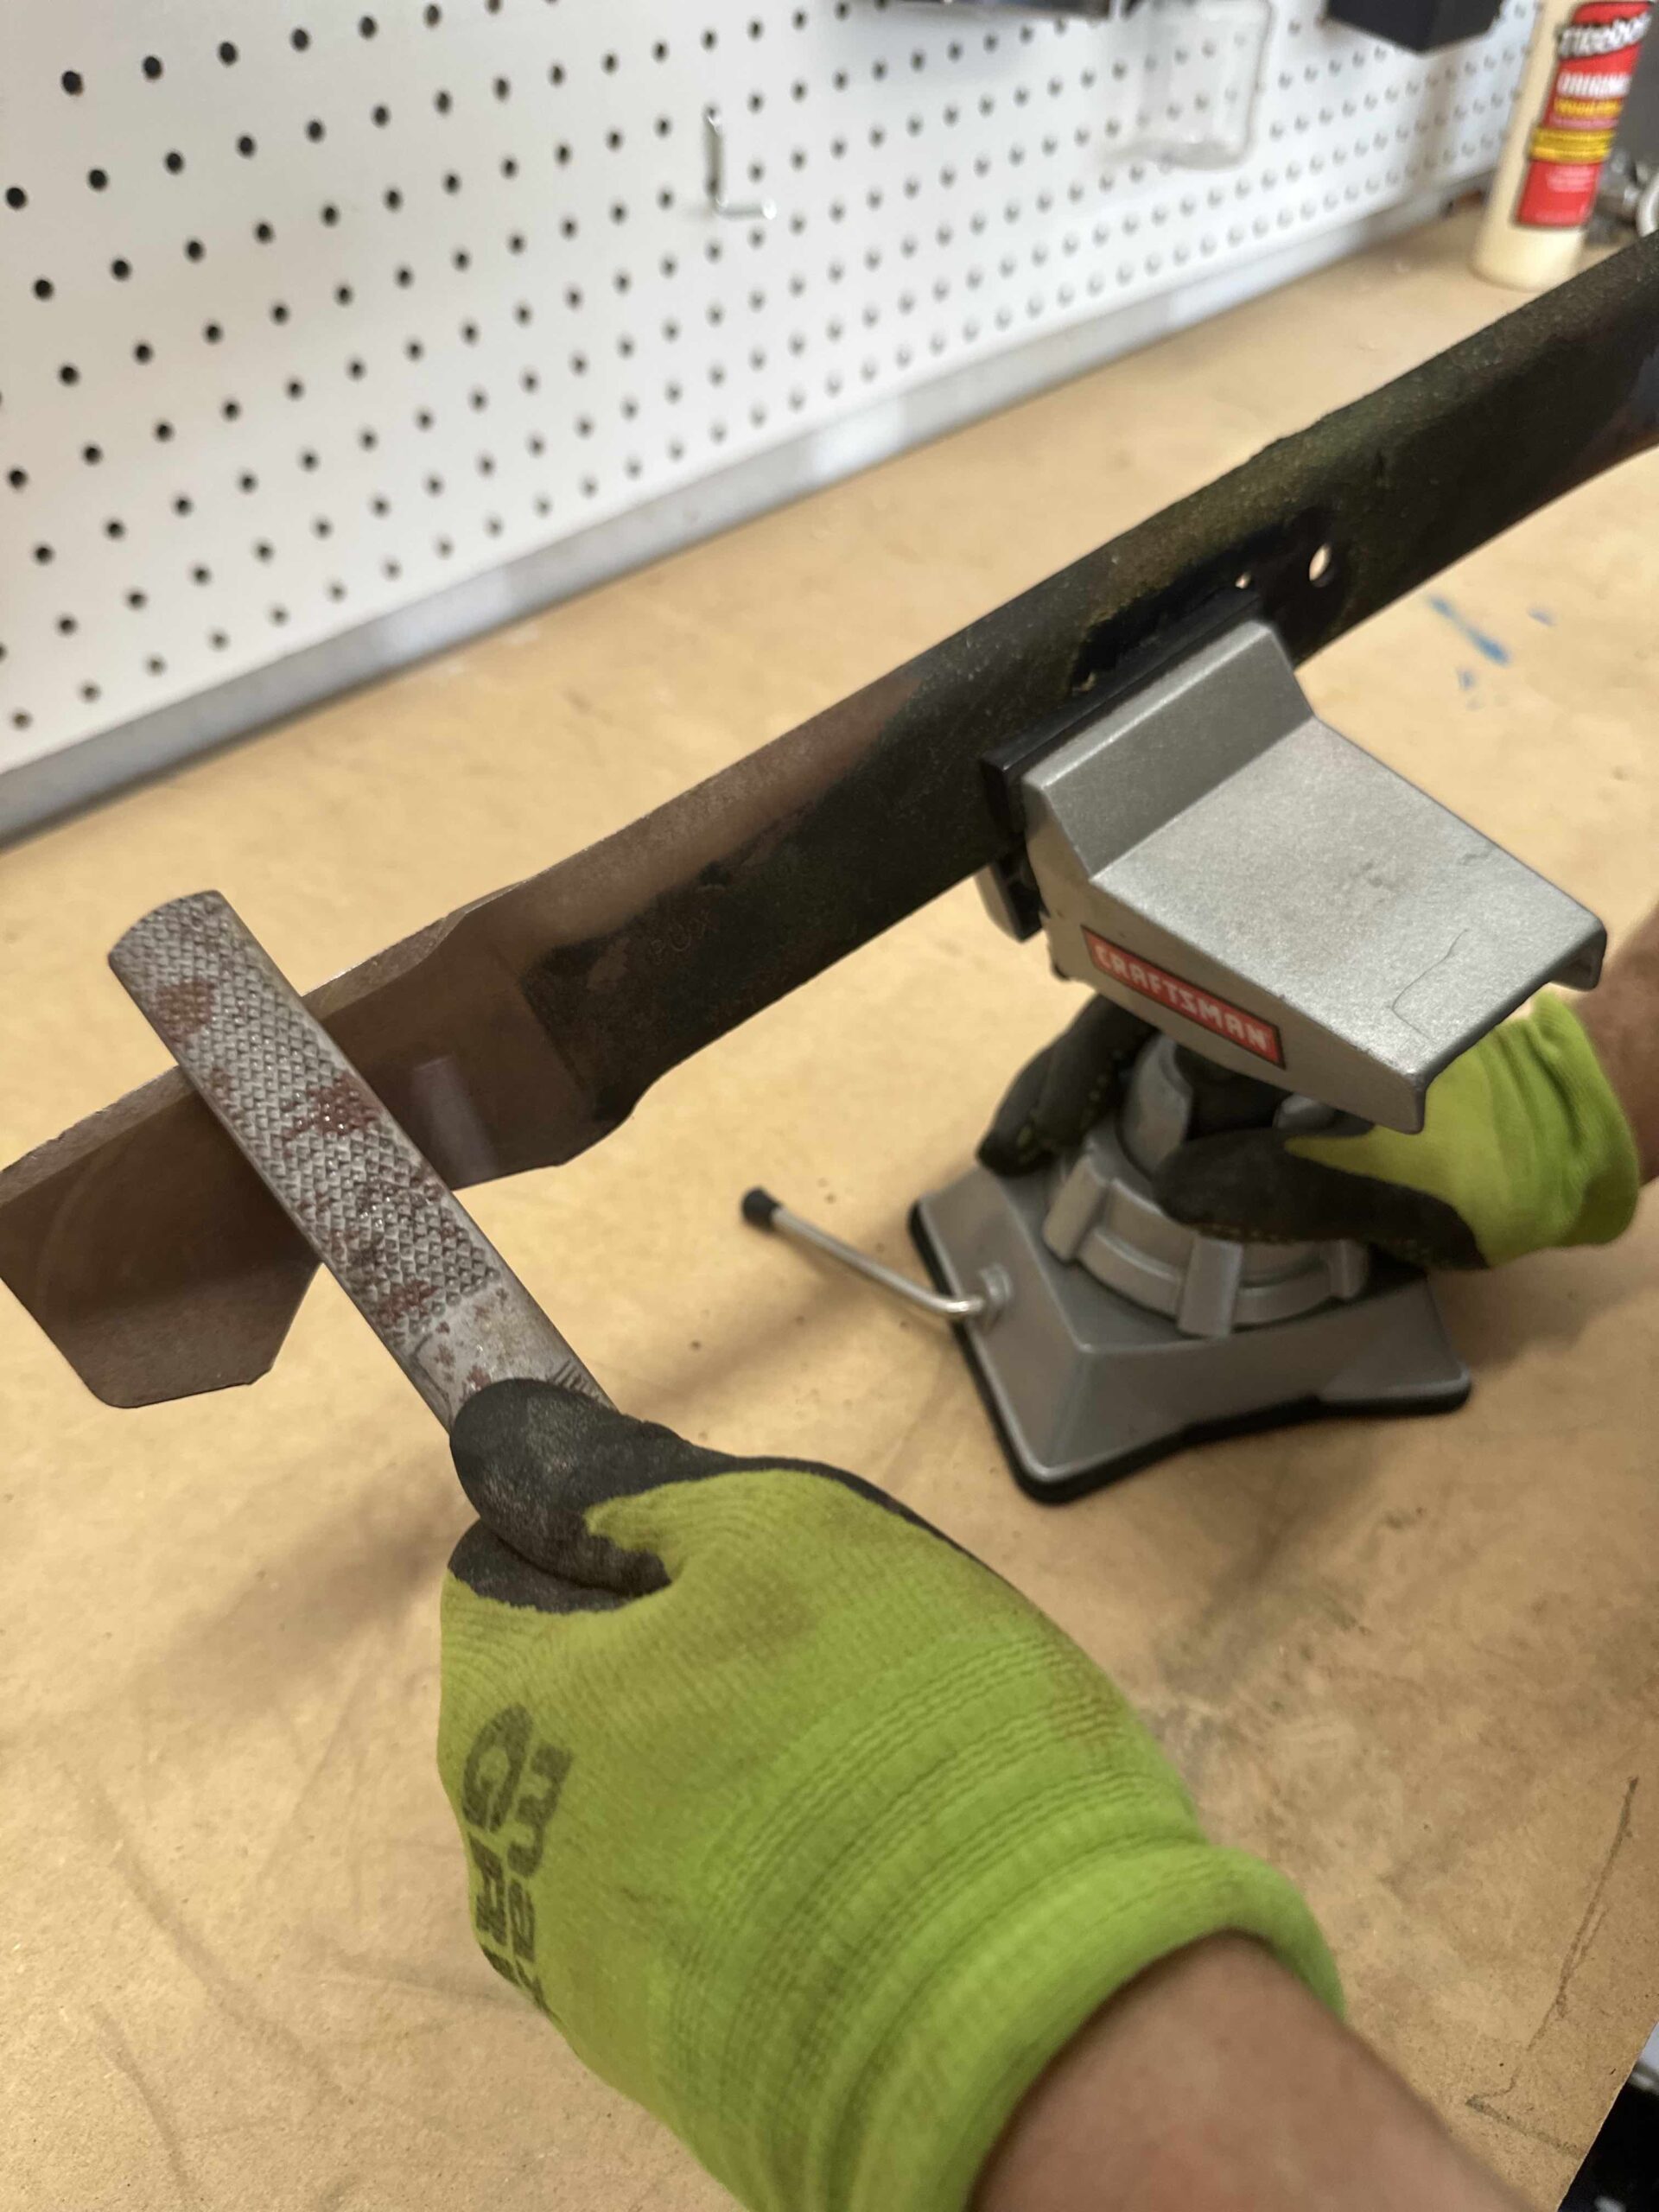
- How to sharpen lawn mower blades with a file: Clamp the blade horizontally in a vise and run a bastard-cut mill file along the cutting edge, using a one-way down stroke. Follow the existing angle (usually 45 degrees, but you can refer to your owner’s manual for the ideal angle) until the blade has the sharpness of a butter knife. Aim to remove an equal amount of metal from the cutting edge of both ends of the blade. Counting strokes may help you keep track.
- How to sharpen lawn mower blades with a power drill: A faster technique involves a power drill with a sharpening stone attachment. Clamp the blade—cutting side up—in a vise. Secure the sharpening stone in the drill; the stone’s plastic guide should rest against the rear of the blade to ensure the proper cutting angle. Put on safety glasses, turn on the drill, and move the stone from the center of the blade to the tip.
- How to sharpen lawn mower blades with a grinder: The fastest way to sharpen the blade is with a bench grinder. With this method, you’ll need to be careful not to oversharpen the blade or remove too much metal. Oversharpening creates a thin edge, which is easy to damage, and removing too much metal shortens the life of the blade. Hold the blade perpendicular to the rotating wheel as you move it along the cutting edge at the angle of the existing bevel. This throws sparks, so be sure to wear safety glasses. If the blade gets too hot, dip it in a bucket of water to cool it.
Step 5: Check the blade’s balance.
Check the blade’s balance before remounting it, because a lopsided blade will wobble and overtax the mower’s engine. Set a blade balancer on a flat surface and rest the blade on the balancer using the center hole. If the blade dips, use the file, sharpening stone, or grinder to remove metal from the back edge—not the cutting edge—of the heavier side toward the end of the blade.
You can also check the balance by hanging the blade on a wall from a nail through its center hole. If the blade tilts to one side, remove material from that side.

Step 6: Reinstall the blade in the lawn mower.
Reinstall the blade to the spindle under the mower using the mounting nut. Tighten the nut with a socket wrench while holding the blade with one hand. Flip the mower over and reconnect the spark-plug wire or power source, and then get to work!
Final Thoughts
If your lawn mower isn’t cutting it, then it’s probably time to give that blade a good sharpening. This process isn’t difficult if you have the right tools for the job and follow the above instructions. That said, if mower blade sharpening isn’t something you have the tools or time to do yourself, you can have a local lawn mower repair shop sharpen your blade for you for about $15 to $20. If you examine the blade and determine that it’s too worn out or damaged to be sharpened, then you’ll need to purchase a new one that’s compatible with your mower brand and model for about $20 to $25.
