We may earn revenue from the products available on this page and participate in affiliate programs. Learn More ›
I have a tiny urban townhome kitchen. You can’t open the refrigerator door more than 60% without banging into the oven, and the oven can’t be opened more than 80% without hitting the fridge. And don’t get me started on having any more than two people in the kitchen at once.
My mother, on the other hand, has a newer home where the kitchen/dining area takes up more than half of the “great room”. The walk-in pantry is bigger than my entire kitchen, and I’d estimate that that Mom enjoys 15 times more cabinet space, and roughly 30 times more counter area, than I do.
But even with these differences in our kitchens, we do share one thing in common: we’re both out of storage space. Everyone, everyone, needs more kitchen storage space. And if you’ve gathered a respectable set of cookware—pots, pans, skillets, griddles and gadgets—you probably want to keep them where you can get to ’em.
You, my friend, need a pot rack! And through the magic of S-hooks, you can turn all sorts of objects into a custom option with plenty of character. Here are five creative kitchen storage ideas that will should help you maximize available space.
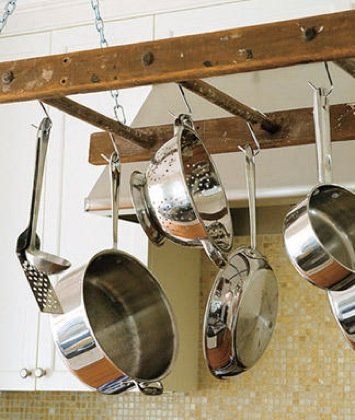
1. LADDER POT RACK
This ladder pot rack is certainly my favorite. It’s got the warmth of the wood and plenty of places to hang your cookware. I love that you can still distinguish the original object while it does double duty as a functional pot rack. Old ladders can be found everywhere. If damaged, simply cut off the problematic areas, hang, and put to new use. See how it’s done at Women’s Day.
2.GALVANIZED PIPE RACK

Galvanized pipe fittings are amazing for creating all kinds of stuff for the home (here are ten ideas), but nothing more suitable than hanging heavy-duty cookware. (Well… except actual plumbing.) There are endless configurations that work for hanging pots and pans—a long bar against a wall, a square grid secured to the ceiling, a lattice-like freestanding design set in a corner. The choice is yours. For inspiration, check out this how-to from ReadyMade.
3. DIY VERTICAL POT RACK
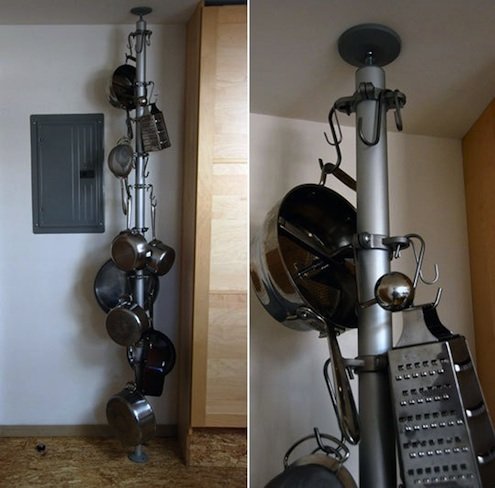
For the seriously space-challenged, consider this vertical pot rack solution constructed of shelving parts from a certain beloved Swedish flat-pack store. Or for some serious repurposing, check out a similar project involving heavy-duty chain from the hardware store.
4. UPCYCLED OVER-THE-DOOR POT RACK
This over-the-door solution is straight brilliant. Can you guess what it was constructed with? They’re replacement grill grates! Genius, right? They are a fantastic option for readily available, strong, metal “organizers.” I’d love to see this same technique applied to a ceiling-mounted pot rack using a kettle grill grate (available for less than $35 just about anywhere).
5. UPCYCLED WINDOW POT RACK
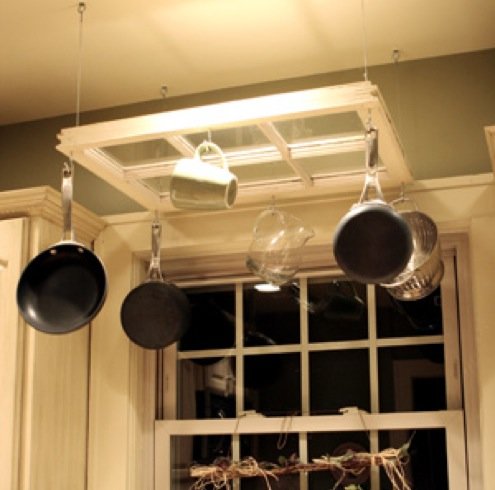
And lastly, an upcycled window pot rack! Windows are readily available at architectural salvage stores, Habitat for Humanity ReStore shops, garage sales, flea markets, and thrift stores. And as it turns out, they make a fantastic, strong source material for kitchen storage!