We may earn revenue from the products available on this page and participate in affiliate programs. Learn More ›
What kid wouldn’t love a secret playroom off his bedroom? From the first time we toured our house, I knew the extra storage space off a second bedroom was destined for something great. At first, we used the bare-beamed, 8-foot by 10-foot space as a meditation hideaway, adding a rug and some plush cushions. We covered one wall with plywood decorated with colorful paints. Unfortunately, after a few ambitious weeks, we stopped using it, especially on chilly days, since the room lacked sufficient insulation.
Our Vision and Inspiration
After finding out we were having twins, we decided to get more ambitious with the space. We knew our 5-year-old son would need a hideaway for some alone time once his two new sisters arrived. We envisioned a bright space where he could have a Lego table and a reading nook. It also seemed like a great solution for tucking away the toys that were overflowing in our main living space and to safely store the tiny types—like the thousands of Legos—that might pose a choking hazard for our babies on the way.
We brought the project to our contractor for a quote, which he estimated at $6,000! With two more kids coming soon, that cost was not in our budget, so we decided to take on the renovation ourselves.
RELATED: 9 New Ideas for Shared Bedrooms
Building Considerations
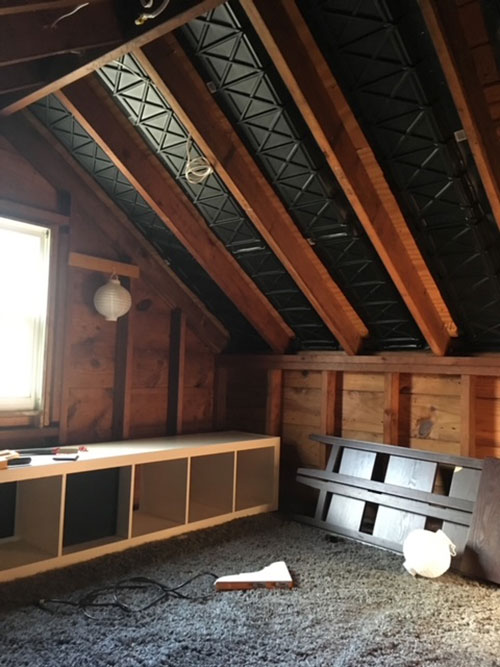
We knew that adding drywall was a larger undertaking than we wanted. Instead, we decided to insulate the space and add shiplap to the walls and ceiling. We had installed shiplap before, so we felt it would be a simple solution. As pretty novice DIYers, one of our main challenges was dealing with the roof line. We learned there needs to be airflow between the roof and the ceiling to avoid moisture and mold buildup. To accommodate this, we added channel vents along the ceiling line to the floor (pictured below). Once the vents were in place, we fitted batt insulation between each beam. Next, we installed the shiplap from the floor up with a nail gun.
Challenges
While the insulation helped, the temperature control in the room isn’t perfect. If the door is left open, the space remains the temperature of the bedroom. However, if the door is shut, the room can get either hot or cold, depending on the season. We considered adding an electric baseboard heater but were worried about safety. Though my son doesn’t seem to mind the cold when temperatures drop, we’ve also considered a space heater—at least to heat up the space before playtime. Blocking the sunlight from streaming in during warmer months helps keep the space cool enough.
Luckily, my dad is also an electrical engineer, so he pitched in to help with access to electricity. There was a light switch already in the space. But, for an extra outlet, we took one from the interior bedroom wall, just outside, and repurposed it by running a line off the electrical box.
RELATED: 45 Backyard Landscaping Ideas for Creating the Ultimate Outdoor Living Space
Finishing Touches
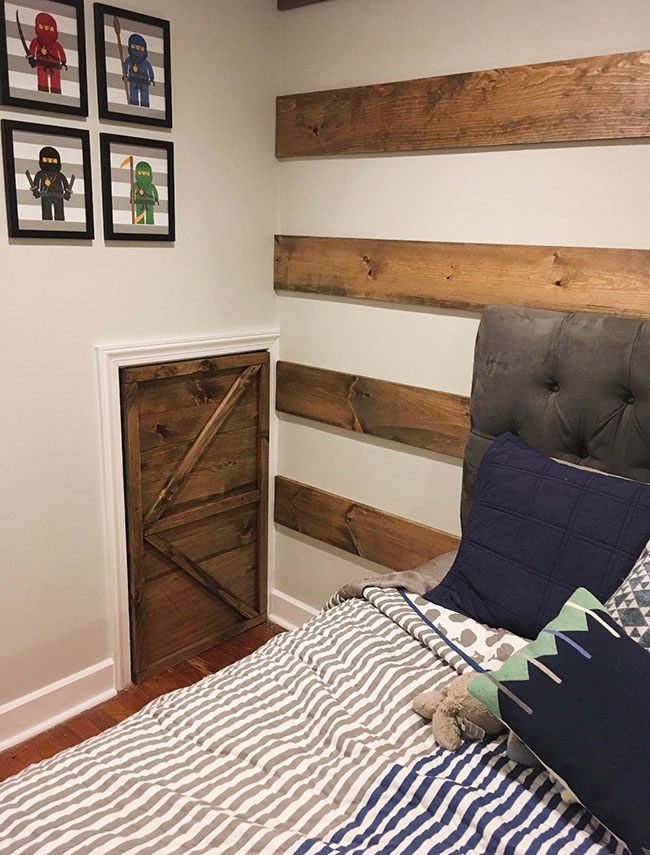
We wanted the space to feel bright and airy, so we chose white paint for the walls. We opted for a nontoxic, water-based paint, which occasionally needs touch ups when the wood knots start to show through. An oil-based paint would probably do the job a little better, but we weren’t willing to compromise on the potential for off-gassing.
For the floor, we used a carpet scrap cut to fit the space. A set of shelves (available on Amazon) holds books and toys, and a fold-out futon chair (also available on Amazon) offers a spot to read or relax. More recently, we turned the space into a DJ booth, adding a shelf along the inside wall for equipment and a disco ball for ambiance.

Favorite Feature
One much-loved part of this project is the little farmhouse-style door that serves as the entrance from my son’s bedroom (pictured below). Nothing says “cool kid’s hideaway ahead” more than a fun entryway. Another idea we considered was a door disguised as a bookshelf for a really top-secret hideout, but we worried about safety if someone was watching over our son who didn’t know about the hidden room.
So far, he loves the space, especially when his sisters are having toddler tantrums. I suspect he’ll be hiding from us a lot in there, particularly during his teen years.
RELATED: The 50 Best Tech Gifts for Any Budget