We may earn revenue from the products available on this page and participate in affiliate programs. Learn More ›
Tile floors are a popular option for kitchens, bathrooms, laundry rooms, entranceways, and halls because they are both attractive and functional, making them appealing for high traffic areas that require regular cleaning. Installing tile floor in a bathroom or a kitchen could be a great weekend project for a DIYer looking for a challenge or wanting to save on the cost of hiring a professional.
This guide explains not only what you need to install tile floors and how to prepare the space, but also the individual steps you must follow to get the job done, from measurement and tile selection to sealing the grout lines and reinstalling baseboards.
Tools & Materials
Bobvila.com may earn a commission from purchases made through these links.
- Chisel
- Floor scraper
- Measuring tape
- Level
- Chalk line
- Bucket
- Paddle mixer
- Spray bottle
- Notched trowel
- Rubber mallet
- Sponge
- Tile cutter
- Tile nippers
- Rubber float
- Caulk
- Sandpaper
- Underlayment
- Tile
- Tile spacers
- Thinset mortar
- Grout
- Grout sealant
Project Overview
Working Time: 5 to 10 hours
Total Time: 1 to 2 days
Skill Level: Intermediate
Estimated Cost: $500 to $1,000
Before You Begin
While it is possible to tile over tile, we generally don’t recommend it, especially if the old tile is in poor condition. Before you start this project you will need to remove any existing tile from the floor. Use a chisel and floor scraper to get rid of any flaking wood, unsecured sheet flooring, or other obstructions that may prevent or hinder the successful installation of the new tile.
Additionally, you will need to remove existing baseboards, molding, and transition strips so that the entire floor is accessible. Make sure to put the baseboards, molding, and transition strips in a safe location so that you can reinstall them after you’ve tiled the floors.
These steps explain the process for installing tile floors; note that the installation method and steps for other tile installation projects, like wall tiles or backsplashes, may vary.
Step 1: Measure your floors.
Take precise measurements of the space so that you can determine how many tiles you will need to complete the project. Keep in mind both the size of the tiles you intend to use and the tile pattern. The easiest option is to simply go with a grid pattern, but you may want a more complex layout or tile mosaic depending on personal design choices.
Measure the area of the room to determine its square footage, then add about 10 to 15 percent to the square footage to account for wastage. With this number in hand, you should be able to determine the number of tiles that you will need to cover the entire floor..
Step 2: Prepare the floors.
Before laying tile, make sure the floors are level and then install an underlayment.
Use a long, 48-inch level to check for dips in the floor and mark any uneven spots. Small seams can be filled in with caulking, and you can sand down any uneven or high spots. If you opt for a liquid underlayment, then gravity will help the liquid underlayment fill any dips in the floors, seeking its own level.
Your subfloor should be able to support tile, mortar, grout, and furniture, so check for any cracks, dips, or weak places that may need to be repaired before you begin installing the underlayment. Once you are satisfied, you can put in whichever type of underlayment you decide is best for the project, including flexible membranes, liquid underlayment, or sheet-type underlayment, like backer board or cement board.
Step 3: Create a tile layout.
The next step before laying tile is to create a layout to help ensure the tiles are properly centered in the room. Measure two opposite walls, then snap a chalk line between the center points. Repeat the process for the remaining walls to find the center (your starting point), then draw perpendicular lines from the center to create a grid.
Dry fit your tiles on the floor to check the layout, making sure to use tile spacers to ensure the gaps between the tiles are correct. While you are doing this, leave a ¼-inch gap along the outside edges to account for expansion.
Note: If this layout leaves small pieces of tiles on one end, then you can shift the layout to one side to give the edge tiles more width, but make sure to mark new reference lines to reflect this shift.
Step 4: Prepare and test the mortar.
No matter whether you are installing kitchen, hallway, laundry room, entrance, or bathroom floor tiles, it’s important to prepare and test the mortar before laying them. Use a bucket and paddle mixer to mix your thinset mortar according to the manufacturer’s directions, keeping in mind that most mortars will require about 5 to 10 minutes to stand after mixing.
If you have backer board underlayment, use a spray bottle filled with water to dampen the backer board before using your trowel to spread the thinset over your starting area. Press the trowel into the underlayment at roughly a 45-degree angle to ensure the mortar fully adheres, then put the first test tile onto the thinset bed.
Place the tile flat on the thinset mortar. Use mild pressure to slide the tile about ¼-inch back against the ridges, then slide it back into place before pulling the tile up to check the back. If you have done it correctly, then the back of the tile should be completely covered with thinset.
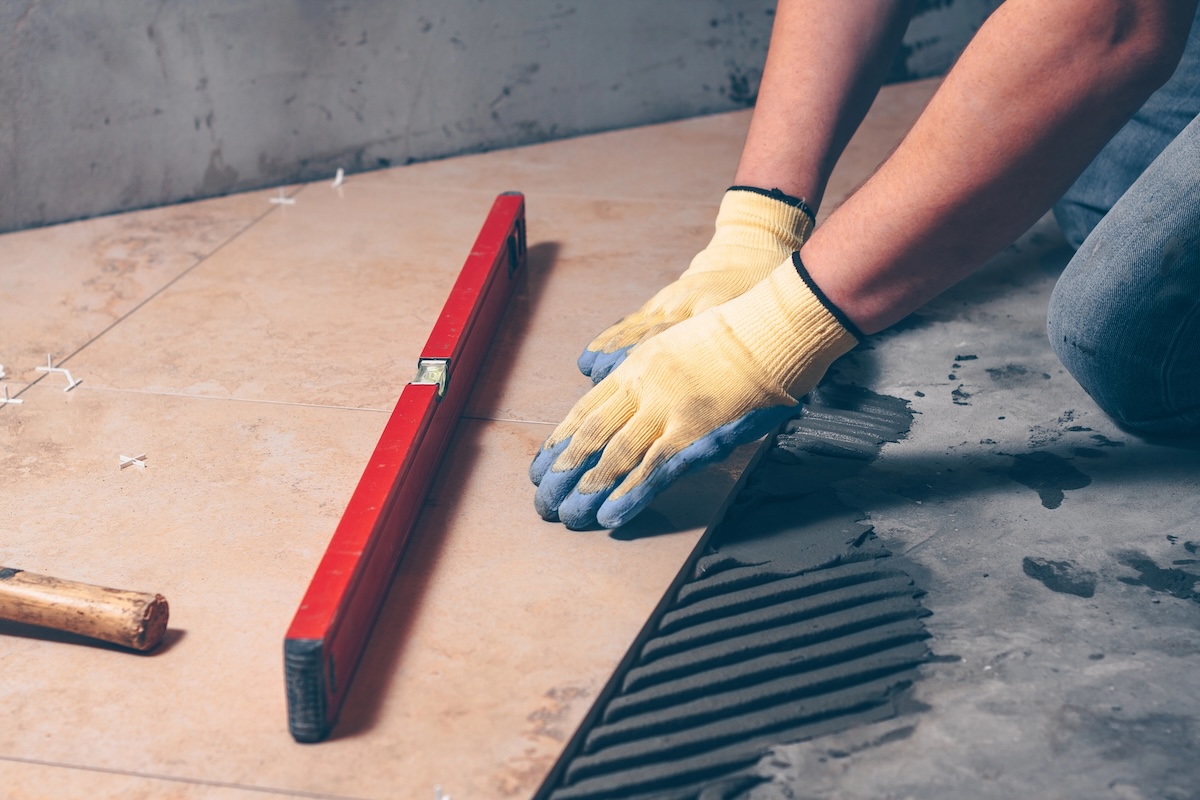
Step 5: Start laying the tile.
After you have confirmed that the mortar consistency is correct and you have tested the first tile, you can go ahead and relay the first tile, ensuring that it lines up with your layout. Once the first tile is in position, place two spaces along the side where you will be adding the next tile to ensure proper spacing, then place your second tile. Make sure the second tile is properly aligned with the first and follows your layout. Any slight adjustments to the positioning should be made as soon as possible.
Step 6: Work in sections.
Proceed slowly and diligently in sections, especially if this is your first time installing a tile floor. Apply just enough mortar for about one or two tiles at a time, so you don’t feel rushed to lay the tiles before the mortar dries. You should also try to use tiles from each of your tile packages so that if there is any slight color discrepancy between packages, it will mix throughout the floor, creating a more uniform appearance.
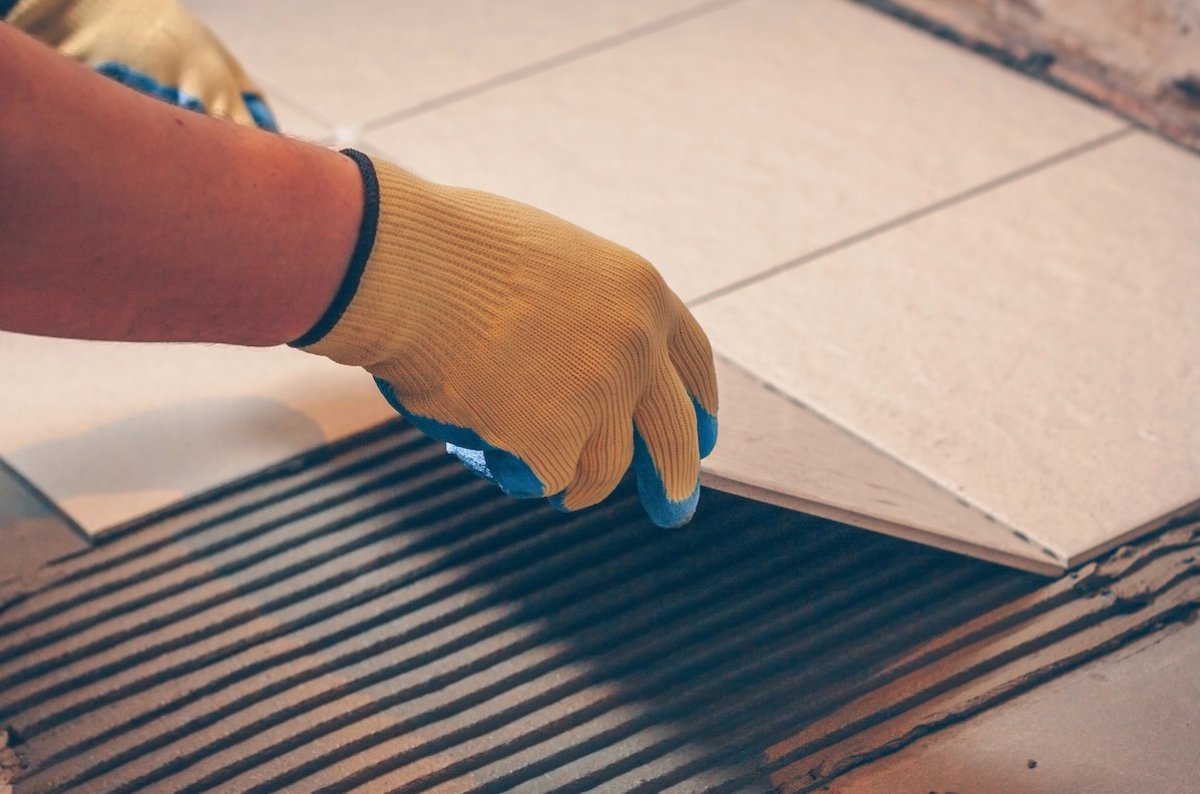
Use the notched side of the trowel at a 45-degree angle to apply the mortar, combing the thinset out in one direction, instead of creating circular or swirling patterns. As you lay the tiles, use a thin trowel to remove a small amount of thinset from around the edges of the tile to keep the project neat and controlled, rather than allowing this excess thinset to start drying around the edges.
Step 7: Clean and level tiles as you work.
As you work, clean the tiles and check that they are level. Use a damp sponge to wipe off any mortar that ends up on the tiles as you work. Make sure to clean the tiles frequently so that the mortar doesn’t have a chance to dry on the top of the tiles.
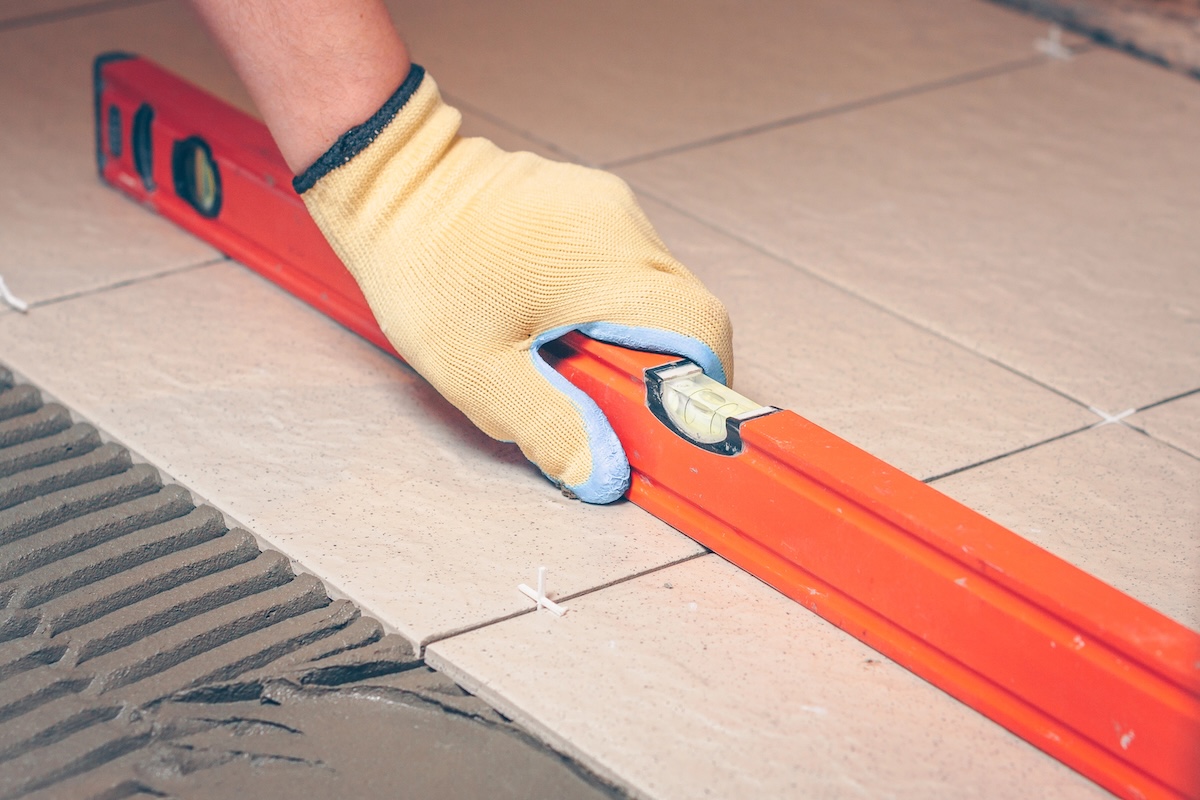
You can check that the tiles are level by placing a 2×4 block of wood on top of them, tapping the wood with a rubber mallet to ensure the tiles are firmly embedded in the mortar, then using a level to confirm that the tiles are level and properly aligned.
Step 8: Cut tile if needed.
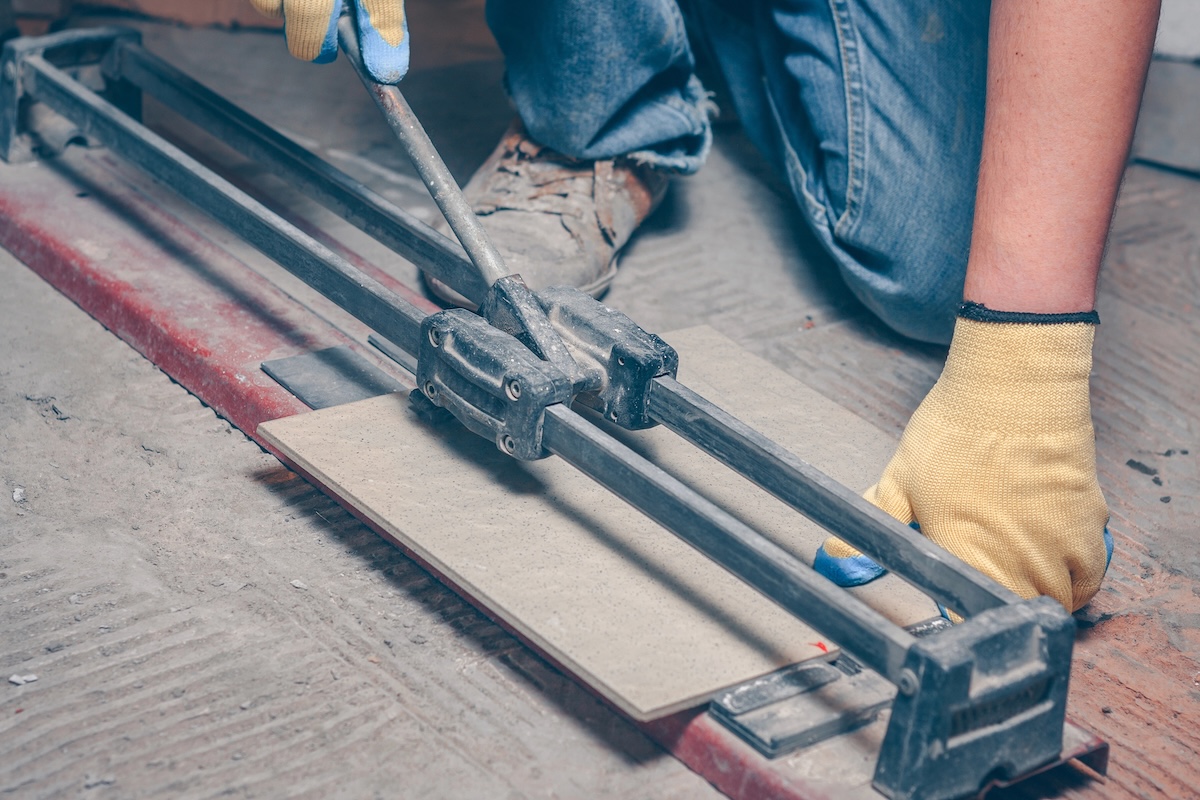
Rarely will you have a room that doesn’t require cutting at least a few tiles during a tile floor installation. As you approach the edges of the room, lay out, mark, and cut small groups of tiles at a time, leaving them in the spaces where they will be installed. Measure the size of the tile that needs to be cut, transferring the dimension to the glazed surface using a felt-tip marker, then position the tile on the tile cutter and align the center of the cutter with the marked line.
Draw the cutter across the surface of the tile with firm, even pressure to cut through the glaze, making only one pass with the cutter, then snap the tile by applying pressure to the score line. If you need to cut a curve, first cut a straight line, then cut away bits of the tile with tile nippers, before smoothing the cut edge with an abrasive stone. For natural stone or porcelain floor tiles, use a wet saw instead of a snap cutter to avoid breaking or chipping.
Step 9: Let the mortar set for 24 hours.
Let the mortar set for about 24 hours after you finish installing all of the tiles. Not allowing the mortar enough time to set can cause the tiles to shift and become misaligned.
Step 10: Apply the grout.
Grouting tile keeps debris and liquid from seeping between tiles, and keeps the tiles from chipping and moving around. is a necessary step to complete this project. Here’s what to do:
- Remove the spacers between the tiles.
- Use a rubber float to press the grout into the joints between the tiles.
- Working in sections, pull the grout across the lines diagonally, removing any excess grout as you go.
- Let the grout set for about 20 minutes.
- Wipe the grout lines with a wet sponge and clean water to smooth the lines and get rid of any grout that may otherwise dry on the tiles.
Step 11: Seal the grout.
After applying the grout to the newly tiled floor, wait about 3 days before applying a grout sealer. Choose a sealer that has a built-in applicator or invest in a grout sealer application bottle to make the process easier. Apply the sealer to the grout lines, wiping up any excess sealer within 10 minutes of application, taking extra care to only seal the grout. Typically, you should reseal grout about once every 1 to 2 years to keep the tiled floor looking and feeling great.
Step 12: Install baseboards and molding.
When you are finished with the flooring installation, you can reinstall the baseboards, molding, and floor thresholds that you had to remove at the beginning of the project. Alternatively, if the old baseboards, molding, or floor thresholds are worn or in poor condition, it may be worth it to invest in new materials to complete the updated appearance of the room.
Final Thoughts
Putting in a new tile floor is a manageable project for experienced DIYers who have the right tools and the careful precision required to measure the space, create an appropriate layout, mix the mortar, cut the tiles, lay the tiles, apply the grout, and finish off the job by sealing the grout lines and replacing the baseboards and molding. Hiring a professional to install a tile floor can increase the price by about $5 to $14 per square foot for labor costs, so learning how to install a tile floor is a great way to save on the cost of tile installation.
However, if you don’t have the time or simply are not confident in your ability to install the tile floor, then it’s better to reach out to one of the best tile flooring companies instead of attempting this job on your own. This will ensure that the project is completed to your satisfaction without wasted time or money.
