We may earn revenue from the products available on this page and participate in affiliate programs. Learn More ›
Insulation is a vital component in any home that is energy efficient. Typically placed in areas where air escapes, such as between the stud cavities inside the walls and in the attic, it serves to slow and reduce heat transfer. By sealing air leaks and adding proper insulation to the attic, crawl spaces, and basement, homeowners stand to save an average of 15 percent on heating and cooling costs—11 percent on total energy costs—estimates the U.S. Environmental Protection Agency’s ENERGY STAR program.
For the typical homeowner, this translates to about $200 pocketed year after year. Still, approximately 90 percent of single-family homes in the U.S. do not have sufficient insulation, according to 2015 research by the North American Insulation Manufacturers Association. Not only does poor insulation waste energy and increase energy bills for these buildings, it also disrupts the residents’ comfort level by allowing drafts and offers little barrier to a home’s CO2 emissions.
Insulation Basics
Before rushing to the home center to inquire about insulation or to hire a contractor for installation, it’s important to understand the basics. Not all insulation is created equal, and various types exist for different applications. Here, we outline the details of the major residential insulation options: blanket batts and insulation rolls, spray foam insulation, blown-in insulation, foam board or rigid foam panels, loose fill cellulose, Rockwool, and eco-friendly alternatives. We also share details about insulation that’s typically used in new construction and commercial buildings: structural insulated panels, insulating concrete forms, concrete block insulation. Plus, we describe reflective or radiant barriers that reflect heat and vapor barriers that are often installed with insulation to help prevent moisture transfer in a home’s walls.
Each of these insulation products works by trapping air, or at least making it more difficult for air to pass through the material. The materials range from man-made products to eco-friendly options. Also, some products are more suitable for certain scenarios than others, such as certain products being useful in horizontal applications but useless in vertical walls. Choosing the right type of insulation is really a case-by-case situation.
Note: While carefully weighing each of these insulation options to determine which (or which combination) best works for a particular home, carefully consider a product’s R-value, which is typically found on the product packaging. This is a measurement of resistance to heat flow. The higher the R-value, the better the insulation is at reducing energy loss, but not every climate requires the highest R-value. Check out this chart by ENERGY STAR to learn more about the measurement and the recommended R-value for your area.
Safety Considerations When Handling Insulation
There are certain considerations to keep in mind when working with different types of insulation. First, some insulations—like fiberglass batts, blown-in insulation, and spray foam—can irritate skin and airways, and they can cause other health concerns. For this reason, proper ventilation, personal protective equipment for eyes, hands, skin, and respiratory, and safe installation procedures are absolutely necessary.
Replacing insulation in older homes could also put DIYers in direct contact with asbestos. While this product is fire retardant and does a decent job of insulating the home, its fibers are very dangerous if inhaled. Homeowners with older homes full of insulation should call a professional to ensure that insulation isn’t fiberglass with asbestos and, if it is, that it’s removed safely.
There are many types of insulation, and even more ways insulation is used in a building. Some varieties are better suited for new construction or unfinished spaces, and others are easier to use by DIYers for remodeling projects. There also are different types of barriers that can be part of an insulation product or sold and installed separately to increase vapor and thermal transfer through a wall assembly.
RELATED: Our Favorite Attic Insulation is Surprisingly DIY-Friendly
Insulation for Remodeling and New Construction
While most may be familiar with blanket batts and rolls, there are a few other types of insulation products that are DIY friendly to use when increasing the thermal efficiency and comfort inside a home.
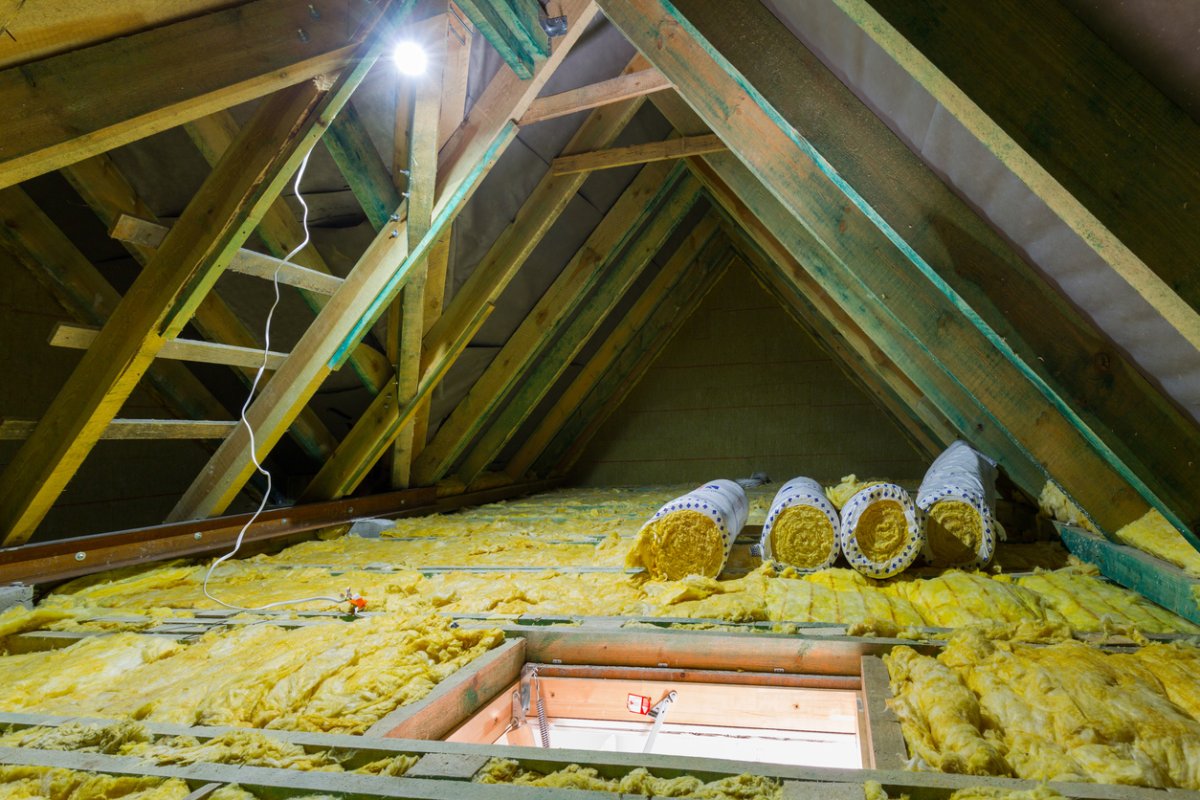
1. Blanket Batts and Rolls
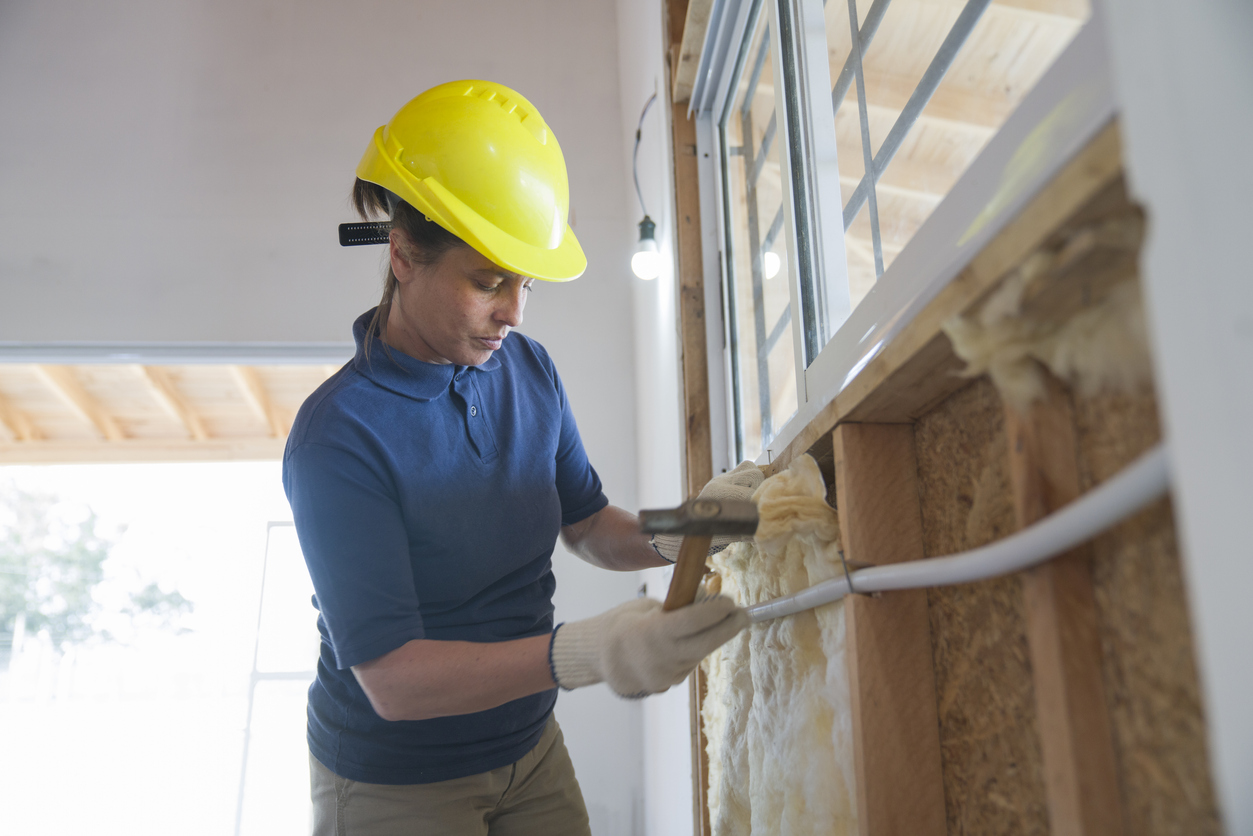
Perhaps the most standard insulation form available for walls, blanket batts and rolls are typically constructed with fiberglass, although versions made of cotton, mineral wool, sheep’s wool, and plastic fibers are also available. This is one of the cheapest insulation types, and it’s a DIY-friendly product to install, since the materials are designed to fit into the standard width between wall studs, attic rafters, and floor joists.
Pro tip: Keep in mind that fiberglass is a lung and skin irritant, so always wear protective clothing and a mask when handling the material.
Those who opt for the roll variety will need to cut the insulation to the proper length with a utility knife. Don’t (or rather, do) cut corners here! Cutting insulation to the correct size influences its functionality: Forcing blanket batts or rolls to fit by compression makes them less effective.
Standard fiberglass blankets and batts have R-values between R-2.9 and R-3.8 per inch of thickness. High-performance (medium-density and high-density) fiberglass blankets and batts have R-values between R-3.7 and R-4.3 per inch of thickness.
Best For: Do-it-yourself insulation of unfinished walls, floors, and ceilings
Our Recommendation: Owens Corning R-21 Kraft Faced Fiberglass Insulation Batt on The Home Depot for a pallet (10 bags)
Owens Corning R-21 Kraft Faced comes in pre-cut widths and lengths for easy installation in standard 2×6 stud bays, and provides an insulation value of R-21.
2. Spray Foam Insulation
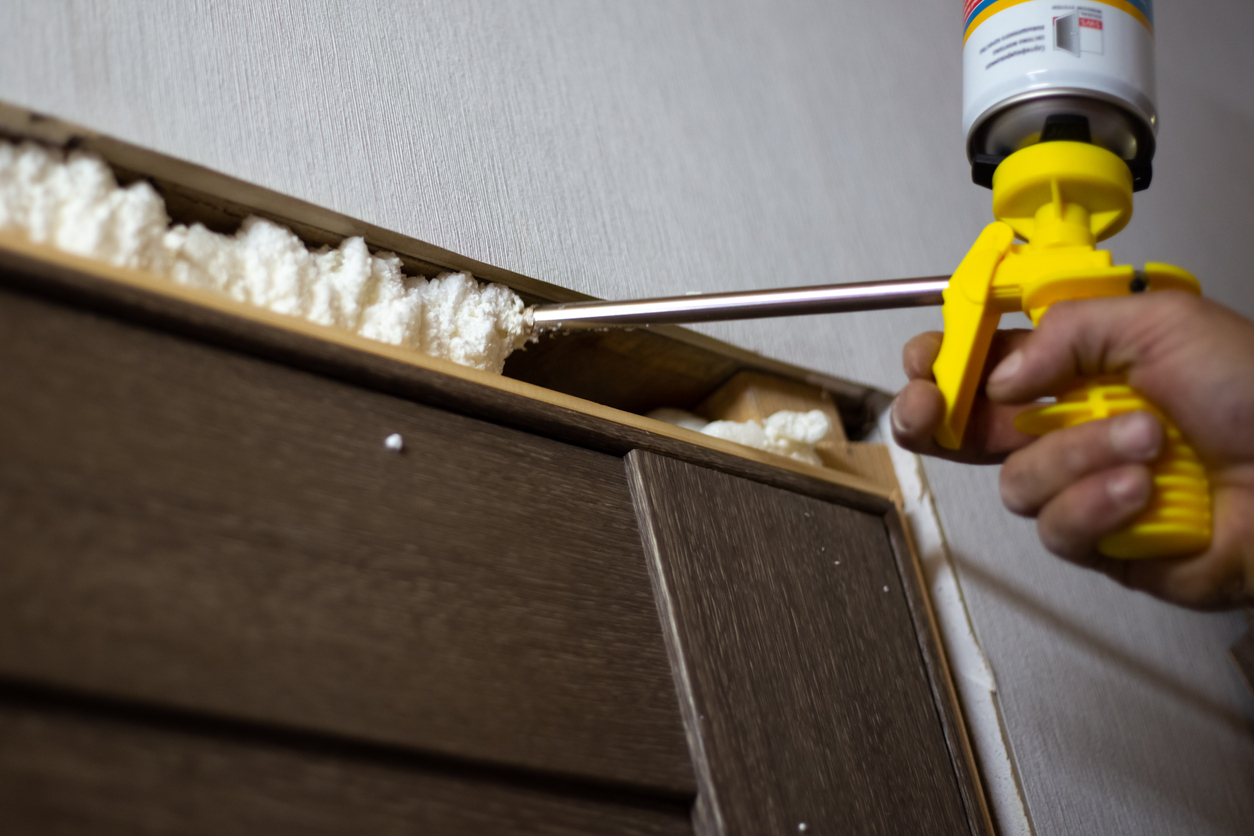
Spray foam insulation seals leaks and gaps inside existing walls. Liquid polyurethane is sprayed into the cavity of the wall, where it then expands and hardens into a solid foam. When working with a larger area, homeowners can use a pressure sprayed (foamed-in-place) foam insulation.
Spray foam comes in two constructions: open-cell foam or denser closed-cell foam. Closed-cell foam has one of the highest R-values of any insulation, around R-6.2 per inch, but it can be expensive. Open-cell foam insulation values are around R-3.7 per inch of thickness. When choosing spray foam to increase the R-value of a home’s insulation, consider calling a professional to do the job, since installation can be trickier than simply aiming and spraying. However, determined DIYers can handle this job on their own with a DIY kit.
Best For: Adding insulation to existing finished areas, as well as irregularly shaped or hard-to-reach spaces
Our Recommendation: Froth-Pak 620 Spray Foam Sealant Kit on Amazon for $955.79
Froth-Pak’s 620 Spray Foam Kit provides up to 620 board feet of coverage with closed-cell foam, and it comes with the hoses and gun to install it.
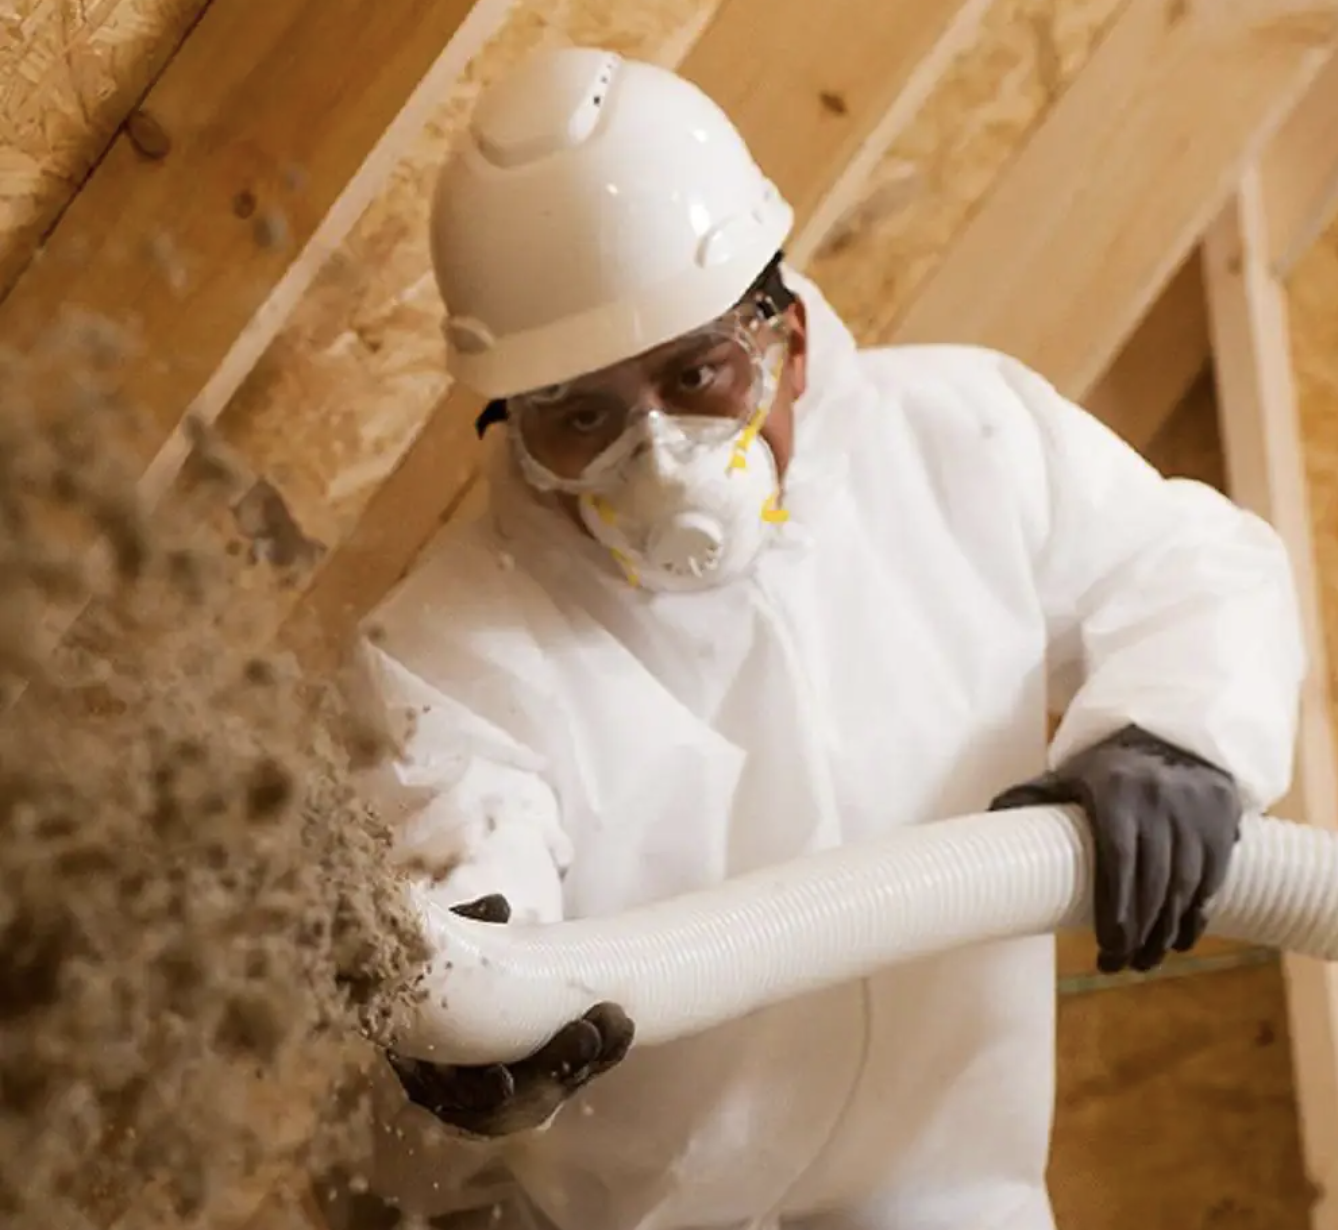
3. Blown-In Insulation
Blown-in insulation is applied using a machine that blows a paper-like material into the space to be insulated. This type of insulation is often made of fiberglass, rock wool, or reclaimed cellulose material (like recycled newspapers or cardboard), which conform to fit nearly any type of location—even the peskiest obstructions.
For blown-in insulation, R-values range from R-2.2 for fiberglass up to R-3.8 for dense cellulose. Simple insulation jobs may be DIY-friendly if a local home improvement or tool rental store has the blower to rent, but it may be worth considering calling a professional for best result
Best For: Adding insulation to horizontal areas, as well as irregularly shaped or hard-to-reach spaces
Our Recommendation: Owens Corning 19 Fiberglass Blown-In Insulation at Lowe’s for $52.98
Owens Corning 19 Fiberglass Blown-In Insulation offers a minimum value of R-19, and is specially designed for attic applications.
4. Foam Board or Rigid Foam Panels

Whether it’s for insulating a floor or an unvented low-slope roof, foam boards and rigid foam panels can get the job done. They reduce the amount of heat conducted through wood, wall studs, and other elements that make up a home’s structure.
Many homeowners rely on this type of insulation—which is usually made of polyurethane, polystyrene, or polyisocyanurate—as part of both exterior and interior wall sheathing. Foam boards work well to insulate everything from foundation walls and basement walls to unfinished floors and ceilings. R-values typically vary between R-4 and R-6.5 per inch of thickness, indicating that foam boards and rigid foam panels reduce energy consumption better than many other types of insulation on the market.
Best For: Unfinished walls (such as foundation walls and basement walls), floors, and ceilings
Our Recommendation: Owens Corning FOAMULAR NGX F-250 at The Home Depot for $34.70
Owens Corning Foamular NGX F-250 comes in 4×8 sheets that are 2 inches thick to provide up to R-10 in insulation value.
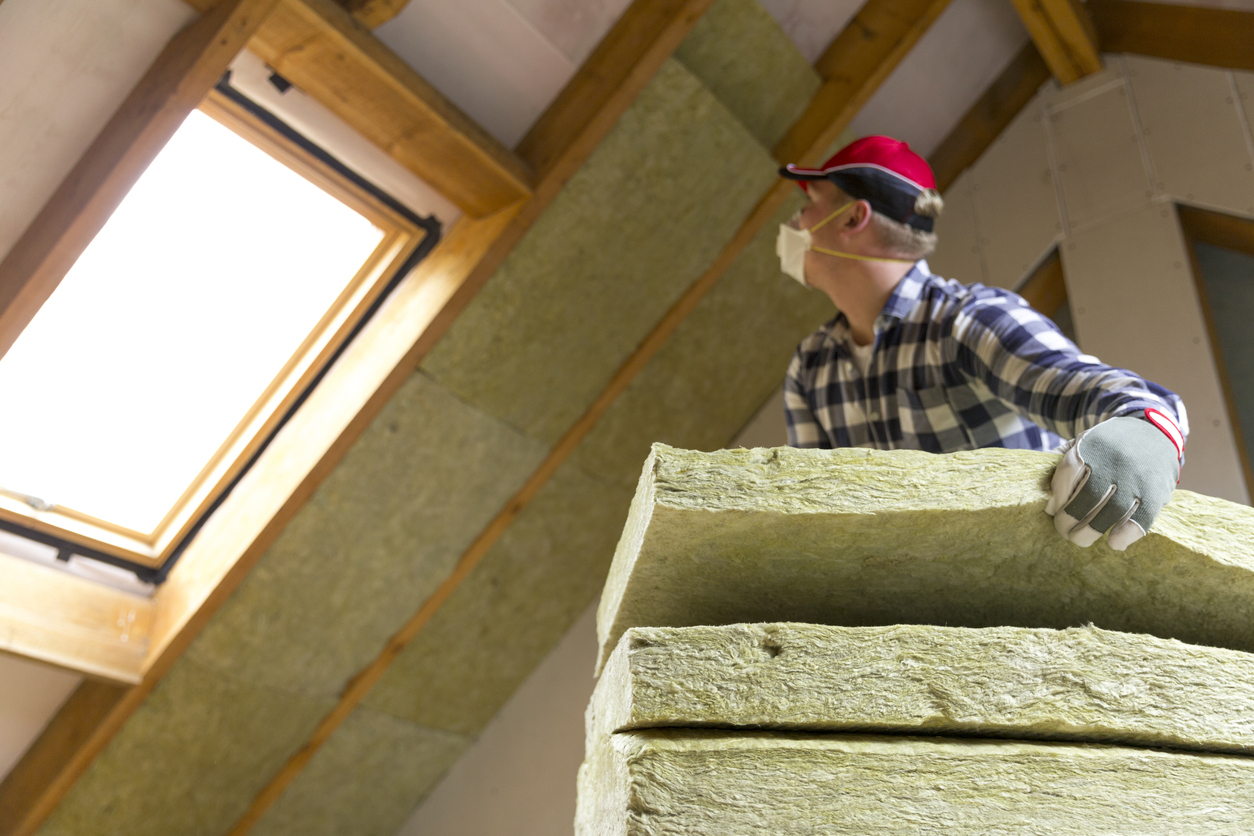
5. Rockwool
Rockwool, or mineral wool made from extruded lava rock, is a great insulation material for typical residential wood-framed structures. This material is made from lava rock which the manufacturer spins at high speeds, creating thin strands of material not unlike fiberglass. It insulates against heat transfer and sound, and it’s fire- and moisture-resistant.
Rockwool is more expensive than fiberglass, but it’s just as easy to install. It typically comes in rolls of batts in pre-cut widths for easy installation. It provides up to R-3.3 per inch of thickness, meaning it outperforms most other batts materials. It’s also suitable for floors, walls, and ceilings.
Best For: Floors, walls, and ceilings, especially when fire-resistance and noise-dampening is a concern
Our Recommendation: Rockwool R-23 Comfortbatt at The Home Depot for $59.33
Rockwool’s Comfortbatt provides an insulation value of R-23 for 2×6 walls, and the pre-cut widths make installation fast and easy.
6. Loose Fill/Cellulose
Loose fill insulation, also commonly known as cellulose, is a form of blow-in insulation used in attic floors and other horizontal structural spaces. Cellulose is typically made from recycled newspaper or denim. The manufacturer then sprays the cellulose with a chemical that keeps pests and bugs from burrowing through and making a home.
Usually, installers will blow cellulose into an open attic floor or similar space. But DIYers can also spread bags by gloved hands in small areas if necessary, as long as they fluff-up the settled cellulose to achieve the lofty texture. If it’s too compacted, it won’t insulate as well.
Best For: Attic floors
Our Recommendation: TAP EPA Registered Pest Control Blown-In Insulation at The Home Depot for $770.69/pallet
TAP’s Registered PEst Control Blown–In Insulation is made from cellulose and has an insulation range between R19 and R60.
7. Eco-Friendly Insulation Alternatives
Some eco-friendly alternatives have already been mentioned, but it’s a good idea to wrap them all up in one section: Recycled denim, sheep’s wool, cork, and cellulose apply, but so do man-made materials like polystyrene and Aerogel (a material consisting of more than 90 percent air).
It makes sense that recycled materials would be eco-friendly, but how do man-made materials fit the bill? The reality is that some of these insulating materials, like polystyrene and Aerogel, are so good at insulating that they make a net positive impact on the environment despite the manufacturing process or non-biodegradability. Keep in mind that many of these materials are expensive, so be ready to make a financial commitment if you want to keep up an eco-friendly lifestyle.
Best For: Eco-friendly wood-frame construction walls, floors, ceilings, and roofs
Our Recommendation: These specialty materials can be difficult to find, so it may be necessary to track down the manufacturer and custom order the product you desire. For recycled denim insulation, consider UltraTouch. To purchase sheep’s wool insulation, check out Havelock Wool that covers 100 square feet for $150. For more about Aerogel, head over to Aerogel.com.
RELATED: How Much Does Insulation Cost to Install?
Insulation for New Construction
Some insulation products aren’t designed for DIY installation, and are typically sourced from the manufacturer or local dealer for new construction projects. While you may not encounter the following types of insulation in your home improvement projects, it’s good to be aware of these options if you are planning to build a new home, accessory dwelling unit, or large addition.
8. Structural Insulated Panels
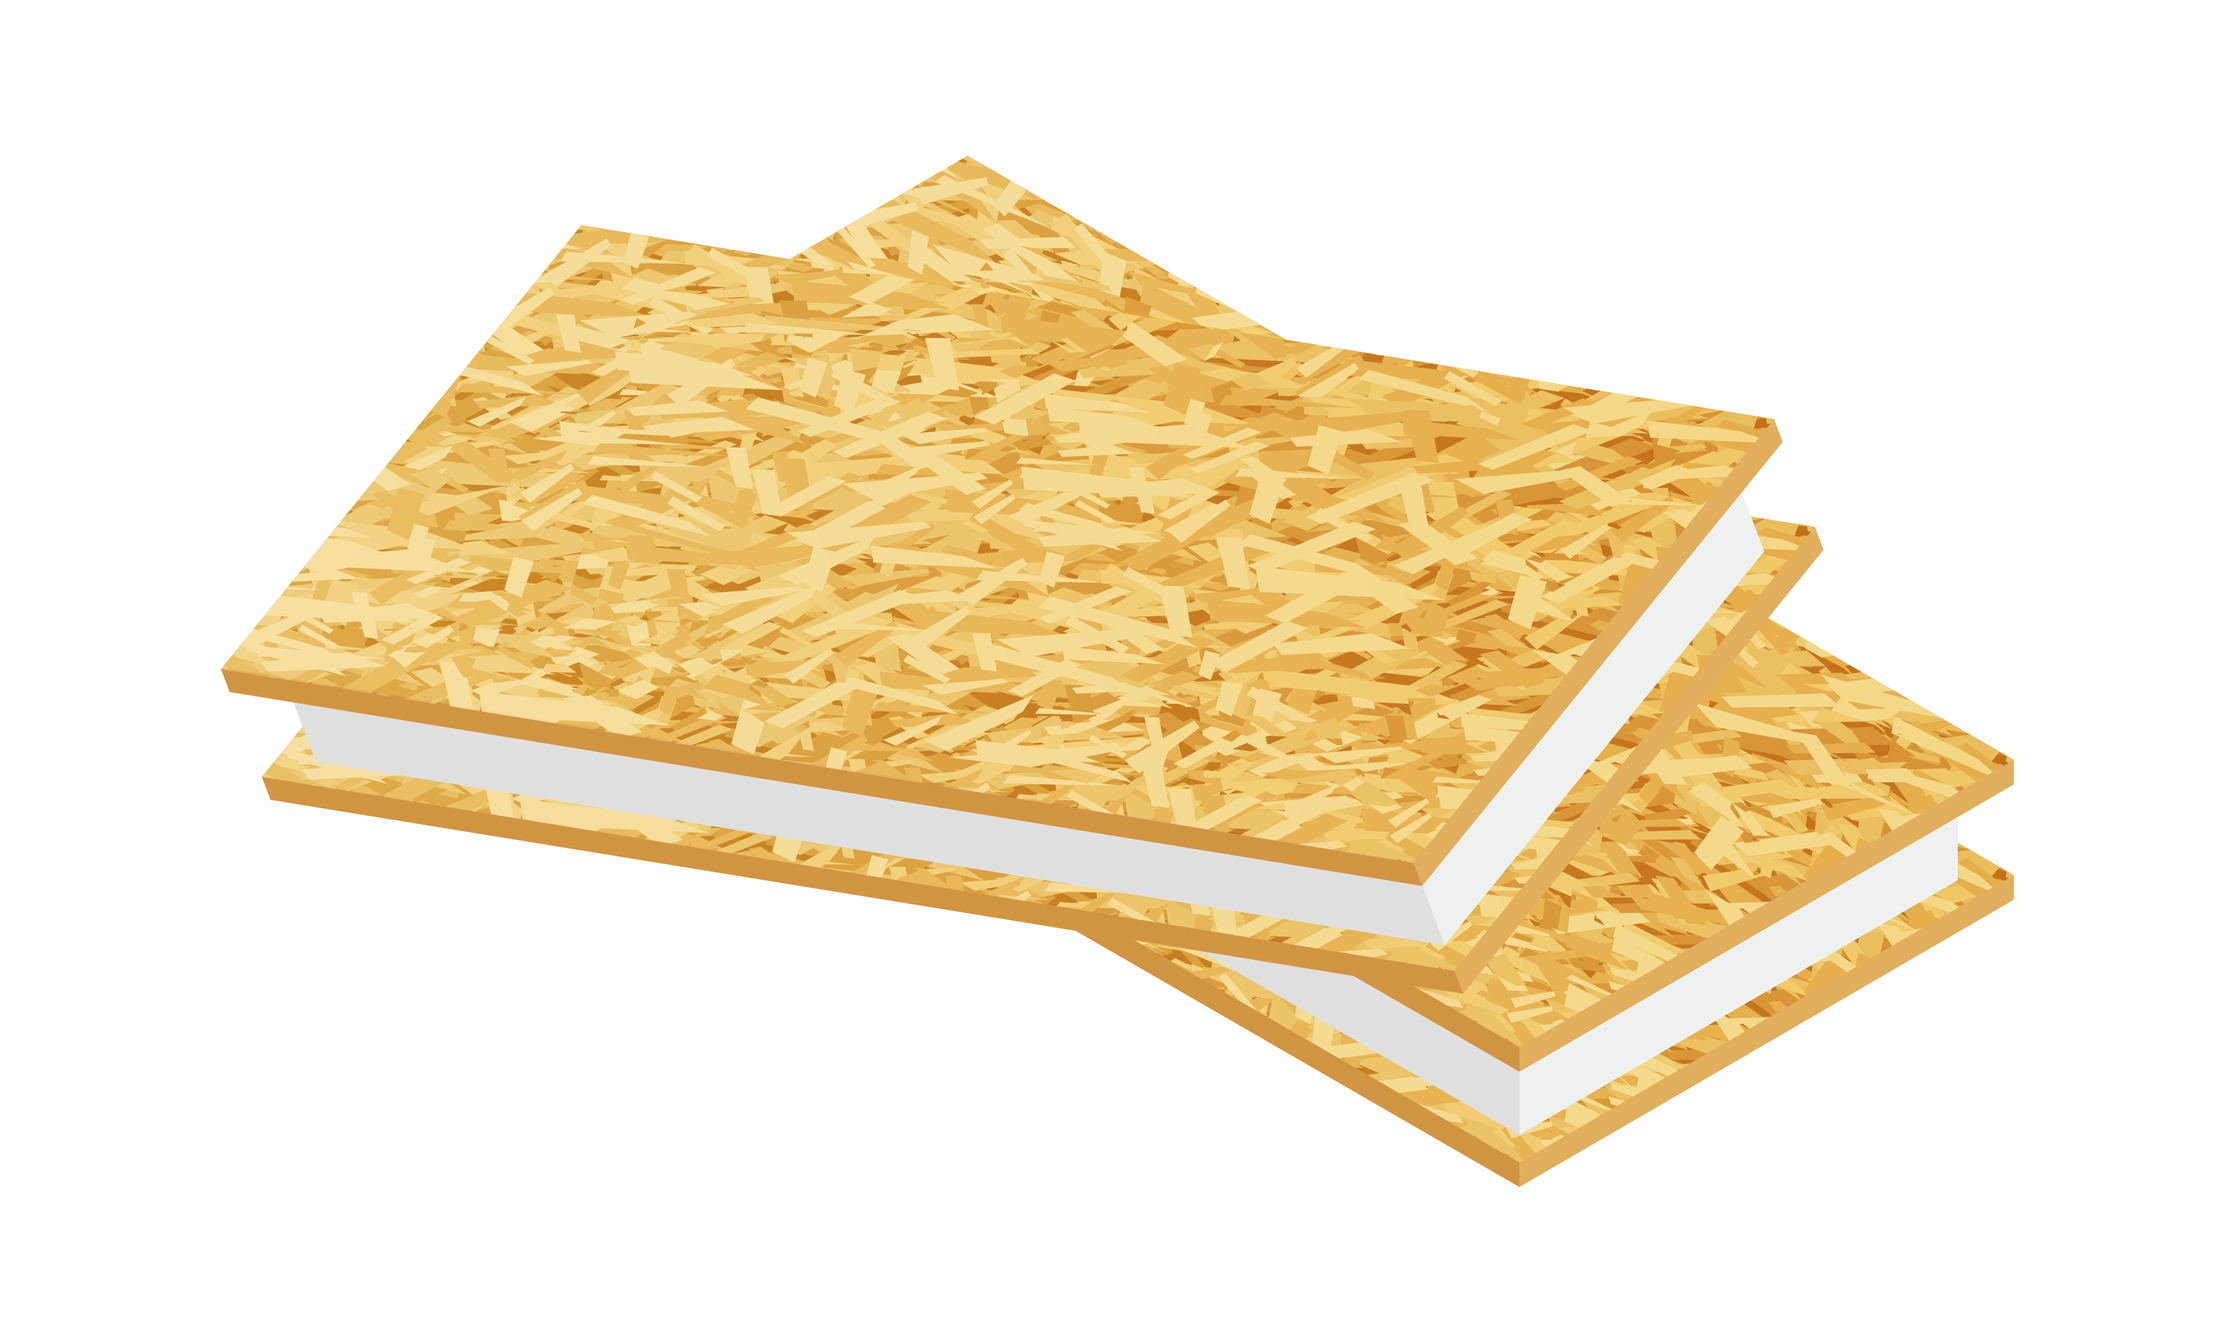
Structural insulated panels (SIPs) were a major advancement in post-and-beam and timber-framing insulation. These panels are essentially two pieces of OSB with a thick piece of foam in-between, and they provide strength and insulation for open wall space that might not otherwise have any. They feature tongue-and-groove connections, and installers can run electrical wiring, pipes, and other utilities through the foam.
SIPs are large and heavy, often requiring a crane to set them in place. However, a very experienced DIYer may find their installation manageable. They’re also built to order, so DIYers determined to install their own will have to contact a shop or retailer to place an order.
Best For: New construction or open walls in timber frame or post-and-beam buildings
Our Recommendation: Contact the Structural Insulated Panel Association’s member listing to find a local SIPS dealer.
9. Insulating Concrete Forms (ICFs)
For homeowners and builders tackling new poured wall construction, why not mix the building form and insulation into one product? Insulating concrete forms (ICFs) do just that, acting as both the forms to shape the concrete and the insulation for energy efficiency. There are essentially two reinforced foam panels with a gap between, and the concrete is poured into the gap to cure, while the foam remains in place for the life of the concrete wall.
The act of installing ICFs isn’t terribly difficult, but the forms themselves are quite expensive compared to reusable wood forms. But they provide an automatic vapor barrier, and if the homeowner is planning to use the area within the concrete walls as a finished space, the cost is worth it.
Best For: Poured concrete foundations and walls
Our Recommendation: ICFs aren’t readily available from most typical home stores, so DIYers looking to purchase a set for their project may be able to find a local seller at the Insulating Concrete Forms Manufacturer Association.
10. Concrete Block Insulation
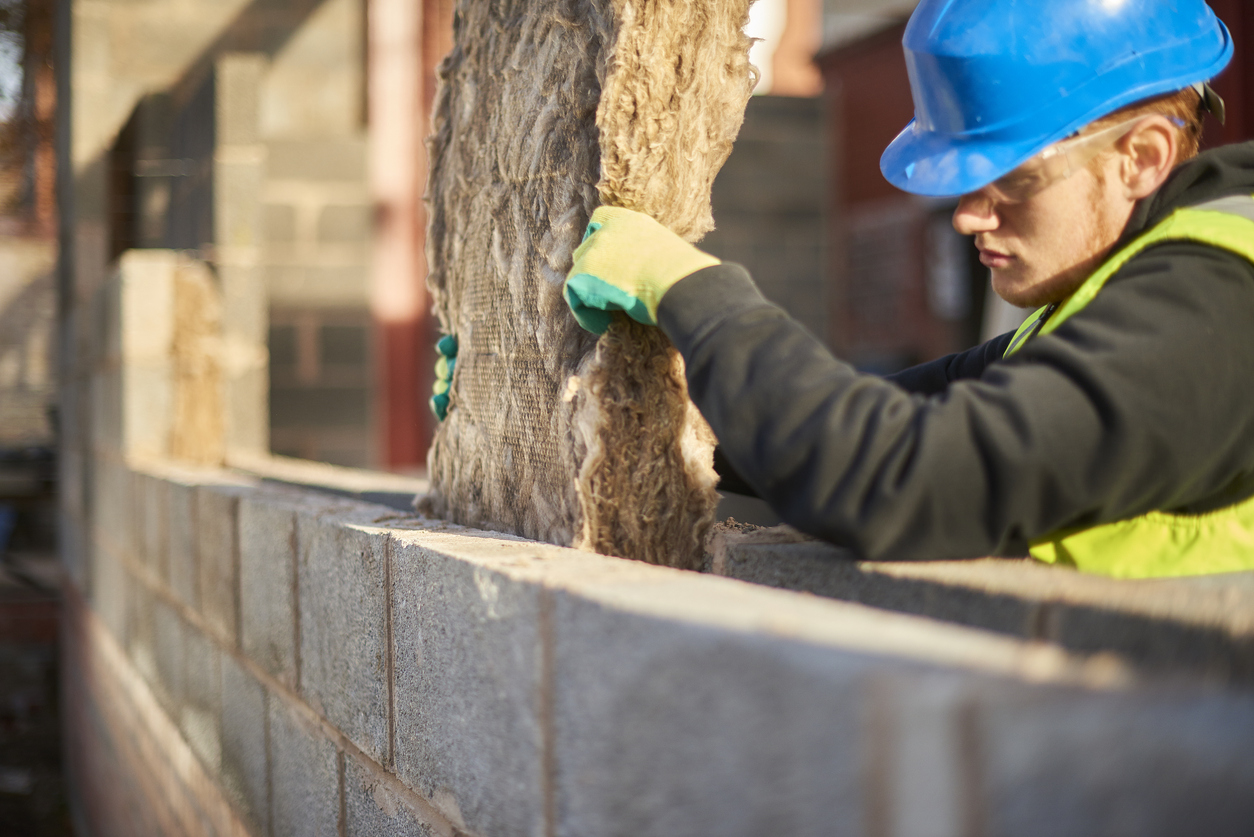
Believe it or not, it is possible to insulate a block wall from within. As long as the gaps within the concrete blocks are still accessible, stuffing the blocks with insulation can make a difference in the energy consumption, sound transfer, and comfort within the space.
Generally speaking, products suitable for concrete block insulation include spray-foam, loose-fill mineral wool, or polystyrene beads. These materials will travel to the bottom of the wall cavity and fill it up, reducing air and sound travel through the wall. There also are expanded polystyrene (EPS) blocks that are cut to fit inside the cavity of a concrete masonry unit (CMU). However, some of these products aren’t readily available, and the job is typically best left to a professional during the construction process.
Best For: New construction concrete block walls
Our Recommendation: Since concrete block insulation isn’t a DIY project, the National Concrete Masonry Association may be able to help connect you with a local contractor or dealer.
Barriers that Increase Insulation’s Effectiveness
Some insulation products are faced with a special barrier designed to decrease heat transfer into the home or reduce the amount of moisture entering the wall system. These barriers also are sold separately, and can become part of the home’s insulation system and help make a home more comfortable. While they can be used without insulation, they don’t take the place of traditional insulation.
RELATED: Faced vs. Unfaced Insulation: Which Is Best for Your Home?
Reflective or Radiant Barriers
Reflective or radiant barriers work differently than traditional insulation, and so this material’s effectiveness is not measured by R-values. While standard insulation reduces heat flow in a home, reflective insulation instead reflects the heat away from the home to prevent heat gain and radiant heat transfer to cooler surfaces indoors. The material is constructed using a reflective barrier (like aluminum foil) placed over a substrate material (like kraft paper or polyethylene bubbles). It can work with other forms of insulation, as a facing material.
Homeowners in warmer climates typically place reflective or radiant barriers in the attic between joists, rafters, and beams, since the attic is where most heat enters a home. Installation here, too, can be done without a professional.
Best For: Attics, unfinished walls, ceilings, and floors—especially in hot climates
Our Recommendation: US Energy Products (3MM Reflective Foam Insulation Shield on Amazon for $19.88
This affordable radiant barrier features two foil-faced sides and a closed-cell foam to provide insulation and fire resistance.
Vapor Barriers
Vapor barriers aren’t necessarily insulation, but many types of insulation require them to do their job properly. These impermeable vapor retarders reduce the amount of moisture from traveling through the exterior walls, helping prevent mold and mildew on the wall framing, drywall, or even the insulation facing. It’s required by code in many cases.
Typically used as sheets of plastic, vapor barriers can be coatings like paint or membranes made from metal, rubber, and other materials. While a vapor barrier won’t do much to prevent heat transfer, it can be effective at reducing vapor and air movement through the wall. And, since vapor barriers are usually just plastic sheets, many DIYers can easily handle the installation on their own.
Note: In the case of flooring underlayment, the underlayment material can act as a vapor barrier and can provide some degree of insulation, though it’s often not much.
Best For: Extreme climates and specifically concrete walls, floating floors, bathrooms, laundry rooms
Our Recommendation: MP Global Products 6 mil Polyethylene Film at The Home Depot for $14.70
MP Global Products’ 6-mil vapor barrier comes in easy-to-use rolls with adhesive strips, and can be installed quickly.
Final Thoughts
Choosing the best type of insulation comes down to several factors, but the tips and characteristics outlined above should help. Ultimately, the budget, the space that needs insulation, and the required R-value are usually the main determining factors, but eco-friendliness and ease of installation might factor in as well.
Whatever the chosen product may be, improving a home’s insulation is one of the most effective ways to make a home’s interior more comfortable, save a bit on the energy bill, and create a greener future.
FAQs About Different Types of Insulation
That’s a lot of information on the types of insulation available, but there might still be some questions floating around. The following aims to help, as it’s a list of answers to some of the most frequently asked questions about insulation.
Q. What is the best insulation for walls?
The best insulation for walls depends on many circumstances. However, for open walls where budget is not a concern, spray-foam insulation typically delivers the highest resistance of heat flow.
Q. What is the best insulation for exterior walls?
One of the best ways to insulate an exterior wall is to clad it with rigid polystyrene foam. This insulation can attach to a wall and hide under siding, or adhere directly to a concrete wall that is free of cracks or any signs of moisture.
Q. What does fiberglass look like?
Fiberglass insulation looks a lot like cotton candy. It’s made of tiny strands of fiberglass that create a pillowy, lofty appearance, though the fibers themselves are extremely itchy and irritating to skin.
Q. What is the most energy efficient wall insulation?
Closed cell spray-foam insulation is the most energy efficient wall insulation. Applications can reach much higher R-values for each inch of thickness than other insulation products, with values as high as R-6.2 per square inch (roughly R-34 on a 2×6 wall).