We may earn revenue from the products available on this page and participate in affiliate programs. Learn More ›
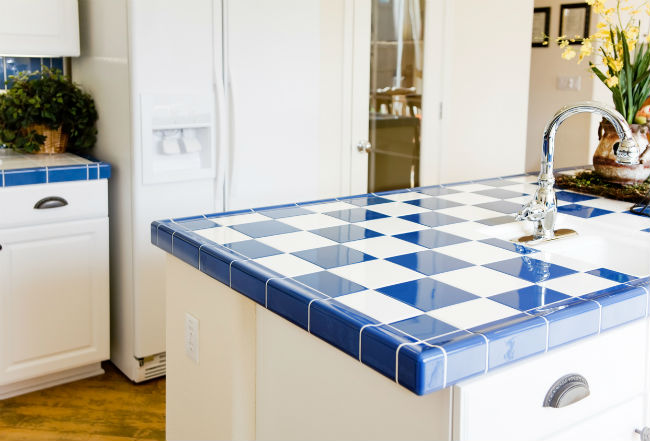
Unlike natural stone, laminate, or solid surface (made of mineral dust and resins), tile offers endless creative possibilities for your kitchen countertop—from simple square patterns to elaborate mosaics. Tile is also both do-it-yourself- and budget-friendly yet, as with any countertop material, has its own set of drawbacks. Keep reading for the 411 so you can make an informed decision for your kitchen remodel.
Types of Tile
While tile countertops have been around since the late 1800s, when the manufacture of ceramic tile began in earnest, they didn’t catch on until after World War II, when kitchens began to evolve in size and function. Tile countertops reached the peak of their popularity in the 1970s and 1980s, only to wane in favor of solid surface composite materials and the increased availability of natural stone slabs.
Today’s tile offerings include fired tiles, such as ceramic or porcelain, and tiles cut from larger stones, such as slate, travertine, and granite. There are also striking glass tiles on the market. And while tile is seen everywhere now—on floors, shower walls, even roofs—on kitchen countertops it serves not only as a design element but also as a surface for food preparation.
Pros and Cons
Depending on your needs and lifestyle, tile just might be the ideal countertop material for you.
PROS:
- Tile countertops can be installed by an enthusiastic DIYer who has some experience with tile-setting; slab countertops should always be professionally installed.
- Tile is heat resistant, which makes it a good choice next to a stove or oven. You can set hot pans right on the tile surface without fear of damage.
- Homeowners have an endless array of custom design options, based on a wide selection of colors, sizes, shapes, and the types of tile that are available.
CONS:
- While installing a tile countertop is not difficult, a novice DIYer can end up with a less-than-perfect surface. (See DIY Installation Tips, below.)
- Tile can chip if something heavy is accidentally dropped on the surface.
- Coffee, wine, and other spilled liquids can stain grout lines if the grout isn’t sealed regularly. (See Maintenance Matters, below.)
Countertop Costs
Tile can be a bargain, running on average between $2 and $3 per square foot for ceramic and porcelain tile. Stone tile, such as granite, slate, or marble runs $4 to $7 per square foot, while glass tile can cost up to $30 per square foot due to a multistep manufacturing process that often involves handcrafting by glass artisans.
RELATED: The Best Countertop Material for Every Type of Kitchen
The savings are even greater if tiles are DIY-installed. Professional installation will boost the price of ceramic tile countertops to $18 to $35 per square foot, $45 to $75 per square foot for natural stone tile, and up to $100 per square foot for glass. This is still less expensive than professionally installed slab countertops, which run between $100 and $185 for soapstone, $75 and $200 for granite, $80 and $155 for engineered quartz, and $85 and $125 for concrete countertops.
Design Decisions
The ability to create simple or elaborate motifs is one of tile’s big draws. Nowadays, more popular designs involve incorporating smaller tiles in rows between larger ones and extending the same tile design from the countertop to the backsplash for a continuous look. Different types of tiles can be used to achieve custom, one-of-a-kind designs.
- Ceramic and porcelain tiles come in a wide range of sizes and colors, from one-inch octagons to 12-inch squares, and an array of shapes and sizes in between. Rounded edge tiles are also available for creating a smooth, contoured countertop edge.
- Glass tile also comes in a large variety of colors and styles and brings a translucent gem-like quality that’s truly stunning. But glass tile is fragile and most prone to chipping, one reason it is more commonly used as a backsplash than a countertop.
- Stone tiles, such as travertine, slate, and granite, add a natural touch to the kitchen or bathroom. Most stone tiles are available in squares or rectangles from four to 12 inches in size.
DIY Installation Tips
You can save major money by installing tile countertops yourself, but if you’ve never worked with the material before, try to observe the process in person before you tackle your own project. Alternately, a YouTube search will pull up a number of tile-installation videos that can be very helpful. While every job is different, based on your counter configuration and the type of tile you choose, the following tips will help you get started on the right foot.

- Use the right substrate. Don’t lay tile over a plywood base. Grout (and some types of tile) absorb moisture, which will seep down and dampen the plywood, eventually causing it to delaminate and swell, which can lead to tiles heaving and popping. Use only tile backer board as a substrate to prevent this problem.
- Use a commercial tile wet saw. A good tile saw can make the difference between smooth, clean cuts or the chipped edges that can occur when you manually score and snap the tiles. Glass tile especially has a tendency to chip or scratch if not cut precisely, and a highly visible countertop is no place for poorly cut tiles. You can rent a tile wet saw for between $45 and $60 per day from a construction rental store.
- Make a dry layout on your counter. A dry layout means positioning every piece of tile before you actually start installing with adhesive. Think of it as an essential trial run.
- Use plastic tile spacers to achieve uniform joints between the tiles. Tile spacers are inexpensive and available in sizes between 1/16-inch and 1/4-inch so you can create a professional look no matter what your design.
- Arrange the cut ends of the tiles against the back of the countertop. Tiles come with smooth factory edges but after you cut one, the edge will be sharp. Position whole tiles, whenever possible, at the front and center of the countertop, and reserve cut tiles for the back edge. The backsplash will cover the cut edge.
- Only use the adhesive recommended by the tile manufacturer. Porcelain, for example, requires the use of porcelain adhesive, while thinset adhesive can be used for ceramic and natural stone tiles. Always read and follow the adhesive requirements of the manufactures.
- Use the correct trowel to spread adhesive. The tile manufacturer will specify a specific size of notched trowel. The notches let you spread a uniform base, which will ensure that the surface of your tiles is flat and even. Be particularly careful about even spreading of adhesive when laying translucent glass tiles—any irregularities will show right through.
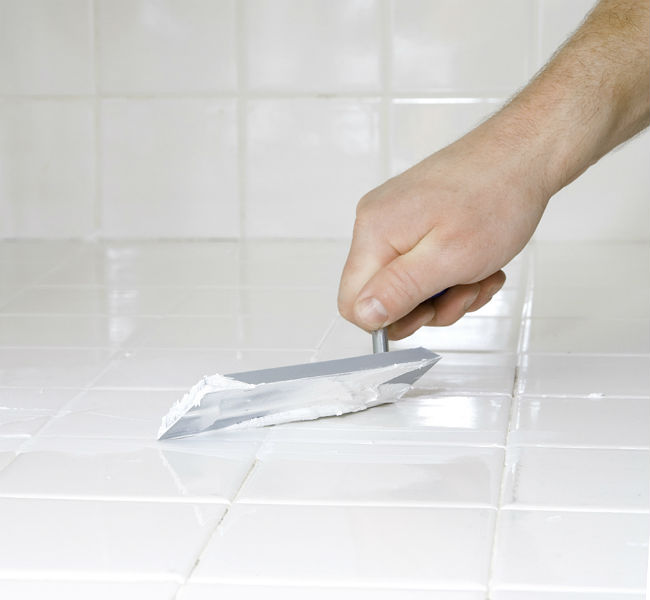
- Use the right grout. When installing ceramic, porcelain, or stone tiles, use sanded grout for joints that are 1/8-inch wide, or wider. Use unsanded grout for joints narrower than 1/8-inch wide. For glass tiles, use only grout that’s recommended by the manufacturer. Also, it takes at least 24 hours for tile to set, so be sure it has dried completely before grouting the joints.

Maintenance Matters
Tile countertops are relatively easy to maintain, but they do require a minimum of care and upkeep to retain their good looks.
- Wipe down the countertop after meal preparation with a damp sponge or washcloth. Use an all-purpose kitchen cleaning spray when necessary to remove stubborn grease or grime.
- Avoid using acid-based cleaners such as vinegar or commercial cleaners that contain mineral acids. These can damage the surface of stone tiles and may remove the sheen from porcelain, glass, or ceramic.
- Use a small brush (an old toothbrush works well) to scrub away food deposits on grout lines.
- Seal grout lines at least once a year with an interior grout sealer that is compatible with the type of tile on your countertops. Pigmented sealers can stain natural stone tiles.
- Stone tiles are porous and should be sealed once or twice a year to protect them from staining.
- Wipe up spills promptly. Because grout—and some types of tile, such as stone—are porous, they can absorb liquid and remain damp, increasing the risk of mold or mildew growth.
