DIY Furniture & Design

These 10 Sturdy Furniture DIYs All Share 1 Secret Ingredient

You can build seating, storage, accent pieces, and more with a little ingenuity and a bag of concrete. This content has been brought to you by Quikrete. Its facts and opinions are those of BobVila.com.

We may earn revenue from the products available on this page and participate in affiliate programs. Learn More ›

Start with the Right Supplies

istockphoto.com

So, you’ve crafted a few small projects for your place and are eager to join the DIY big leagues and make yourself some serious furniture. Lucky for you, creating custom home furnishings doesn’t always require heavy-duty power saws and sophisticated woodworking equipment. In fact, you can build striking, solid pieces using a handful of fairly basic supplies—things like buckets and wheelbarrows—along with a versatile and durable material: concrete.

Yep, tables, benches, and even a beautiful addition to the bathroom can take shape from mixed concrete. As you’ll see here, devotees of Quikrete Cement & Concrete certainly create amazing stuff, and their professional-looking results belie how easy and fun the projects can be. So, whether you want some new surfaces for entertaining (indoors or out), need inventive storage solutions, or just feel like fashioning some functional furniture, get clicking for inspiration on how you can kill it with concrete!

Rack to Nature

quikrete.com

This shelf design—a union of sleek slabs and wooden stems—was inspired by city sidewalks and the trees that rise above them to bring a bit of nature to the urban jungle. Once you decide what size shelves will best suit your shoes and your space, build a boxy mold out of laminate or melamine and fill it with Quikrete’s Fast-Setting Concrete Mix. The legs can be attached with epoxy after the concrete cures: Cut tapered legs in the wood of your choice—these are red oak—and finish with tung oil for a warm glow.

Rough Cut

quikrete.com

For an inventive twist on the traditionally smooth concrete surface, this DIYer opted to show off the interesting insides of the material on this shelf support. To expose the raw, textural beauty, vertically cut a slab of Quikrete Concrete Mix (which has a nice mix of aggregate), using a circular saw with a diamond blade. Don’t worry about getting a clean edge—the irregularity is part of the piece’s rugged charm! Square shelves of warm dark wood add just the right contrast.

Sink Out of the Box

quikrete.com

A repurposed sewing machine base topped with a rugged concrete basin lends powerful steampunk appeal in a bathroom of any size. The DIYer fashioned a custom-made form for the basin, but you can find ready-made polyurethane rubber sink molds of various shapes and sizes for purchase online. The next step was to prepare and pour high-strength Quikrete Countertop Mix into the mold. Once the concrete cured, it was smoothed and sealed to make the basin water and stain resistant.

Living on the Edge

quikrete.com

Concrete makes a dramatic foil for live edge wood in these circular tabletops. The key to combining these materials successfully? First, protect the naturally porous wood with several coats of polyurethane—this prevents moisture from wet concrete from soaking in. Then, set the two shaped, sanded, and sealed pieces of log in a round mold (think springform pan) with the live edges facing inward. Two metal bars inserted between the wood pieces, as well as a sheet of mesh rebar, hold it all together before Quikrete’s Fast-Setting Concrete Mix is poured in the center.

Marble Magic

quikrete.com

Even without color, cool gray concrete mimics stone, but if you go above and beyond like this DIYer did, you can make it look as polished as a pricey marble accent from a design store. In this elegant table lamp, concrete’s gritty edge gets tamed, thanks to a marbleizing paint technique. A plastic spaghetti canister serves as the mold, with a piece of PVC piping centered inside to create space to thread wiring through the lamp base. Pour Crack Resistant Quikrete Concrete into the mold, tapping gently to banish air bubbles. After painting the cured base white, mix a darker shade of acrylic paint with marbleizing medium, and spoon it over the finished product, tilting the base as you apply the second tone to create the subtle yet stunning two-tone swirl.

Why Weight?

quikrete.com

Getting pumped up has never looked so good, and your at-home weight system has probably never been as sturdy as this one that was assembled with concrete. Here, laminate shelf boards are used to create two molds, one for each side of the bench base. The concrete supports cleverly let the structure double as a 100-pound barbell, thanks to the one-inch iron pipe that connects them. Mix up some Quikrete 5000 and pour it into the molds, using a stick to push the mixture all the way to the bottom of each mold. While the base cures and you count down to your new training plan, create a bench from layers of ¾-inch plywood that has been cut, glued, and sanded. Now get down and give us 20!

Nesting Instinct

quikrete.com

Short on space, but not on chic? Mold these tiny nesting tables using Quikrete Countertop Mix and a form fashioned from—yes, really!—Lego bricks. Build the form piece by piece to your desired dimensions, adding small base plates to the bottom for easier removal. Fill the form with Quikrete, level and smooth the top, and once the table has cured, lose the Legos. (They can be washed and reused for future projects or play!) Sound too easy? Check out the video tutorial here.

Block Party

quikrete.com

Your patio is bound to become far more popular with an outdoor bar built from dry-stacked cinder blocks and a concrete countertop. Make sure the first course of your blocks is level and aligned, then build up in a running bond pattern. For a strong, fiberglass-reinforced stucco finish, mix up some Quikwall (throwing in a bit of Liquid Cement Color just for fun), and then apply with a trowel. For the top, make a melamine form, fill it three-quarters of the way with Quikrete Countertop Mix, add metal mesh for reinforcement, and then fill the mold the rest of the way. Knowing how well concrete performs on other exterior surfaces, you can rest assured that it will stand up to all the lively outdoor bashes in your future.

Cool Stool

quikrete.com

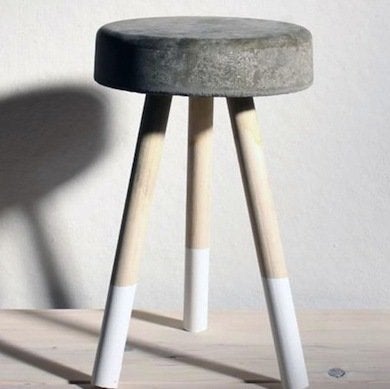
If you’ve ever fallen right through a wooden, wicker, or fabric seat, you know the painful consequences of a weak frame. Cured concrete, on the other hand, will never let you down that way. All it takes to create a concrete stool that’s as dependable as it is cool is an old bucket, three 16-inch dowels, and a bag of Quikrete 5000. No need to make a mold: Just fill the bucket with three inches of mix, add water, and—once the concrete has settled—stick in the dowel legs, taking care that they’re evenly spaced. Let the stool cure for a good 20 hours, then bend the bucket outward several times in all directions and slide out your brand-new seat. (Do let the seat complete the curing process before pulling it up to a table, though.)

Bench Beauty

quikrete.com

Nothing compares with outdoor seating that’s stylish and weather resistant. This easy-build modern bench combines warm wood and cool concrete in a design that will last outdoors for years to come. For the bases, build two forms out of 2x4s and 2x6s, then fill with Quikrete 5000. While the concrete is curing (give it three full days), dig two holes about 10 inches deep, adding ample gravel for stability, then wheel over the bench bases and put them in place. A trio of sanded 4x6s make up a perfect seat. Watch the full how-to here, and maybe even go on to build a matching fire pit.

For more ideas on how to harness the power of concrete as furniture, home accessories, and beyond, check out this year’s One Bag Wonder Contest entrants in Quikrete’s annual Concrete Coffee Table Book.