We may earn revenue from the products available on this page and participate in affiliate programs. Learn More ›
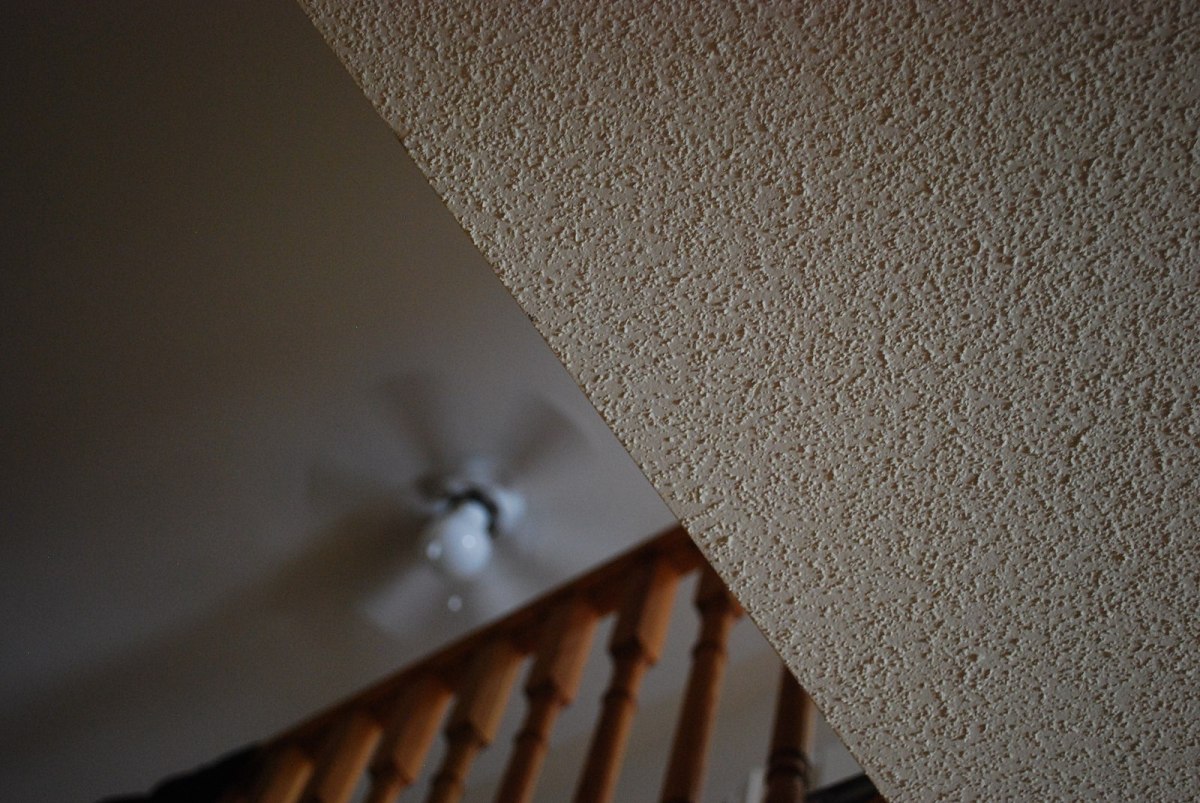
From the 1950s through the ’80s, the ceilings in many new homes were finished with a rough, stippled texture that became known as a “popcorn” finish. Proponents touted the sound-dampening properties of popcorn ceilings, and professional builders liked using them because they hide surface imperfections better than their smooth counterparts. Nowadays, popcorn ceilings date your space 50 years—and not in a chic, mid-century modern way—like nothing else. Another downside of popcorn ceilings (apart from being just plain ugly, that is) is that they don’t reflect much light, and cast a dreariness to a room even when the curtains are open.
If you’d like to get rid of a popcorn ceiling and bring your home into the 21st century, you have a couple of options: One, you can remove the popcorn texture and refinish the ceiling. This is not a difficult task, though it is a labor-intensive and extraordinarily messy one. Two, you can cover the eyesore overhead with planks, tiles, or other materials. Ahead, learn how to remove popcorn ceilings and give your space a brand-new look.
Before You Begin

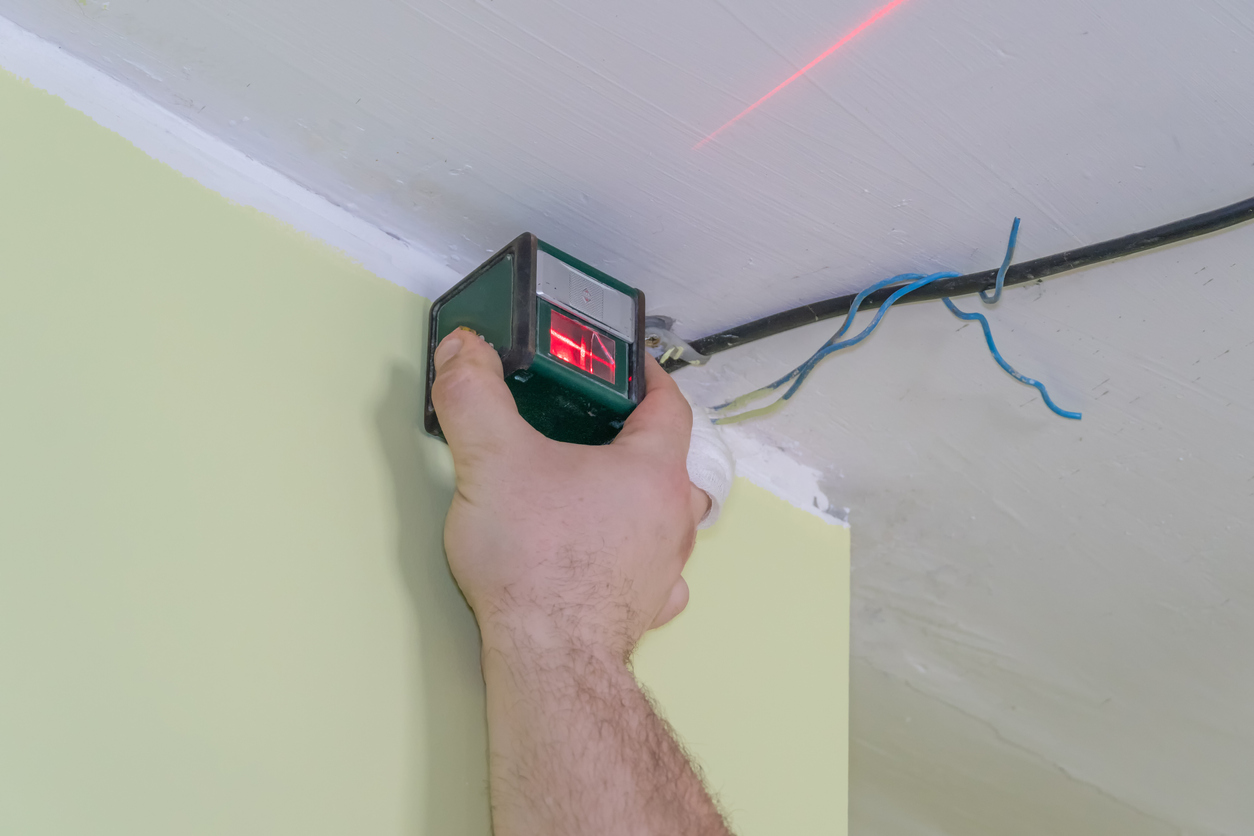
Before you start laying drop cloths and dreaming about smooth ceilings, your first order of business is to test the ceiling for asbestos. Why? Asbestos is a known carcinogen that was widely used in home construction until the EPA began banning its use in the mid-1970s. If you have a textured ceiling and your home predates 1978, the year in which the EPA banned spray-on surfacing materials that contain asbestos (including the sprays that gave popcorn ceilings their bumpy textures), there’s a fair chance that there’s a carcinogen lurking overhead. Sending a sample of your ceiling to the EPA-certified laboratory listed on your asbestos test is the only sure way to know where you stand.
How to Test for Asbestos in a Popcorn Ceiling
Though the collection procedure will vary depending on the asbestos test kit you use, the general method for how to test for asbestos is as follows:
- Close windows and turn off air conditioning, fans, and anything else that might circulate air in the room.
- Don your PPE, including long pants and sleeves, shoe covers, disposable gloves, and a face mask.
- Lay plastic sheeting in the work area to catch any asbestos that might be disturbed during collection.
- Use pliers, a utility knife, or other tools recommended in the collection kit to collect a sample of the popcorn ceiling. Mist the sample with water to settle any disturbed fibers.
- Package your sample in the container provided in test kit.
- Send the asbestos test kit to the lab and wait approximately 3 to 5 days to receive results on your sample.
If an at-home test reveals that your popcorn ceiling does contain the carcinogen, you have two choices: Leave the ceiling be—asbestos is relatively harmless if it is left undisturbed—or call in a professional asbestos abatement company. The health cost to scrape popcorn ceiling containing asbestos far outweighs the money you’d save by doing this project yourself.
If the test indicates that your ceiling has a paper-based popcorn treatment, you can handle the textured ceiling removal yourself. Because the process involves water, you’ll first want to cut electrical power to the room where you’ll be working. Don your dust mask and safety goggles, and you’re ready to begin.
SUPPLIES
Dust mask
Safety goggles
Masking tape or heavy-duty painter’s tape
Plastic sheeting
Putty knife
Ladder
Garden sprayer
Metal file
Paint
STEP 1: Prepare the room.
Removing a popcorn ceiling makes a big mess. Properly preparing the room beforehand, however, can minimize the amount of cleanup you’ll have when the project is complete:
- Remove all furniture from the room.
- Cover the floor and the lowest 16 inches of each wall with thick plastic sheeting.
- Use heavy duty painter’s tape or masking tape to secure the sheeting in place.
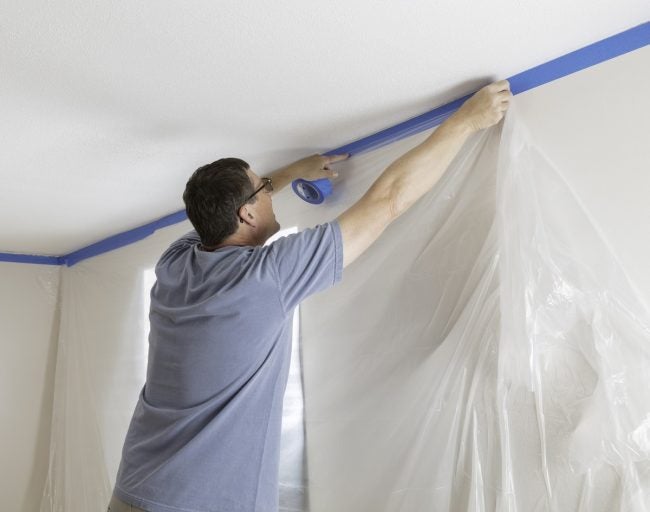
Upper walls have to be protected from the mess, too. Here’s the process to follow:
- If there’s a ceiling fan, medallion molding, HVAC vent or hanging light fixture in the room, you’ll need to remove them before removing the popcorn—it’ll be hard to work around otherwise, and the job could take longer than planned.
- Apply a strip of tape around the perimeter of the room, ¼ inch below the ceiling.
- Fasten plastic sheeting to that initial strip by means of an additional layer of tape.
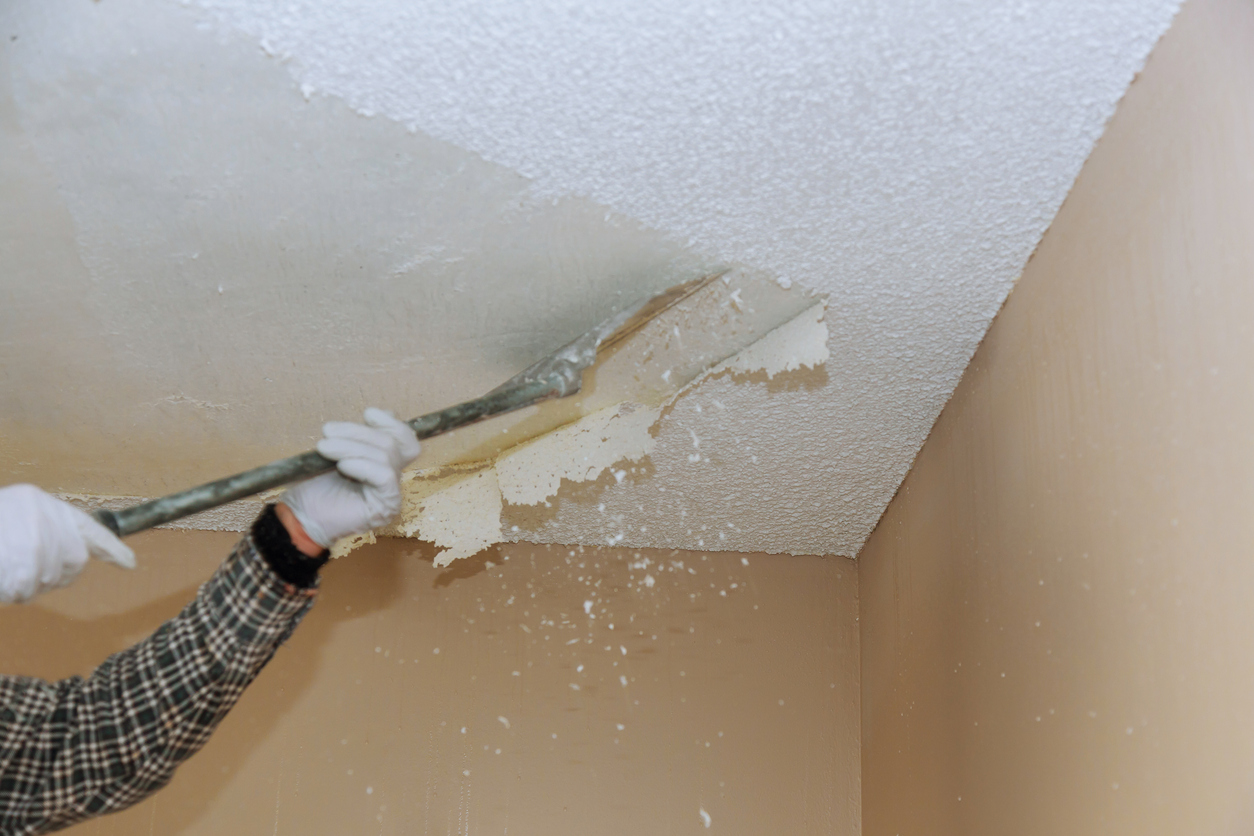
STEP 2: Moisten, then scrape, the ceiling in sections.
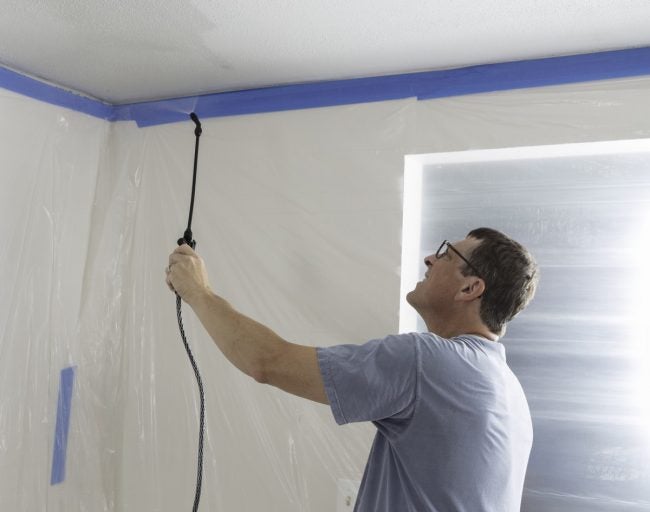
Divide the ceiling into 4-foot by 4-foot sections. With a garden sprayer, thoroughly moisten the initial section, letting the water soak in for 10 or 15 minutes. Position the ladder under the moistened section, Holding a putty knife at a 30-degree angle to the ceiling, start scraping the popcorn away. The method is to spray, wait, and then scrape. In this manner, work your way around the room, one section at a time.
STEP 3: Prime and paint the ceiling (optional but recommended).
Continue until you have removed the popcorn ceiling to reveal the drywall underneath. Given that you’ve put so much work into preparing the room, covering the walls and floor with plastic sheeting, now’s the time to prime and paint the ceiling if you plan on doing it. Wait until the final coat has dried before removing the sheeting.
STEP 4: Reinstall ceiling fixtures and restore power to the room.
If you’re reinstalling a ceiling fan, enlist an assistant to help you bear its weight while reconnecting it. Turn the power back on to the room.
How to Cover Popcorn Ceiling With Tile

Although scraping is an effective way to get rid of a popcorn ceiling, the mess of popcorn removal can be more of a hassle than some DIYers are willing to undertake. Another option to consider is to use decorative glue-up tiles to cover up the popcorn (pictured here are Lilies and Swirls Glue-Up PVC tile). These tiles are generally made from polystyrene, PVC, or tin, and are fairly easy to cut and install.
SUPPLIES
Decorative ceiling tiles
X-Acto knife, utility knife, or hand saw
Construction adhesive
Latex caulk
STEP 1: Determine how much tile you need.
Calculate the number of ceiling tiles needed to cover the ceiling by multiplying the length times the width of the room, and then dividing the total area by the size of the tiles. It’s a good idea to order 10 to 15 percent more material than you think you’ll need, to account for breakage and waste.
STEP 2: Plan the layout of the tiles.
You want your tiled ceiling to look symmetrical, and slivers of tiles on one side of the room and full-sized pieces on the other will make your space look out of whack. For a professional-looking job, first find the center of the ceiling, and mark your starting point with chalk lines. Use an X-Acto knife or hand saw to trim the tiles to the sizes you need.
STEP 3: Glue the tiles to the ceiling.
Apply construction adhesive around the perimeter of the back of each tile in turn, and then dab a few dots of adhesive in the middle of the tile. One by one, press the tiles onto the ceiling, ensuring that they sit flush next to each other. Depending on the type you use, it may be helpful to hold the tiles in place at the seams with masking tape as the adhesive dries.
STEP 4: Caulk the ceiling perimeter.
Fill in any gaps or edges around the perimeter of the room with a latex caulk such as DAP Kwik Seal adhesive caulk.
How to Cover a Popcorn Ceiling with a Plank Ceiling
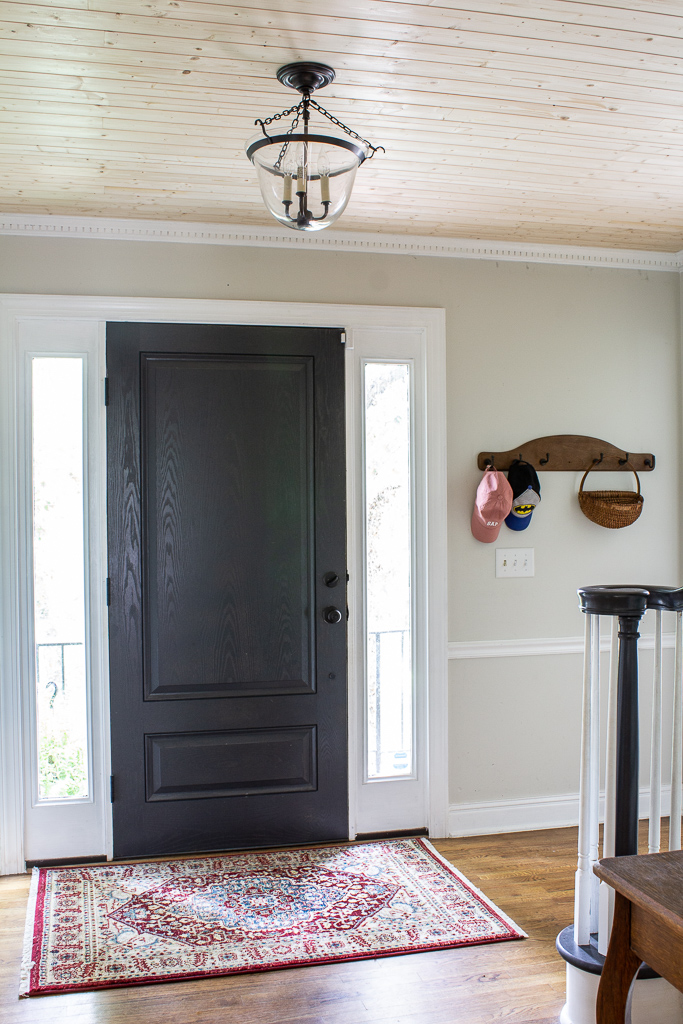
If you’ve updated your floors, furniture, windows, lighting, and everything else and your tacky, textured ceiling is the only thing standing between you and a chic abode, there’s yet another way to fast track removing popcorn ceilings from your life: planking over them. We’ve heard of homeowners using materials like plywood and beadboard, but you can also use tongue-and-groove planking, like this planking from Design Innovations, as blogger Sincerely, Marie did.
Although this project requires some patience and the help of a DIY partner, the results are worth it. (When shopping for planking, be sure to buy 10 to 15 percent more product than you need to account for waste.) This is how to get the planked-ceiling look in your own home.
SUPPLIES
Stud finder
Chalk line
Circular saw (optional)
Miter saw (optional)
Finish nailer
Wood planks
Construction adhesive
2-inch finish nailer nails
Sandpaper
Primer (optional)
Paint (optional)
Stain (optional)
Wood conditioner (optional)
Paint supplies (optional)
STEP 1: Use a stud finder to identify the ceiling joists.
You’ll be attaching the planks to ceiling joists, so you’ll need to start by marking their location using a stud finder. Stretch a chalk line along to identify each ceiling joist. The chalk line will serve as a guide when it’s time to attach each board to the ceiling using your nail gun.
STEP 2: Determine the direction in which you’ll lay the planks.
You’ll need to lay the planks perpendicular to the chalk line, so that each plank can be nailed into a joist. If the ceiling area you’re covering is small, you may be able to lay the planks side by side without staggering them. If the room is large, you will want to stagger the planks so the joints do not all end up on the same wall.
As you go, you’ll need to cut boards to size to account for the room’s HVAC vents, light fixtures, and ceiling fans using either a circular saw or chop saw. When you’re cutting your boards, take into account the size of the vent covers and fixtures. When cutting around a vent, make sure the hole you create matches the size of the vent cover. If you’re cutting around an electrical fixture, make the hole big enough to account for the electrical box but not so large that the fixture doesn’t completely cover the hole when you reinstall it.
STEP 3: Apply adhesive to the back of each of the wood planks.
You’ll be using physical nails to attach the boards to the ceiling joists; however, you’ll also want to add liquid nails to each board just before installing them to make sure they stay put. Test fit each plank before adding the glue to make sure it fits well with the adjacent plank.
Apply a single line of glue in an S-pattern over the entire length of the board. Since the glue isn’t the primary thing holding the planks to the ceiling (the nails are), there’s no need to go overboard with the glue. Applying too much will cause it to squeeze out the sides, creating a mess you’ll have to clean up.
STEP 4: Nail the planks into the ceiling joists with a nail gun.
Since you’ll be adhering the planks to the rough ceiling texture, not directly to smooth drywall, you’ll need to use nails to secure the planks in the ceiling and ensure they stay in place. Using the nail gun, apply two nails at each point a plank crosses a ceiling joist. Remember, you’ll be nailing through the popcorn coating and 3/4-inch thick drywall, so you’ll need to use 2-inch finish nails to ensure the nail bites into the joist enough to hold the plank to the ceiling.
Make sure to adjust the depth setting on your nail gun so that the head of the nail ends up just beneath the surface of the plank but no deeper. If you don’t drive the nails in deep enough, you won’t be able to hide the heads later. If you drive the nails in too deep, they may push through the thin plank and fail to secure it in place.
STEP 5 (optional): Paint or stain your wood ceiling.
This step is optional, because natural wood looks great on its own. You can also paint the ceiling planks after you install them, but painting them beforehand is (literally) less of a pain in your neck. If you choose to paint or stain the planks, begin by lightly sanding the boards with 150 to 220 grit sandpaper. Next, if you’re painting the boards, first coat them with a quality primer. If you want the ceiling to be more noticeable, go with a semi-gloss finish. For a more nuanced look, go with eggshell.
If you choose to stain the ceiling, apply wood conditioner first to ensure you get an even finish. For best results, use an oil-based stain.
Final Thoughts
There’s more than one way to deal with a popcorn ceiling. If you don’t mind the mess of popcorn ceiling removal and want the smooth look of painted drywall when you’re done, then follow the above steps for how to remove a popcorn ceiling. Make sure to test your ceiling for asbestos before embarking on this option.
If you’re after a more decorative ceiling or are concerned about asbestos, you can leave the popcorn ceiling in place and instead cover it with either ceiling tile or wood planks. Just keep in mind that the expense of the planks or tiles will increase the cost of the project.
FAQs
Below, find out more about the hidden danger of asbestos that might be lurking in your popcorn ceiling and learn which asbestos removal method is cheapest.
Q: When did they stop using asbestos in popcorn ceilings?
The Environmental Protection Agency banned spray-on building materials that contain asbestos in 1978. However, companies were still allowed to use asbestos through their current supply of the product, which means it was still being used up through the mid 1980s. If your home was built from the 1950s to the 1980s and has a popcorn ceiling, there’s a very good chance that it contains asbestos.
Q: What does asbestos popcorn ceiling look like?
Since asbestos fibers are practically invisible, it’s nearly impossible to identify an asbestos popcorn ceiling from a non-asbestos one simply by looking at it. The best way to determine if the popcorn ceiling in your home has asbestos is to take a sample of it and send it off to an EPA-certified laboratory.
Q: What is the cheapest way to remove popcorn ceilings?
The cheapest way to remove a popcorn ceiling is to take on this project yourself. According to HomeAdvisor, the average cost to remove a popcorn ceiling is $1 to $2 a square foot if you pay a professional to do it. You can expect to pay around $1,927 to remove a popcorn ceiling, depending on the size of the room.