We may earn revenue from the products available on this page and participate in affiliate programs. Learn More ›
In a standard, single-pole switch, one light switch controls one light fixture—on/off. Things get a bit trickier with 3-way switch wiring, in which there are two switches and one light. When you understand how electricity travels in this type of circuit, however, they start to make sense.
While installing new electrical wiring should almost always be done by a licensed electrician, DIYers can successfully replace old switches with new switches, if local codes allow. Replacing a 3-way switch is a straightforward task, but it is more involved than replacing a single-pole switch. If you’re contemplating such a replacement, you should have a working knowledge of switch wiring. If you’re not comfortable replacing a switch, call an electrician.
Don't want to do it yourself?
Connect with a qualified local pro today and get free, no-commitment estimates for your project.
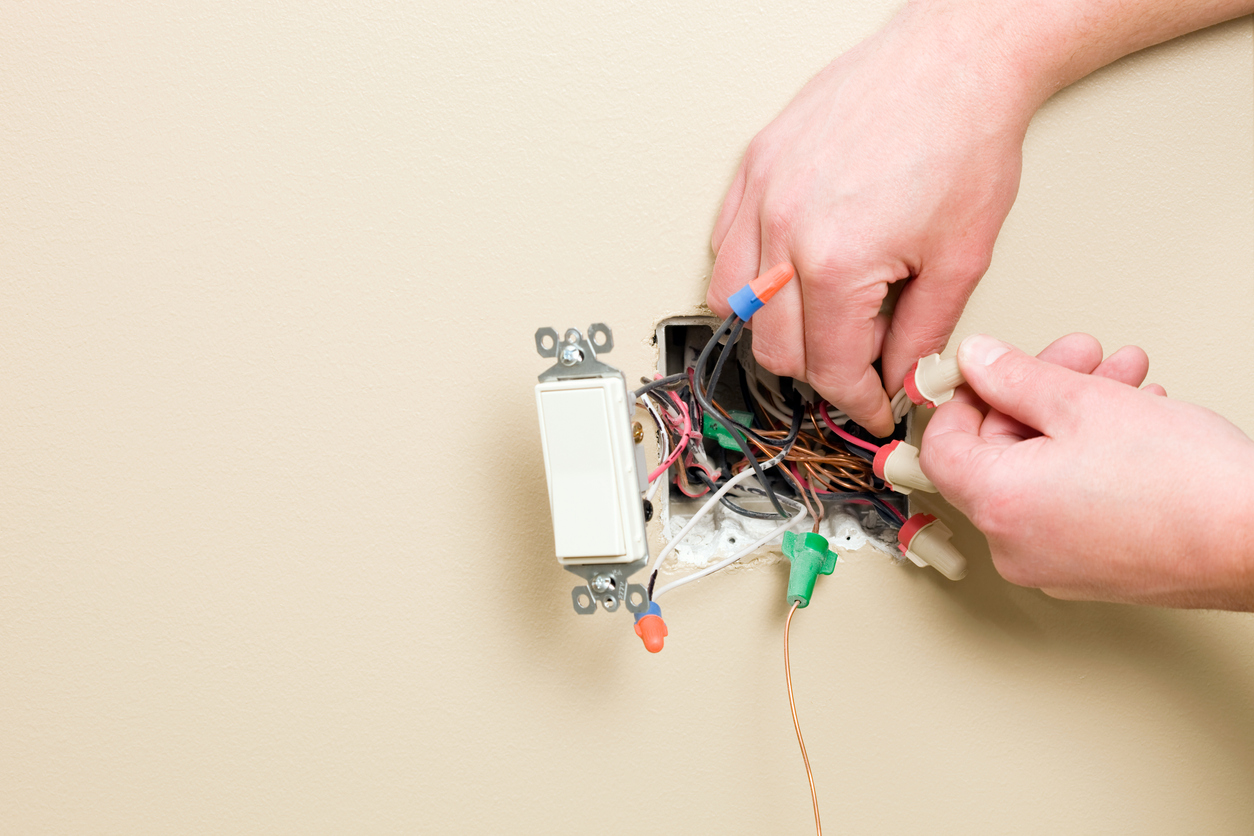
Safety is always the top consideration when doing any wiring. Before you do anything else, always turn off the electricity at the breaker box, and use a voltage tester to test the wires in a switch box to make sure they’re not hot.
RELATED: The Best Voltage Testers, According to Our Tests
What is 3-way switch wiring?
It’s no fun to come home late at night and stumble to the other side of a dark room looking for the light switch. That’s just one instance in which 3-way switches (also known as 3-pole switches) are handy: These switches allow users to turn on a centrally located light from different sides of a room, or from the upper and lower ends of a stairway. A 3-way switch setup will even work with a dimmer switch, as long as the dimmer switch is designed for 3-way wiring.
Individual 3-way switches resemble single-pole switches. However, they are not labeled “OFF” or “ON,” because they either allow or stop the electrical current based on the other switch position in the setup. In essence, a 3-way switch is a toggle switch.
Types of Wire Cable Used in 3-Pole Switches
Two different types of wire cables are used in wiring a standard 3-way switch, most often 14/2 cable and 14/3 cable. The 14 stands for the gauge of wire (rated for 15-amp circuits) and the following number, 2 or 3, represents the number of conductor wires in the cable. The number of conductor wires in the different cables are important, because an extra wire is required in one section of the 3-way switch setup. Without a 14/3 wire, it wouldn’t be possible to have both switches control the light.
Some homes may have 12-gauge wire rather than 14-gauge wire, which just means the wire is rated to carry more amps. The 12-gauge can carry 20 amps. Houses built since the mid-1960s likely contain non-metallic sheathed cable (NM), commonly called Romex, after a popular brand of wire.
Parts of a 3-Way Switch
When you pop off your light switch plate and peek inside—or examine a diagram of how 3-way switches work—you may wonder about the different colored wires, what the colors mean, what they’re supposed to connect to, and what to touch (and not touch). Here’s the 411 on the parts you’ll encounter when wiring a 3-way switch.
Wire Cables
A 14/2 NM Cable contains two conductor wires: one black and one white. It also contains a third, bare copper wire. The cable runs from the power source to the first switch box in the typical 3-way setup described here, but other wiring configurations also are possible (see below). The following electrical wire colors are standard, but different wire brands can use different colored wires.
- Black wire: This is a hot wire that carries electricity from the power source to the first switch in a typical 3-way setup. It’s also called the “common wire” or the “line wire.” Unless the breaker is off, this black wire is always hot.
- White wire: This is the neutral wire, and its purpose is to complete the electrical circuit. In all electrical circuits, power must return to the energy source, and this is the job of a neutral wire.
- Ground wire: The ground wire is a bare copper wire or a green wire, and its purpose is to provide a measure of safety. When the circuit is operating correctly, the ground wire doesn’t carry any electricity. If a problem occurs, such as a short circuit, the ground wire transfers excess electricity to the ground (the earth).
A 14/3 NM Cable contains a bare copper wire and three conductor wires: one black, one white, one red. In a typical 3-way setup, the 14/3 cable runs from the first switch box to the second switch box.
- Black wire: A black wire is a hot wire, but also a traveler wire. In a 3-way setup, the black wire (along with the red wire) is a traveler wire. This is because power travels from one switch box to the other through both wires, but only through one wire at a time and is determined by the configuration of the toggle switches.
- Red wire: The second hot/traveler wire is the red wire that serves the same purpose as the black wire between the two switch boxes. Depending on toggle switch configuration, either the red wire or the black wire will be hot if the light is on, but not both.
- White wire: Still considered the neutral wire, the white wire from the 14/3 cable serves to carry electricity back to the power source to complete the circuit.
- Ground wire: This wire also serves the same purpose as it did in the 14/2 cable, to carry excess electricity to the ground in the case of a short or a fault.
Neutral Wires
In a typical 3-way switch, the white neutral wires do not connect to the actual switches. Instead, they connect to one another. This creates an uninterrupted return circuit to the power source, which is generally a bus bar terminal on the breaker panel.
Neutral wires can be connected by twisting both wires together in each switch box, but today’s lever nut connectors make it so much simpler. Wire connectors, such as Aigreat’s Lever Nut Connectors, work by lifting a lever, inserting the end of the wire, and then pushing the lever back down to lock the wire in place.
Traveler Wires
When wiring 3-pole switches, there are always two traveler wires that connect one switch to the other. For a 3-way switch setup to work, electricity must be routed through either one traveler wire or the other, and the route depends on whether the toggle switch is in the “up” or “down” position.
When the first switch turns the light on, the electrical current runs through one of the traveler wires. However, if the second switch is used to turn the light off, then the current will run through the other traveler wire when the first switch turns the light on. Think of how a conductor switches a moving train from one track to another: That’s how a 3-way switch routes the electricity along either the red or the black traveler wires so both switches can control the light.
Screw Terminals
On a 3-way switch, each screw terminal has its own purpose. A standard 3-way switch features four terminals, each represented by a colored screw. The screw location is often similar from switch to switch. Some manufacturers locate the screw terminals in different spots, so be sure to study the diagram that comes with the switch.
- Black screw terminal: The black (or darkest in color) screw attaches to the black common wire from the 14/2 cable. The terminal may be labeled COM.
- Green screw terminal: The green screw is the ground terminal. Two ground wires will be found in both switch boxes, one from the 14/2 cable and one from the 14/3 cable. Both of those ground wires should be connected to one another, and then connected to the green screw in each box.
- Two traveler terminals: In addition to the black and green terminals, there are two other screw terminals that are often brass. These are the traveler terminals. It doesn’t matter which traveler wire (red or black) connects to which traveler terminal as long as it’s the same in both switch boxes. For example, if the red traveler wire is on the top traveler terminal in the first box, it should also be on the top traveler terminal in the second box.
Alternate 3-Way Switch Wiring Configurations
While the wiring configuration described above is typical, it isn’t the only way to wire a 3-way switch. The configuration is determined by where the power enters the circuit (at a switch or at the light fixture). Alternate wiring configurations should only be done by an electrician.
If the DIYer opens a switch box to find a white wire with black electrical tape on it, the white wire is hot. This doesn’t mean replacing the switch requires a pro, because replacing a 3-way switch does not require running new wire. It’s simply a matter of disconnecting one switch and connecting the new one.
No matter the wiring configuration, the simplest way to successfully replace an old 3-way switch with a new 3-way switch is to label each wire with the terminal that it’s connected to before removing the wires from the old switch. Then, it’s a simple process to connect the correct wires to the correct terminals of the new switch.
How to Wire a 3-Way Switch
If you’ve ever successfully replaced a single-pole switch, it shouldn’t be tough to replace a 3-way switch. The biggest difference is that there is an additional wire in the box. The extra wire is a “traveler” wire that connects the two switches to each other.
When wiring a 3-way switch, it’s common to first run wires from one switch to the light and then to run them to the second switch. Whether or not your switch is wired this way, the switches can still be replaced using the method described in the following steps on how to wire a 3-way switch.
RELATED: The Best Motion Sensor Light Switches
STEP 1: Turn off the power at the service panel.
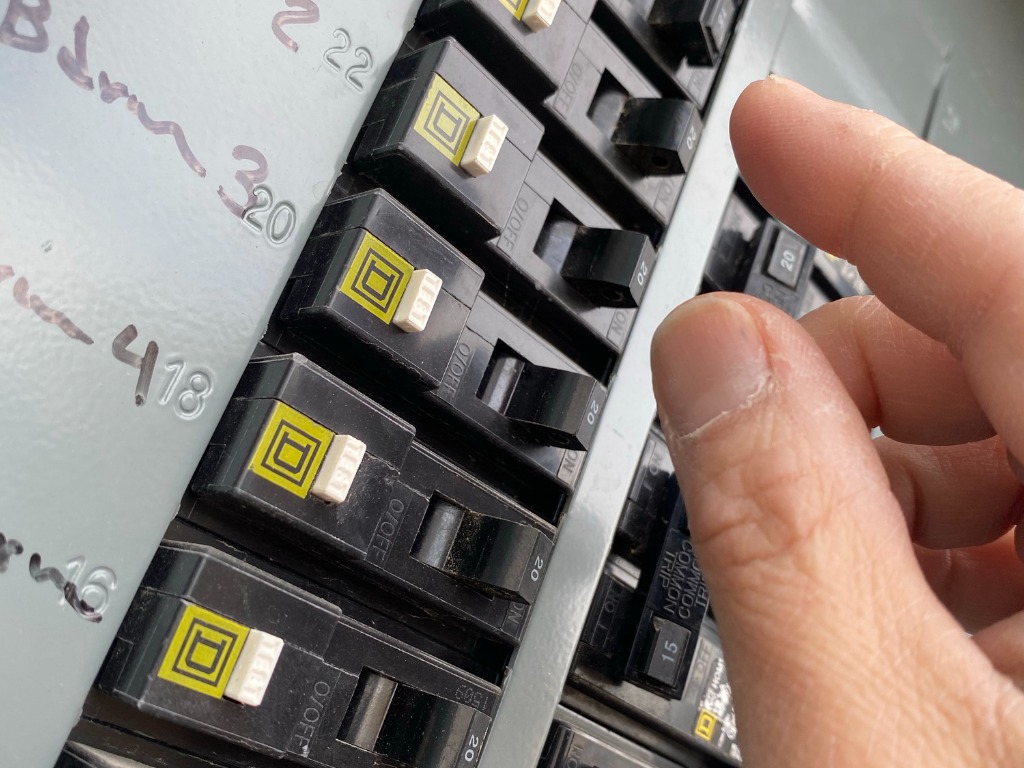
Find the breaker panel in the home. Look for a label next to a breaker that describes the location where the 3-way switch is located. Flip the breaker switch off.
Before moving on to the next step, be sure to test the switch to make sure the power is off.
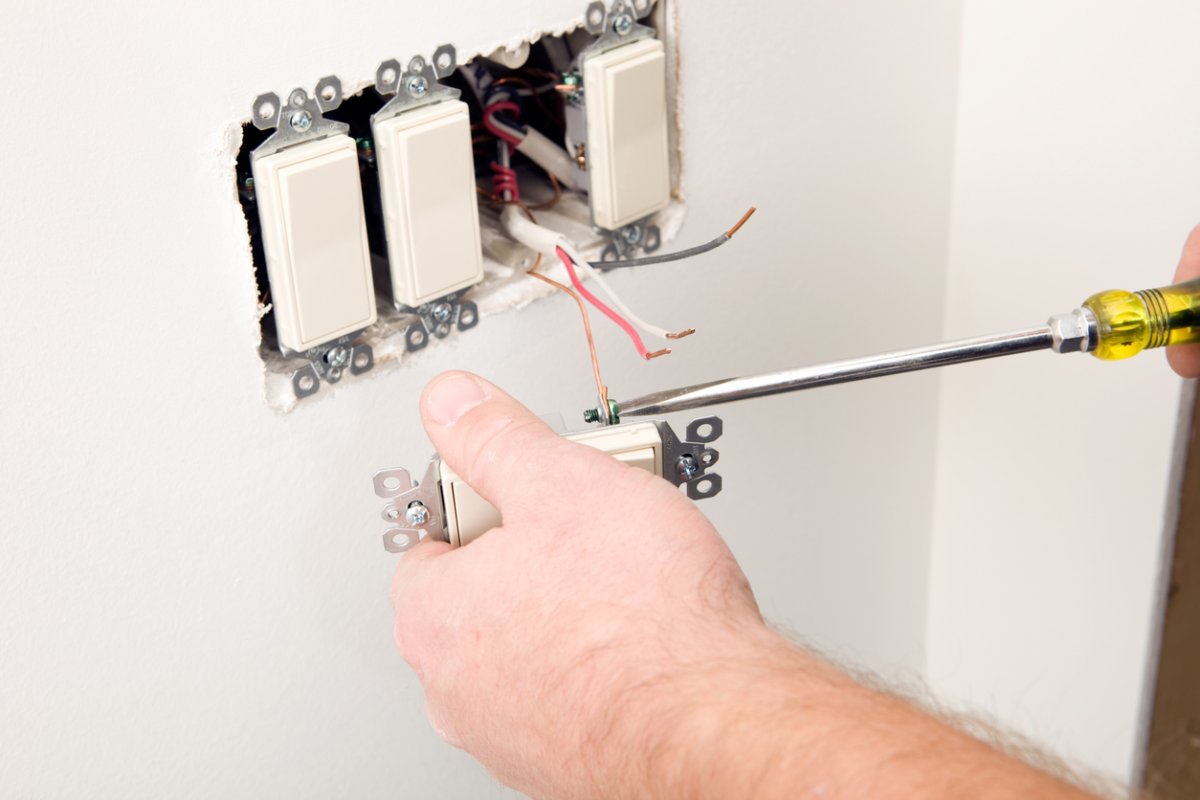
STEP 2: Pull out the old switch.
Remove the two screws on the switch plate, and then remove the plate to reveal the old switch. Unscrew the fasteners holding the switch in place. There should be enough give on the wires, so that you can gently pull the switch out of the hole with the wires still attached.
STEP 3: Look at the wires to identify each kind.
Depending on the way the switch was wired, there could be two different types of wires inside. If there is a white wire, black wire, and ground wire, it’s a standard 14/2 cable. If there is a black wire, white wire, red wire, and ground wire, then it’s a 14/3 cable.
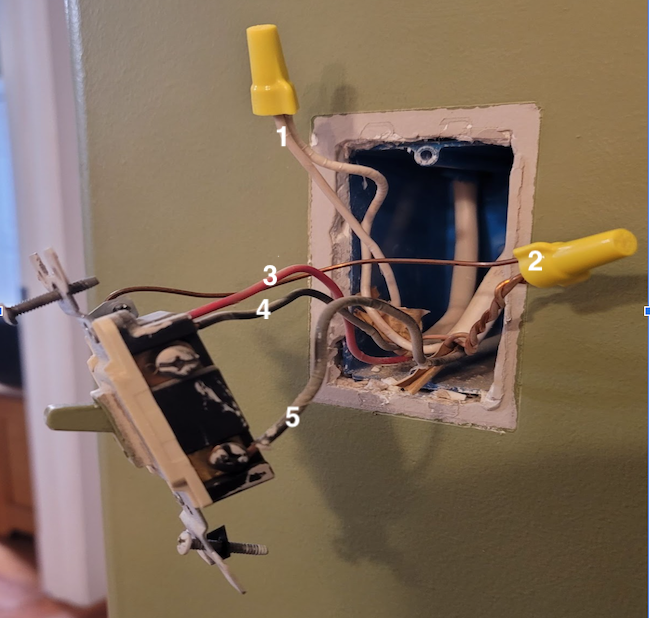
STEP 4: Identify the common wire and label it.
There should be eight wires in the box. Among them are two white neutral wires connected with a wire nut, three round wires connected with a wire nut, a black and a red wire, and a black wire connected to a copper or black screw terminal. The black wire is called the common wire. Before disconnecting it, place a piece of electrical tape on it so it’s easy to remember which is the common wire later.
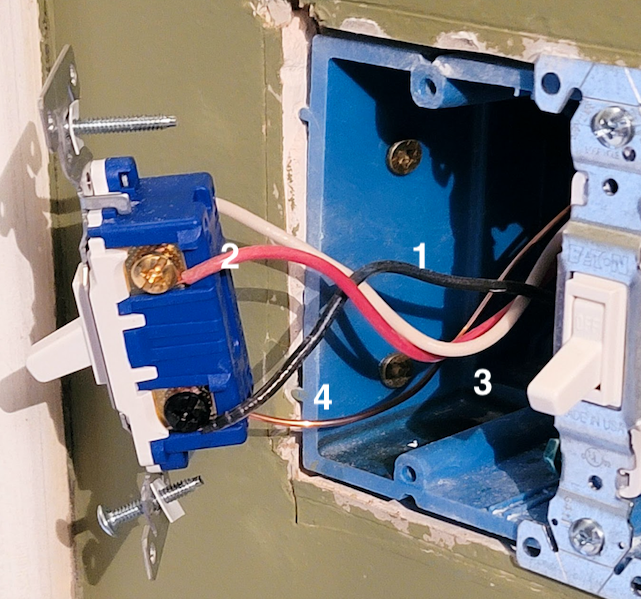
STEP 5: Open the second switch box and identify those wires.
There should be just four wires in the second switch box: a white wire, a red wire, a black wire, and a ground wire. The white wire may be labeled with black paint or electrical tape to show that it’s a hot wire. The black wire runs to the common terminal, and it’s the common wire in the box. It’s helpful to label the common wire at this point, so it’s easy to identify later.
STEP 6: Twist off the wire nuts, and disconnect the wires.
Before disconnecting the wires, make sure you know what each does and that they are clearly labeled. Then, twist the nuts off of the wires and loosen the terminal screws, so the bare ends of the wires are revealed and no longer attached to the switch.
STEP 7: Install and connect the new switches to the wires.
Before installing the new switches, make sure they are the same. Since wire configurations can vary among brands, it’s easiest to install the same switch in both locations.
Identify the common wires and common terminals on the new switches, either by label or by color. Look for a black or copper terminal on the switch’s lower area. Then, connect the common wires to the common terminals.
Next, it’s time to connect the red traveler wire in both switches. The red wires connect to the top of the switch. Make sure to connect it to the same location, either the upper right or left side in both boxes.
There is a second traveler wire in both boxes, and it’s time to connect those. The first box’s traveler wire is a black wire that’s not labeled as a common wire, and the other box’s traveler wire is white with black paint or black tape on it. Connect these wires to the open upper terminals that aren’t being used by the red wire.
Now twist and connect the white neutral wires in the first box together using a wire nut, and then twist and secure the three ground wires in the first box. Then the end of the shortest ground wire needs to be connected to the switch’s green terminal. Head over to the second box and connect the ground wire to the switch’s green or brass terminal screw. All of the wires should now be connected.
STEP 8: Install the switch covers, turn on the power, and then check the switches.
After all of the wires are secure, the switches can be secured back into the box with two screws. Next, reinstall the switch plate covers. Head back to the breaker panel, and switch the breaker for the switches back on. Test each switch by switching it on and off.
