We may earn revenue from the products available on this page and participate in affiliate programs. Learn More ›
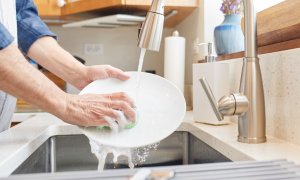
You woke up shivering in a cold house. Your morning shower, usually a warm and pleasant revitalization, was spent futilely turning the knob toward “hot” as your skin erupted in goosebumps. When you tried to scramble up some eggs for breakfast, the burner clicked but would not light.
While these annoyances might put a damper on your morning, there’s no need to call a repair person just yet. If your home’s gas-powered appliances are quite old, the problem might be as simple as a pilot light that’s gone out, and that’s something homeowners can usually handle on their own.
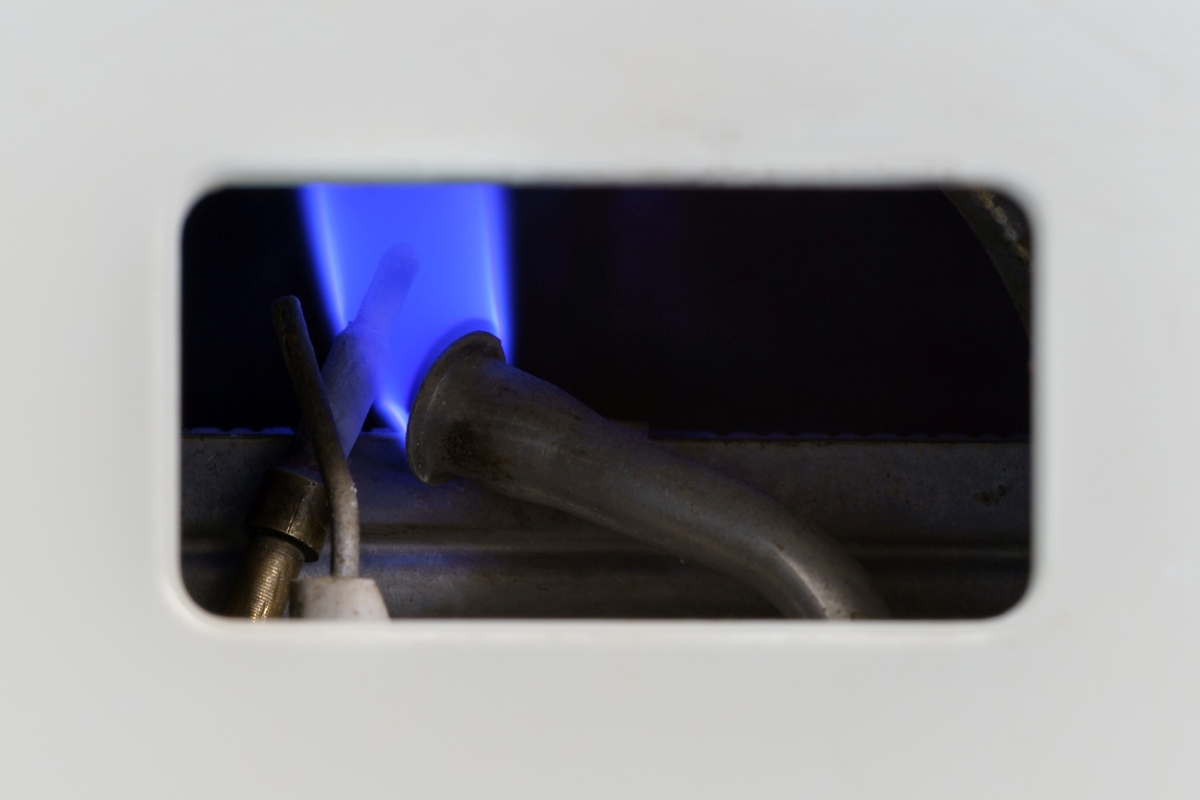
The pilot light is a small gas flame meant to burn continuously so it’s available to light a larger burner when needed. This flame may go out as a result of an errant draft, dirty valve, or faulty thermocouple (the safety device that shuts off the gas to an appliance when it detects that the flame has gone out).
Most of today’s gas appliances have electric starters rather than standing pilot lights. But if you have older appliances that still use flames, it’s helpful to know how to light the pilots should they ever get snuffed. Here’s what you need to know about relighting pilot lights in gas furnaces, water heaters, ovens, and stoves.
One caveat, however: If you hear a hissing noise near the appliance or detect the strong smell of natural gas, do not attempt to light the pilot. Leave the house immediately and call your local gas company or 911.
Gas Water Heater
Forget about suffering through a freezing shower! If your water heater’s pilot light is out, check for relighting instructions fastened to the appliance, or look on the manufacturer’s website. If you can’t find instructions, the method outlined here works for most models. While it should take no more than a few minutes to relight the pilot, expect to wait for 30 minutes to 2 hours for the water to heat up, depending on the size of the tank and how long the pilot’s been out.
- Remove the access panel. Most water heaters have a small access panel covering the pilot light. Depending on the model, the panel might simply snap on and off, or you might need to use a screwdriver to remove it.
- Turn the gas regulator valve to “off” on the small gas regulator valve near the bottom of the water heater. Wait 5 to 10 minutes to allow any residual gas to clear the pipe.
- Turn the temperature on the temperature control valve down to the very lowest setting. This valve is located near the gas regulator valve. (On some water heaters, the lowest setting is even labeled “pilot.”)
- Assess the type of pilot ignition. Some older water heaters require you to apply a flame to light the pilot. To do this, you’ll need a butane barbecue lighter or fireplace match that’s long enough to reach the pilot without exposing your hand to the flame. Newer water heaters—in fact, pretty much all new models—use electronic ignition. Look for a red (or sometimes black or green) button or switch near the regulator valve. The button will be labeled “pilot ignition” or something similar. If your water heater has an igniter, you will not need to apply a separate flame.
- After you’ve waited for the gas to clear the pipe, turn the regulator valve from the “off” to the “pilot” setting.
- Light the pilot light. If your water heater has a standing pilot light, push down on the regulator valve, and then apply your match or lighter to the pilot burner. Continue holding down the regulator valve for a minute or so after you see the pilot light ignite. This gives the thermocouple time to kick in and sense that the pilot light is on. If your water heater has an igniter, press down on the regulator valve and continue holding it down as you press the igniter button. You may need to press the igniter repeatedly to get the pilot to light. Once the pilot light ignites, continue holding down the pilot valve for another minute or so to make sure it remains lit.
- Switch the gas regulator valve back to the “on” position, and set the temperature to the desired setting. For safety, your water heater should never be set above 120 degrees Fahrenheit.
- Screw or snap the access panel back into place over the pilot light.
RELATED: Solved! What to Do When Your Pilot Light Goes Out
Gas Stovetop
Unless you have an unusually old stove or a scrupulously maintained antique, your gas stovetop is probably equipped with automatic ignition, a technology that has been around since at least the 1970s. While this means you’ll never have to light a pilot, you still might have to deal with a fussy burner.
To troubleshoot a stove burner that won’t ignite, try cleaning the igniter (the part that sparks when the burner is turned on) or the burner base (the metal circle that channels the flame). The igniter can be wiped down with a damp cloth. Soak the burner bases in warm, soapy water and scrub the channels and holes. Use a safety pin or other small, metal tool (never a toothpick!) to clear clogged ports. Let everything dry off before replacing.
If your stove does have a standing pilot, consult the manual, either online or in your files, for instructions on lighting it. You can also check the appliance for instructions, which may be printed under the stovetop or near the control knobs. If you can’t find any instructions, follow the steps outlined here.
- Make sure that the oven is off and all burners are set to “off.”
- Remove the grates and burners. Take this opportunity to give them a thorough soaking and scrubbing, and then set them aside.
- Expose the pilot lights. Some stovetops lift up to expose the inner workings, while others require that you simply lift out the drip pans.
- Either way, once you have the stovetop open, you will probably see a small pipe connecting the two burners on the left and another connecting the burners on the right. There is typically a pilot light in the center of each of these small pipes. (Note: Configurations can vary.)
- Use a damp cloth or paper towel to wipe away any grease or debris on the pilot light valve and the gas pipes.
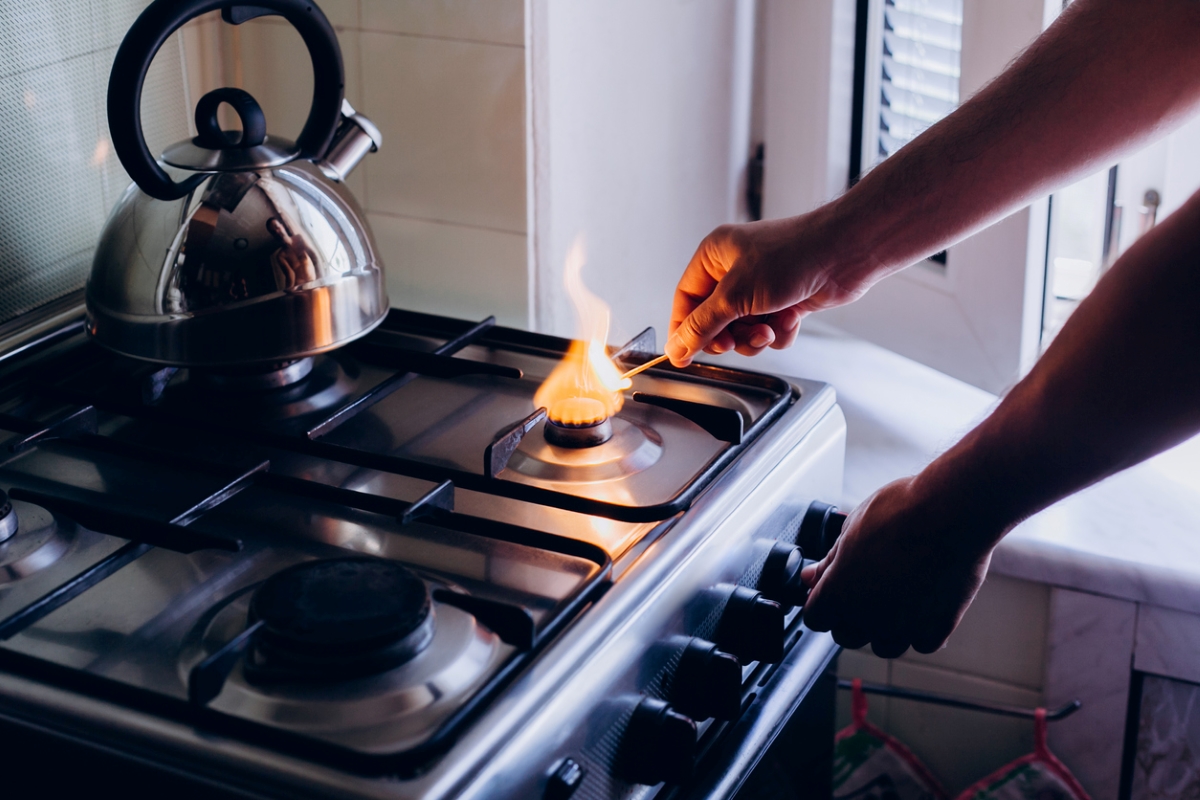
- Using a long fireplace match or butane barbecue lighter, touch flame to the pilot light ports. The pilot should light almost immediately.
- Lower the top of the stove or put the drip pans back into place. When they are completely dry, return the burner bases to their normal positions and turn on each burner individually to make sure they all light.
RELATED: Solved! Who Installs Gas Lines for Stoves?
Gas Oven
Regulations have prohibited standing pilot lights in gas stoves since 1990, so most of us will never have to deal with an oven pilot light. But if you do have an old stove with a standing pilot, your first order of business is to look for the user’s manual, or check for info online or on the appliance itself. Lighting instructions might be printed either inside the oven door or inside the broiler compartment below the oven.
1. Check that the oven and all burners are set to “off.”
2. Look for the oven’s pilot light. It is much trickier to find the pilot light in an oven than on the stovetop, and it may require some acrobatics to find and reach it. Depending on the brand and model, your oven’s pilot light might be in a front corner of the oven, in a back corner of the oven, in the center near the door, below the floor of the oven, or even inside the broiler compartment toward the very back. You’ll see a small hole with a tiny valve inside it, often labeled “pilot light.”
3. Light a long match or barbecue lighter and hold it near the pilot light valve. The flame should catch almost immediately. If it doesn’t light, wipe off the pilot with a microfiber towel and try again.
RELATED: The Best Kitchen Appliance Brands
Gas Furnace
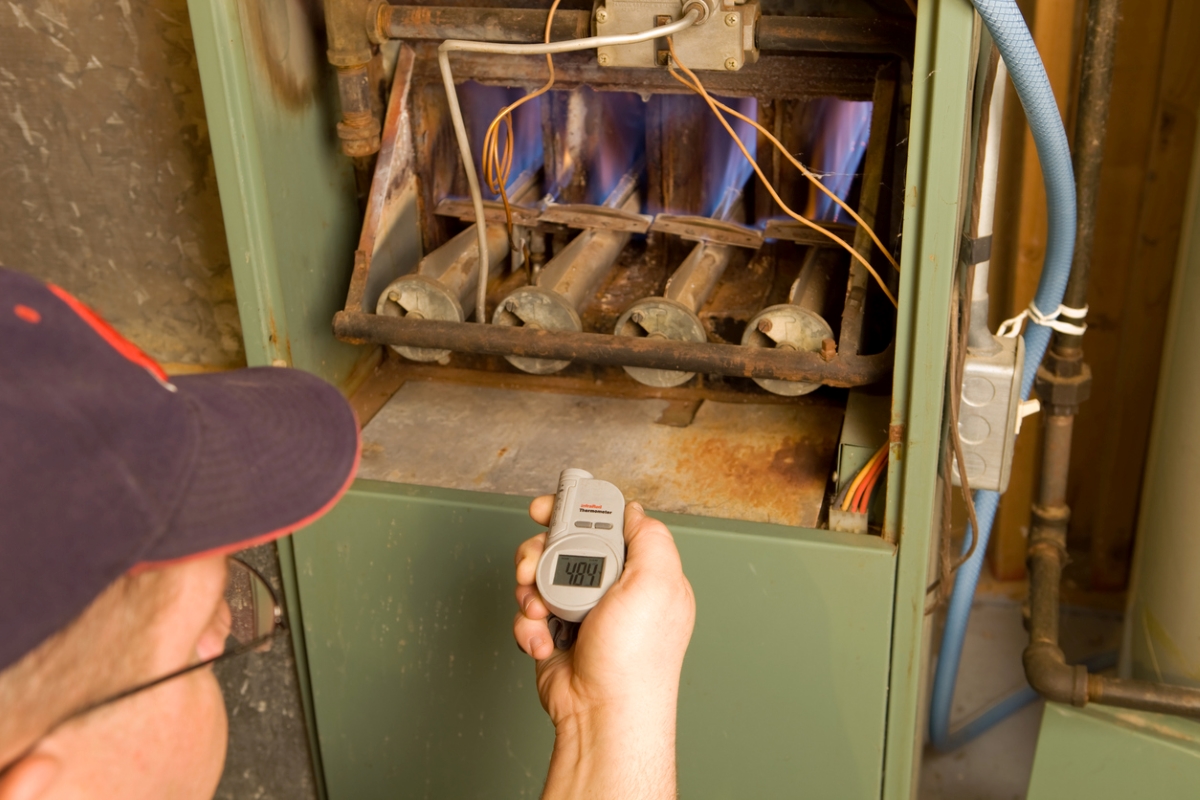
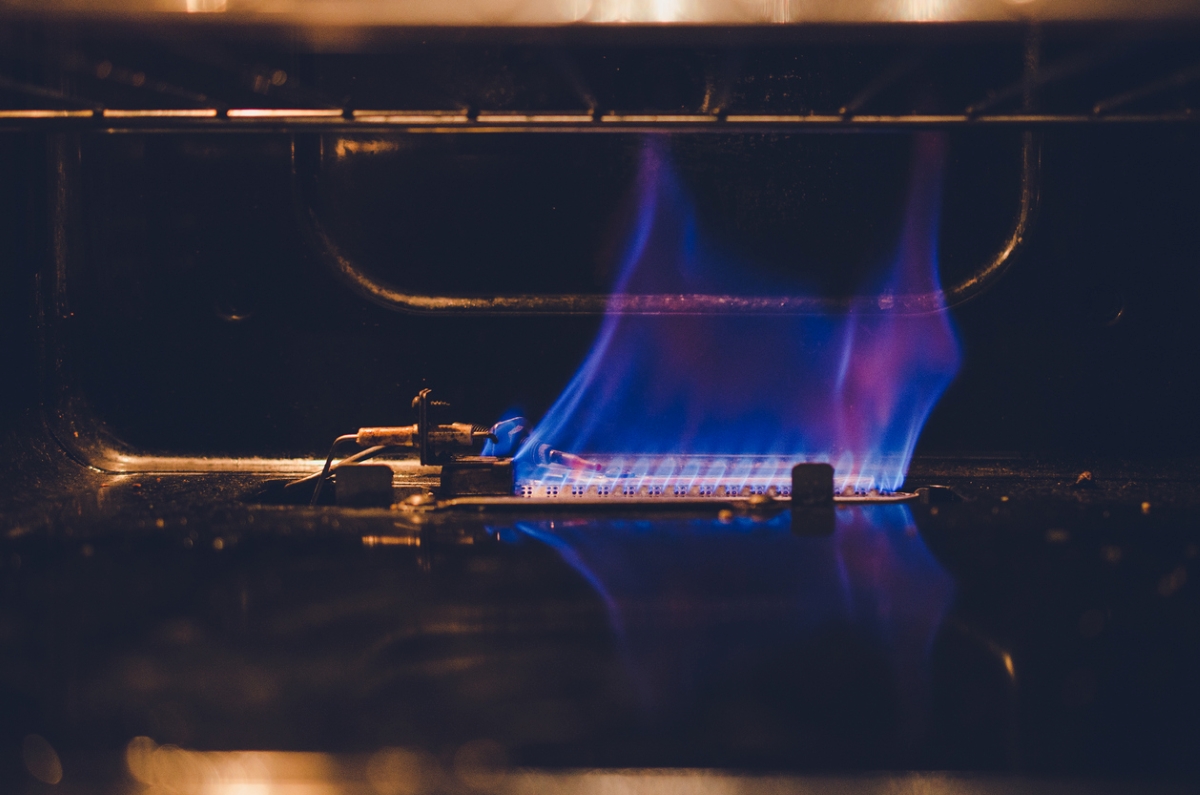
If your gas furnace conks out unexpectedly, there’s no reason to shiver in chilly misery. It’s possible that the pilot simply went out, and it’s not difficult to relight your gas furnace’s pilot light.
Although standing pilot lights have been phased out in furnaces and boilers, the lifespans of these HVAC appliances are relatively long. There are still plenty of furnaces and boilers with standing pilots in older homes throughout the country. As we’ve said of other types of gas appliances, check for a manual first. Still, the instructions for lighting the pilot are probably printed near the pilot light—the process will be very similar to the instructions that follow.
- On most furnaces, you’ll spot a small valve near the bottom of the unit with three positions: “on,” “off,” and “pilot.” Turn the valve to the “off” position, and wait 5 minutes to allow any residual gas to clear from the pipes.
- Turn the valve to “pilot.” Near the valve, you’ll see a small button labeled “reset.” Press this button while applying your lit match or butane fireplace lighter to the pilot light valve. Hold the flame steady until the pilot ignites, then release the button. Repeat the process if the pilot doesn’t stay lit.
- Switch the valve back to the “on” position.
RELATED: How to Fix a Furnace That’s Not Turning On
Gas Dryer

Standing pilots were banned in gas dryers in the 1980s, and given the short lifespan of the typical dryer, it’s unlikely that there are many gas dryers still in use now that have pilot lights. In the event that your gas dryer does have a pilot light, try to find the manual. Unfortunately, for an appliance of that age, online information may not be available.
To figure out where the pilot light is, look to see where the gas line enters the appliance; the pilot should be on the same side. Look for an access panel on the front (often toward the bottom) or top of the appliance. It could simply snap open or require a screwdriver to remove.
Still having trouble with your pilot light?
If your pilot light continues to go out, the appliance’s thermocouple may be faulty. While some homeowners are comfortable tackling this job (a new thermocouple is less than $20), most prefer to call in a professional to replace this part. Note that other issues, including accumulated dirt, can affect the pilot light. If you’re constantly relighting the pilot, it’s probably time to call a service technician.