We may earn revenue from the products available on this page and participate in affiliate programs. Learn More ›
Old houseplants often drop all their lower leaves, resulting in an unbalanced top-heavy look. Or they may simply have grown too tall for the room in which they reside, so you wish there was some way you could cut them off at the knees without killing them. Actually, there is.
Maybe your problem isn’t gawky houseplants, but instead a wish to multiply woody outdoor trees such as magnolia or camellia, which can be difficult to propagate via regular cuttings. Again, the solution is the air layering technique, which might be called a method for getting roots out of thin air!
What is air layering?
As for an air layering definition, let’s just say that the process is similar to taking cuttings. However, you leave the cuttings on their parent plant or tree until they root before actually removing them. How is that possible?
When you make a heavy enough cut in the plant’s stem to stop nutrients traveling from the plant’s leaves to its roots via the inner layer of bark, those nutrients congregate at that cut and encourage it to produce new roots. Once those have developed, you can lop off the stem beneath them and have an entirely new—or actually not-so-new but definitely smaller—plant.
Related: Count On These 25 Indoor Plants for Easy Color Year-Round
Which plants can be propagated by air layering?
Air layering propagation is appropriate for many tropical houseplants, such as croton, dieffenbachia, ornamental fig, rubber plant, and schefflera. It also will work for outdoor trees and shrubs such as azalea, camellia, daphne, dogwood, flowering quince, forsythia, gardenia, holly, jasmine, lilac, magnolia, maple, philodendron, rhododendron, rose, smoke tree, viburnum, and witch hazel.
Air layering fruit trees such as apple, citrus, pear, and pecan also can work. However, you’ll want to keep in mind that the most productive fruit trees usually are grafted onto more vigorous stock rather than relying on their own roots.
Types of layering in plants include removing a ring of bark and stem slitting. The former is most appropriate for woody outdoor plants, the latter for more herbaceous indoor ones.
What are the pros and cons of air layering?
Unlike regular cuttings, those propagated by air rooting continue to receive moisture from their mother plant the whole time they’re rooting, lessening the chances they will dry out. The process of air layering plants also will produce large specimens more quickly than standard cuttings do, without requiring a pot and potting mix.
As for the cons, air layered stems can take longer to produce roots than other types of cuttings, but that often depends on the type of plant involved. Also, you aren’t likely to get as many cuttings as you would if taking shorter and completely detached ones.
When is the best time of year to propagate via air layering?
Either spring or mid-summer will work. If you are able to get to your air layering in spring, choose shoots from the previous year’s growth. Should you not get around to that propagation until mid-summer, select shoots from the current year.
Keep in mind that shoots on woody outdoor trees should only be about the size of a pencil in diameter up to 3/4 of an inch. Those on “softer” indoor plants can be much larger than that. However, in that case, you may want to make two small alternating slits on opposite sides of the stem rather than a single long cut on one side.
Related: 10 Houseplants You Can Propagate the Fastest for an Ever-Expanding Indoor Garden
Air Layering How-To for Herbaceous Indoor Plants
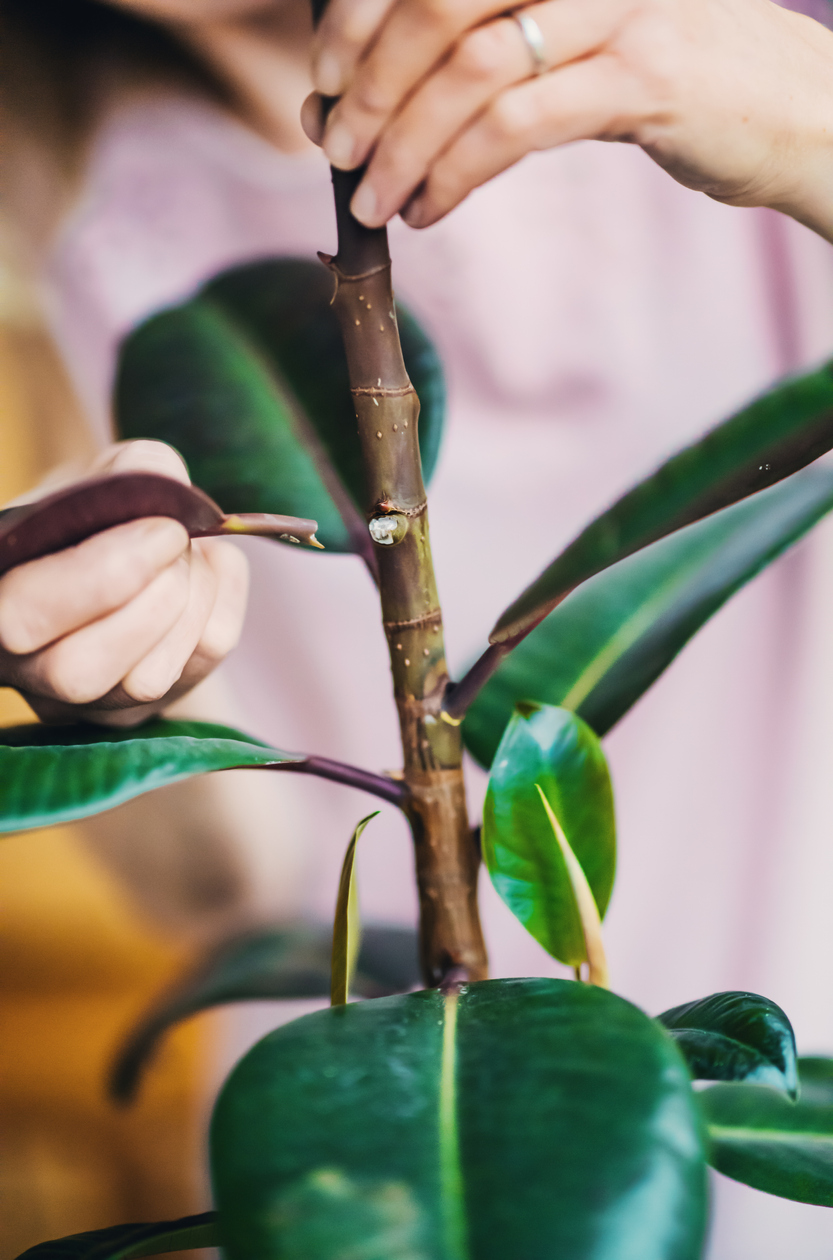
Select the place on your plant’s stem—about 12 to 18 inches below the tip—where you want the roots to appear. It either should have leaves growing there or old nodes from which leaves have fallen. Remove the leaves, if necessary, and use a sharp knife to slice upwards at a slight slant. Begin beneath a leaf node and make a cut 1 1/2 to 2 inches long, preferably no more than a third of the way into the plant’s stem.
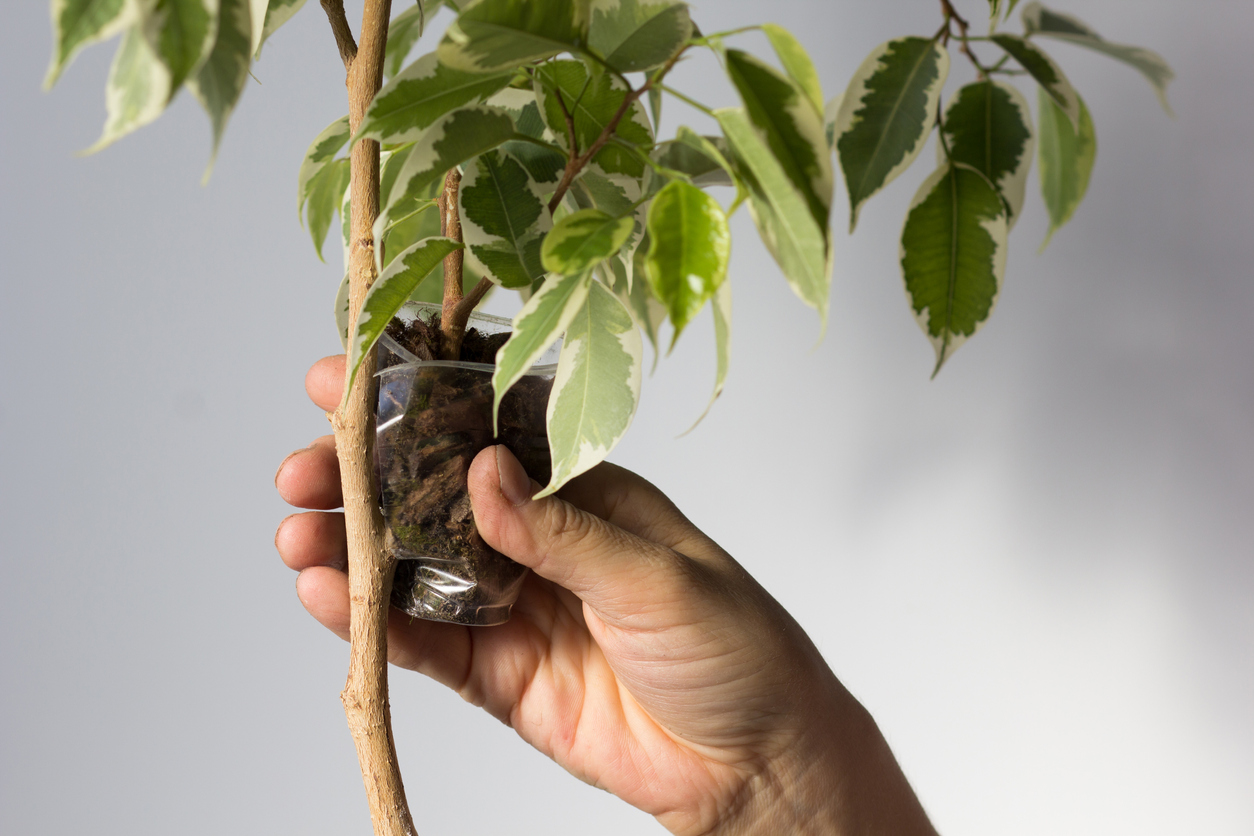
Place a toothpick in the cut to hold it open and sprinkle rooting hormone powder into the opening. Then wrap it with damp sphagnum moss from which any excess moisture has been squeezed, tying the moss in place with garden twine. Cover that moss with plastic wrap, securing it at the top and bottom with electrical or medical tape, but leaving a small opening at the top. See this link for an air layering diagram.
Air Layering How-To for Woody Outdoor Plants
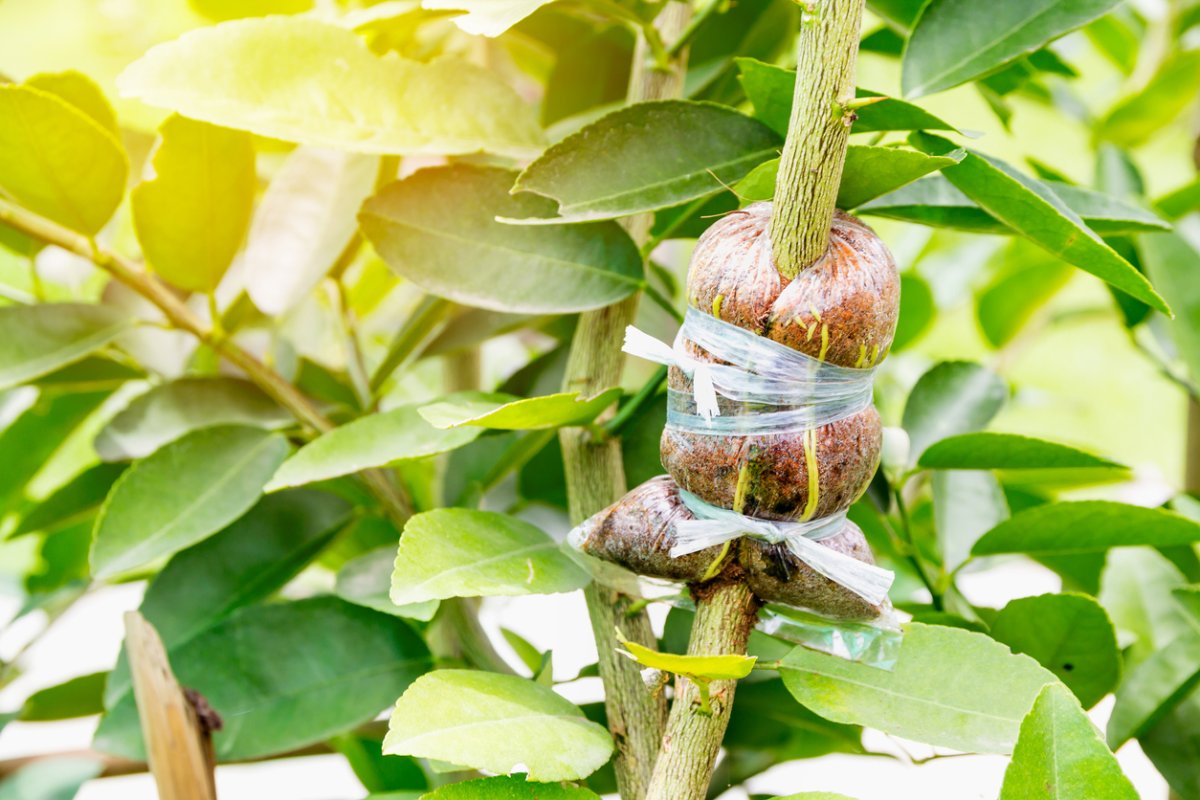
For woody outdoor plants, use your sharp knife to make two horizontal cuts 1/2 to 1 1/2 inches apart through the bark, all the way around the stem. Then make one vertical cut between the two and peel the piece of bark off. Afterwards, scrape off the green layer (cambium) just beneath the removed piece of bark. Dust the indentation you have created with a rooting compound and wrap it in damp sphagnum moss.
For plants exposed to the weather outdoors, you’ll probably need a heavier plastic than plastic wrap to enclose the moss, so you may want to opt for polyethylene film. Close it tightly at both ends with electrical tape or twist-ties. Then cover the plastic bundle with aluminum foil to exclude sunlight. See this link for air layering plants examples.
Related: How to Help Your Houseplants Survive the Winter
Follow-up Care After Air Layering
Keep an eye on the rooting bundle, to which you may need to add a few drops of water if it appears to be drying out. It can take from one to three months for roots to appear. They should be about two inches long and showing through the moss before you attempt to detach your cutting from its parent plant. To do so, cut its stem just beneath the roots with your knife or pruning shears and remove the plastic wrap or film. Leaving the moss in place, pot the new plant up.
Keep it out of direct sunlight and covered with plastic, suspended over the plant with stakes for about a week. Then you can begin punching holes in the “tent” to expose the plant gradually to lower humidity. Just make sure you don’t forget one of your air layering bundles and leave it up in the air!