
We may earn revenue from the products available on this page and participate in affiliate programs. Learn More ›
While you may be concerned with watering or fertilizing during the growing season, are you giving your soil consideration? Loam—a particularly desirable combination of different soil components—is a top achiever in garden plots, capable of producing bumper crops and beautiful blooms.
Still, it’s not a set-and-forget solution that comes into play only at the start of the growing season. Most gardeners struggle with some type of soil issue—often an overabundance of clay or sand—and it’s an ongoing process to achieve and maintain a loamy soil. If you’re looking to improve the soil in your garden or flowerbeds, keep reading. We’ll dive into the importance of loamy soil and how you can get it in your garden by amending your soil.
RELATED: 15 Secret Ingredients to Make Your Garden Grow

SOIL COMPONENTS
Types of soil are classified by the amount of sand, clay, and silt they contain. The composition of these different sized particles determines how well the soil will absorb and retain water. Each component brings something to mix, and loamy soil contains a mixture of all three.
- Sand particles are the largest of the three. While sand does not retain water, its large particles help to create spaces in the soil that permit air to circulate and bring vital oxygen to plant roots (also known as “aeration”).
- Clay particles are very fine, so they tend to pack tightly together, which leaves little room for aeration or drainage. Clay, however, is naturally nutrient-rich.
- Silt has medium-size particles—larger than those found in clay, but smaller than sand. This component is the most fertile of all three.
A BALANCING ACT
By blending all three soil components, loamy soil has the ability to retain enough moisture (as well as an abundance of nutrients) to keep plants healthy but also allow the excess to drain away. That balance is key to preventing standing water conditions, which can smother a plant’s roots. Indeed, loamy soil offers the best of all worlds, and its composition is agriculturally defined as being:
- Less than 52 percent sand
- Between 7 and 27 percent clay
- Between 28 and 50 percent silt
Yes, it’s not an exact ratio. Since the percentages of the three main components can vary and still qualify the soil as loam, a gardener’s rule of thumb when trying to create the perfect loam is to strive for equal parts of sand and silt and half as much clay.
DETERMINING SOIL CONTENT
Achieving loamy soil can be a bit of a guessing game—you need to know what type of soil you currently have in order to know what you’re missing. One way to determine soil content is to collect a soil sample from your garden and take it to your County Extension Office (a branch of the USDA), for testing.
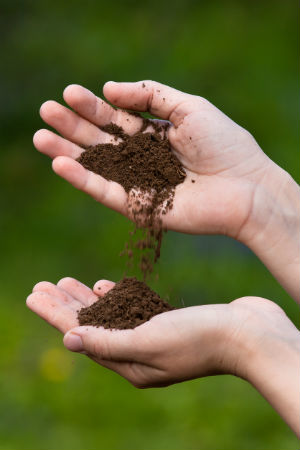
Many gardeners, however, learn to estimate the content of their soil by feel. To get an idea of your soil type, pick up a handful of slightly damp soil and squeeze it tightly in your fist to form a ball; then, open your hand and observe the results.
- Sandy soil will not hold a ball shape—it feels coarse to the touch, and it will sift through your fingers as you open your hand.
- Clay soil will form a firm ball that will retain its shape after you open your hand. If you set the ball aside and let it dry, it will become rock-hard and difficult to break.
- Silty soil will form a loose, slightly slimy ball that will flatten somewhat as you open your hand. If left to dry, the ball will become compact but it will break down into a powdery substance if crumbled between your fingers.
- Loamy soil forms a soft ball that will crumble if you press it with your finger. When dry, the ball will break apart easily.
A third method for determining the content of your soil is to fill a lidded glass jar halfway to the top with soil and then pour in water until the jar is three-quarters full. Put on the lid and shake the jar vigorously to thoroughly blend the mixture, and then set it aside. After six to 10 hours, check the jar—the soil and water will have separated and settled into layers. Sand (the heaviest) will be at the bottom, silt will be in the middle, and clay will be on top. If the sand and silt layers are relatively equal and the clay layer is about half their thickness, congratulations—you have loamy soil!
RELATED: 9 Clever Landscaping Hacks for Your Best-Ever Yard
Not as loamy as you’d like? If signs point imbalanced proportions of silt, clay, and sand, you can take steps to bring the soil into a more beneficial balance.
CREATING LOAMY SOIL
While it might seem as though you should be able to balance the components by adding sand to heavy clay soil or clay to sandy soil, it doesn’t work that way. Instead of achieving loam, you’ll end up with something akin to cement, which is very hard to dig and plant.
No matter what imbalance your soil currently has, the key to achieving a fertile loamy soil is to amend it with organic matter. This includes garden compost; peat moss; composted horse, goat, chicken, or cow manure; dried leaves or grass clippings; or shredded tree bark.
Creating optimal loam is an ongoing process—you’ll need to amend your soil annually because growing plants use up nutrients and water that runs off can also take nutrients with it. If your soil is heavy in clay or sand, you won’t fix it the first year—but you will improve it. It can take three to six years to obtain optimal loamy soil.
RELATED: 9 Brilliant Ways to Put Your Garden on Autopilot
Implement one or more of the following methods to get your soil in top shape, and keep it that way:
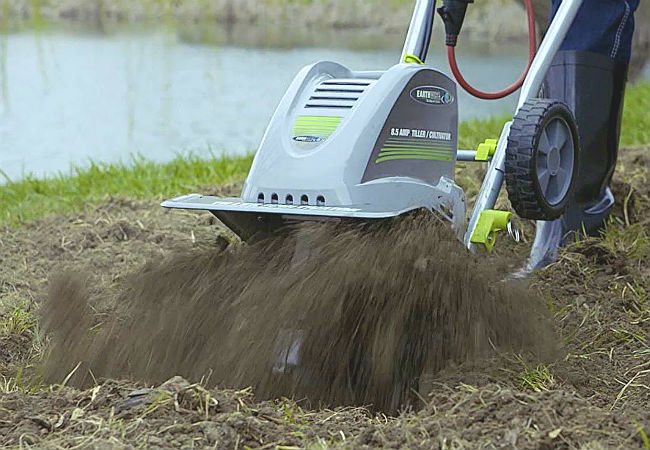
- Apply a two-inch layer of organic matter to the surface of your garden in late fall, after harvest is over and the plants have died. Wet the growing plot thoroughly until the organic matter is saturated, and then leave it in place to overwinter. In spring, work the soil well by turning it with a shovel or tilling it with a rototiller to a depth of six to eight inches. Repeat the process yearly.
- Plant a cover crop solely for the benefit of enriching the soil in the fall. Typical cover crops include annual ryegrass, alfalfa, sweet clover, and buckwheat; call your County Extension agent if you’re unsure which will grow well in your area. When the cover crop sprouts and reaches a height of three to six inches, till it under and then leave the growing plot undisturbed to overwinter. In spring, turn or till the soil to a depth of six to eight inches in preparation for planting.
- Mulch around plants during the summer growing season with a commercial mulch such as shredded hardwood bark, dry grass clippings, or dry leaves. Adding two to three inches of mulch will help keep the soil cool and moist during a hot summer and protect your plant’s roots while it’s decomposing. After harvest, turn or till the soil to work the now-decomposed mulch deeper into the soil.
- After annual flowers and vegetable plants die in the fall, pull them from the ground and lay them on top of the soil, wetting them down thoroughly. They will break down and decompose over the winter and can be worked into the soil in spring.
