We may earn revenue from the products available on this page and participate in affiliate programs. Learn More ›
Caulking window frames, which is typically done to give them a finished look (inside and out) and seal out drafts, is a fairly common DIY task. If it’s done incorrectly, however, you may be left with a sloppy, amateurish look. Caulk is not a design element; it should blend in with the window and be unnoticeable.
“Caulking eliminates the gap between trim and windows so you’re preventing air, water, and insects from getting inside,” says Andrew Prchal, who is the president and co-founder at Gunner, a window, siding, and roofing company. “You are putting it on the edge of the exterior trim to the outermost part of your window on the outside.” And then caulk the outer edge of the window frame on the inside of the house. “You usually put it on both sides for double coverage.”
Pros call the process of laying the long, narrow strip of caulk “running a bead.” And it takes a degree of skill. Keep reading to learn the proper techniques so you can caulk like a pro.
DO choose the correct caulk.
You’ll find dozens of types of caulk at your local home improvement store, and each type is intended for a specific situation.
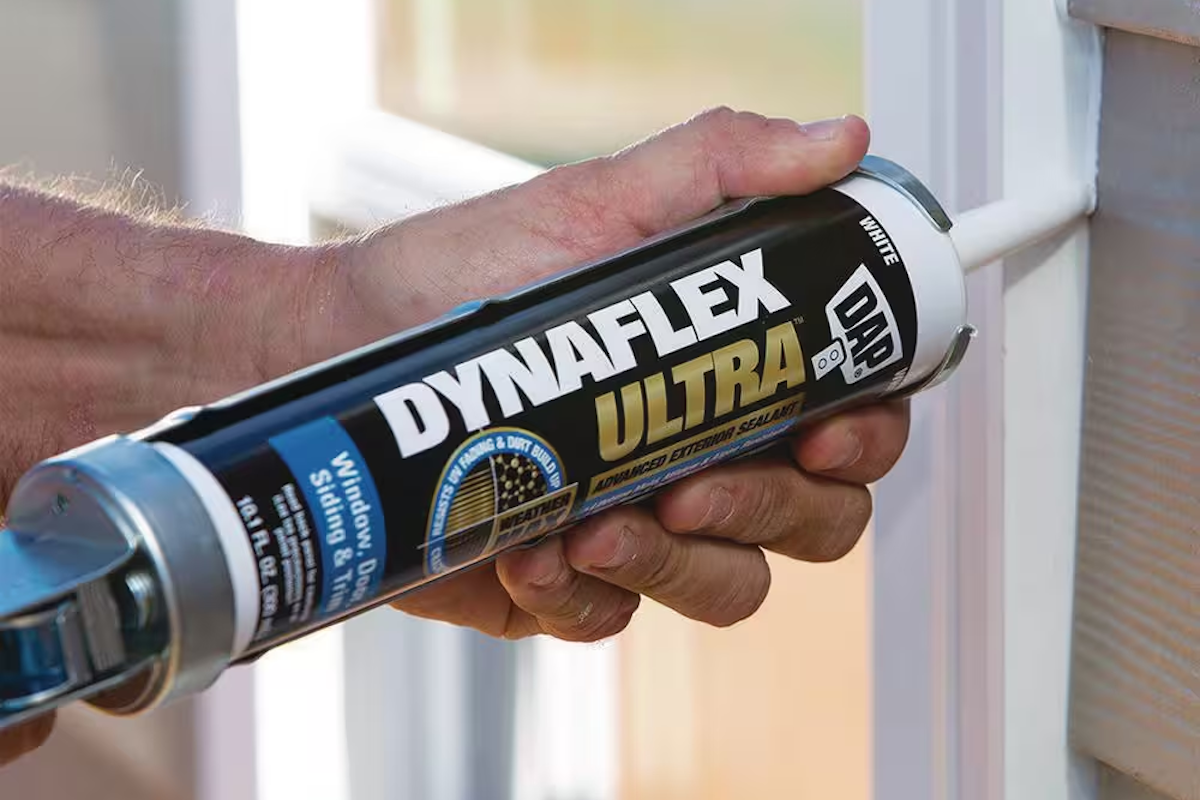
- Exterior windows: To stand up to the elements, exterior caulk is impervious to harsh sun rays, water, and fluctuating temperatures. The tube of caulk should specify it’s intended for exterior surfaces. During hands-on tests for the guide to the best exterior caulks, our testers found that GE Advanced Silicone 2 Window & Door Sealant was the top choice for windows and doors. The guide also contains top picks for all budgets and exterior types.
- Interior windows: Caulk used on interior windows should not emit toxic fumes, and it should hold paint well. High quality, paintable latex, such as White Lightning’s Painter’s Preferred Acrylic Latex Caulk, is a good choice for interior windows.
- Humid rooms: Caulking bathroom windows, or caulking windows in other high-humidity rooms, calls for interior caulk that’s both waterproof and mold-resistant. Kwik Seal Ultra works well in steamy situations.
- Masonry siding: When caulking seams between windows and masonry siding, including basement windows and windows on stucco or brick homes, you’ll need an exterior caulk that’s compatible with both the window and the masonry surface. General Electric Advanced Siliconized Acrylic Latex Caulk is a solid option for these types of uses.
DON’T caulk over old caulk.
If the existing caulk has hardened and is pulling away, don’t caulk over existing caulk. Running a bead over it is sure to be an exercise in futility. The old caulk will continue to pull away, taking the new caulk off with it—and before that happens you’ll be faced with a thick, messy caulk line that detracts from the look of the window. Scrape out the old caulk and clean out the area before laying a new bead of caulk.
DO use a caulking gun with a thumb release.
Cheap caulking guns come with a ratchet-style handle that must be twisted loose to release the pressure on the caulk in the tube. With this type of gun, caulk will keep oozing out until you loosen the handle with your hand, resulting in excess caulk on the window frame. A better choice is to use a caulking gun with a thumb release you can press to instantly release the pressure on the caulk so it stops flowing when you’re done running a bead. We like Dripless Caulk Gun for its ability to prevent dripping, which is a major frustration with many caulk guns.
DON’T cut too much off the end of the caulk tube tip.

The plastic tip on a caulk tube narrows to a point, and the more you cut off, the larger the bead of caulk will be. Some tubes come with measured cut lines on the tip, allowing you to select the one that most closely matches the width of the seam; others are unmarked. The best practice is to cut off just the end of the tip, and then squeeze out some caulk to see the size of the bead on a scrap. You can always cut off more, but if you cut off too much at first, your bead will be too thick for the seam. Prchal says that among the mistakes homeowners make: “The biggest mistake is that they apply too much, and they don’t apply it evenly.”
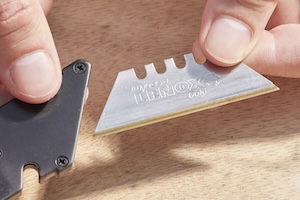
ESSENTIAL GEAR
Lenox utility knife blades are made from a high-speed steel and titanium blend, which gives the blades improved lateral strength and an edge that remains sharper for longer than other blades of its kind.
Lenox blades are suitable for slicing through any material, including drywall, cardboard, carpet, and fabric. We also like that their four-notch design allows them to extend farther from the knife.
Lenox Titanium Edge Utility Knife Blades (4 pack), $2.89 at Amazon.
DO keep a towel and a bucket of water nearby.
Caulking can be a messy endeavor. The amount of potential mess depends on the caulk gun you choose, how much experience you have, and the temperature. For example, warmer environments make caulk more runny, so it’s best to not attempt your first caulk job on a hot or humid day.
Pros always have a towel and a bucket of water close by when laying a bead of caulk. While they can be used to clean up little mistakes made with water-based caulk, the water is also used to finger-smooth water-based caulk beads for a finished look.
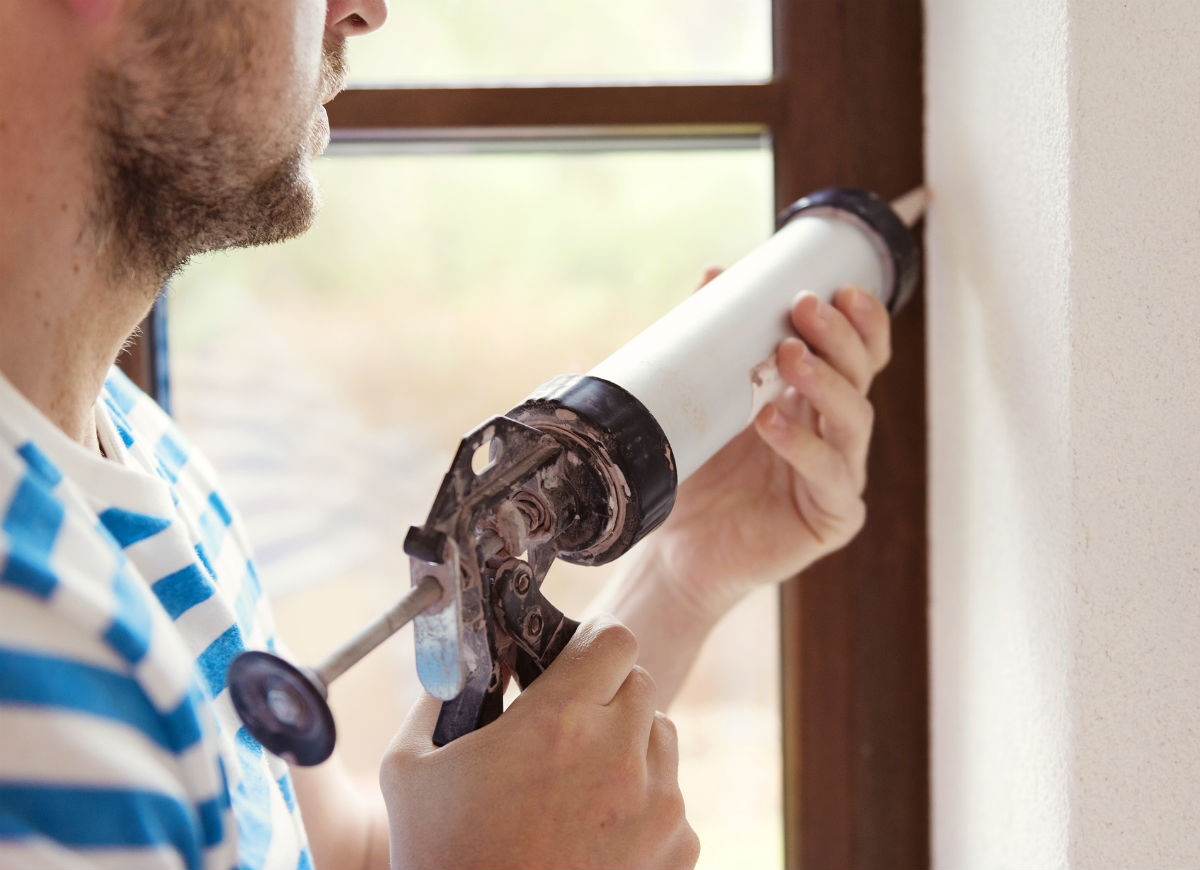
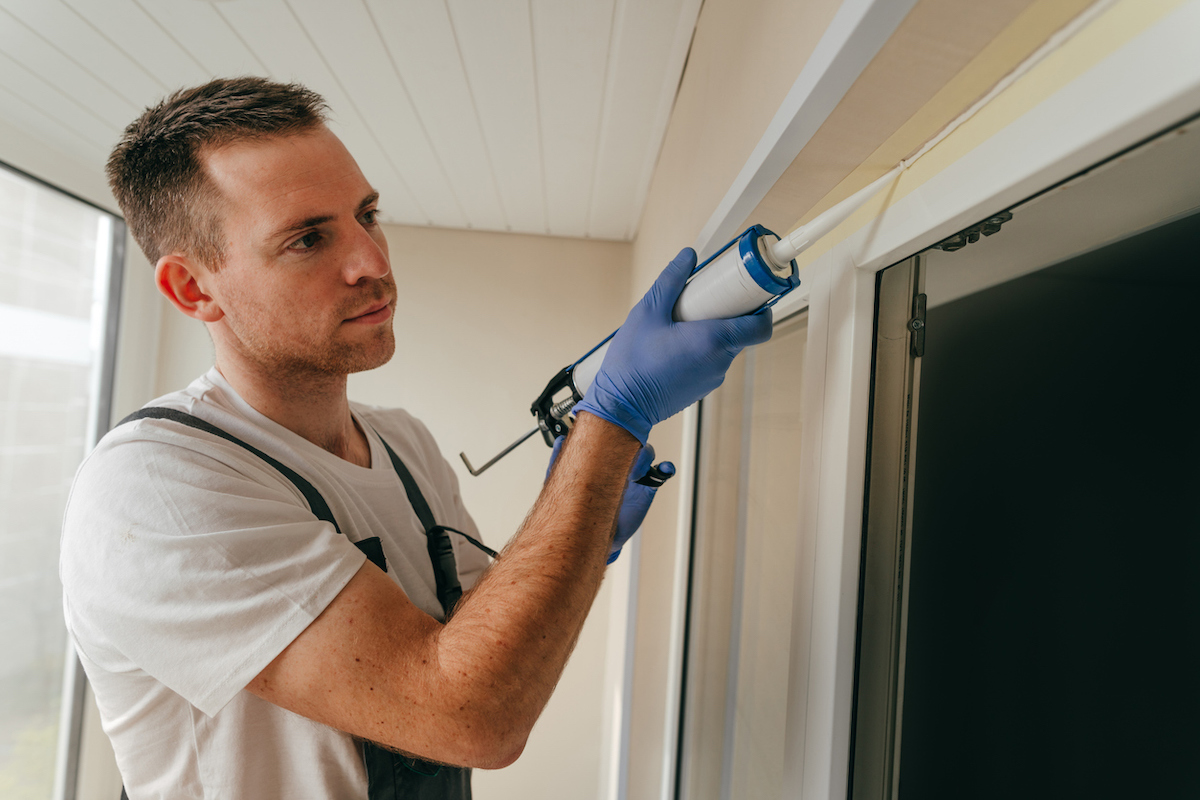
DO use both hands to run a bead.

It takes two hands to control a caulking gun. Use your dominant hand to hold the gun and pull the trigger, and support the barrel of the gun near the tip with your other hand. Also be sure to keep your wrists straight, moving your elbows and body when running a bead. For example, if caulking a vertical seam, start at the top and as you progress downward, bend your elbows—or knees—to caulk lower while maintaining your wrist position. Bending your wrists would alter the angle of the caulking gun, changing the appearance of the bead.
DO run a continuous bead if there’s brick.
If applying caulk between a window and masonry, it’s tough to smooth a bead of caulk and it can end up being a mess. Therefore, it’s important to lay the bead of caulk uniformly. However, this doesn’t mean that you have to run the bead from top to bottom without stopping.
When running a long bead, you may have to change your grip on the caulk gun or your position on the ladder by the time you reach the end, which can affect the uniformity of the caulk bead. Another strategy is to caulk from one end to the middle of the seam and stop. Then, start at the other end and caulk to meet the first bead. This will allow you to maintain a steady hand position, which will result in a uniform bead.
But, don’t pause while caulking without lifting the caulk gun from the surface. Prchal says: “Make sure you don’t stop because if you stop while caulking it makes the bead bigger.”
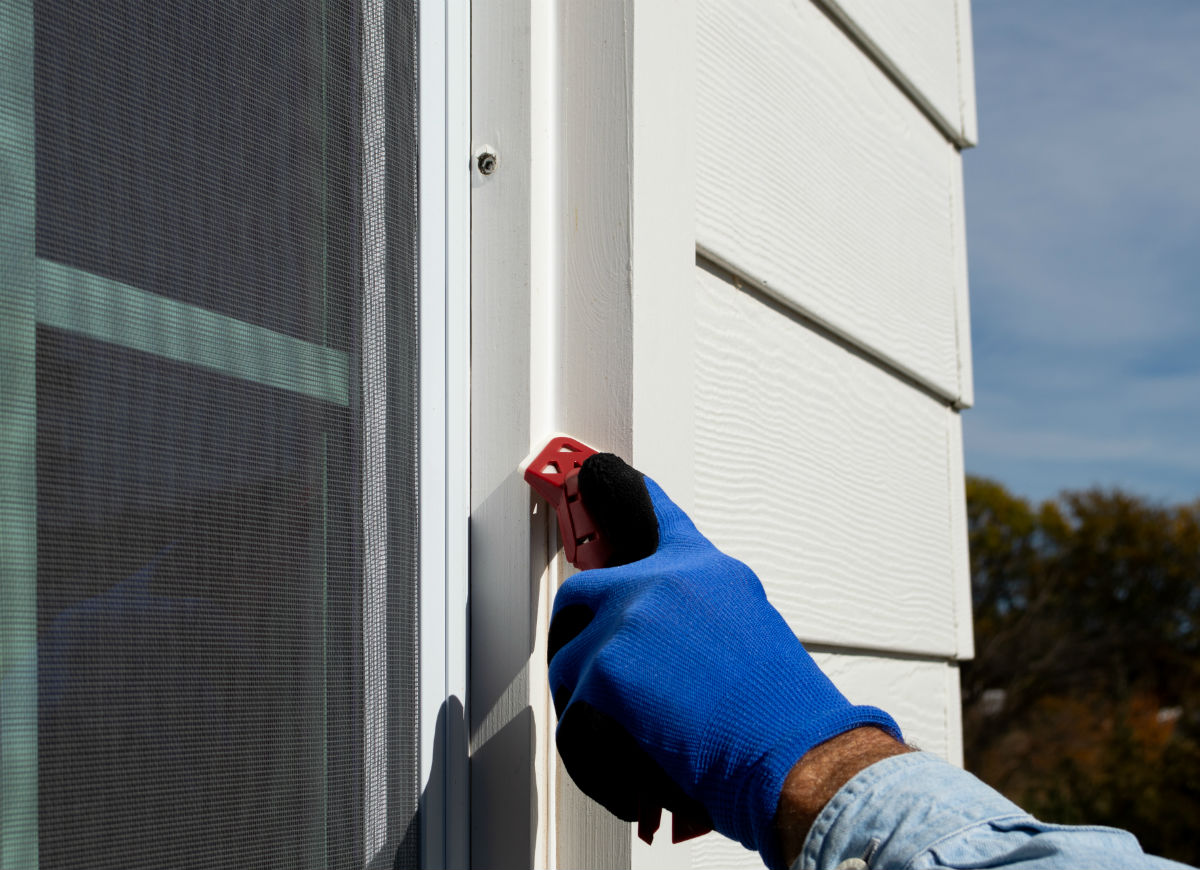
DO ride the smooth edge when caulking a seam between a window and textured siding.
Exterior cladding like siding is often textured, and if you slide the tip of the tube along the bumpy texture, the bead of caulk will also be bumpy. The solution is to allow the tip of the tube to slide, or “ride” as the pros say, only along the smooth window frame edge. The caulk will still seal the seam and you’ll have a better-looking bead.
DON’T smooth the bead of caulk all the way from one end to the other.
For a finished look, water-based caulk is smoothed after application with a wet finger, but silicone caulk is often applied as a continuous bead and isn’t smoothed with a finger. You can use a plastic spoon or a tool designed for smoothing both types of caulk such as HYDE’s Caulk-Rite Pro Application Tool. A bit of rubbing alcohol with the tool can help smooth a bead of silicone caulk, too.
The best way to smooth the bead is to start about 6 inches from the bottom and smooth that small section first, and then dip your finger or tool into a bucket of water. Then, move up another 6 inches and smooth that section next, pulling downward toward the section you just smoothed. Amateurs often try to smooth the entire bead at one time, which causes excess caulk to build up and overflow on the sides of the seam. Smoothing just a small section at a time will give you a professional look and prevent a mess of excess caulk on the sides of the seam. It takes a couple of hours for the caulk to start drying, so you should have ample time to smooth it.
DO tape off your seams if you can’t run a smooth bead.
If your hands are shaky or you just can’t seem to move the caulking gun smoothly enough to run a uniform bead, you can still obtain good results by taping off the seam with painter’s tape. Simply attach strips of painter’s tape along both edges of the seam, approximately ⅛-inch away from the seam itself. Then, run the bead of caulk and smooth it off as described above. As soon as you’ve smoothed the bead, carefully pull off the painter’s tape and you’ll have a perfect ¼-inch caulk line.
DON’T use caulk as a filler for poorly trimmed-out windows.
Caulk is intended for use on relatively narrow seams, typically ¼-inch wide or tighter. “One of the biggest mistakes a homeowner makes when caulking windows is overcompensating with caulk,” says Chuck von Nordeck, product manager at DAP. “Often, users fill in large voids beyond recommendations without the use of backer rods or properly repairing the windowsill beforehand.”
If applied to large gaps, caulk can sag out of the gap and create an unattractive mess. If you have gaps wider than ¼ inch, the best practice is to fill them first with a foam backer rod, such as this C.R. Laurence Closed Cell Backer Rod and then run your bead of caulk.
DO apply a thick bead between fiber cement siding and windows.
Caulking between fiber cement siding and window frames takes a little more caulk than some other exterior materials that aren’t as textured. “When caulking between windows and fiber cement siding, it is crucial not to go too thin with your bead. Make sure you apply a sufficiently thick bead to seal the edges of each fiber cement board effectively,” says von Nordeck.
He adds: “Smaller beads are more prone to failure due to the thermal cycling of weather, which causes expansion and contraction between the substrates. A thicker bead will accommodate these movements better, providing a more durable and long-lasting seal.”
DON’T wait to replace cracked caulk.
Cracked caulk isn’t serving its purpose, so it’s important to replace it as soon as you notice that it’s failing. “Look for early signs of cracking, which appear as small stress fractures in the joints around the windows,” says von Nordeck. “Regular inspections can help you catch these issues early, ensuring your home remains well-sealed and protected from the elements.”
Expect caulking around window frames to last about 5 years depending on weather conditions. “You’re going to notice when the caulk gets exposed to the sun over time. It starts to harden up and it starts to crack and become brittle,” says Prchal. “The discoloration and peeling overtime will be a tell-tale sign, as well.”
Need help with window caulking?
Let a pro do it for you. Get free, no-commitment estimates from trusted handymen near you.
DO call a pro if you don’t feel comfortable caulking.
If caulking your windows involves a ladder and you aren’t comfortable working from heights and aren’t confident about caulking, it’s a good idea to hire a pro to do the job.
“Call right away, if you don’t have the proper tools or safety equipment. Especially if it is two stories, involve a professional,” says Prchal. “It is all about safety.”
