We may earn revenue from the products available on this page and participate in affiliate programs. Learn More ›
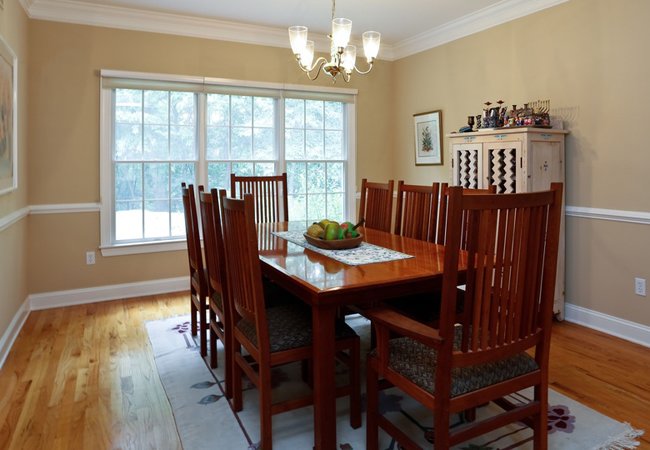
Sometimes the simplest updates make the most impact in a room—and chair rail molding is no exception. More than an easy way to add architectural interest and classic style to bare and basic walls, chair rail is also a fairly straightforward addition that most DIYers can tackle in a weekend. Follow our steps for installation, and give your space an embellishment to brag about.
Tools & Materials
Bobvila.com may earn a commission from purchases made through these links.
Step 1
Before you purchase materials, determine how much molding you’ll need by measuring the length of your walls at the appropriate chair rail height. As a general rule, chair rail should be applied one-third of the way up the wall from the floor—so for a room with an 8-foot ceiling, installing the chair rail at around 32 inches is a safe bet. When considering how much to buy, make allowances for miter cuts and mistakes by adding about 1 foot to the length of each wall.
Step 2
Shop around for your favorite style of molding, mindful of the room’s existing trim when making your selection. Installation will be easiest and will look best if the molding is similar to and no thicker than the trim around the room’s doors and windows. Whether you’re interested in a simple, restrained look or something more ornate, most big-box home improvement stores will carry a wide selection of molding to choose from. If you strike out there, though, a local millwork dealer or lumberyard is sure to have options that suit your style.
Step 3
If you’re looking to paint or wallpaper your room, do that before you install the chair rail, and plan to touch up afterward as necessary. Next, find the wall studs and mark their locations with masking tape or a pencil. Then, use a level and measuring tape to draw a guideline around the room at the height where you want the chair rail to sit. If your floor is not level (a common issue in older or historic homes), you may need to split the difference between the guideline on the wall and a consistent measurement from the floor, otherwise the chair rail could end up looking crooked even if it is truly level.
Step 4
Evaluate your space so you can figure out a plan of attack for cutting the molding to fit. If possible, start at a window or doorframe that requires only one piece of molding that can be cut at a 90-degree angle on both ends. For everything else, you’ll need to employ a few other cuts to create specific joints.
- If one of your walls runs longer than your longest piece of molding, connect two pieces with a miter joint. The two should join over a wall stud, so first measure along the wall and cut the moldings to a length at which they will overlap at the stud. The cuts should be at opposite 45-degree angles.
- For inside corners where one of the strips of molding has been finished with a square cut, you will have to cope the end of the connecting piece for a seamless joint.
- For outside corners, a miter joint formed from two matching 45-degree angles will do the trick. Not all outside corners are perfect right angles, however, so it’s best to use scrap pieces to test the corner angle before making the cut on your molding.
Step 5
If you want to apply a stain to your molding, do so before attaching it to the wall, and touch up after as necessary. But if you want to paint the molding, it’s best to apply a coat of primer first, attach the molding to the wall, and then paint the molding once it’s set.
Step 6
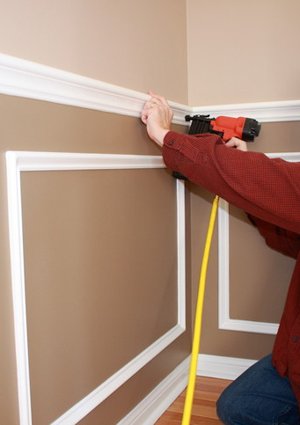
To install the molding, apply wood glue or construction adhesive to the back of the first piece and attach it to the wall, placing the bottom edge of the wood at the guideline you marked in Step 3. Secure each piece with two 2-1/2-inch finishing nails in line with each other. When you’re bringing two ends together in a miter joint, add extra wood glue at the joint, and complete the seam with two finishing nails into the studs. Use a nail set to recess the nail heads to achieve a smooth appearance. Continue with each piece until you complete the room.
Step 7
Once you’re sure all nail heads are recessed, use wood filler to fill the holes and any gaps at joints. Then, lightly sand the filler and the joints. Apply a bead of caulk at the top and bottom edge of the molding where it meets the wall. Finally, complete any touch-ups or finish coats as necessary and step back to admire a job well done.
