We may earn revenue from the products available on this page and participate in affiliate programs. Learn More ›
Plywood is essential for many DIY carpentry projects you take on in your home. It’s exceptionally strong, resists splitting and warping, and is much more affordable than using solid wood. All these factors make plywood an ideal choice for everything from built-in shelving to kitchen cabinets.
That’s not to say that plywood doesn’t have its disadvantages: Plywood’s layered structure makes cutting it without splintering its edges tricky, whether you’re using a table saw or circular saw. You need to use the right type of saw blade, support the piece adequately, and employ a few tricks of the trade if you want to execute clean, precise cuts.
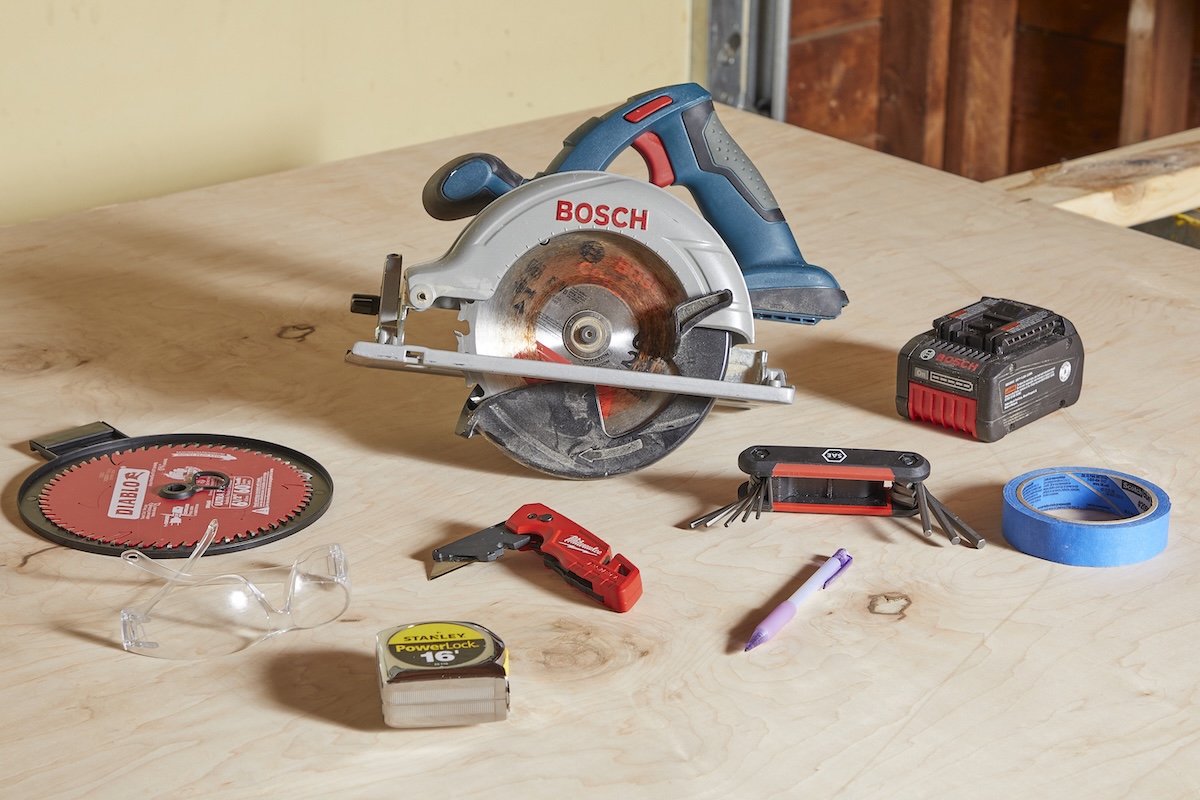
Tools & Materials
Bobvila.com may earn a commission from purchases made through these links.
How to Get Perfect Plywood Cuts
Step 1. Choose the right blade.

If you’re looking to execute clean cuts in plywood, then chances are you’re going to need a new blade. That’s because the stock blade that comes with table saws and circular saws is usually in the 14 to 24 teeth count range, which is designed for general purpose, fast rough cuts. “A lot of chipped-up plywood cuts come from people using whatever blade is already on the saw, and half the time it’s just the wrong blade for the job,” according to Jacob Rhodes, owner and chief engineer at TrueTrac, an Ohio-based woodworking tool company that makes tracks for circular saws.
To get a smooth cut, you’ll need a 40- to 60-tooth fine-tooth circular saw blade, or a 60- to 80-tooth blade if you’re using a 10-inch table saw. Make sure you choose a carbide-tipped blade, which stays sharper longer and won’t heat up like other blade materials.
Best Circular Saw
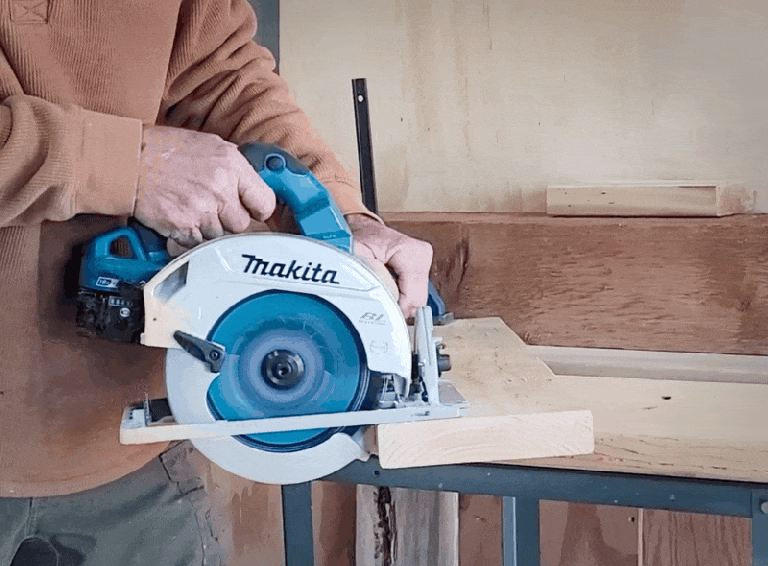
Makita XSH06PT 36V Brushless Cordless 7-1/4” Circular Saw Kit
The Makita has a durable magnesium blade guard, quick-change angle adjustment, and doesn’t lose torque as the battery dies down. Read the full review.
See It
Step 2. Set up support.

Safety First: Plywood comes in 4 foot-by-8 foot sheets and can weigh between 40 pounds and 70 pounds depending on its thickness, making it difficult and even dangerous for one person to carry. When moving plywood, especially if it’s the heavier 3/4-inch-thick variety, get an extra set of hands to help you.
You can set up the plywood on the floor or on a set of saw horses when making cuts with a circular saw. Either way, you need to support it, so that it’s not sagging:
- Cutting with saw horses: Set the sawhorses about 6 feet apart, then lay two 2x4s parallel about 2 feet apart from each other across the sawhorses. Lay the plywood sheet over the sawhorses.
- Cutting on the floor: Lay a piece of foam board on the floor, then lay the plywood sheet on top of the foam board. The foam board supports every inch of the plywood while allowing the blade to slice through it easily. A single piece of foam board should carry you through many plywood cuts.
Keep in mind that whatever material you choose to support the sheet of plywood will be cut by the blade.
Step 3: Position the wood properly.
Plywood has a good side that’s smoother and free of any knots or patches. Since a saw blade is much more likely to splinter plywood as the blade is exiting the wood then entering the wood, you want to place the good side facing down when cutting plywood with a circular saw since the blade enters from the bottom and exits from the top.
The blade on a table saw enters wood from the top, so place plywood face up when cutting with a table saw.
Step 4: Set the blade depth.

Set the blade depth on your saw so that the teeth drop about a 1/4 inch below the bottom of the wood with a circular saw, or 1/4 inch above it for a table saw. This allows the gullets to remove sawdust and wood chips as it’s cutting, making for a smoother, more efficient cut. There is a caveat here if you’re using a table saw (see below).
Step 5: Make the cut.

- Circular saw: Line up the blade so that it’s on the waste side of the cutting line and begin making your cut. Push the saw at a slow, consistent pace so the blade cuts through the wood without bogging down, but doesn’t spend so much time in one place that it burns the wood. Rhodes says stability is key. “The other important thing is keeping the saw from wandering,” he says. “If the saw stays on a fixed path, you usually get a much cleaner edge.”
- Table saw: If you’re cutting with a table saw, it’s crucial to keep the wood up against the fence as you’re cutting to get an accurate, smooth cut. Position yourself so that both hands are outside the blade. Push straight ahead with the hand closest to the blade, while pushing toward the fence with the hand that’s further from the blade. This will push the wood through the blade while keeping it pressed firmly against the fence. As with a circular saw, push the wood at a pace that doesn’t bog down the blade or burn the wood. As you near the end of the cut, reposition your hands so that they are on either side of the blade.
Cross Cuts vs. Rip Cuts


There are two types of cuts that are made through plywood (or really any type of wood): rip cuts and cross cuts. A rip cut is a cut that’s made parallel to the grain, while a cross cut is a cut made perpendicular to the grain. Cross cuts typically cause more splintering with plywood while rip cuts are smoother. You’ll want to use a higher tooth count blade for cross cuts then for rip cuts.
Plywood Cutting Tips
Use a fence.

If you want to make a straight, accurate cut with a circular saw, you need to use a fence. Rhodes advises using a fence unless you’re making a rough cut. “Most bad cuts are not because the saw lacks power,” he says. “It’s because the saw drifts, the sheet moves, or the setup was off before the blade even touched the wood.” You can buy an after-market cutting guide or make your own quick guide:
- Step 1: Measure and mark your cut line on the plywood.
- Step 2: Measure the distance between the saw blade and the edge of the shoe. If you’re keeping the piece of plywood on the left side of the saw, then measure from the left side of the blade to the edge of the shoe. If you’re keeping the plywood that’s on the right side of the blade, then measure from the right side of the blade to the edge of the shoe.
- Step 3: Add that measurement to your cutline and make a new mark.
- Step 4: Line up your straight edge with that new mark and lock it into place using clamps.
- Step 5: Push the circular saw’s shoe up against the guide as you make your cut to execute a perfectly straight line.
Tape it down.

Adding low-adhesion blue masking tape to both faces on the cut line holds the wood fibers in place while cutting plywood. Be sure to secure it firmly, and peel off lightly to minimize splintering.
Tag-team saw types.
Table saws make more precise cuts than circular saws. But running an entire sheet of plywood through a circular saw can be difficult and nearly impossible if working by yourself. If you have both types of saw, use the circular saw to cut the plywood into more manageable pieces, and then make the precise cuts with your table saw.
Best Table Saw for Beginners
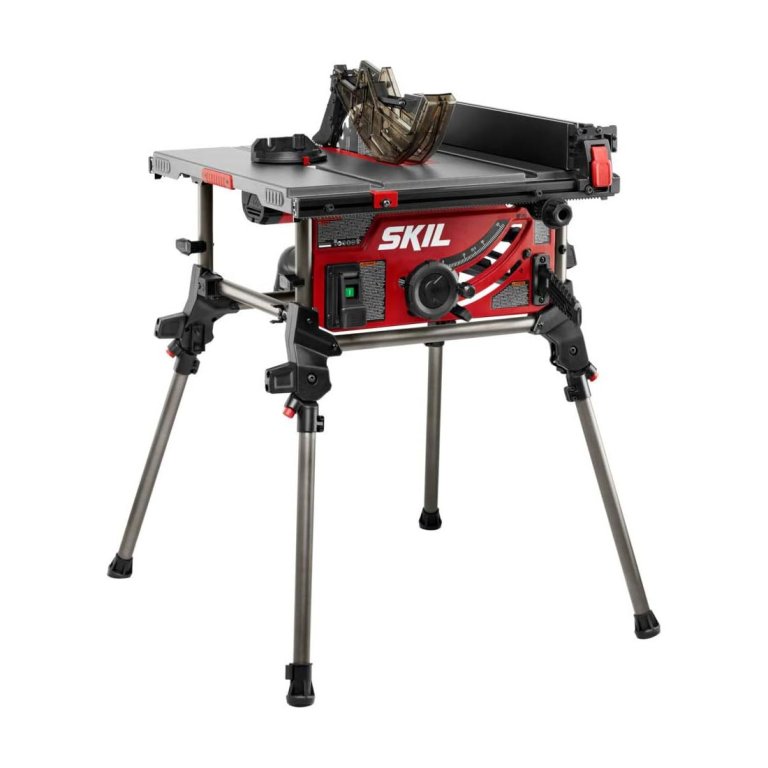
Skil 10-Inch Jobsite Table Saw
SKIL’s moderately priced saw comes with a 10-inch blade and easily can cut through 5/8-inch plywood easily. Read the full review.
See ItRaise the blade.
Typically, to prevent kickback with a table saw, you set the blade to exit the wood just at the gullets, the valleys between the teeth. By raising the blade you can change the direction at which the teeth actually enter the wood, shifting from an angled cut to an almost perpendicular cut. Of course, you need to account for the change and be much more careful when making your cuts—use a feather board and slow your feed rate down.
Note: This does increase the danger of making these cuts and is best practiced on a table saw by an experienced DIYer. Don’t raise the blade more than 1 inch above the gullets, and support the wood on both sides of the blade.
Use a zero-clearance insert.
Depending on what type of saw you’re using, you can minimize tear out by providing support at the cut.
- Circular saws: Use a scrap piece of hardboard to create a zero clearance shoe for your circular saw. Cut the hardboard to the same dimension as the circular saw shoe. Retract the circular saw blade, then attach the cut piece of hardboard to the shoe using double sided tape. Turn on the saw and make a plunge cut through the hardboard to create a zero-clearance slot.
- Table saws: Table saws have a removable throat plate that fits around the blade. There is usually a gap between the stock plate and the blade. Trade out that plate with a zero-clearance throat plate that fits nearly flush to the blade, providing more support for the piece and hence less chance of tearout. You can make one yourself using scrap plywood or MDF.
Score the plywood.

Scoring is an especially good idea if both sides of the plywood will be visible in your project. Before making your cut, score the cut line several times using a straight edge and utility knife to cut through that first layer of veneer. By cutting through that first layer, you’ll prevent the blade from splintering the wood as it pulls through it.
If you’re cutting with a table saw, you don’t need to score the line with a knife. Instead, simply lower the blade to a height of about 1/8-inch and make a scoring cut. Then raise the blade to its normal height and make a second pass to complete the cut.
FAQ
Q. What is the best tool to cut plywood?
The best tool for cutting plywood is a circular saw, says Rhodes. “It’s usually the easiest way to break down plywood without fighting a full sheet on a table saw,” he says. “Table saws are great, but not everybody has the space, and not everybody wants to wrestle a 4’x8’ sheet by themselves.”
Q. Can you cut plywood by hand?
Yes. You can cut plywood by hand using a handsaw, but it’s not ideal. “I wouldn’t choose it unless it’s a small cut or you don’t have power tools handy,” Rhodes says. “It’ll work, but it’s slower, harder to keep straight, and tougher to get a clean edge across a big panel.” When cutting plywood by hand, use a fine-toothed Japanese pull saw and hold the saw at a shallow angle for best results.
Q. Will Home Depot cut plywood for you?
The Home Depot will cut plywood for you using its in-house panel saw, usually for free. However, these saws are intended to make quick rough cuts that make it easier to transport the plywood home rather than precise cuts.
