We may earn revenue from the products available on this page and participate in affiliate programs. Learn More ›
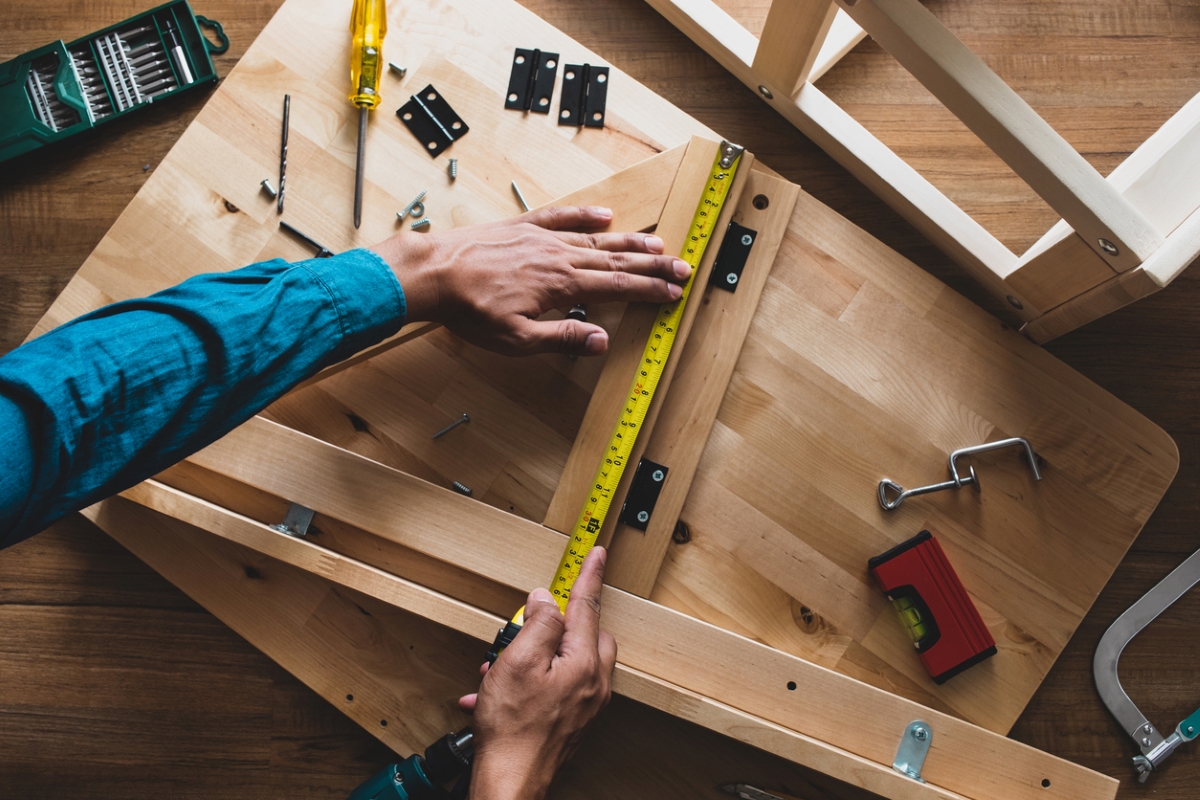
Next to the couch, a coffee table is arguably a crucial piece of furniture in a living room. It’s practical, functional, and offers a focal point that can anchor the style of the room. Though you could buy one, building a coffee table shows off your craftsmanship, saves you money, and allows for personalization—and the final form is one heck of a conversation piece.
What’s the secret behind building a sturdy and stunning table? Having a set of detailed coffee table plans that walk you through how to build a coffee table. Here are some of our favorite DIY coffee table designs to inspire your next building project.
1. Modern Farmhouse Homemade Coffee Table
These wood coffee table plans combine the charm of rustic, traditional design with the clean lines and contemporary elements of modern aesthetics. The final product exudes the warmth and coziness of farmhouse style that seamlessly fits into a wide range of room designs.
This DIY coffee table idea uses standard lumber sizes and results in a stylish coffee table that’s 43.5 inches long by 33 inches wide by 17.75 inches high. This height falls within the range of what’s considered the best coffee table height, between 16 and 18 inches.
Get the Modern Farmhouse Plan at Etsy for $4.99
2. The Ultimate Gaming Table
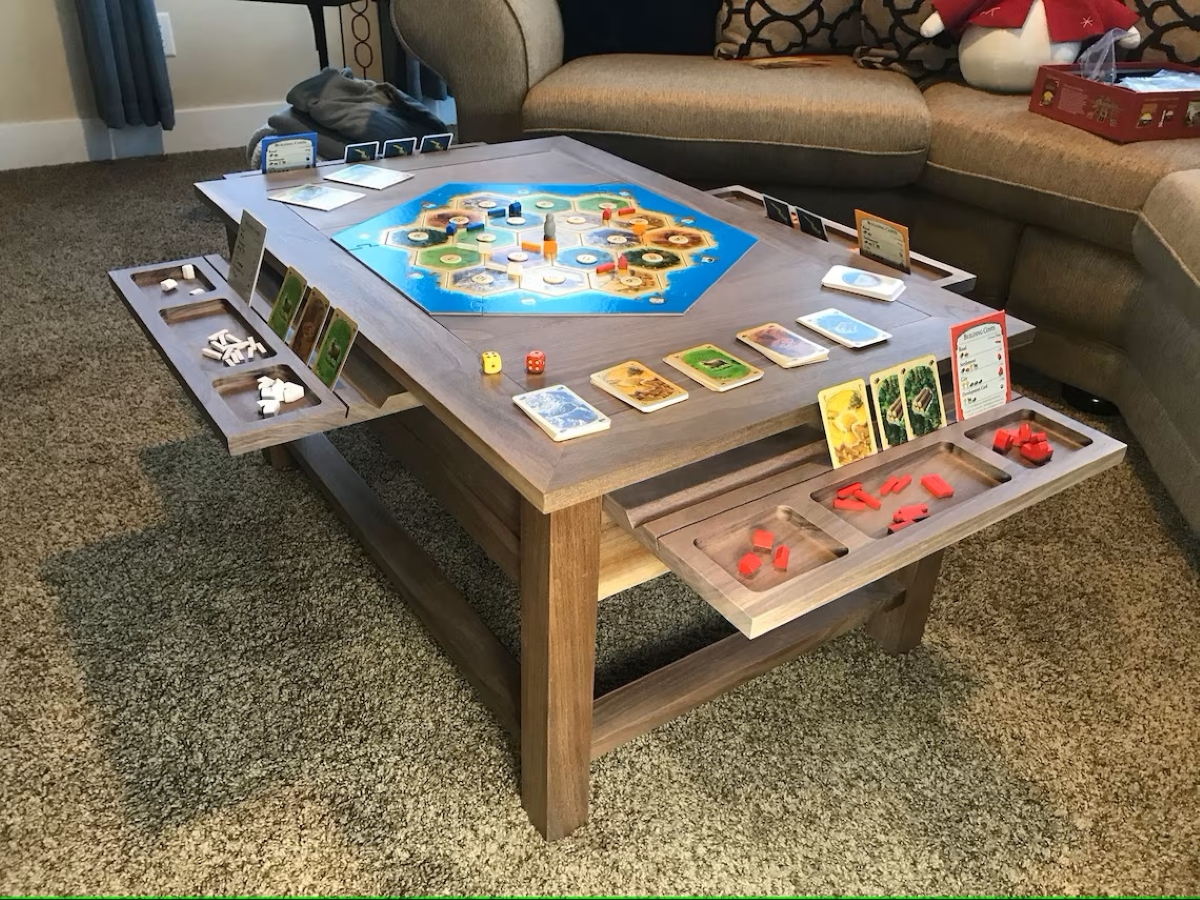
When deciding which coffee table plans are best for your home, consider the area available to fit the table comfortably, the style of your living room, and how the table fits into your lifestyle.
Drew Fisher, the designer of the Ultimate Gaming Table and owner of Fisher’s Shop, goes beyond the beverage stand with his unique coffee table ideas. This design has compartments for board game pieces and puzzles. The completed table is 36 inches long by 24 inches wide by 17.75 inches high.
Though initially intimidating, Fisher breaks down the intermediate build in his YouTube video and says, “My step-by-step instructions list every tool and material you’re going to need, but we also recommend alternate tools for the job … it’s definitely attainable if you know the [woodworking] basics.”
Get the Ultimate Gaming Table Plan at Etsy for $5
3. Indoor/Outdoor Farmhouse Coffee Table

Love farmhouse decor? These DIY wood coffee table plans have a simple storage shelf, stays true to the farmhouse aesthetic, and is for indoor or outdoor use. If you’re making an outdoor version of the coffee table, help it stand up to environmental damage by sealing it with epoxy or varnish; remember to apply it to the feet of the table to prevent the wood from soaking up moisture.
The wood coffee table design is beginner-friendly and only takes a few hours to complete. The result is a charming homemade coffee table that’s 46 inches long by 22 inches wide by 18 inches high.
Get the Indoor/Outdoor Farmhouse Coffee Table Plan at Etsy for $7
4. Compact Outdoor Coffee Table
This DIY coffee table plan is the perfect example of a simple design done right. Intended for outdoor use, this sturdy and stylish design creates an exceptional compact coffee table that fits small patios, balconies, or garden areas. The instructions guide you through detailed steps and assembly instructions to ensure a finished table designed that can withstand the elements.
Get the Compact Outdoor Coffee Table Plan at Etsy for $5.31
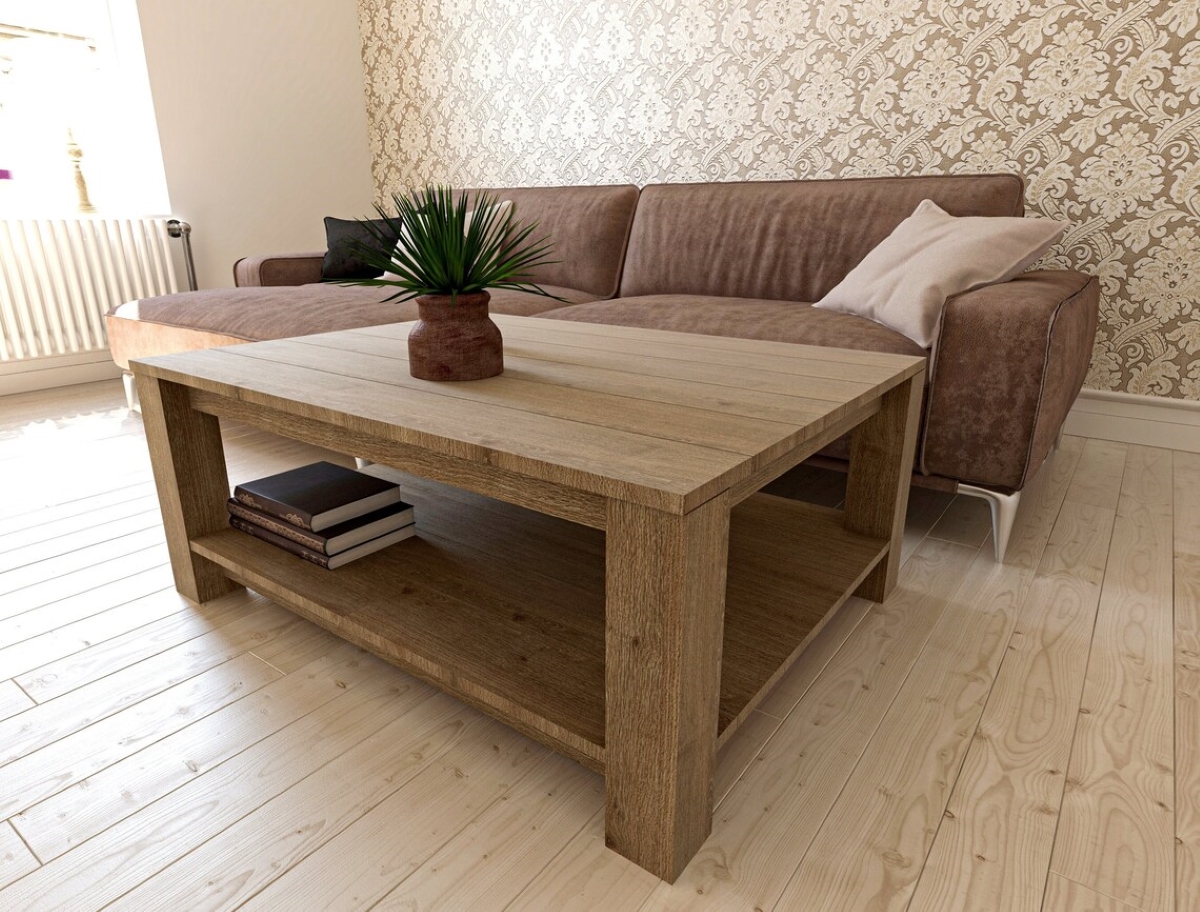
5. Minimalist Coffee Table
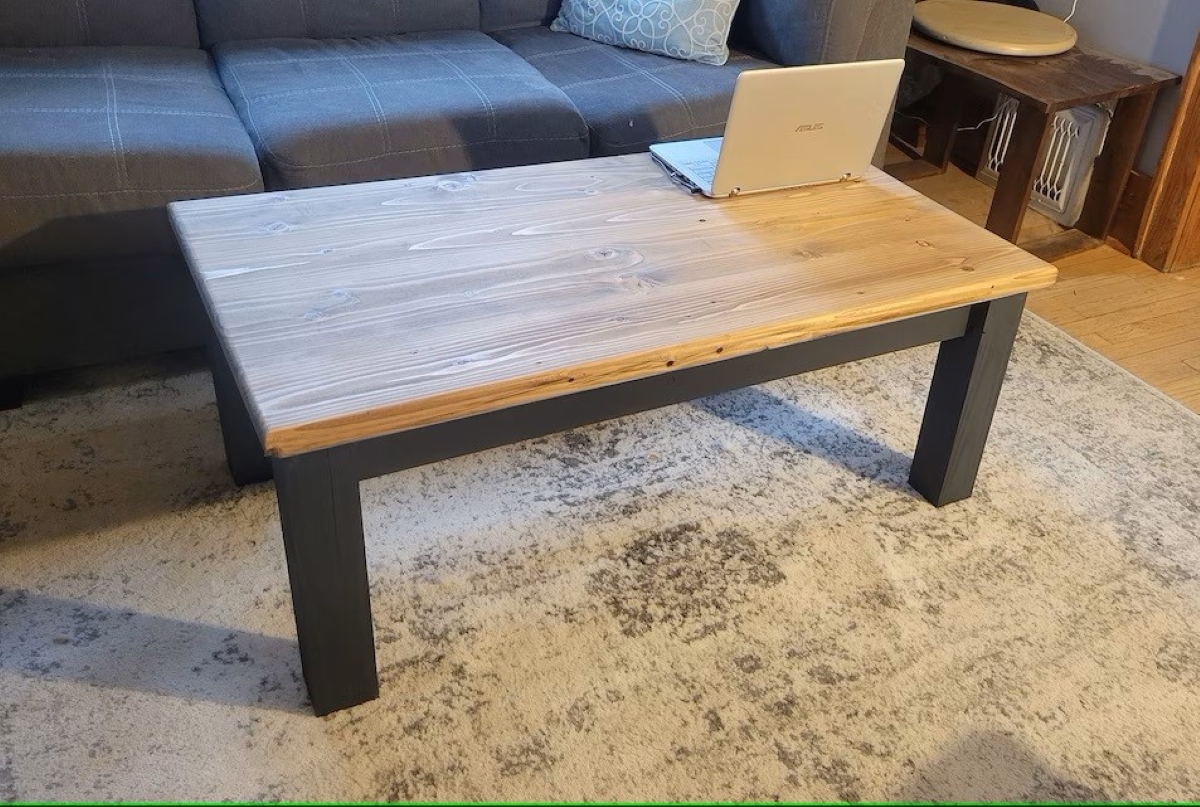
If you value simplicity in your decor, this minimalist DIY coffee table idea may be the one for you. Featuring clean lines and timeless aesthetic, this coffee table is versatile even if your decor style changes.
The featured photo shows a sophisticated contrast between a wood tabletop and a black base. However, in your build, you have the option of getting creative—stain the table, paint it in colors that suit your decor, add a tile mosaic, or add other artistic elements.
Get the Minimalist Coffee Table Plan at Etsy for $2.99
6. A Coffee Table with Dimension
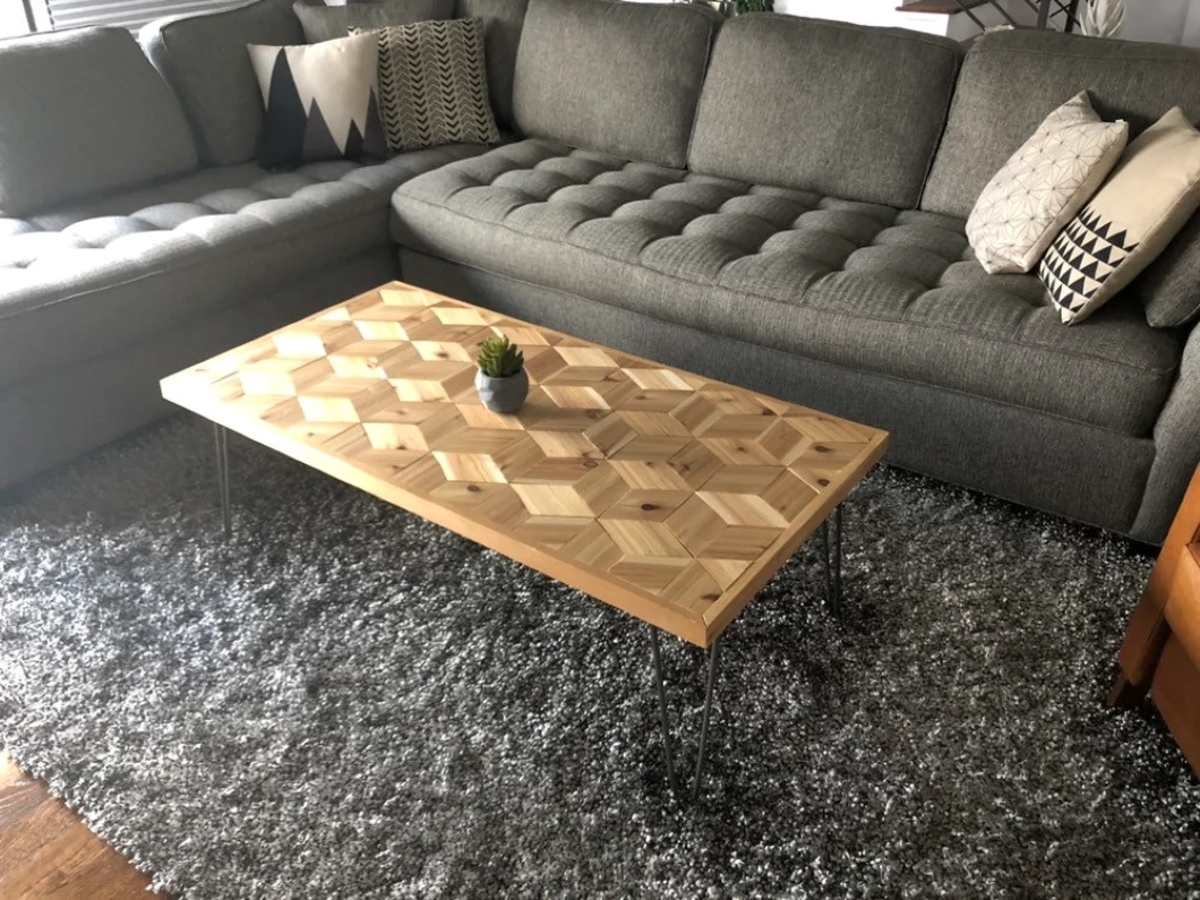
Go beyond the basics of a DIY wood coffee table by adding a pattern to your tabletop and giving a simple piece an eye-catching design. Diamond-shape cuts of wood configured in this layout create a 3-D effect that can add visual texture to a living room.
The step-by-step intermediate coffee table plans walk you through assembly and leave you with a custom coffee table that’s 48 inches long by 24 inches wide by 17 inches high.
Get the Coffee Table with Dimension Plan at Etsy for $4.99
7. Hidden Storage Coffee Table
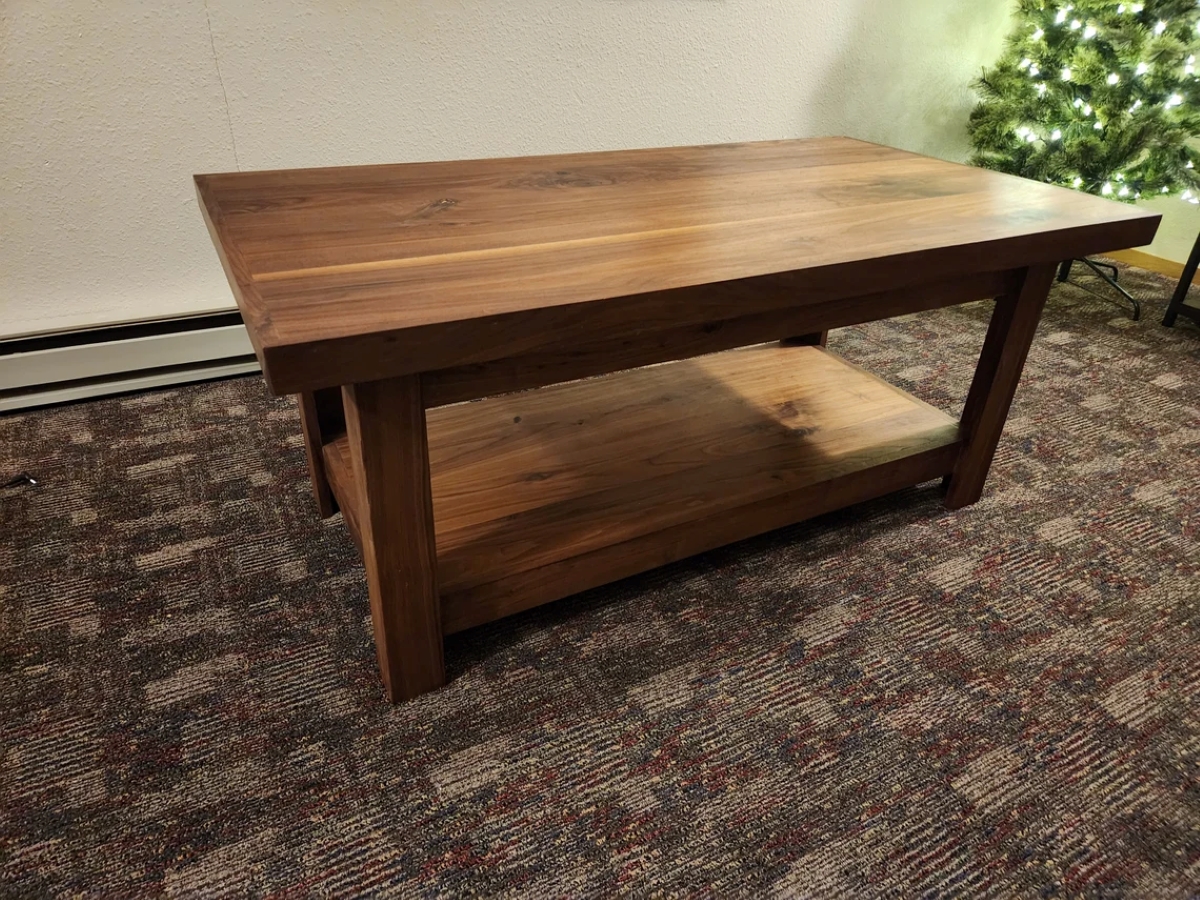
At first glance, this wood coffee table offers a classic design with a low storage shelf but its function goes beyond what you see initially. At 48 inches long by 24 inches wide by 24 inches tall, the table is higher than the usual table height for a good reason. The clever coffee table has a storage compartment hidden within the tabletop. The flip top reveals an excellent place to hide remotes, coffee table books, small blankets, and more to help minimize living room clutter.
Get the Hidden Storage Coffee Table Plan at Etsy for $5
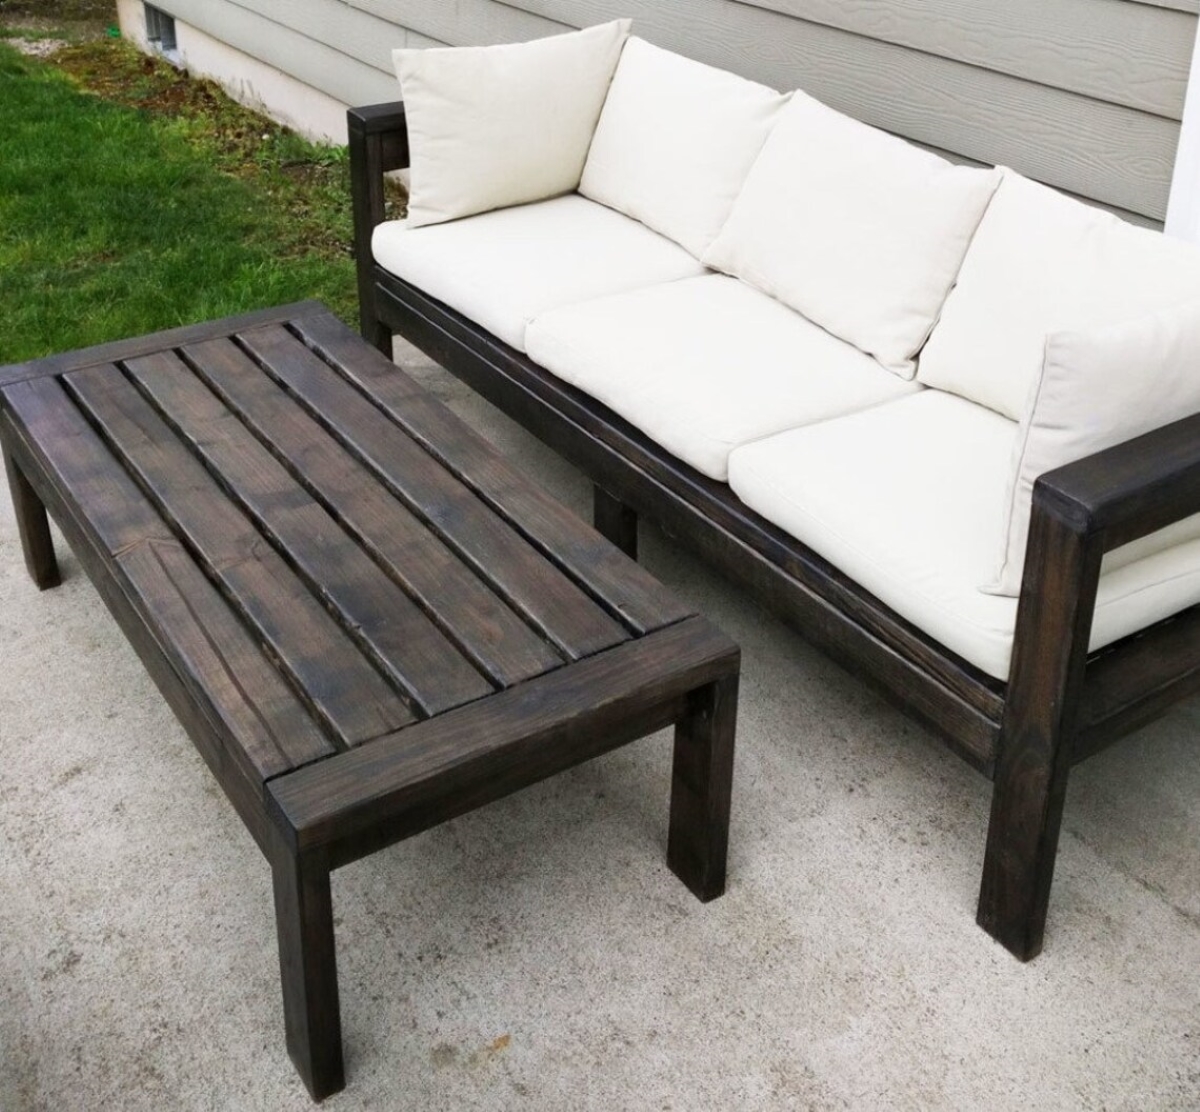
8. Coffee Table and Modular Sofa Set
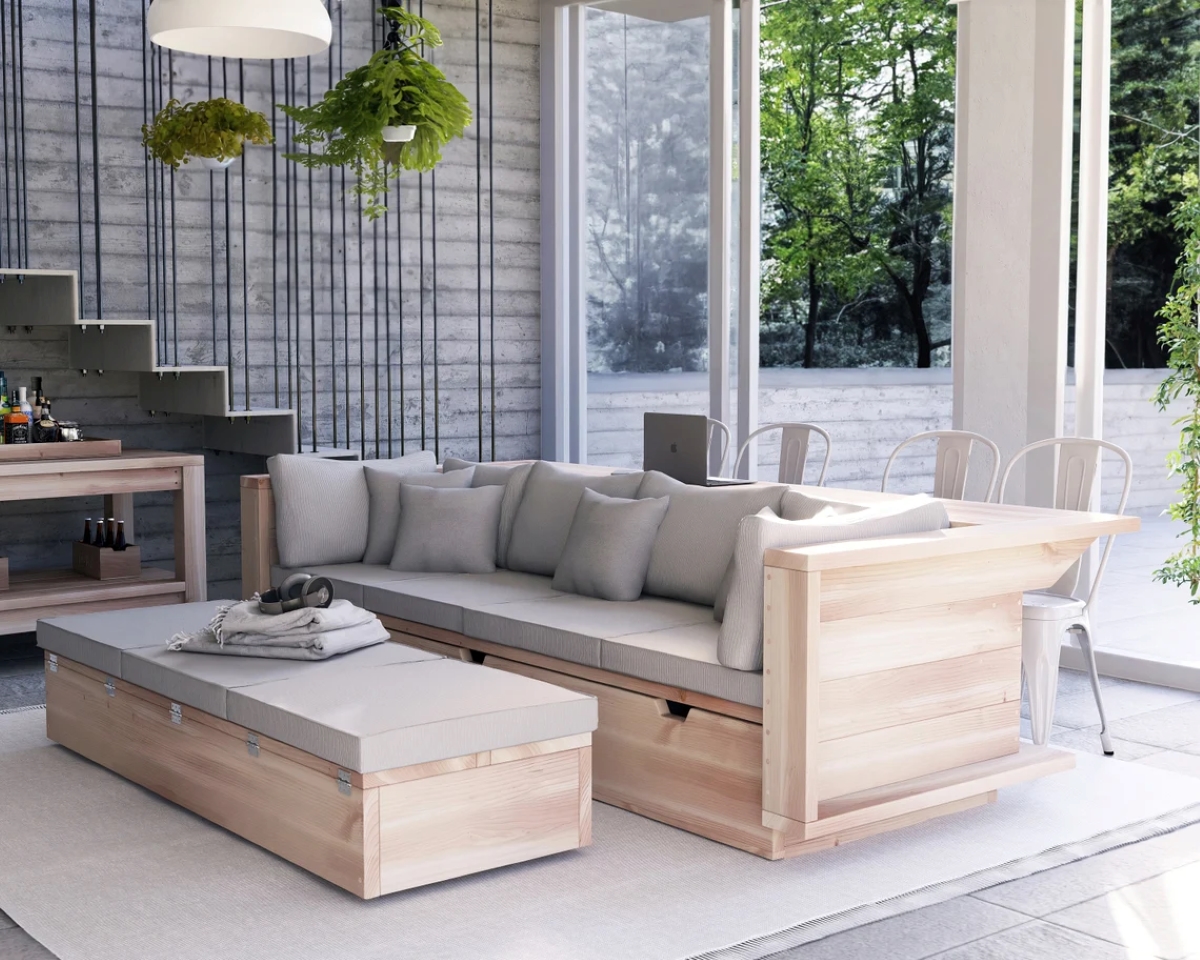
Ambitious beginner and intermediate woodworkers may want to outfit their living room with a furniture set. These coffee table plans include instructions for a matching modular sofa, and the results offer beauty and function to your home. Both have storage compartments for guest bedding, board games, and extra pillows, and you can rearrange the spaces to accommodate your living room space and lifestyle needs.
Get the Coffee Table and Modular Sofa Set Plan at Etsy for $24.98
9. Square Patio Coffee Table
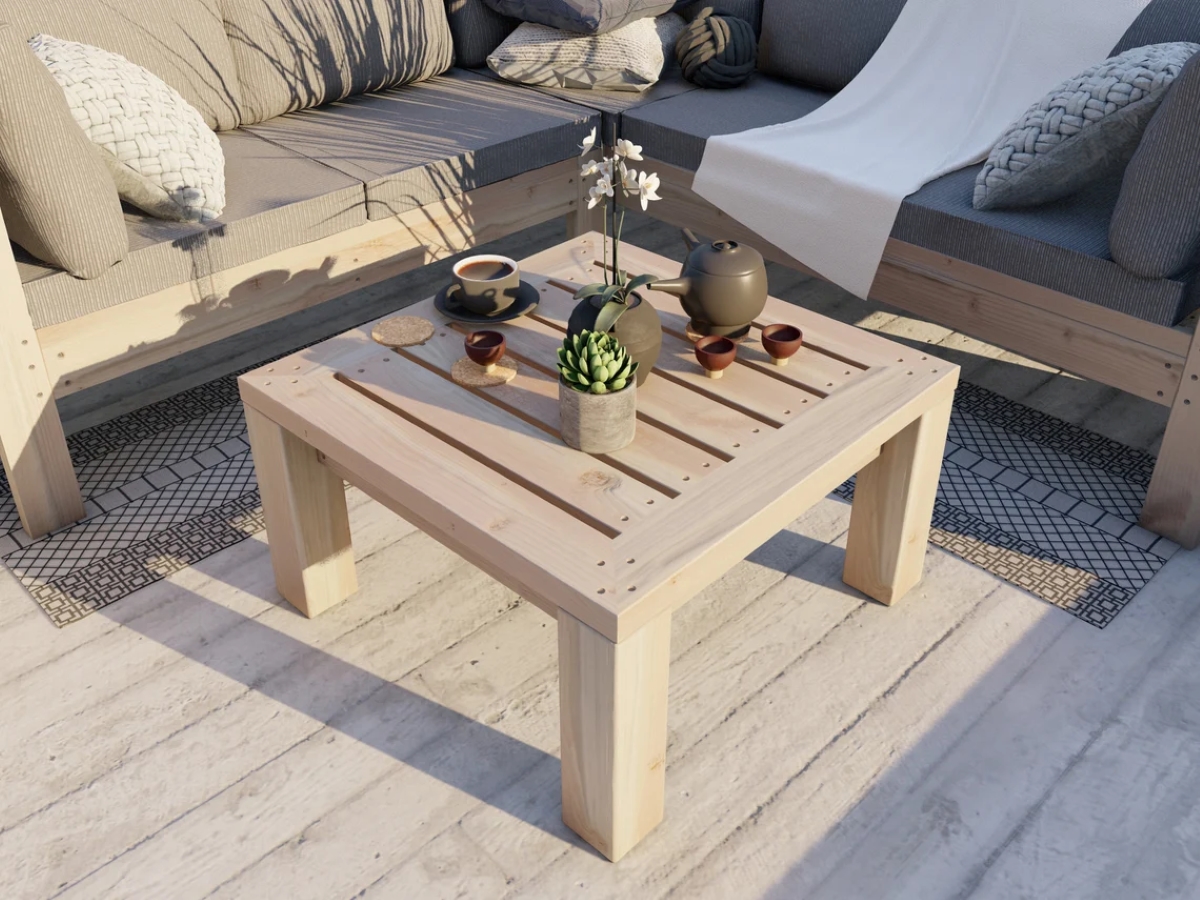
Does your patio or deck need somewhere to rest your drink or a place to put a potted plant? Even small outdoor spaces benefit from having a homemade coffee table to make the area cozy and more functional. Designed for the outdoors, these wood coffee table plans incorporate a slatted tabletop to allow water to drain instead of pool on the surface.
Get the Square Patio Coffee Table Plan at Etsy for $4.98
10. X-Leg Coffee Table
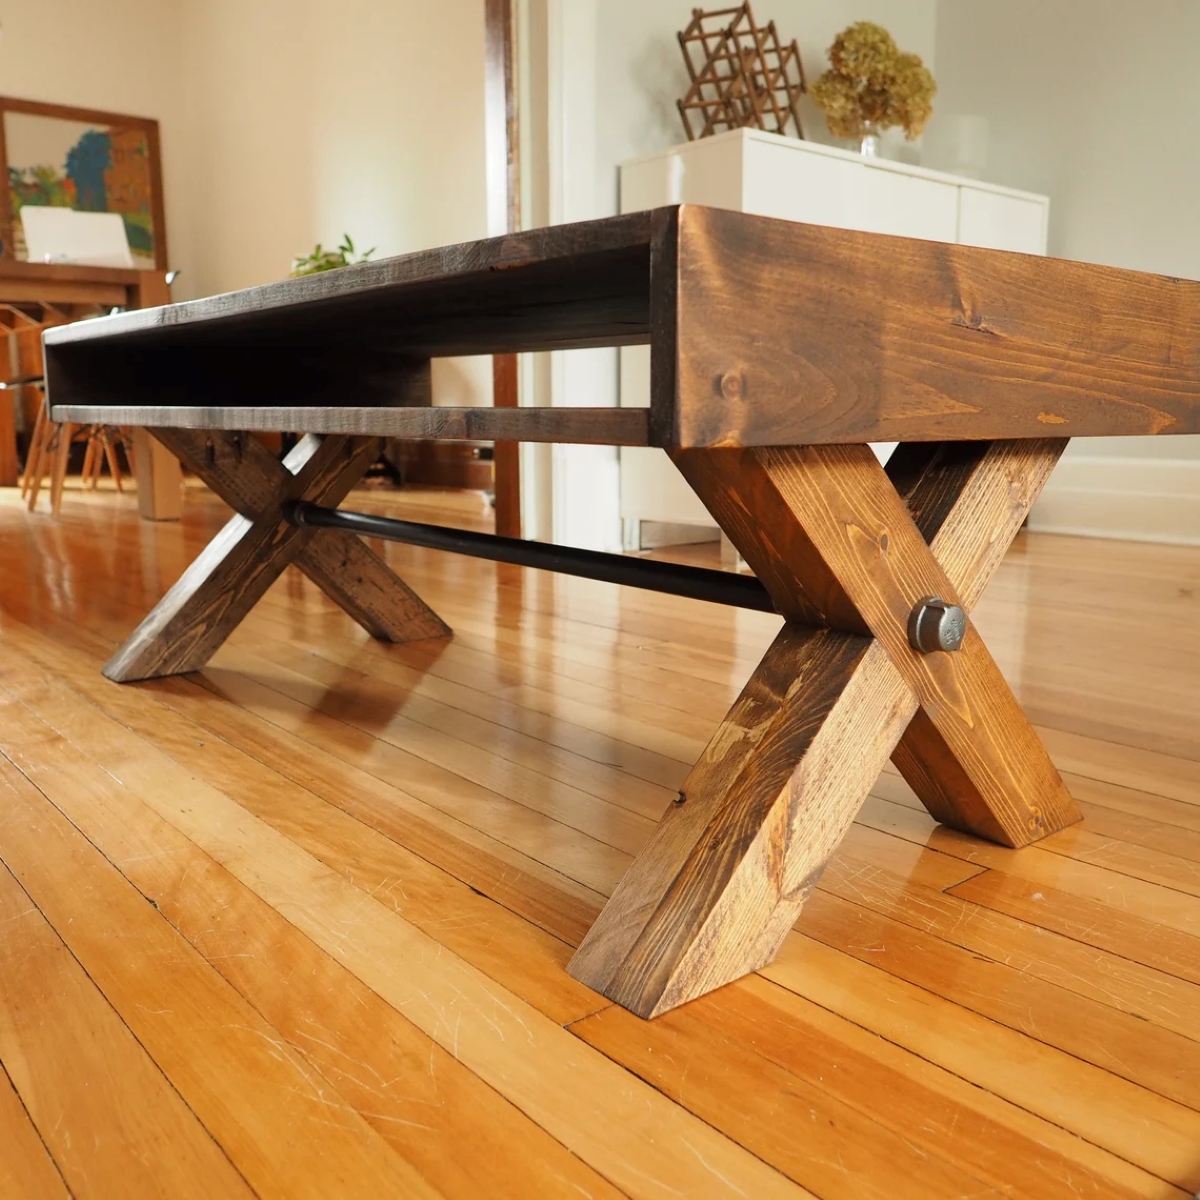
Rustic, bohemian, farmhouse, and other interior design styles look divine with this modern-industrial-style coffee table. The wood X-leg design with iron pipe gives the table stability, and it shows off the raw material aesthetic of industrial design.
These coffee table plans incorporate a double-decker tabletop, creating a small nook for small living room items like remotes and coasters. These plans create an excellent-sized coffee table, that’s 47 inches long, 22 inches wide, and 17.25 inches high.
Get the X-Leg Coffee Table Plan at Etsy for $6.03
11. Sweet and Simple Farmhouse Coffee Table
Simplify your living room design with this farmhouse-style coffee table that’s 40 inches long by 21 inches wide by 18 inches high. The unpretentious design offers aesthetic appeal and practicality; it’s a timeless piece of furniture that effortlessly complements a variety of interior design styles. Best of all, you can make the entire coffee table with just one 2x3x10 board and three 2x4x8 boards.
Get the Sweet and Simple Farmhouse Coffee Table Plan at Etsy for $4.99
12. Modular Hexagon Coffee Table
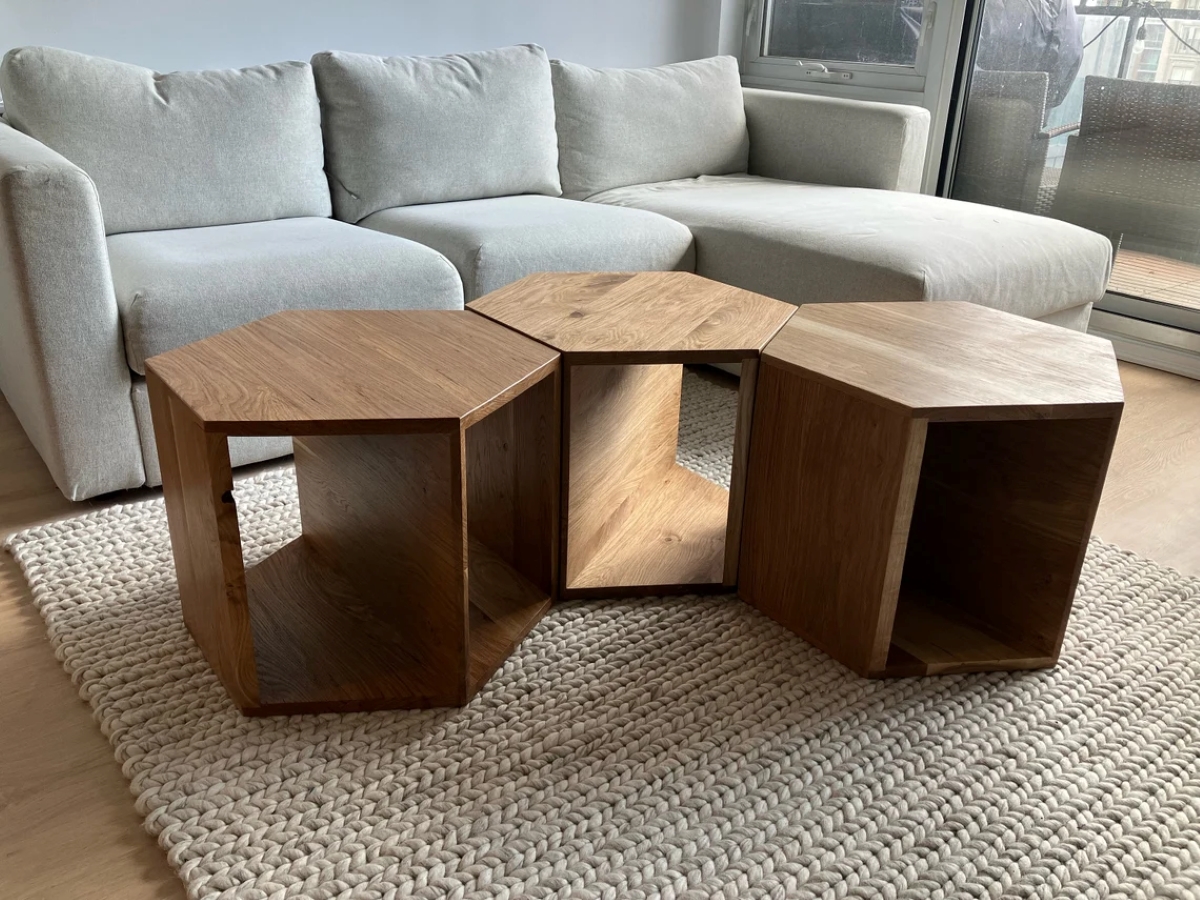
Is your home a gathering hub for family and friends? Game night, party night, and quiet nights at home may all require a different setup, and a versatile coffee table—or tables—is handy.
This beginner-friendly coffee table plan features a charming hexagon shape. With this shape as the tabletop, you can group several of these tables into one large homemade coffee table or separate them so everyone in the room has a place to set down their drink. Additionally, should you need a little storage, flip the table so the rectangular side faces up, and there is a little shelf space built right in.
Get the Modular Hexagon Coffee Table Plan at Etsy for $7.53
13. Classic Coffee Table
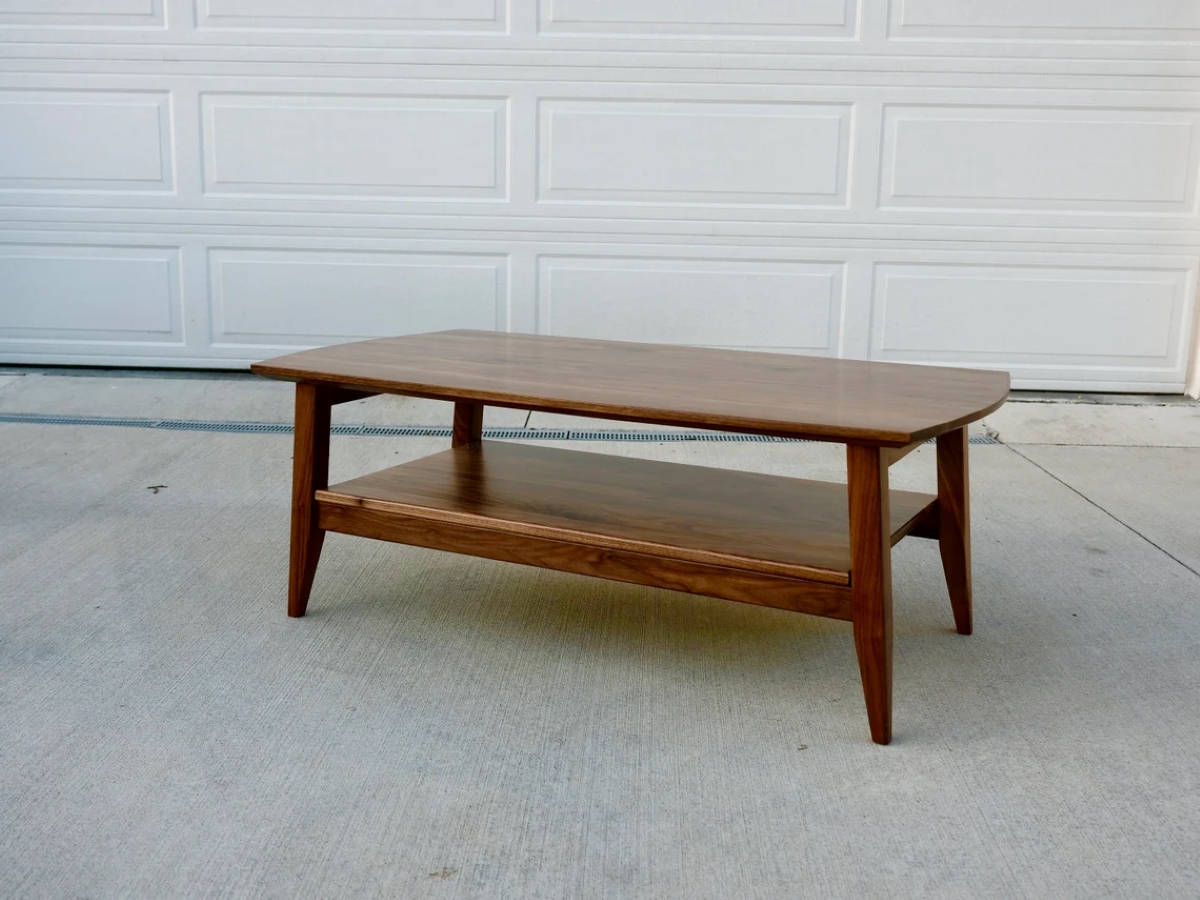
Do you love evergreen furniture pieces? A classic coffee table is characterized by its timeless and simple design, with a shape much like this coffee table design.
The two curved edges make the angle of the tabletop corners wider, creating a more open bend—-which may be less hazardous than a coffee table with sharp 90-degree corners. These coffee table plans are simple to follow and have an accompanying YouTube video about the project. In the end, you have a lovely coffee table that’s 46 inches long, 24 inches wide, and 17 inches tall.
Get the Classic Coffee Table Plan at Etsy for $16
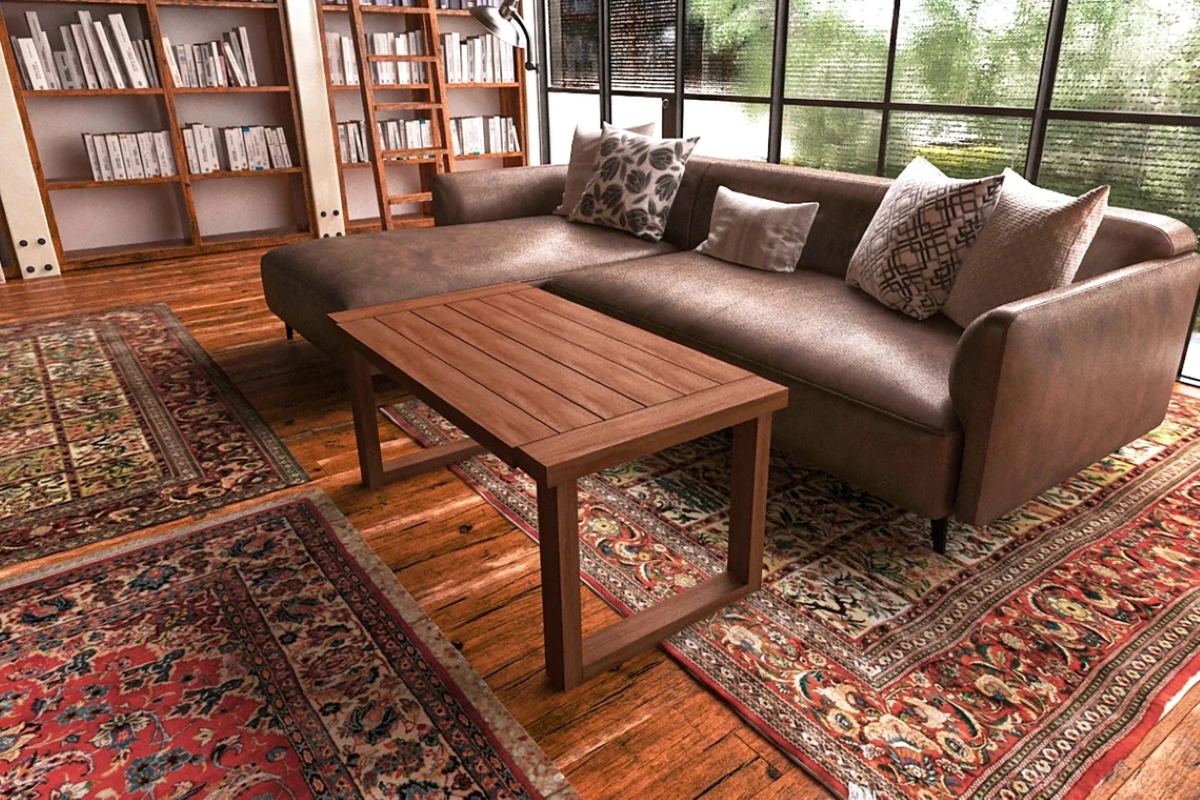
14. DIY Coffee Table Using Joinery Methods
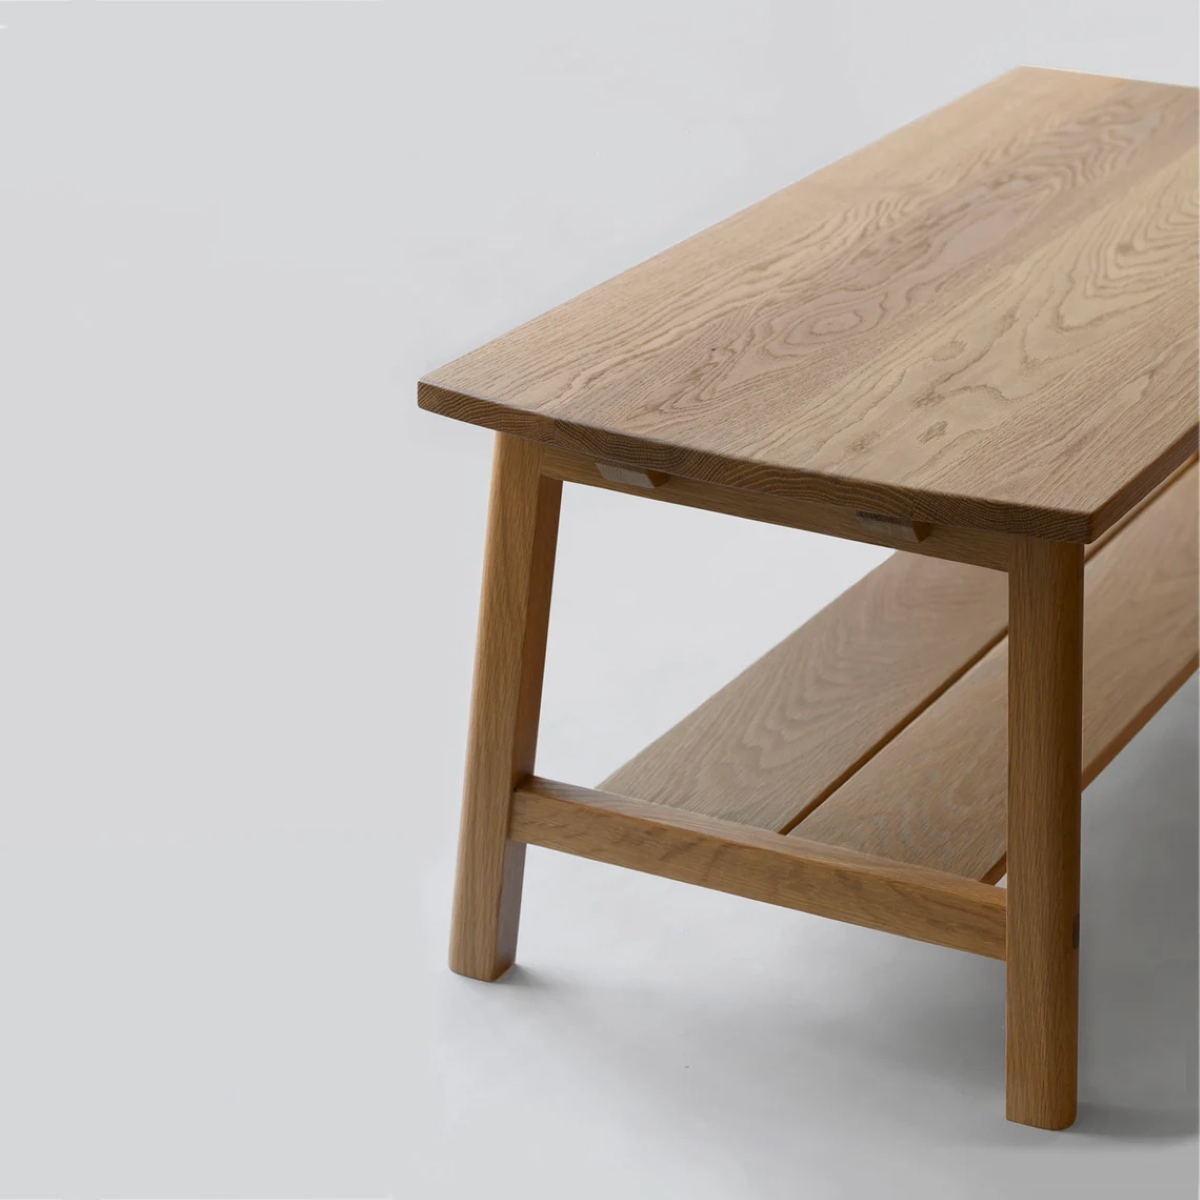
With sleek, clean lines, this wooden coffee table creates an elegant addition to many different styles of homes. Taking inspiration from Japanese minimalism and using joinery methods to upgrade what appears to be a simple design, this coffee table is the epitome of refined style.
These coffee table plans suit various skill sets and include three plans that use different joinery methods. Builders can use dowel joinery or make it by hand, depending on their comfort level and woodworking expertise.
Get the DIY Coffee Table Using Joinery Methods Plan at Etsy for $11.31
15. High End Coffee Table

A coffee table is a prominent feature in a living room style. A high-end, luxurious living room deserves a coffee table to match. When opting for a simple table in a sophisticated room, you need precise plans and quality materials.
If you’re going for a high-end aesthetic, choose a wood that will last a long time. Though pine may be affordable, it’s a softwood that will show dents and dings from use. Opt for hardwood like oak or walnut. You can still paint or stain the table how you like, but they’ll withstand accidental damage much better.
Get the High End Coffee Table Plan at Etsy for $7.98
The prices listed here are accurate as of publication on 10/31/23.
