We may earn revenue from the products available on this page and participate in affiliate programs. Learn More ›
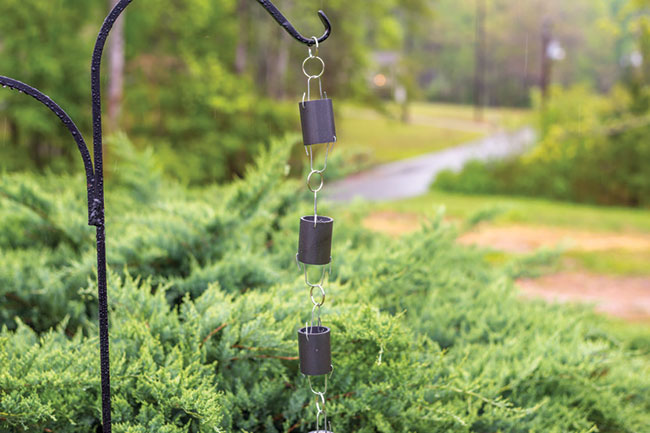
Rain chains bring a little bit of charm to the landscape and can function as beautiful alternatives to traditional gutter downspouts. A rain chain guides rainwater down to the ground, making the flow of water visible and creating a soothing, soft tinkling sound. A simple rain chain can consist of a mere chain, but I fashioned one out of leftover garden hardware and building supplies. While the result is not strictly speaking a “chain,” it operates the same way a rain chain does and adds architectural interest to my garden.
Watch the video tutorial and follow the detailed step-by-step instructions below to make your own rain chain this weekend!
Tools & Materials
Bobvila.com may earn a commission from purchases made through these links.
RELATED: 7 of the Best Rain Gauges, According to Testing
BEFORE YOU BEGIN: Prep the PVC sections.
To kick off this project, first cut the 2-inch-wide PVC pipe into 2 ½-inch lengths. I cut mine into 10 lengths to create a chain with 10 sections.
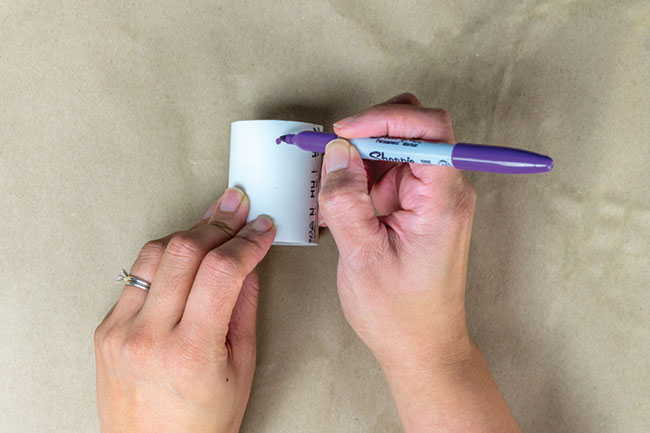
STEP 1: Drill holes in the PVC pipe sections.
Mark a dot about ½ inch down from the rim of one end of each piece of PVC pipe. Make another dot 180 degrees opposite the first dot.
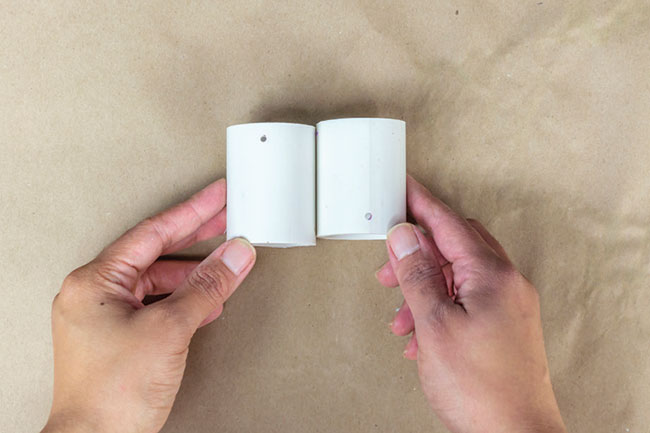
Do the same on the other end of each piece of PVC, but make these dots 90 degrees from the original set of marks. Each piece of PVC should now have four marks total: two on the top and two on the bottom, with the bottom marks offset 90 degrees from the top set. Drill holes in each of the marks using a ¼-inch drill bit. Spray-paint the PVC pieces and let them dry.
Step 2: Form the links of the chain.
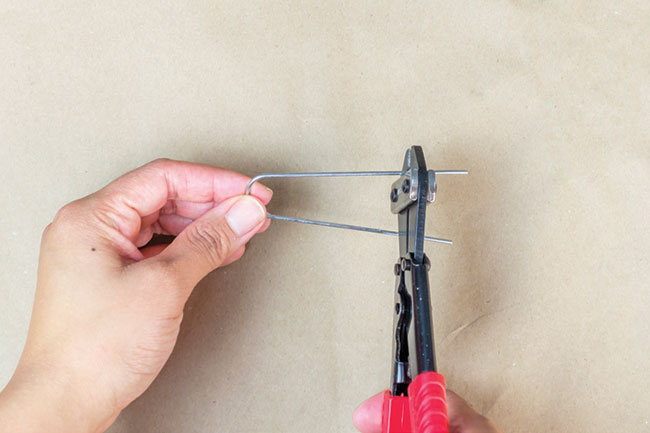
Trim off an inch from each landscape pin using wire cutters. Each piece of PVC will need two landscape pins and one split ring to form the chain links.
You’ll need to make a 90-degree bend at the end of each landscape pin. To keep the bends consistent, it’s best to make a jig. To do this, drill one wood screw into the scrap wood, then drill the other wood screw 2 inches down from the first screw.
Place the landscape pin over the top screw on the jig. Make sure the side of the pin sits on the inside of the other screw on the jig. Grasp the pin with the pliers, placing them right below the lower screw. With a firm squeeze, bend one side of the pin 90 degrees. Flip the pin so that the straight side sits on the inside of the lower screw, and repeat.

When you’re done, each pin should have two 90-degree bends at the ends.
STEP 3: Assemble the rain chain.
To put the rain chain together, start by inserting one end of a bent pin into one of the drilled holes on one of the pipe pieces.
Slip a split ring onto the pin, then insert the other end of the pin into the opposite hole in the pipe piece.
Using the pliers, carefully bend each pin end so that it meets the top of the pipe piece and the side of the pin. Repeat on the other end of the pipe piece.
To attach another piece of pipe, slip the pin through a split ring that’s already attached to a length of pipe, then insert the ends of the pin into the hole of this new piece of pipe. Finish by bending back the pin ends as described above. Continue until you have the length of chain you desire.
STEP 4: Hang the rain chain.
You can hang your rain chain from a shepherd’s hook anywhere in your yard or garden, or hang it from a gutter downspout. (To hang your rain chain from a downspout, you’ll need a rain chain hanging kit, which you can find online or at big-box home improvement stores.) Wherever you choose to hang it, your rain chain will add beauty and charm to your outdoor space.
RELATED: How to Fix Leaking Gutters
Project excerpted from Do-It-Yourself Garden Projects and Crafts. Copyright © 2019 by Debbie Wolfe. Photography by Debbie Wolfe. Used with permission of Skyhorse Publishing, Inc.
