We may earn revenue from the products available on this page and participate in affiliate programs. Learn More ›
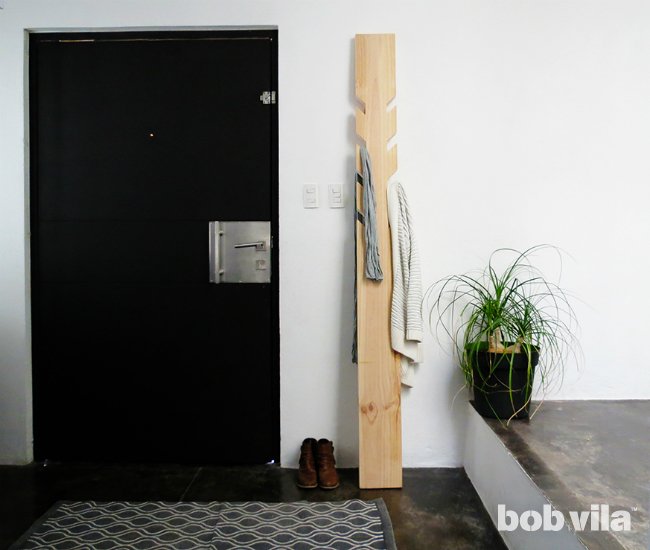
In with the chill, out with the coats—and hats, scarves, mittens … you name it. With so much winter gear and so little space in the typical coat closet, the entryway sometimes needs to do a little more than just welcome you and your guests indoors. Putting a coat rack in this transitional space is a great way to make it more functional and more visually interesting.
Before You Build a Coat Rack
As much as we love the simple design of this leaning coat rack, it may not be the best choice for everyone. Those with young children or rambunctious dogs may want to find a design that offers more stability. Before starting a DIY coat rack project, make sure you’ve selected the right one for your needs and your lifestyle. If this one doesn’t work for you, here are some other DIY coat rack designs as well as a few great ideas for repurposing a coat rack you already own.
Once you’ve settled on a design, it’s time to get moving. Starting a project can be invigorating—nothing beats working with your hands. That said, before you start building this leaning coat rack, or before you start any DIY project, it’s important that you know which tools you need and how to use them safely. If you’ve never used a handsaw, drill, or palm sander, make sure you’re up to speed on safe and proper use before jumping in.
With a handsaw, remember to:
- Start out by cutting at a 45-degree angle
- Use the entire length of the blade on each stroke
- Avoid putting too much pressure on the blade
Always make sure you wear the proper safety gear. As this project involves cutting, sawdust, and varnish, we recommend safety glasses, nitrile rubber gloves, and a solvent mask.
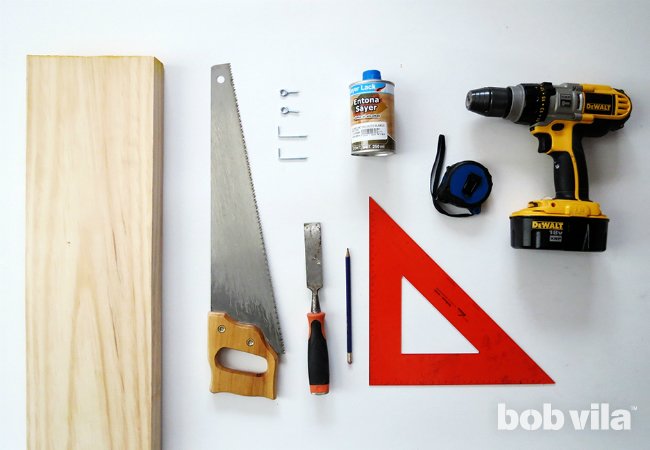
SUPPLIES
- 2×8 piece of lumber
- Ruler
- Set square with a 45-degree angle
- Pencil
- Handsaw
- Clamps
- Wood chisel
- Hammer
- Sandpaper
- Palm sander
- Linseed (flaxseed) oil or varnish
- 2 screw eyes
- 2 square bend screw hooks
- Drill
- Stain or paint (optional)
How to Build a Leaning Coat Rack
This DIY coat rack is incredibly easy to build in a short amount of time. If you work carefully, within a few hours you will have a distinctive coat rack for your home. Proficient DIYers can follow these instructions or try variations to make the project their own. For instance, feel free to use a jigsaw instead of a handsaw, or change the dimensions to better suit your living space.
STEP 1: Trim the 2×8 board to the appropriate length.
Start with an 8-foot-long piece of 2×8 lumber, and cut it down to 7 feet. If you have a miter saw at home, it will be easy to make a quick, clean cut. No miter saw? Many hardware stores will do one free cut for you before you leave the premises.
Most types of wood are just fine to use for your homemade coat rack—you can even use scrap wood. One piece of advice: If you opt for scrap wood, watch out for nails and other hardware, especially when making your cuts.
When you lean this plank against the wall, the height should reach approximately the top of your door frame. Bear in mind, you want the base of the DIY coat rack to sit only a few inches from the wall. If it’s out too far, it may become a tripping hazard.
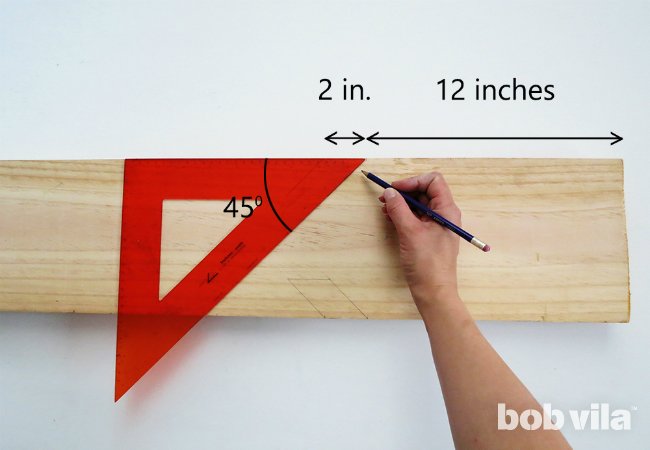
STEP 2: With a pencil, mark where you’ll make the cuts.
In this unique coat rack design, coats will hang from notches cut into either side of the lumber. Begin by marking the notches with a pencil: On one side, measure 12 inches from the top edge and make a mark. Starting at this point, use a set square to trace a 2-inch line at a 45-degree angle. Go down 2 inches from the first mark and draw a second 2-inch line, parallel to the first. Connect them to form a diamond-like notch.
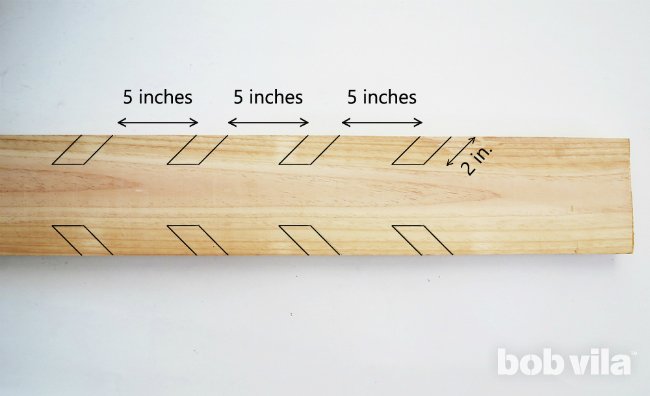
Measure 5 inches down the side of the board from the bottom of the first notch, make a mark, and then repeat this step to trace a second diamond-shaped notch.
Continue this process until you have four angled notches with 5 inches of space between each, on both sides of the board.
STEP 3: Cut the notches with a handsaw.
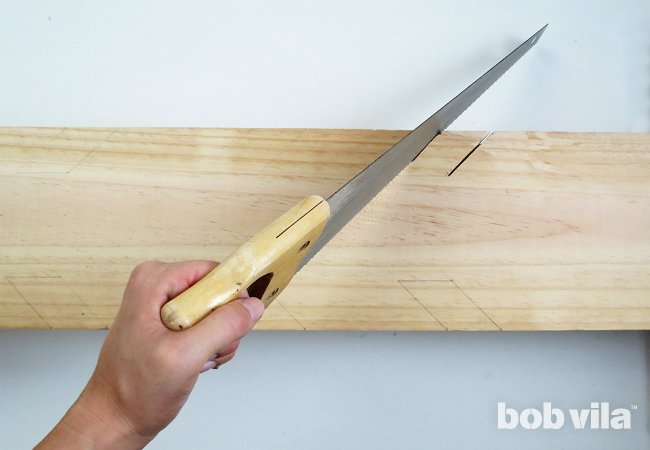
Clamp the wood plank securely to your work surface so it can’t slide around once you start cutting. Use the handsaw to make two cuts on one of the notches, following your pencil marks. Let the blade do the work. You shouldn’t have to apply much pressure.
If you are comfortable cutting out the “hooks” with a jigsaw instead of manually with a handsaw, we recommend a fine cut blade. When cutting, always wear your safety glasses and a dust mask.
STEP 4: Use a wood chisel to create the “hooks.”

Now, use the wood chisel to punch out the wood cut. Place the tool along the uncut line, and hit the top of the chisel with a hammer.
Once you cleanly nick the cutting line, you can hit the chisel harder to take off the wood piece completely.
After you finish the first “hook,” cut out the remaining seven using the same process.
STEP 5: Sand the coat rack’s “hooks.”

You certainly don’t want to damage your coats or accessories whenever you hang them up, so prevent future snags by first removing rough patches with a good sanding. You can use a palm sander for the sides of the lumber and a wood file to finish the inner edges of the notches.
STEP 6: Customize your coat rack to suit your decor.
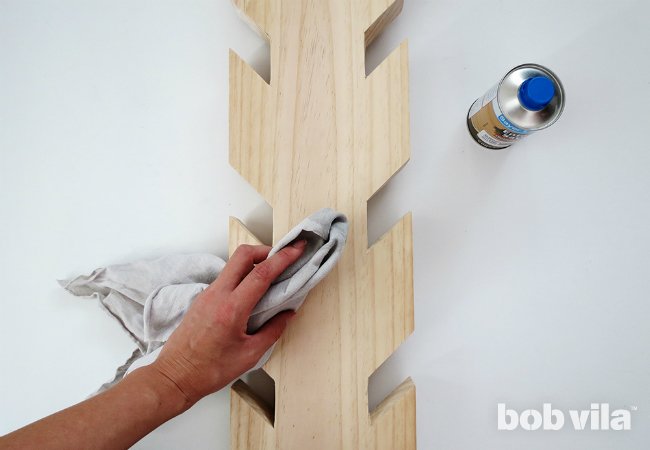
Give your coat rack an attractive finish with either stain or varnish, following the instructions on the product’s packaging. Here, we chose to apply linseed oil—a colorless, rejuvenating wood finish—to give the piece a natural, Scandinavian look.
Note that our steps are merely guidelines. Feel free to get creative with your design. Paint or stain the wood in a color or pattern that complements your decor. You can make your DIY coat rack even more of a statement piece by using paint stencils to make it pop.
Customization of your homemade coat rack can go beyond just the finish. You can choose to create more or fewer “hooks,” or use your jigsaw to cut curved lines instead of straight ones. You can even add hardware, attaching hooks to the front of the plank to amp up the flair and functionality. This is a piece for your home, so it should reflect your needs and aesthetic.
STEP 7: Secure your homemade coat rack to the wall.

To secure this leaning coat rack—and put to bed any worries of its slipping whenever you try to hang a coat—you can use the nearly invisible magic of wall hooks and screws. To do so, attach two screw eyes on the back of your plank, about 10 inches from the top. (You might want to use the drill for this.)
The last step is to attach the hooks. Place the top part of the board against the wall, and make two pencil marks precisely where the screw eyes sit—this is where you need to insert your square bend screw hooks. Screw them in, making sure each hook points upward, and then place the open loops of the screw eyes over the hooks.
Final Thoughts
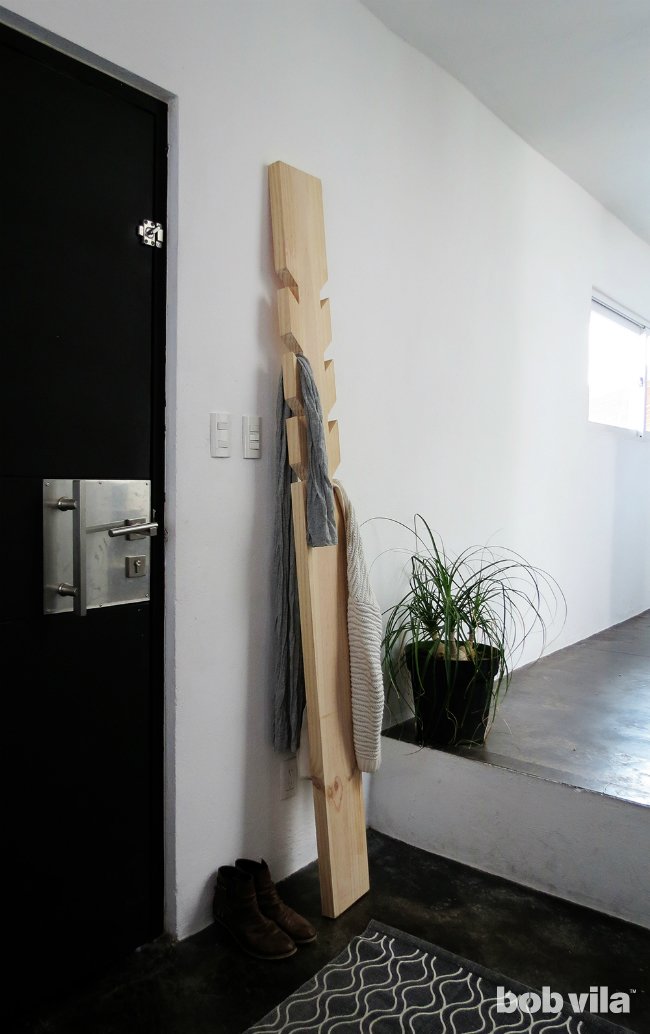
That’s it! In no time at all, you’ve assembled a wooden DIY coat rack that’s sturdy enough to hold several heavy coats as well as scarves, hats, and other accessories. The screw eyes should hold it in place nicely, but don’t make it too top heavy. This coat rack works especially well right next to the front door, where it’s both out of the way and easy to access.
Have you made a DIY coat rack? Post it on Instagram and tag #bobvilahome in your photo.
