
We may earn revenue from the products available on this page and participate in affiliate programs. Learn More ›
A staple in workshops and on construction sites, circular saws are one of the more popular portable power tools, prized for their ability to make quick, straight-line cuts. Different types of circular saw blades are available to cut various materials, including plywood, hardwood, metal, and plastic. Like anything with moving parts, a circular saw blade will eventually become dull with repeated use.
For the cleanest cuts, when one blade dulls, it is replaced by a new blade. Fortunately, learning how to install a circular saw blade is one of the simplest tool-maintenance tasks.
Keep reading—we’ll show you how to remove a circular saw blade and how to replace a circular saw blade.
Tools & Materials
Bobvila.com may earn a commission from purchases made through these links.
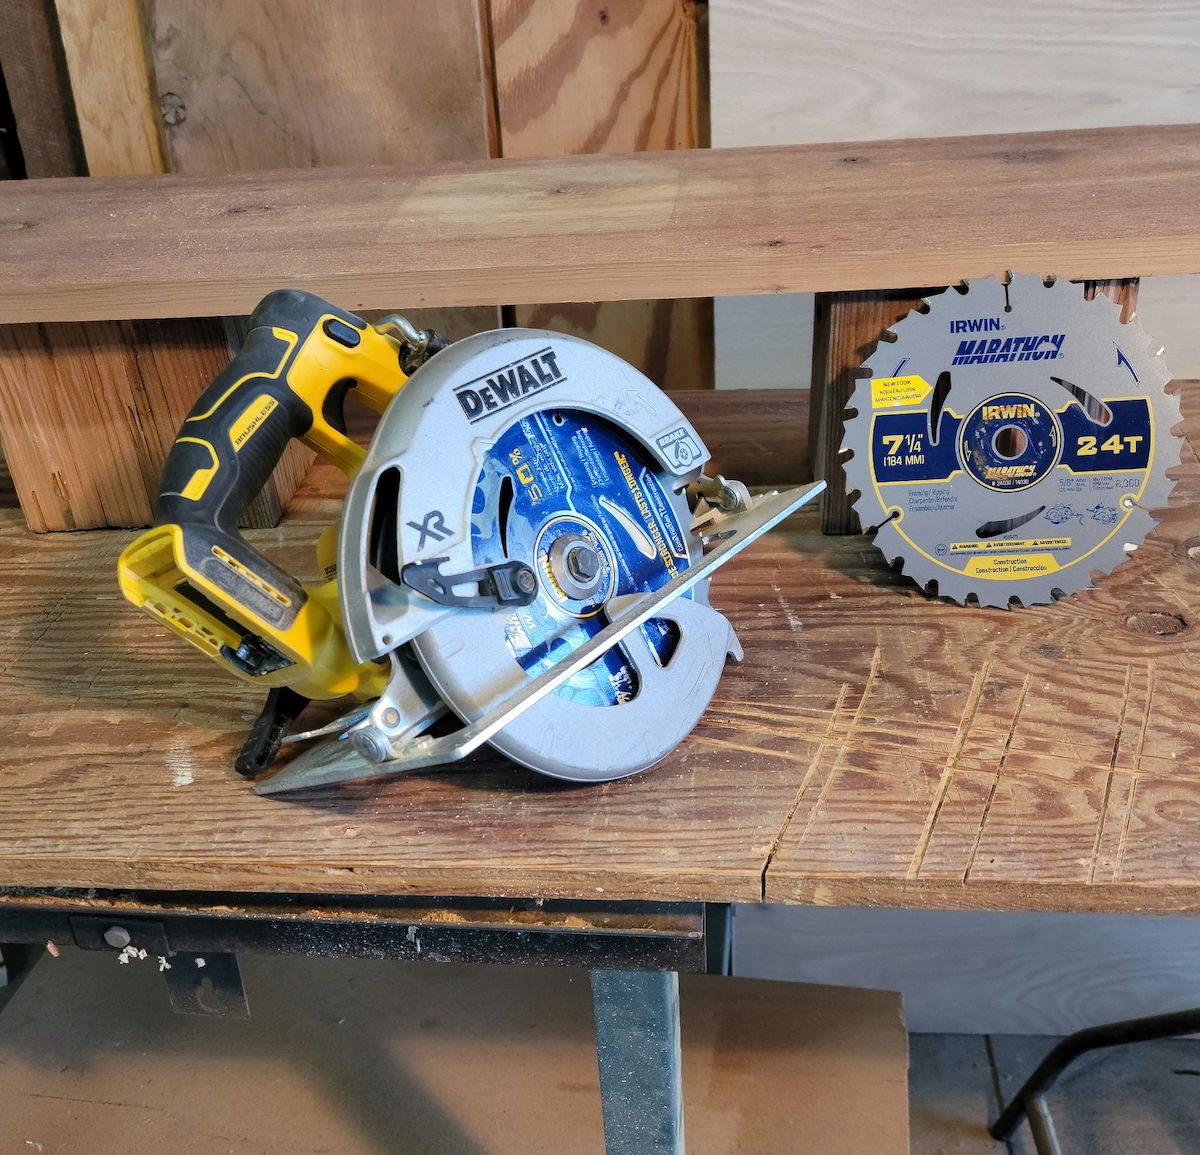
- Circular saw blade wrench (should be stored in a slot on the saw)
- Replacement blade (must match the size of the circular saw)
The required tools and supplies list is short for changing a circular saw blade. You’ll need the saw. While blades on all circular saws are replaced in the same manner, we’re demonstrating how to install a blade on a circular saw with the DeWalt 7-¼” circular saw.
BEFORE YOU BEGIN
No special skills or requirements are necessary to change the blade on a circular saw, but it’s helpful to be familiar with how the saw operates.
In addition, the blade tips on both old and new saw blades are sharp. Handle them with care. Wearing a pair of flexible leather gloves, while not required, will protect hands while still allowing the user enough finger dexterity to change the blade easily.
STEP 1: Disconnect the circular saw from its power source.
Safety first. Savvy DIYers know it’s not safe to service any power tool while it’s plugged in. Unplug a corded or pneumatic circular saw from the outlet or hose, and remove the battery from a cordless circular saw. The goal is to disconnect the power source.
STEP 2: Locate the circular saw wrench stored on the tool.

Circular saws come with special wrenches designed for maintaining the tool. This wrench is typically stored in a slot on the saw body and can be removed just by pulling it out.
If the wrench has fallen out or it’s been lost, it’s a good idea to purchase a replacement circular saw wrench. Alternatively, other types of wrenches are likely to fit the bolt on the circular saw, but if the fit isn’t perfect, the tool could slip and damage the bolt.
STEP 3: Depress the spindle-lock button to keep the saw blade from spinning.

Every circular saw has a spindle lock—a button located on the body of the saw that stops the blade from spinning when the button is engaged. If the spindle-lock button isn’t depressed, the blade and bolt will turn when the user tries to remove the bolt holding the old blade in place, making it impossible to loosen the bolt. The sole reason for the spindle-lock button is to lock the blade in place so it’s possible to remove the bolt or put it back on. Press it and hold it down.
STEP 4: Use the circular saw wrench to loosen the bolt that holds the blade in place.
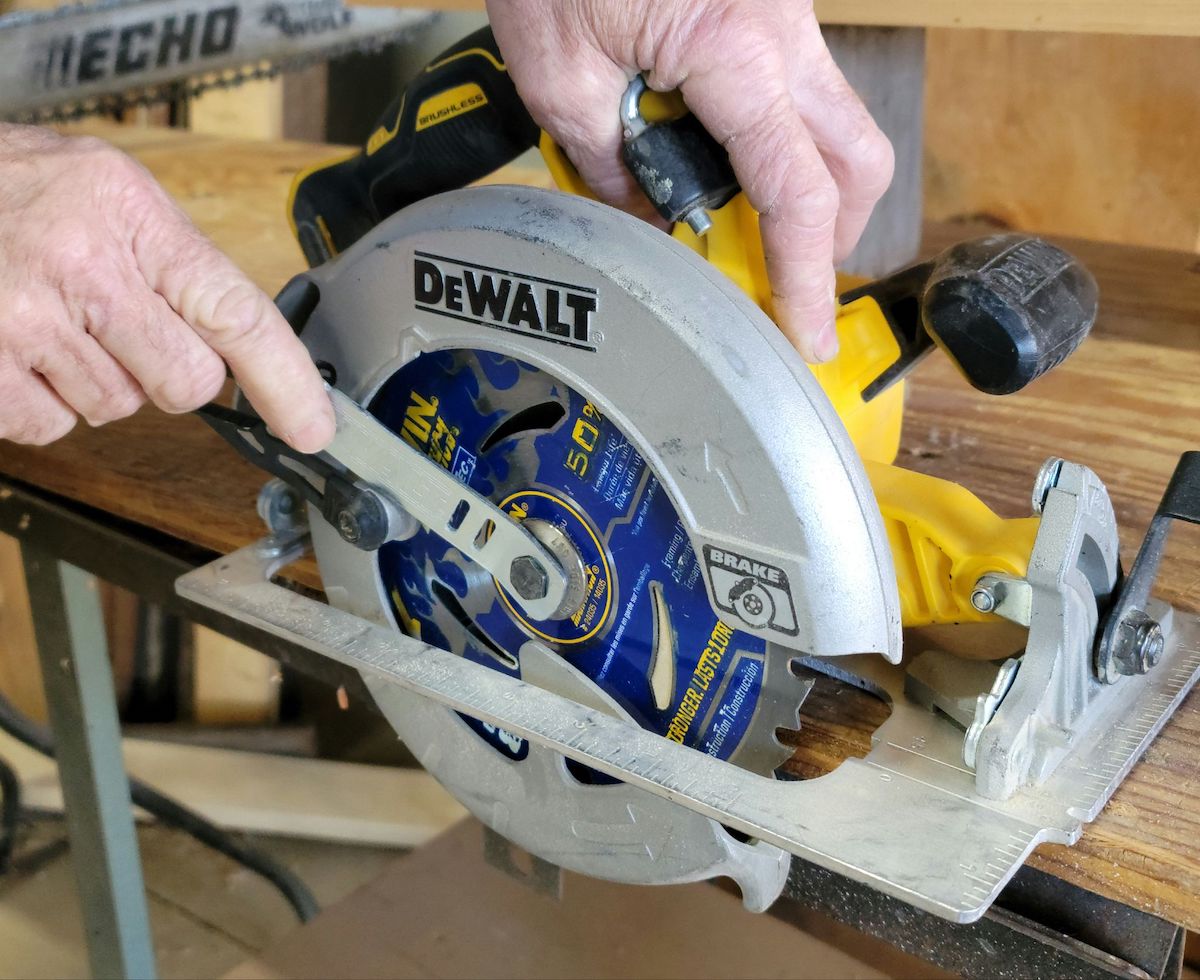
While holding the spindle-lock button down, use the circular saw wrench to loosen and remove the bolt that holds the saw blade in place. Turn the wrench counterclockwise to remove the bolt and set it aside.
In most cases, the bolt is simple to remove with the wrench. However, wood sap residue or even corrosion can make a bolt stick. If the bolt sticks, give it a spritz with a bit of lubricating oil, such as WD-40, and then try again.
STEP 5: Push the blade guard out of the way to remove the old blade.
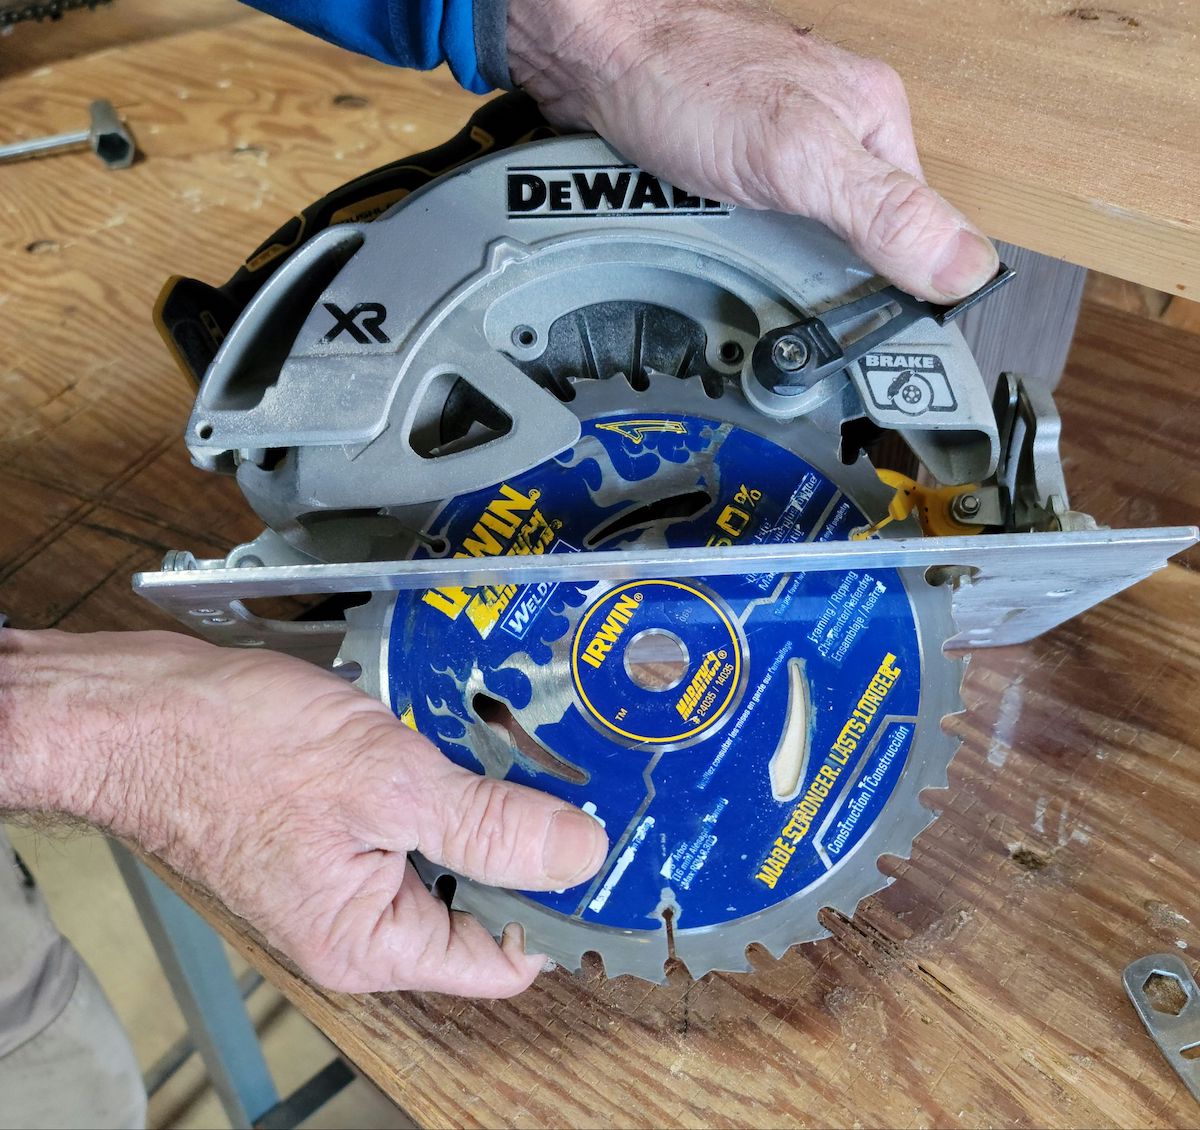
A circular saw’s blade guard is the protective casing that rotates out of the way when the user begins cutting with the saw. The blade guard rotates back over the blade when the saw is not in use. The guard slides easily back and forth.
Now it’s time to actually remove the old blade, which is now loose. Just push the blade guard out of the way with your hand and pull the old saw blade out of the saw.
STEP 6: Slip the new blade in place and replace the bolt.

Installing the new blade is just as simple as removing the old one—just reverse the steps. Slide the blade guard out of the way, position the new blade on the saw—with the wording facing outward and with the center hole aligned over the spool hole. Put the bolt back on and tighten it with the saw wrench. Once again, hold the spindle-lock button down to tighten the bolt snugly without the blade turning.
Pro Tip: When learning how to put a blade on a circular saw, keep in mind that circular saw blades cut from the bottom upward. The saw blade is labeled as to which direction the tips should face. Some professionals turn saw blades around in order to make specialized cuts, but for the best general use, install the blade in the direction suggested by the manufacturer.
