We may earn revenue from the products available on this page and participate in affiliate programs. Learn More ›
An essential tool in the professional- and DIY-forestry worlds, the chainsaw is a powerhouse when it’s running well. However, over time, and with repeated use, a chainsaw chain can wear out, and a chainsaw bar can become bent or damaged.
Overlooking something as simple as keeping the saw’s oil reservoir filled can permanently damage a bar and chain. Replacing both parts is simple and, when you know how, so is figuring out the correct replacement sizes for them.
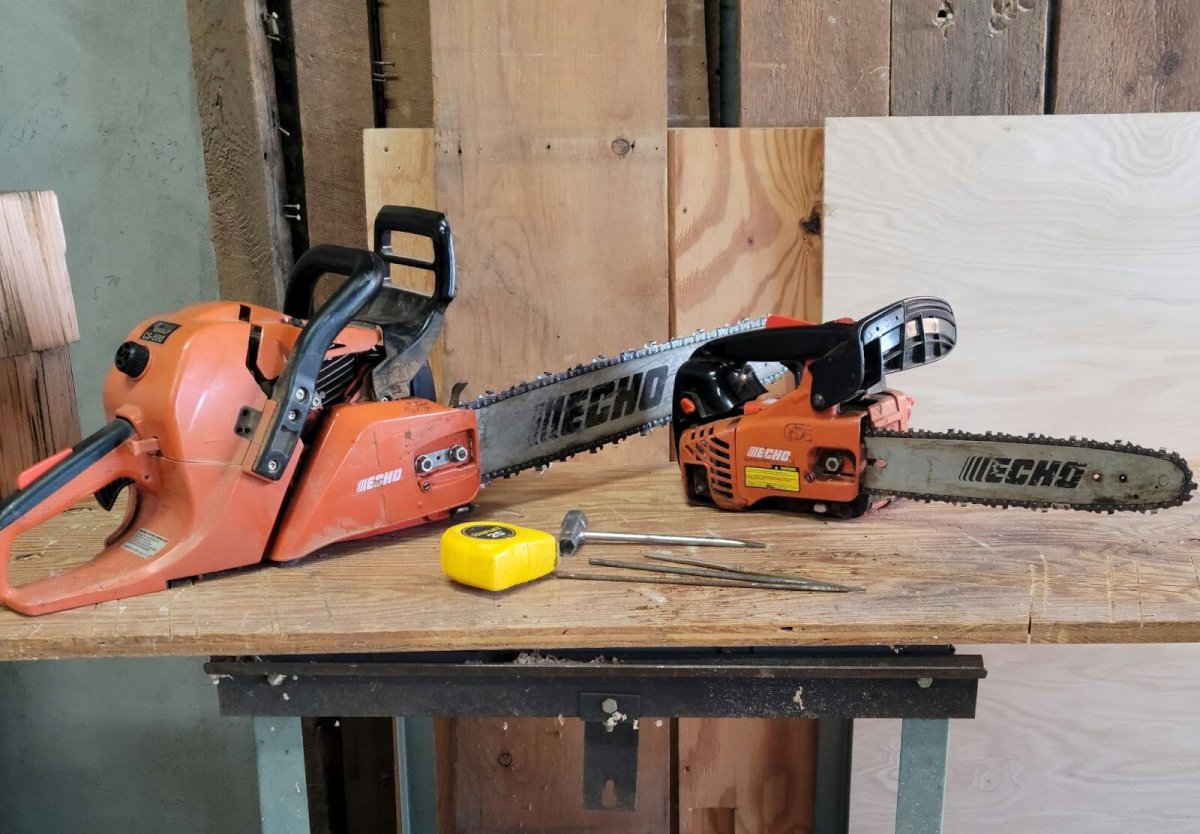
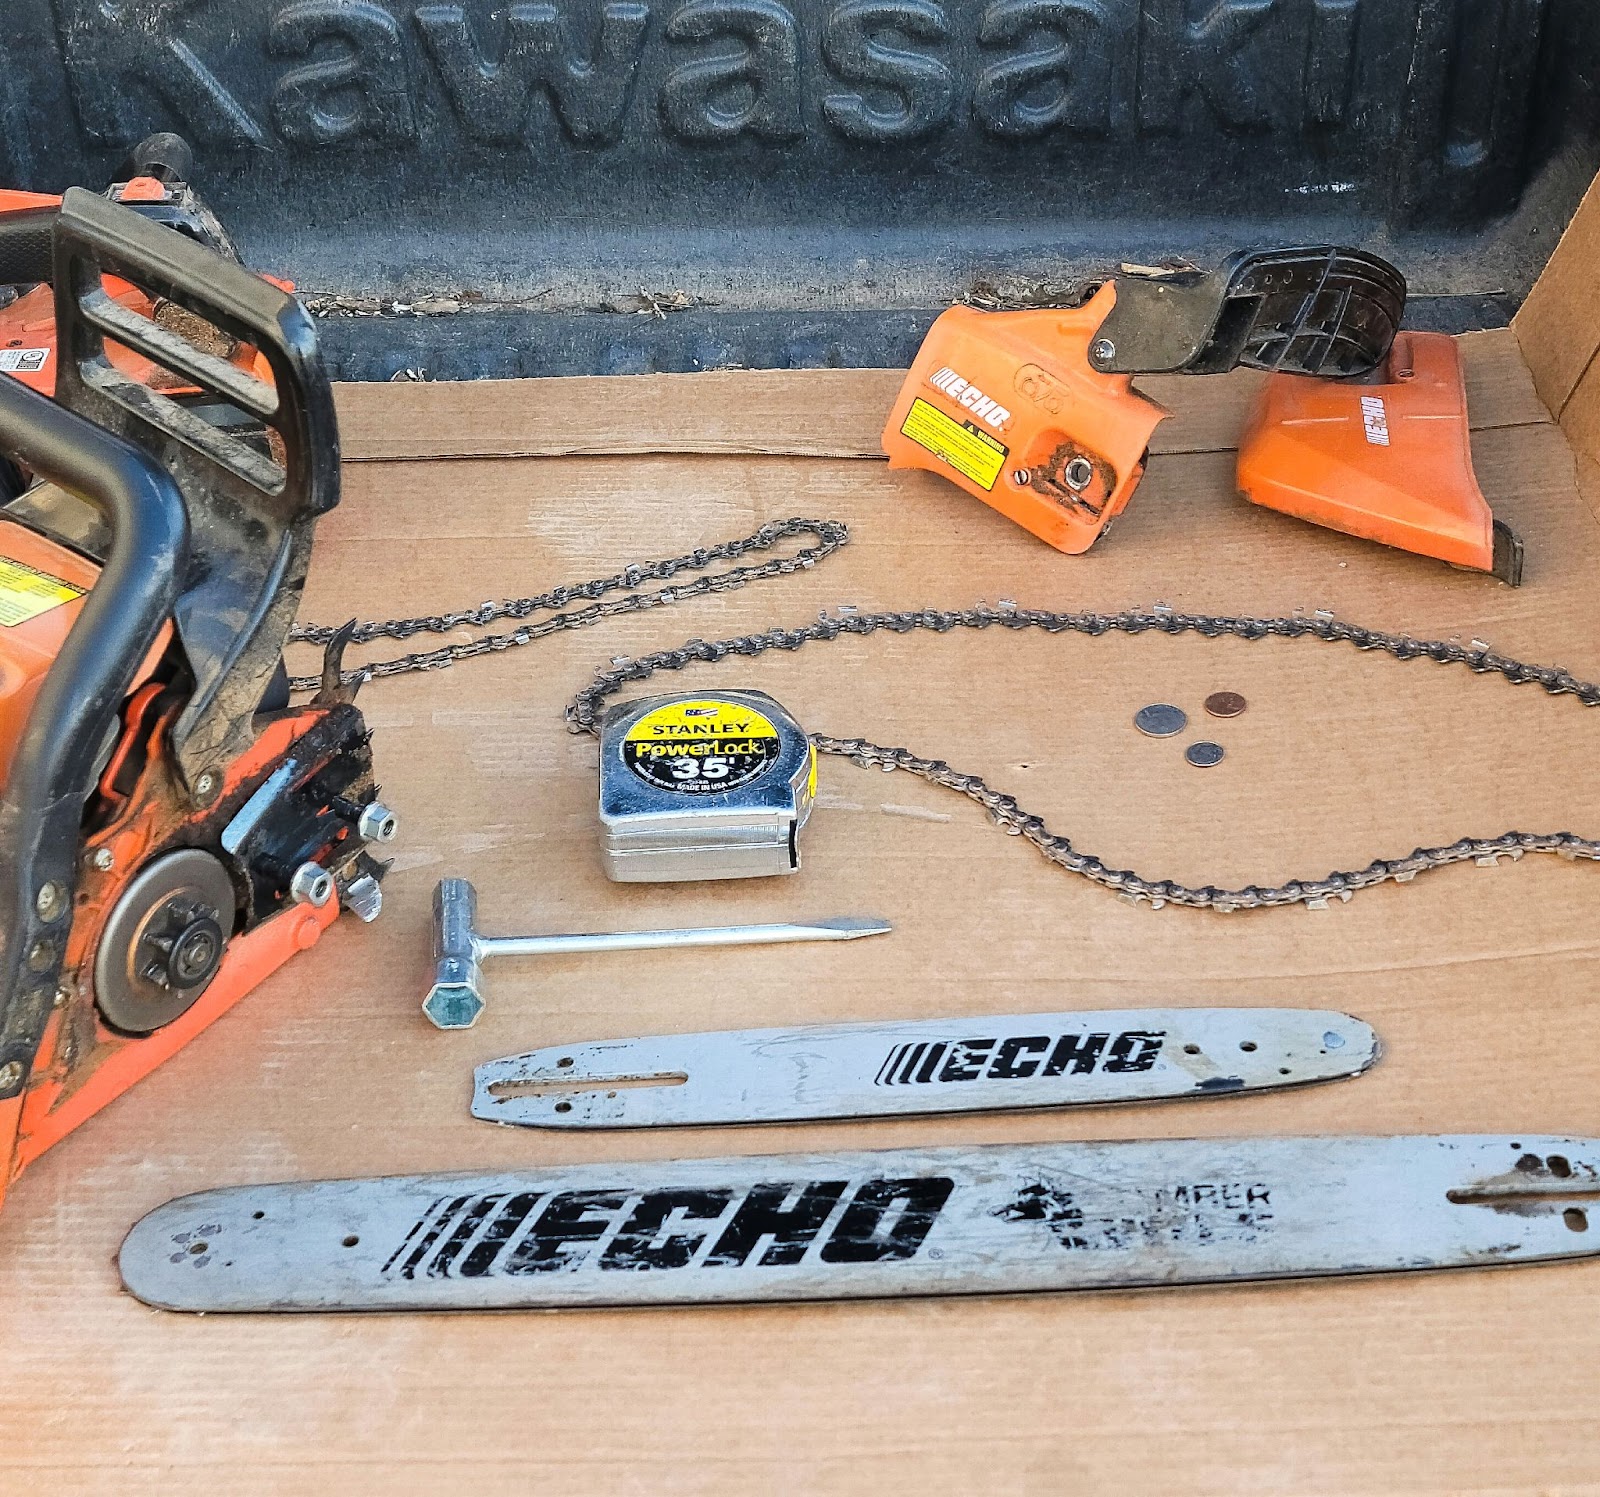
Very few supplies are needed to measure a chainsaw bar and chain. In this guide we’ll measure two different chainsaws, an Echo 20-inch Timber Wolf Gas Chainsaw and an Echo 12-inch Cordless Battery Chainsaw. Other brands and models may vary slightly, but measuring the bar and chain on all models follows the same general guidelines. Gather the supplies before beginning, and it can be a quick task.
Tools & Materials
Bobvila.com may earn a commission from purchases made through these links.
Before You Begin
Safety first! Disconnect the chainsaw from its power source. If it is a battery-powered chainsaw, remove the lithium-ion battery. If it’s a corded chainsaw, unplug the tool from the outlet.
It’s also not a bad idea to wear gloves. The chainsaw blade links on a chainsaw chain are sharp and can easily scratch or cut skin.

Product Spotlight: Best Chainsaw for Backyards
Stihl MSA 300 C-O 16″ Battery Chainsaw

This amazing saw is at the top of our list. This battery-powered machine is quieter and lighter than gas-powered models, but offers the same power and performance. The lightweight design was a real differentiator among all of the battery-powered models. It was easier to use when lifting and making cuts in tricky positions. This chainsaw excelled at dropping trees, delimbing, and slicing through deadfall to fill trailers with firewood. With two batteries, I had no issue running this saw near-continuously for full days in the field. The IPX4-rated battery performed extremely well and had no issues with dew or the light rain that hit one day.
Get the Stihl MSA 300 Chainsaw at Ace Hardware for $819.
For more chainsaw reviews, see our tested guide to the best chainsaws for backyards, firewood, and more.
How to Measure a Chainsaw Bar
Chainsaws are sold by bar length, so most of the time the tool’s owner will know the bar size when purchasing a replacement bar. However, bar length can be forgotten, or the tool may have a different original owner so the current owner doesn’t know the length.
Measuring a chainsaw bar is simple, but it requires disassembling the chainsaw. Here’s what to do:
Step 1: Use a scrench to loosen the bolts that hold the protective case in place.

On the side of the chainsaw are one, two, or three bolts, depending on the make and model of the saw. The bolts secure a protective case over the point where the bar, chain, and sprocket attach.
A chainsaw scrench (combination wrench and screwdriver) is specifically made for this job. Use the socket wrench end to loosen and remove the nut(s) by twisting counterclockwise. Once the nuts are off, the case slips right off. Be sure to set the bolts somewhere safe where they won’t get lost.
Step 2: Remove the chainsaw bar and chain.
Once the case is off, the chain goes slack and it’s a simple task to lift it up and off the bar and the sprocket. Now, pull the bar outward from the chainsaw to remove it. Both the chain and the bar should come off easily.
Step 3: Measure the bar from the tip to the center slot—and round up, if necessary.
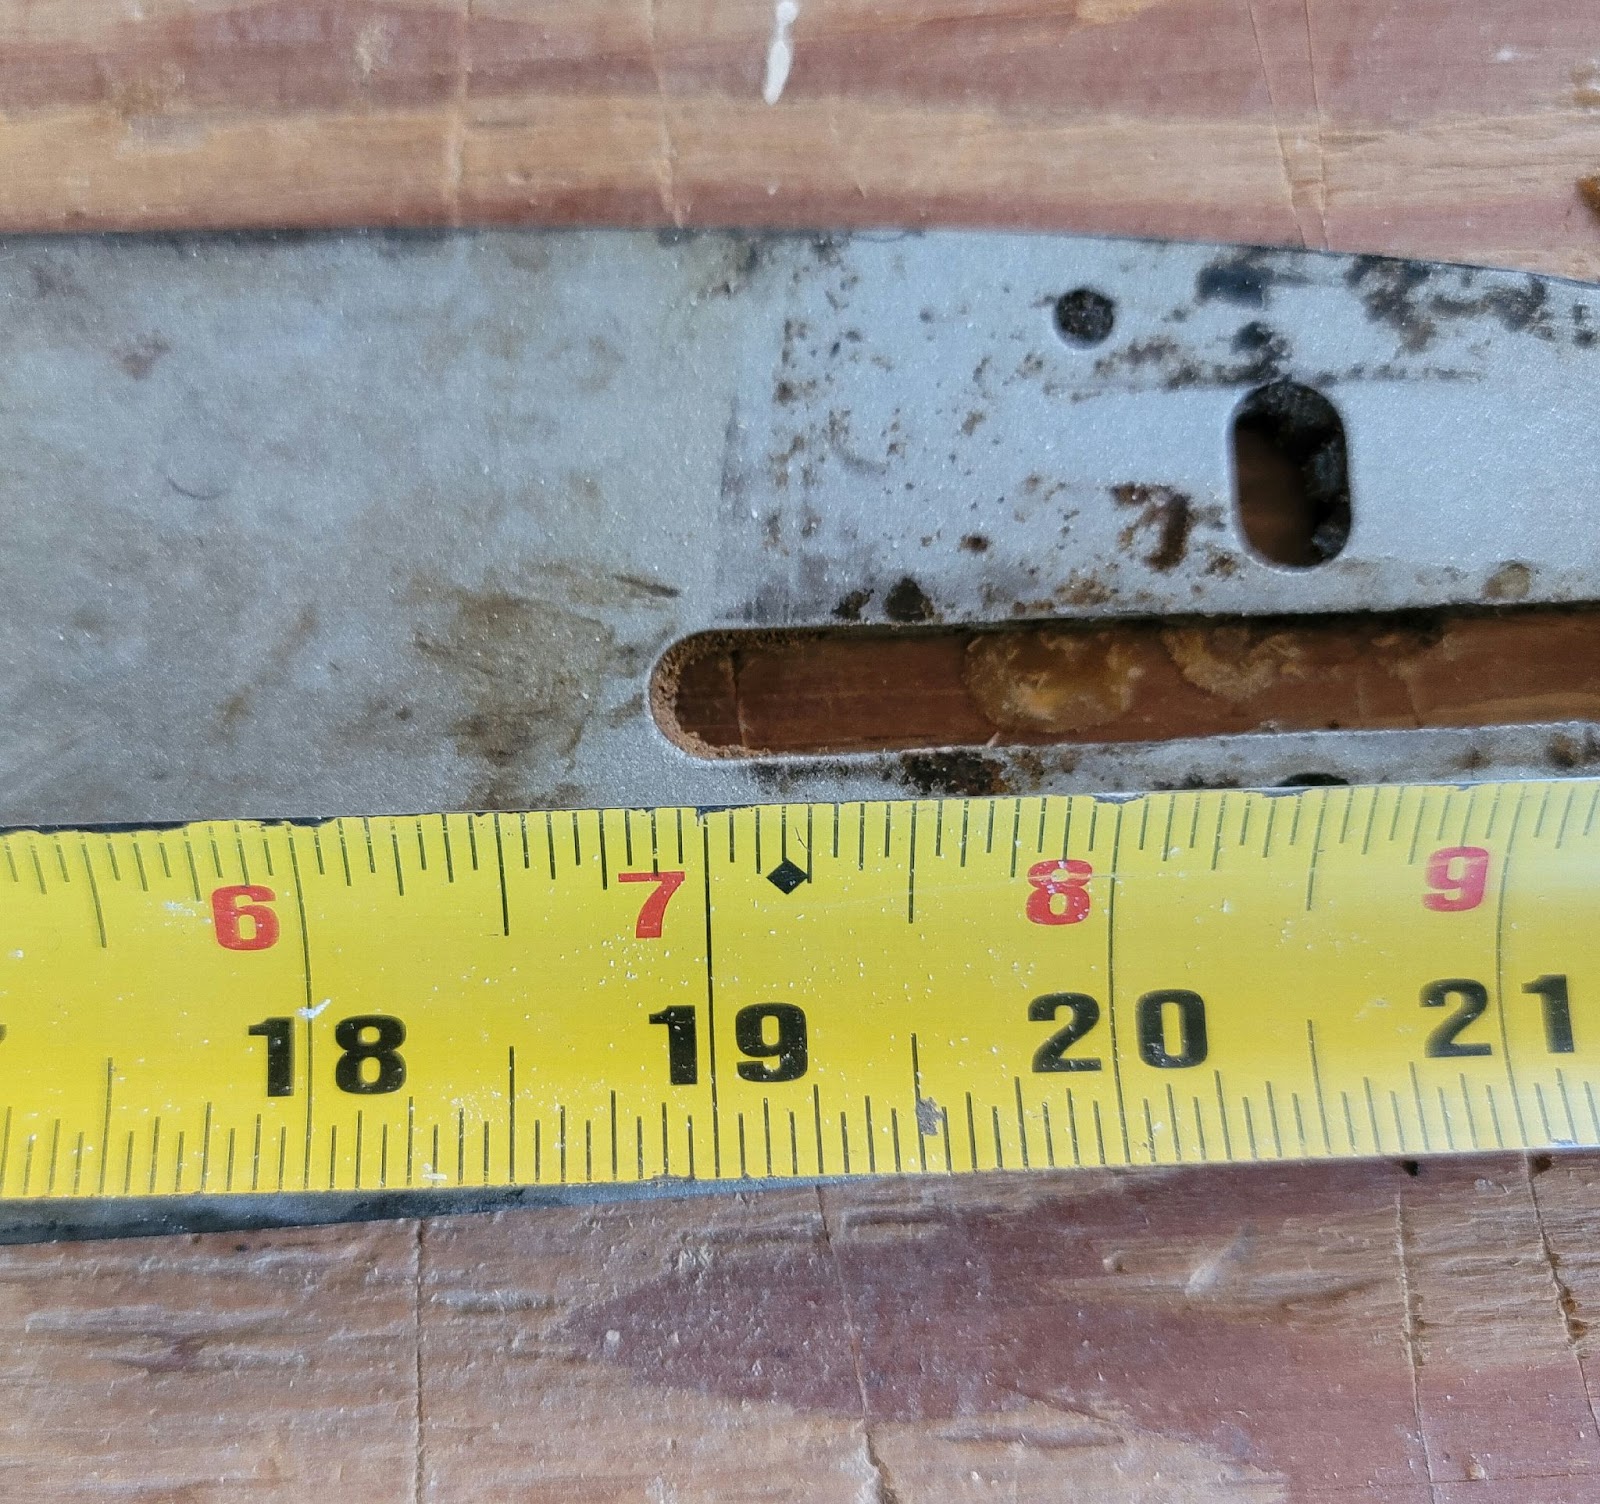
Lay the chainsaw bar flat on a table or counter and measure from the rounded end to the center slot at the other end of the bar. Chainsaw bars sell in even numbers, such as 12-inch, 14-inch, and 16-inch bars. The trick here is to round the measurement up to the nearest even number.
On the Echo Timber Wolf gas chainsaw, the measurement from the tip to the slot comes out to be 18-7/8 inches, so when rounding it up, it will be 20 inches.
RELATED: How to Tighten a Chainsaw Chain
How to Measure a Chainsaw Chain
Figuring out how to measure chain size is a little trickier, but not difficult. To get the correct replacement chain, you need three numbers: the pitch, the gauge, and the number of links in the chain.
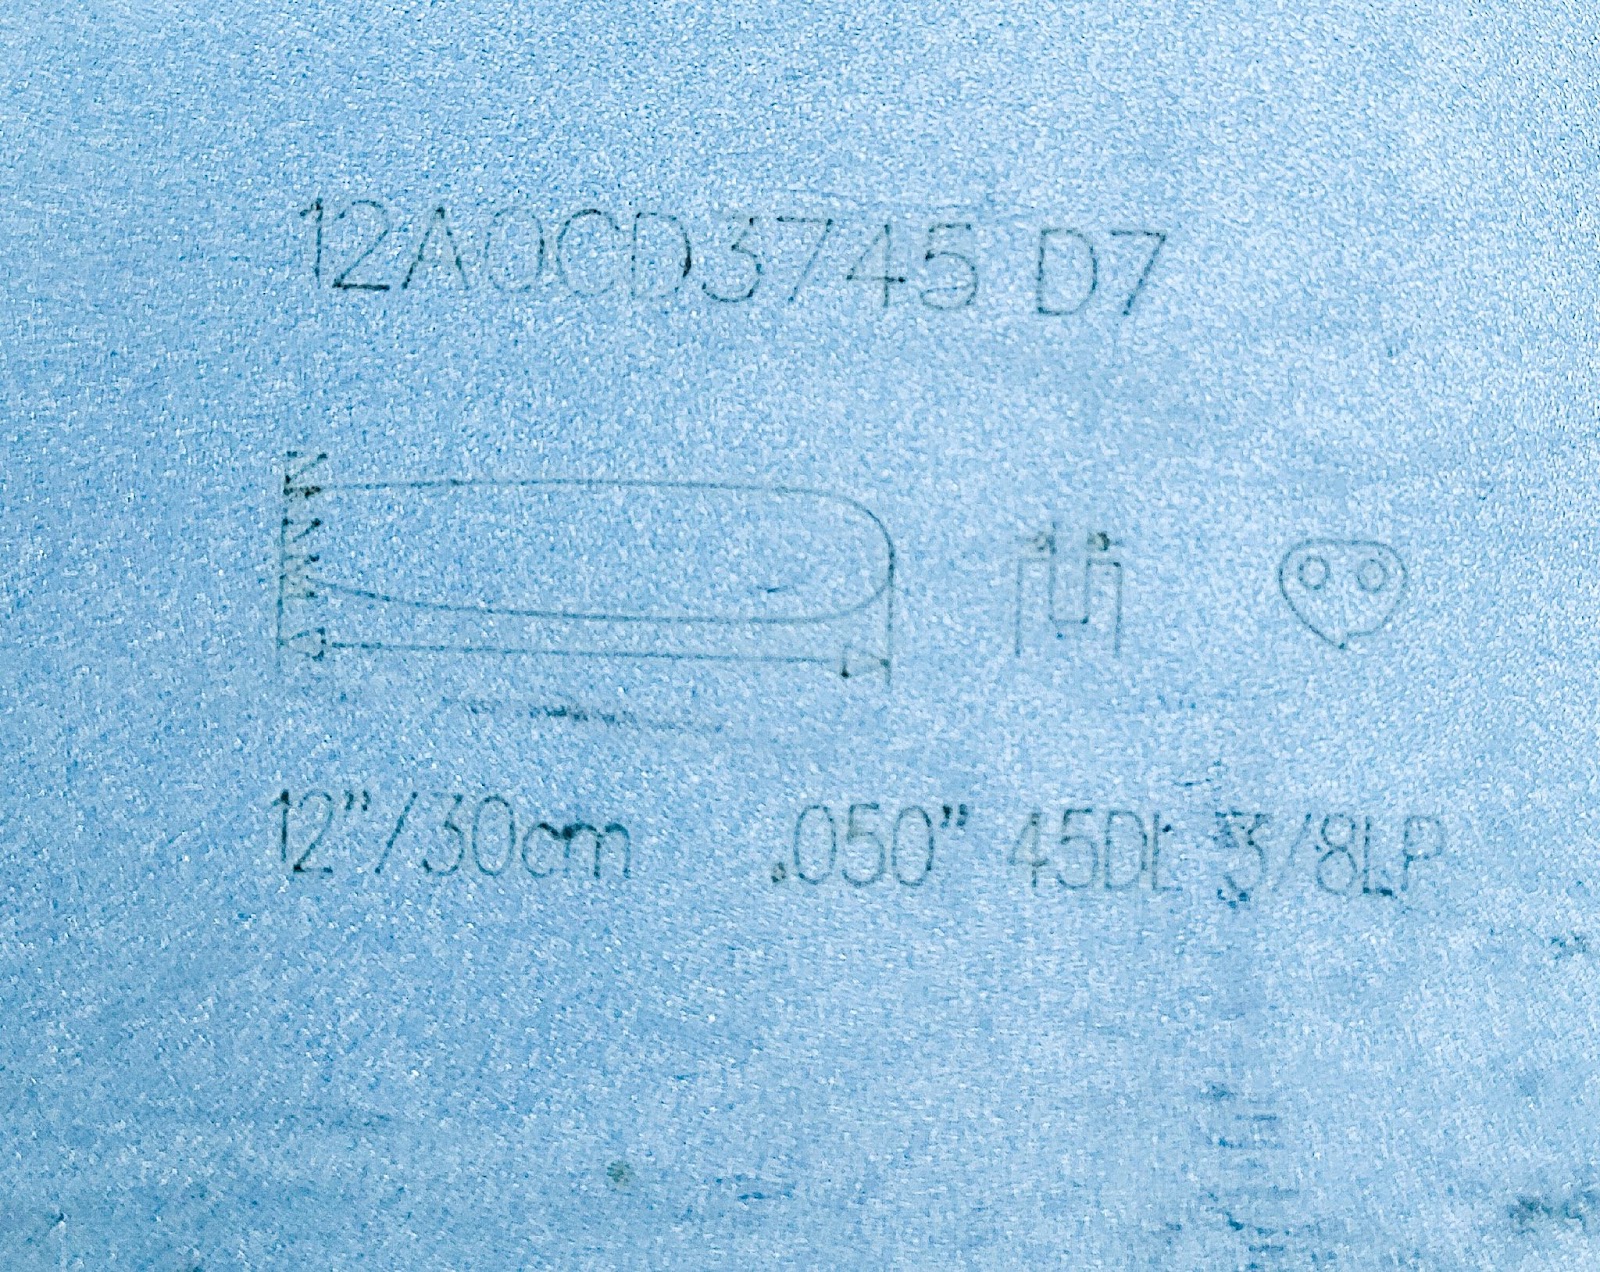
This information may be printed on some chainsaw bars, as was found on the Echo. It has a 12-inch bar, which indicates the bar is 12 inches long, the gauge is .050, and pitch is 3/8 inch. In addition, the number of drive links in the chain is 45, as indicated by the “45DL.”
The larger Timber Wolf has no printing on the bar, but it’s still a simple matter to figure out the measurements.
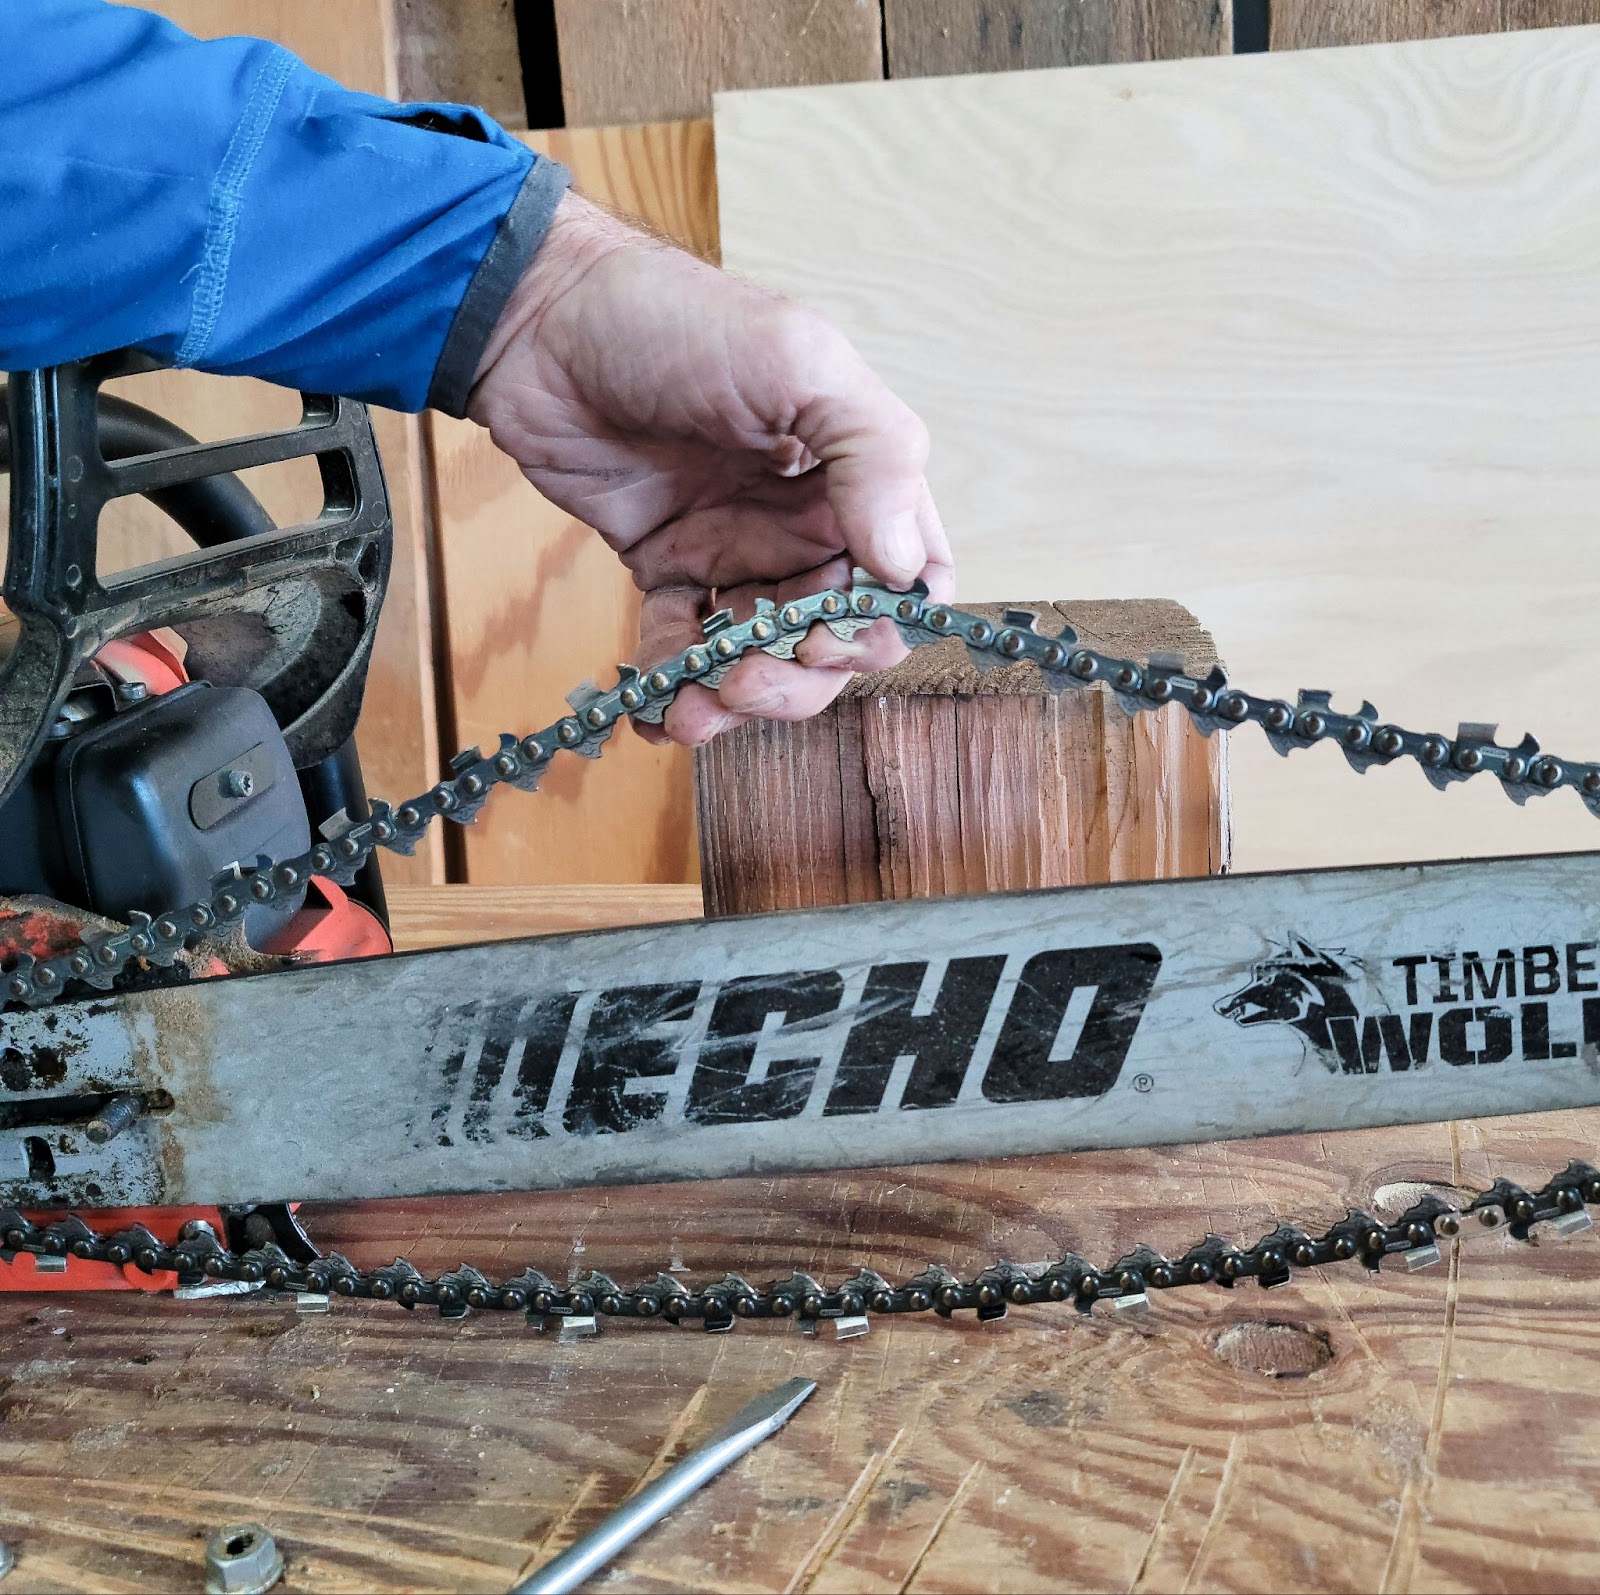
Step 1: Count the number of drive links on the chain.
Chainsaw chain sizes depend on the number of drive links. This is the one step that can become tedious, but it’s not complicated. If the bar doesn’t have the information printed on it—you’ll have to count the drive links.
While not essential, tying a string between links and starting counting right after the string makes it easier to count the links without losing your place. Make a note of the total number. On the Timber Wolf chain, we counted 70 drive links.
Step 2: Measure the distance between three rivets and divide by 2 to find the pitch.
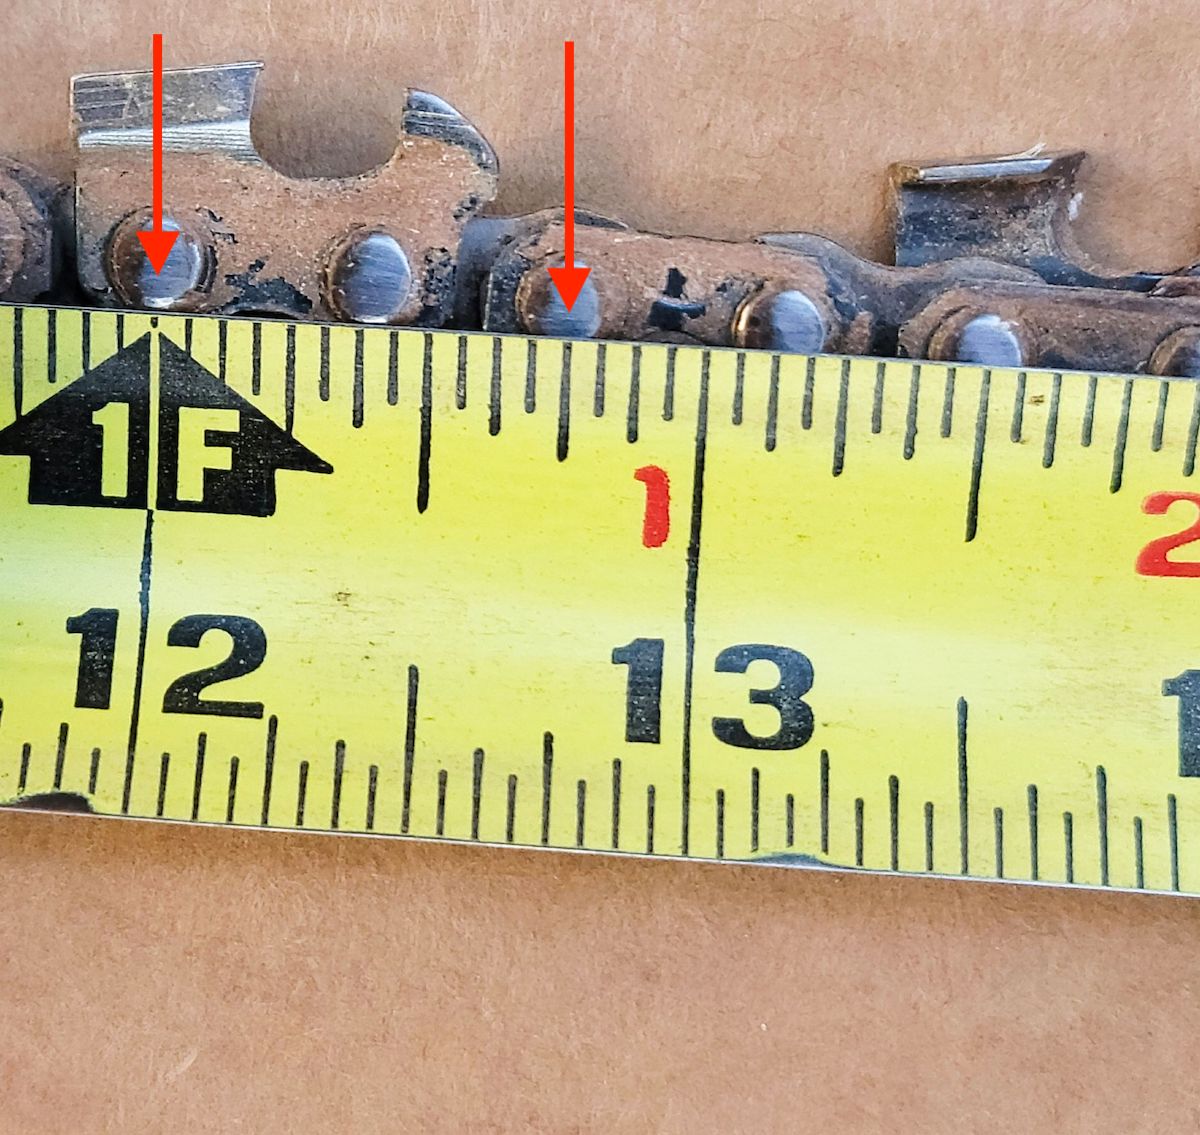
Drive links are held in place by rivets that keep them securely attached and serve as flexible points that allow the chain to bend as it travels around the bar. To obtain the chain’s pitch, measure the distance between three rivets, starting at the center of one rivet, passing the second, and ending at the center of the third. This measurement must be precise, so rather than starting at the end of a tape measure, which has a hook that floats, start at the 1-inch increment on the tape measure.
On the Timber Wolf, the exact distance between the rivets was 6/8 of an inch. When divided by 2, the result is 3/8 of an inch. So, the chain’s pitch is 3/8-inch.
Step 3: Use common coins to determine the chain’s gauge.
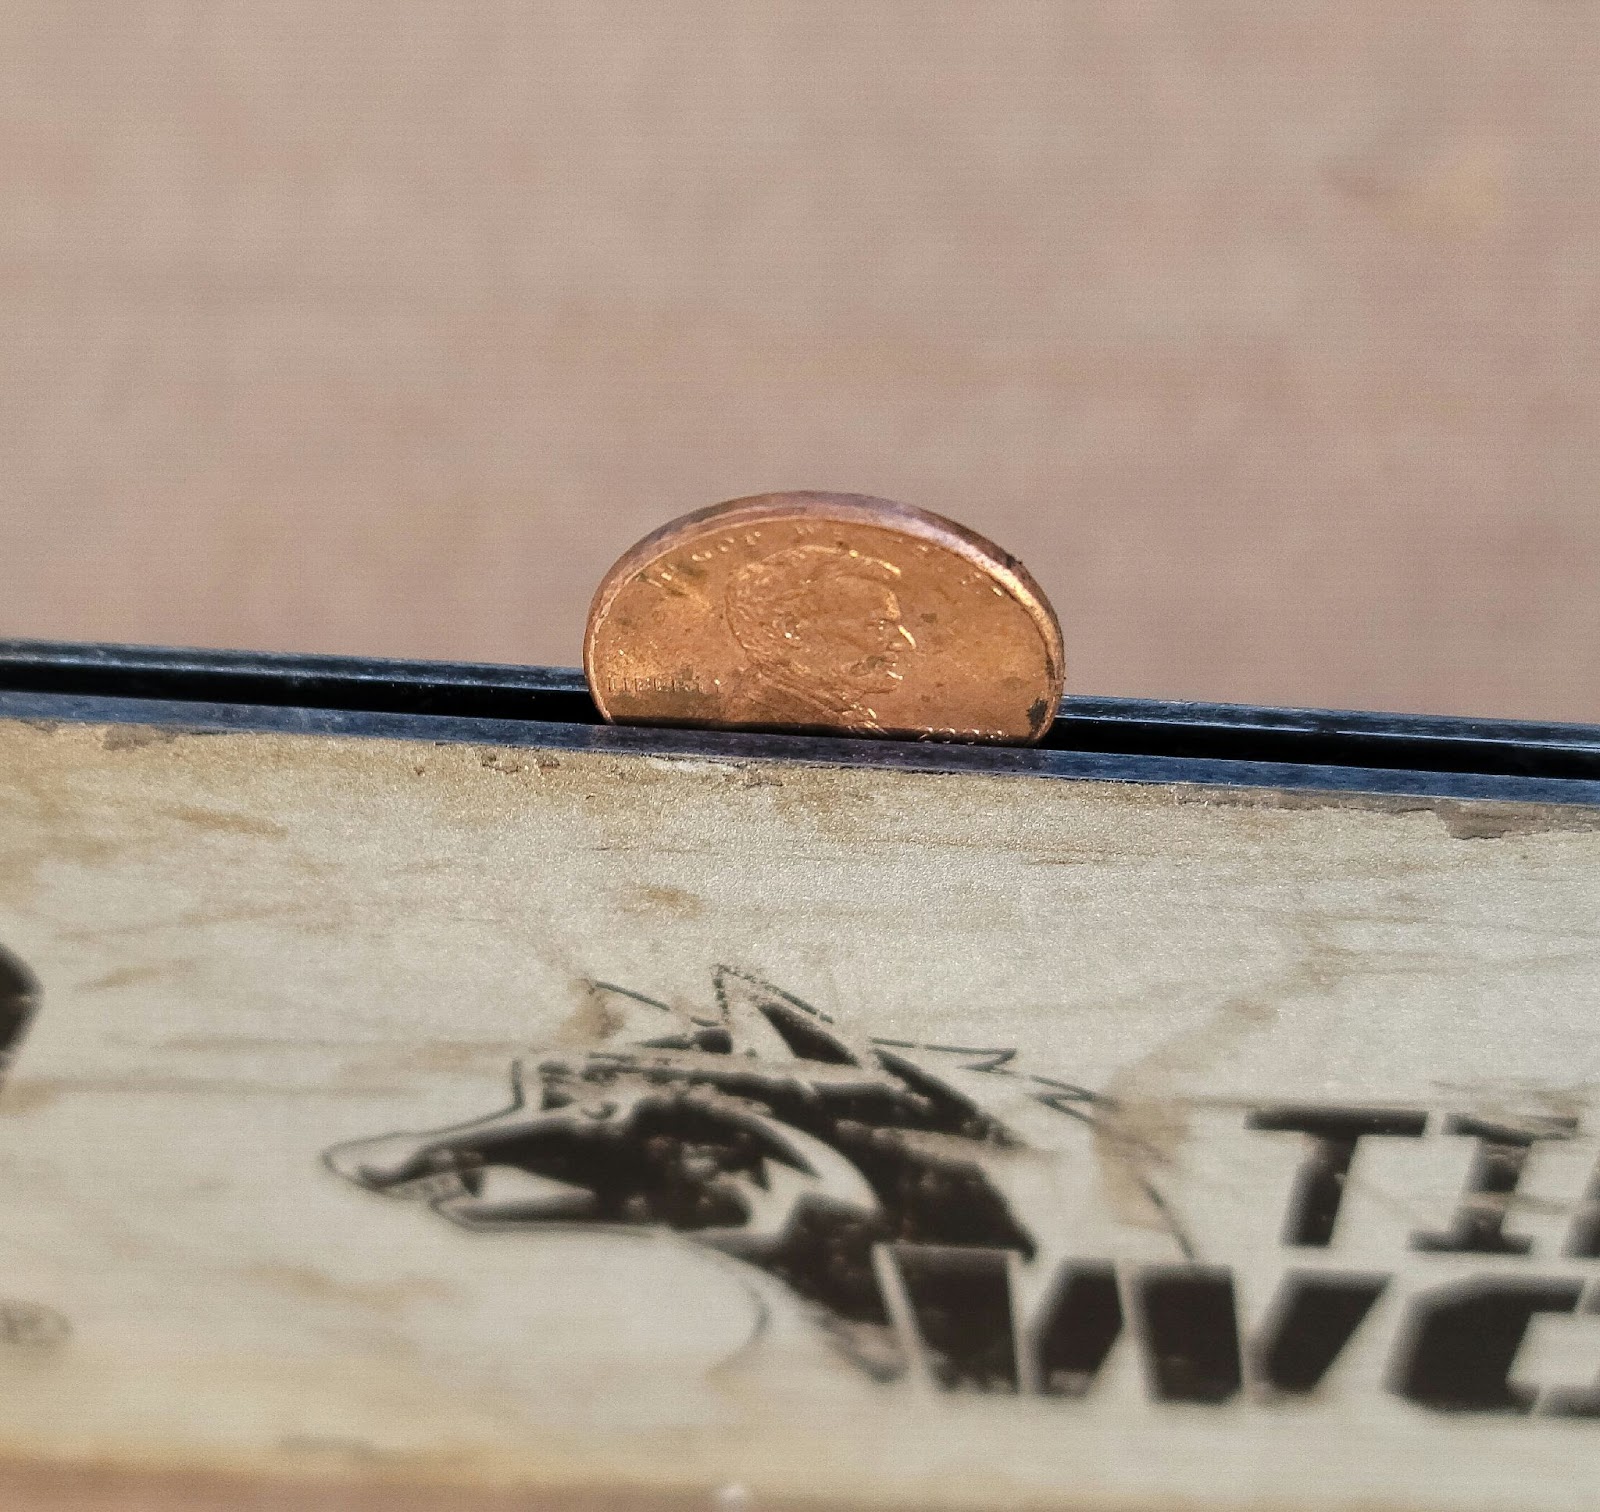
The gauge on a chainsaw chain is the thickness of the tips of the links that travel within the groove of the chainsaw bar. The simplest way to figure out the chain’s gauge is to use coins to determine the width of the groove on the bar. Gather a dime, a penny, and a quarter. One at a time, try fitting each coin into the groove on the edge of the chainsaw bar.
The correct coin should slide into the groove easily but snugly. In the case of the Timber Wolf, the quarter was too wide to slide into the groove; the dime was so narrow it rattled around, but the penny was a nice, snug fit, so the correct gauge was .058. Use the following rules of thumb to determine the gauge, depending on which coin fits the best.
Dime: .050
Penny: .058
Quarter: .063
Final Thoughts
The loud noise and sheer power of chainsaws belie their relatively simple design. Disassembling a chainsaw to measure and replace its bar and chain is a quick and easy task that requires very few tools.
It’s essential that the replacement parts be the correct size. If you don’t have the chainsaw’s original manual and the measurements are not printed on the bar, they’re still easy to figure out. With our how-to guide for measuring a chainsaw bar and chain, there’s one fewer reason to put off replacing worn chainsaw parts. With regular maintenance, you’ll be able to use the chainsaw safely for years to come.