We may earn revenue from the products available on this page and participate in affiliate programs. Learn More ›
Have you ever wondered what dust is made of? Skin cells, animal dander, pollen, and lint are some of the more commonly known components of dust. However, dust can also contain various toxic chemicals, such as phenols and phthalates.
Dusting is important for a variety of reasons. Keeping your home dust-free—or as dust-free as possible—alleviates allergy symptoms. And when your home is clean, it can provide a mental health boost and a sense of calm and accomplishment.
To keep dust at bay, aim to dust weekly. Some items, such as doors, wall vents, and blinds, can typically go about 2 weeks between dustings. However, more exposed surfaces, like tables, shelves, picture frames, and windowsills, should be dusted about once a week.
While it’s one of the simplest household chores, there is a right way and a wrong way to dust to dust. Dusting things in the wrong order can leave you with an even bigger mess.
Tools & Materials
Bobvila.com may earn a commission from purchases made through these links.
Before You Begin
As you’re thinking about how to eliminate dust in your home, the first thing to understand is that dusting in the correct order makes all the difference. Dusting a room out of order only makes extra work for yourself. When necessary, swap out a dirty dusting tool for a clean one to prevent the spread of more dust throughout your indoor space.
Dusting a Home in the Proper Order
Step 1: Change your HVAC filters and declutter your home.
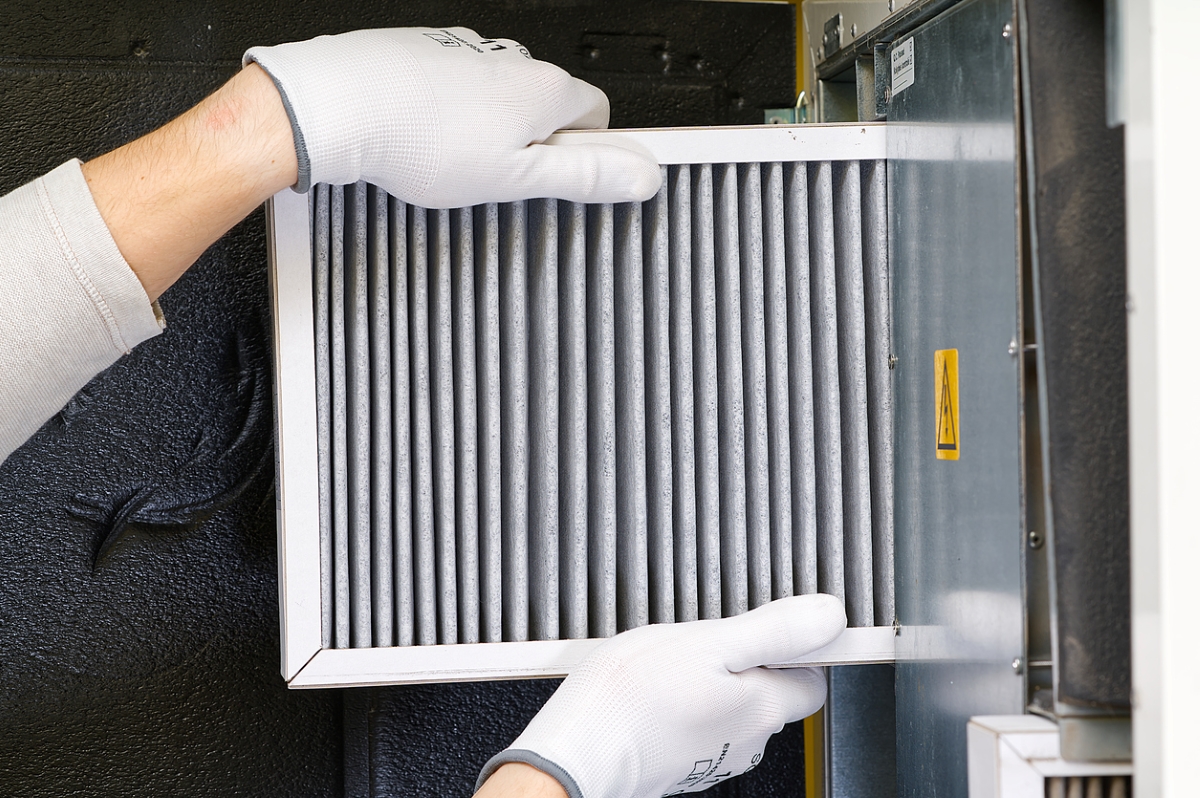
Do you find yourself asking, “Why is my house so dusty?” If you notice that your home surfaces are dusty than they probably should be, there may be too much dust in the air. Changing your HVAC filters every 3 months or so is one of the best ways to get rid of dust in the air. Less expensive fiberglass filters will need more frequent changing (about once a month), while some higher-end filters may last up to 6 months. If your air filters are too dirty, more dust, pollen, and other contaminants will be sent back into your home through the registers.
After you’ve changed your air filters, you should also declutter your home before moving on to dusting. Clearing off shelves and tables will make it easier to dust them, and you’ll also be removing potential problem areas where new dust can settle in the future.
Step 2: Remove and/or launder any linens in the room.
To avoid getting your pillows, sheets, blankets, and towels dusty, you should remove them from the room before you begin dusting. Take them outside to shake them out to get rid of as much dust as possible.
If you haven’t recently washed your linens, now is a good time to do so. Be sure to use hot water to get rid of dust mites. Don’t forget about washing the pillows, too. Neglecting bed pillows is an all-too-common mistake that can make your home even more dusty. Your pillows should be washed every few months and replaced at least every 2 years.
Step 3: Dust the ceiling, light fixtures, and ceiling fans.

The best way to clean dust in your home is to start with the ceiling. If you dust the ceiling last, it will only dump more dust onto already cleaned surfaces.
To dust your ceiling, use a long vacuum hose with a brush attachment. Carefully slide the brush over the entire ceiling, starting at one corner of each room and working your way to the opposite end. If you don’t have a vacuum attachment that will work, you can also use a broom.
Next, wipe down any light fixtures and ceiling fans in each room with a microfiber duster or microfiber cloth. If you can’t reach the ceiling fan’s blades by standing on a step stool, reach for a duster with an extension pole (like the Swiffer Duster with 3-foot extendable handle). You don’t want the fan to throw more dust around the room right after you’ve cleaned it.
As a word of caution: You may want to have your ceilings tested for asbestos if your home was constructed before the mid-1980s. Popcorn ceilings, specifically, are more likely to contain asbestos, and this ceiling texture should be left untouched until the asbestos is removed by professionals.
Step 4: Dust the walls and everything on them.
Wipe down your home’s walls using a clean, damp cloth. There is likely a lot of hidden dust on walls, so while cleaning the walls can be a time-consuming task, it is worth the effort. Be sure to also wipe down doors, trim, and door knobs in the room.
A simple trick to eliminate dust is to make sure you don’t forget to clean anything hanging on or leaned against your walls, too. This can include mirrors, artwork, curtains, blinds, and vents. Some curtains may be machine washable, while others will need to be wiped down. For blinds and other wall hangings, use a dry microfiber cloth or duster. When dry dusting tools are insufficient for cleaning dirty blinds, a damp duster or cloth may help to remove stuck-on dust or grime.
ESSENTIAL GEAR
The O-Cedar Floor ‘N More 3-Action Microfiber Mop, formerly known as the O-Cedar Dual Action Microfiber Flip Mop, comes with one washable microfiber mop head that can be used either dry or wet. The mop head measures 18 inches by 4 inches and is double sided; it has a chenille sweeper on one side and a microfiber shining surface on the other. Use the Floor N’ More on hardwood, linoleum, tile, and more. The handle is adjustable and can extend to up to 56 inches with a telescoping capability.
O-Cedar Hardwood Floor ‘N More 3-Action Microfiber Mop at The Home Depot for $14.97.
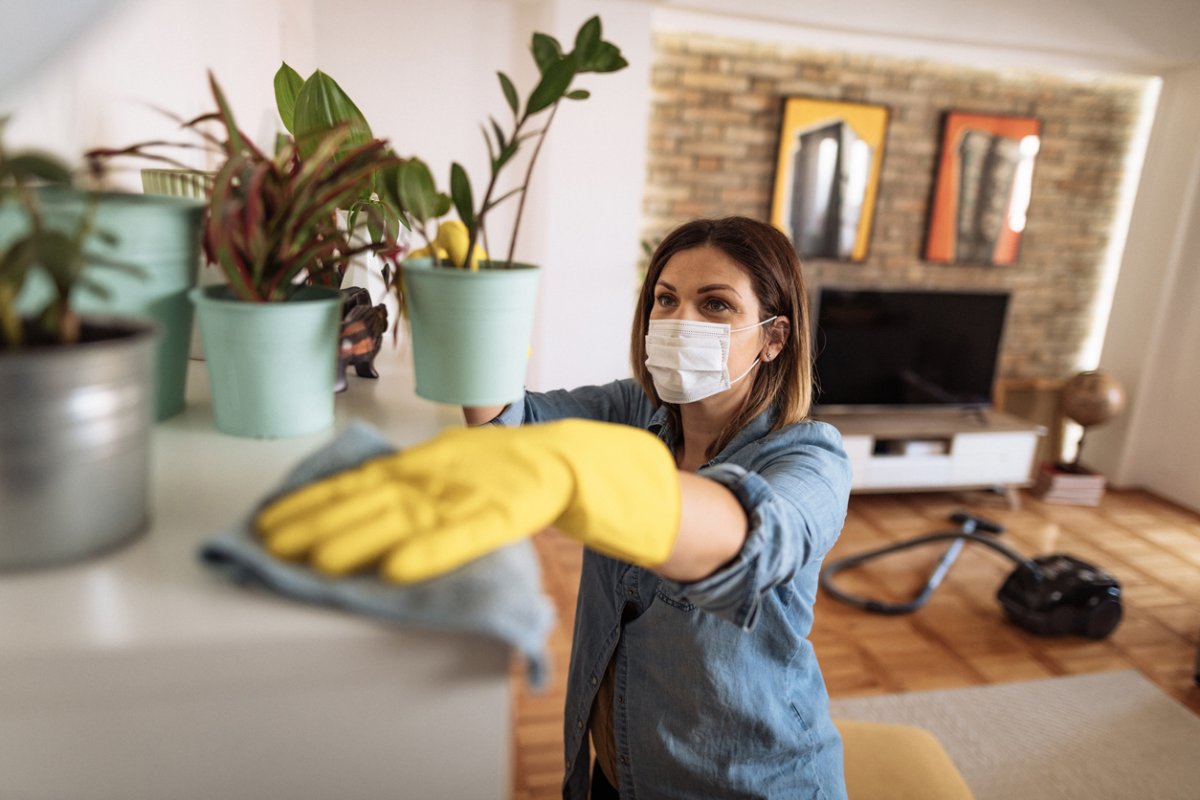
Step 5: Dust the furniture and everything on it.
Once you’ve finished dusting the walls, it’s time to move on to the furniture. Begin by clearing off the furniture surfaces as much as possible. Use a microfiber cloth or duster to wipe down shelves, tabletops, and other surfaces.
Before moving books, decor, or other things back to where they belong, wipe them down, as well. A can of compressed air or handheld vacuum/blower can be helpful when dusting electronics, in particular. Don’t forget to also carefully dust your houseplants with a microfiber cloth or a small paintbrush before returning them to their home.
Use the attachments on your vacuum to clean couches, chairs, or other upholstered furniture. Remove the cushions to make sure you’re able to get into any tight spaces where dust could be hiding.
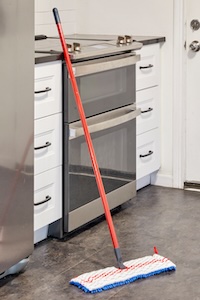
Step 6: Dust the floors.

Now it’s time to move onto dusting the floors. Use a vacuum cleaner for rugs, carpet, and hard flooring such as wood or tile. Brooms can simply push dust around and leave it in another area of the room. When you’re looking for how to eliminate dust, vacuuming regularly—even as often as once daily if you’re able—can be a huge help.
When vacuuming, clean under as much of your furniture as possible. Move lighter items out of the way, and use the attachment tools to reach as much as you can under heavier pieces.
After vacuuming, use a mop or hard floor cleaner for wood, tile, and other hard flooring types. If possible, do this immediately following vacuuming to ensure that you collect any smaller pieces of dust missed by the vacuum.
Step 7: Clean your dusting tools.

Finally, don’t forget to clean your dusting tools before putting them away. Take all of your dusters outside and shake them out to remove as much dust as possible. Some dusters can be washed in a washing machine, but you’ll want to consult each product’s manufacturer recommendations. If you used microfiber cloths or a duster, do not add fabric softener to your wash cycle when washing them; it can decrease how much dust the fibers attract.
Don’t forget to also wipe down your vacuum and any other cleaning tools you used. Empty the vacuum canister or change the bag to get all the dust you sucked up out of your home.
Final Thoughts
The best way to dust involves working your way from the top of the room to the bottom. Remember to follow the order of the steps presented above to dust your home for maximum effect. This will prevent you from knocking dust down from a higher surface onto an area you’ve just cleaned, which can be frustrating.
If you are looking for other ways to reduce dust in the house, consider investing in an air purifier. Air purifiers, particularly those with HEPA filters, help remove excess dust from the air and can be especially beneficial for those with allergies.
