We may earn revenue from the products available on this page and participate in affiliate programs. Learn More ›
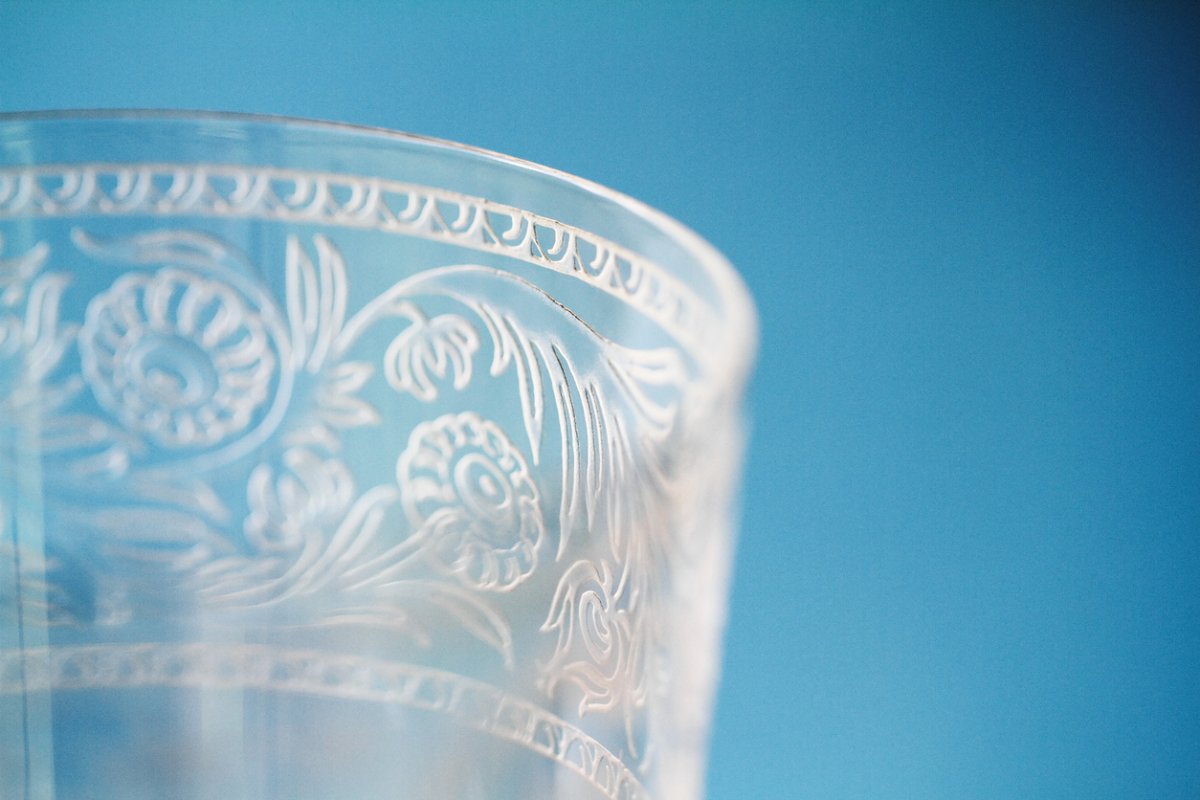
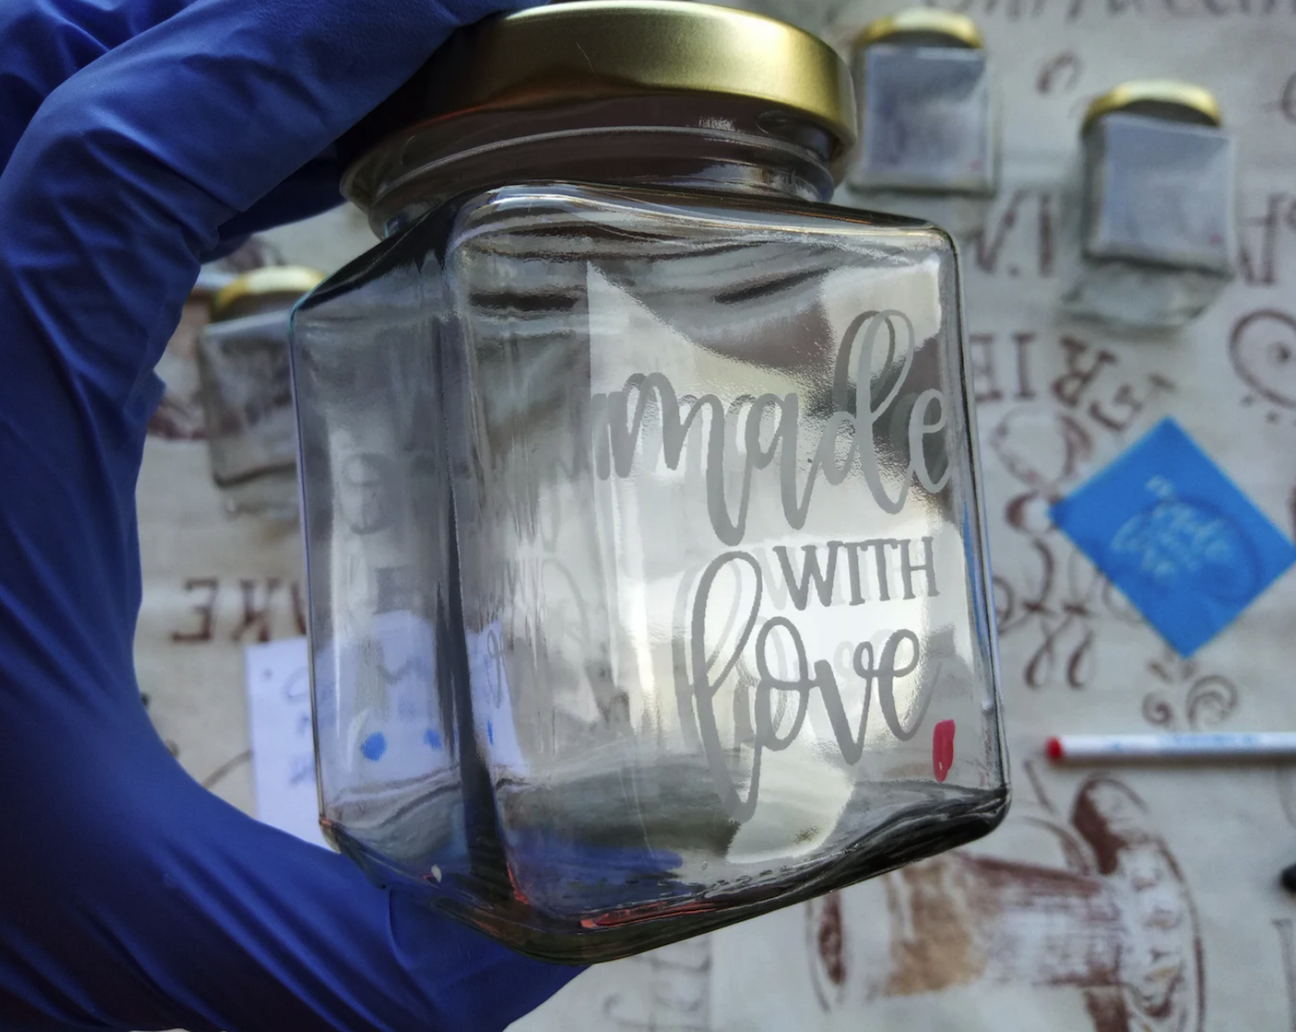
If you’re someone who keeps jars and canisters because “you never know, they could come in handy,” this project is for you. Etching glass can unify all of those spare mismatched glass containers with a simple yet custom design, be it a monogram or a geometric pattern.
We’ll teach you how to etch glass and effectively turn old vases into candle votives, but there’s no reason to stop there: Canning jars can become cool new drinking glasses. Heck, you can dress up plain-old wine glasses, windows, and even mirrors. Keep reading for two easy methods for how to etch glass: a traditional method using etching cream, and a shortcut method using frosted glass paint that looks just like the real thing.
Before You Begin
The traditional method for etching glass uses a chemical-based cream that eats away at the glass to permanently create a stunning design. This DIY method is well suited for creating customized drinking glasses, gifts, and home creations. The second method achieves a similar look, but uses frosted paint on the surface of the glass. This method is useful when creating decorative pieces, but is not an option for functional drinking glasses.
Etching glass, particularly the method that uses chemical etching cream, is not a project meant for children to undertake. Etching cream should only be used by adults who are wearing gloves and working carefully because it can cause severe burns and respiratory issues if not used carefully. Both of these etching methods will release fumes in the air. Work in a well-ventilated area, ideally outside, and wear protective gloves.
How to Etch Glass Using Etching Cream
The traditional way to etch designs onto the surface of glass is to use an acid cream of diluted chemicals. This cream is best used for smaller projects, like etching a design onto wine glasses. Using etching cream on a larger area, such as a shower door, can result in weak etchings or visible brushstrokes.
Etching cream only works on bare, uncoated glass. If you’re decorating other types of glass, it’s best to use the second method in this how-to guide. The look-alike method we explain later does not embed the design into the glass surface itself. Instead, it uses paint to create the illusion of etched glass.
Etching glass is easy if you know what you’re doing. Follow these steps to create bespoke glassware and decor for your home.
SUPPLIES
- Glassware
- Glass cleaner
- Lint-free cleaning cloths
- Cricut or Silhouette machine, or stencils or stencil vinyl
- X-Acto knife or scissors
- Stencil precision tools (optional)
- Washi tape or painter’s tape
- Protective gloves
- Small paintbrush
- Etching cream
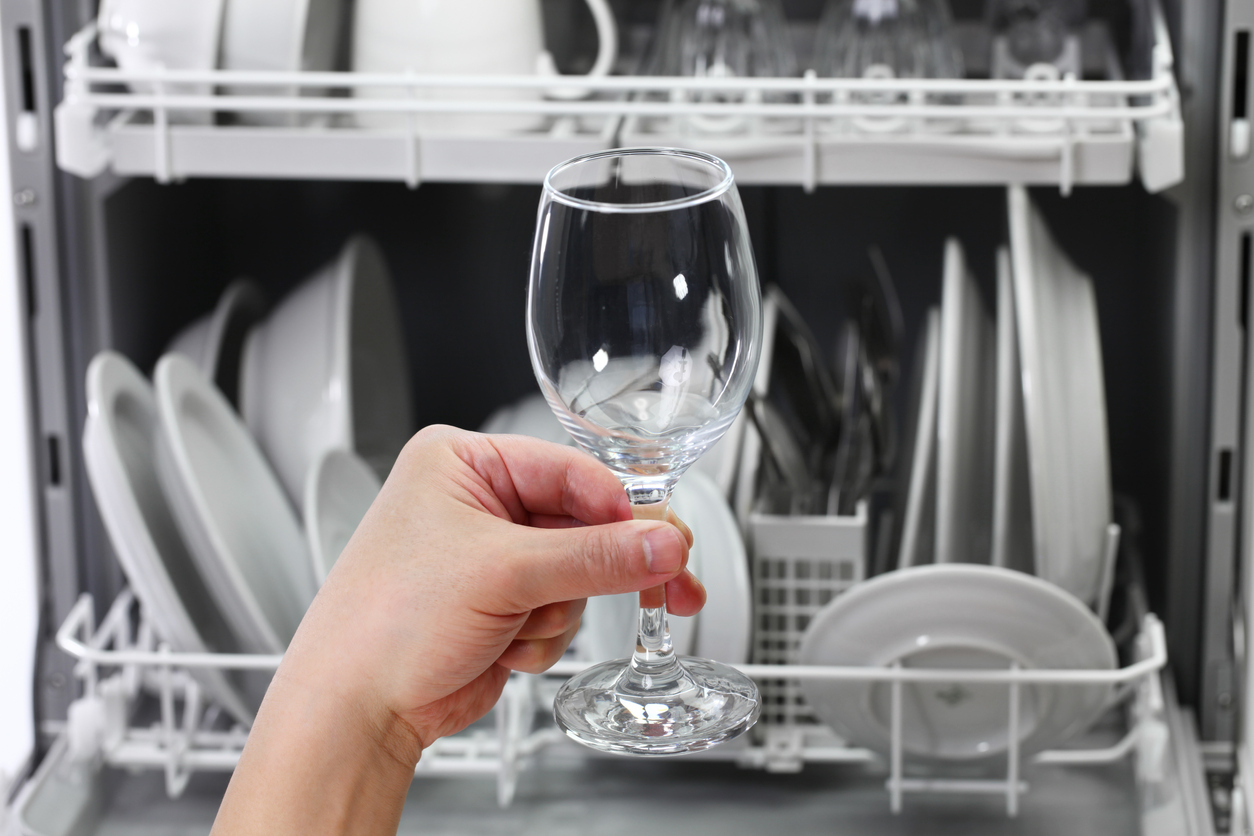
STEP 1: Clean your glassware thoroughly.
No matter what kind of glassware you use, it needs to be clean. Use glass cleaner and a cleaning cloth to remove any dirt and oil so the stencil sticks. Improper cleaning may cause the stencil not to adhere properly, enabling the etching cream to leak under the edges of the stencil or not etch properly.
Putting your glassware through the dishwasher is a good starting point, but the dishwasher can leave particle residue on the glass. You need to wash it by hand to remove any detergent residue. If you’re upcycling a glass that has glue or label residue, soak the glass in hot water with some dish detergent, then scrub with a nylon scrub sponge.
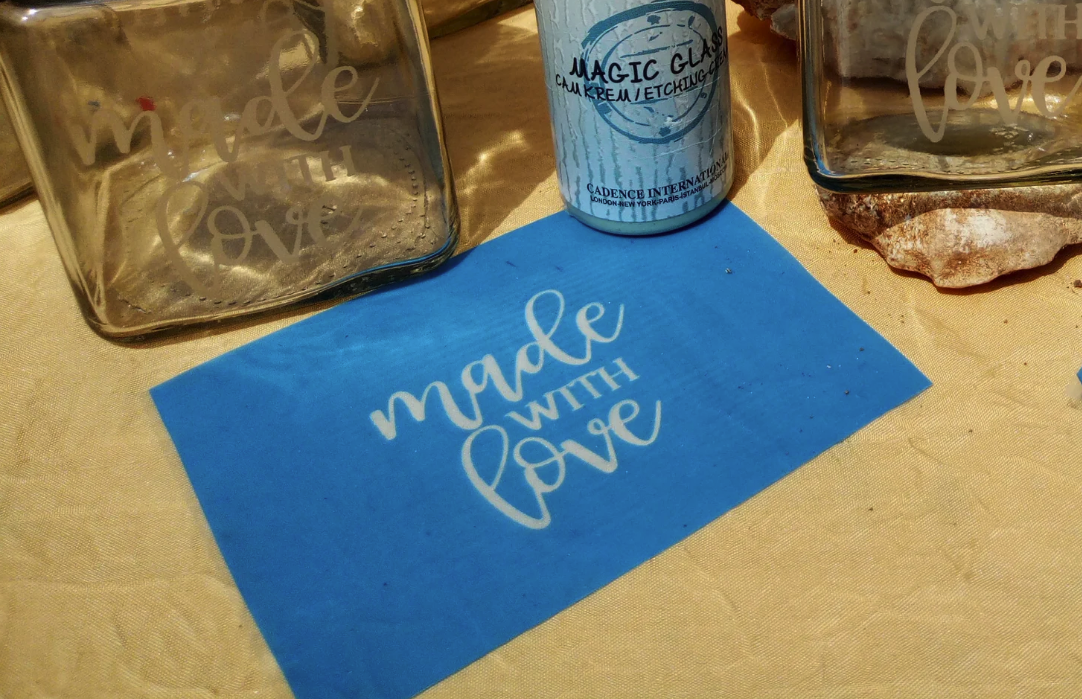
STEP 2: Prepare your stencil.
Using a Cricut or Silhouette machine, you can create custom, precise vinyl designs for your glassware. If you don’t have one of these machines, you can buy adhesive etching stencils for glass, or cut your own unique designs by hand with stencil vinyl and a utility knife or scissors. Leave extra vinyl around the stencil to protect the rest of the glass from the etching cream.
If you go the DIY stencil route, the edges may be a little imperfect, even if you have a steady hand. For a more professional result, consider investing in a stencil kit. If you are planning to use the same stencil for multiple glasses, stencil adhesive spray will help the stencil stick securely to successive glasses.
STEP 3: Apply the stencil and cover any glass you wish to protect.
It’s important to apply adhesive stencils to dry glass smoothly and evenly. Use a tool with a flat, blunt edge to smooth out the stencil and make all sides of it stick to the glass. If you don’t have stencil tools at home, a popsicle stick or an old credit card will do the trick.
There has to be enough coverage on the glass around the stencil that when it comes time to rinse the glass with water, etching cream does not seep into areas where you don’t want it. If your stencil isn’t large enough to cover the entire glass, you can use washi tape or painter’s tape to cover it up.
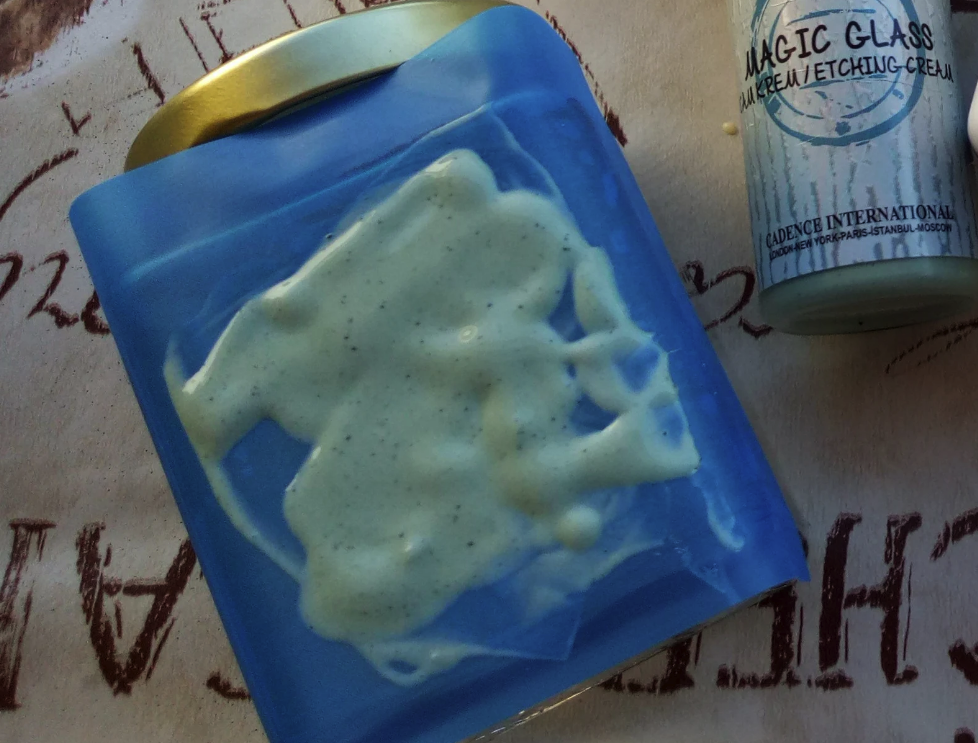
STEP 4: Paint a thick layer of etching cream over the stencil and leave it on for a few minutes.
Do one last inspection of the stencil placement. Once the etching cream is applied, there’s no going back. Etched designs are permanent and any mistakes will have to be built into your design, or you’ll have to start over with another glass.
Put on your protective gloves and add a generous amount of etching cream to a paintbrush, but don’t use so much that the cream drips off. Fight the urge to make brushstrokes, instead, patting the cream onto the glass until there is a quarter inch of etching cream over the stencil. The etching cream you use will advise how long to leave the cream on the glass, typically from one to several minutes.
STEP 6: Rinse the glass and remove your stencil.
Rinse the glass in the sink to remove the etching cream. The instructions on your etching cream will advise which temperature to use; typically warm water is recommended. Try to make the water run off in one direction to reduce the potential for etching cream to go where you don’t want it and avoid using too much water pressure. Keep your gloves on, as you may need to rub a little to remove all of the etching cream.
Once all the cream is removed, carefully peel off your adhesive stencil and run it under water to make sure you remove all of the cream.
STEP 7: Wash the glass really well, then enjoy!
Since this crafting project uses chemicals, you want to be very sure the glass is clean before you use it—especially if it’s a drinking glass. After you remove the stencil, use a glass cleaner to really clean the surface.
Etched glass can be washed in the dishwasher, just make sure to check the label on the brand you’re using to confirm it’s safe to do so, or otherwise you’ll have to hand-wash it. Once the glass has been through the dishwasher, it’s ready to be used!
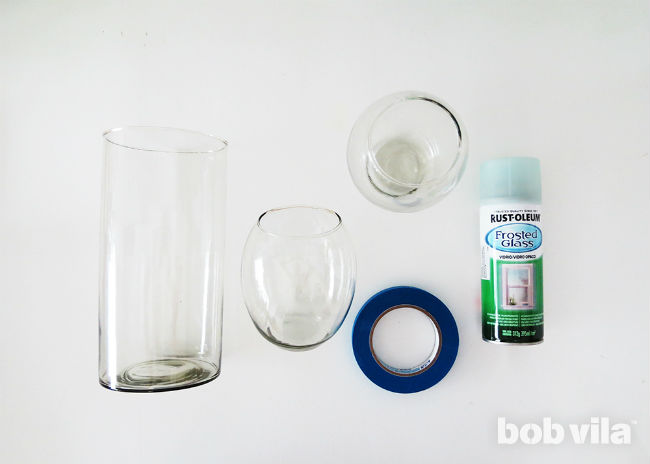
How to Etch Glass with Frosted Glass Paint
Thanks to today’s selection of paints, the etched glass effect is very easy to achieve without actually etching. The secret to the simplicity here is forgoing traditional etching cream, which consists of a number of diluted chemicals, for a frosted glass spray paint. Working with a glass etching cream entails donning work gloves and waiting for chemicals to etch the glass, but frosted glass spray paint is a more familiar medium.
Etching cream is advisable for small projects only, but this spray method can work on both big and small pieces of glass. With it, you’re actually applying a flat, semi-transparent paint—one that can be removed, even, if you change your mind.
SUPPLIES
- Glassware
- Glass cleaner
- Lint-free cleaning cloths
- Cricut or Silhouette machine, or stencils or stencil vinyl
- X-Acto knife or scissors
- Stencil precision tools (optional)
- Washi tape or painter’s tape
- Protective gloves
- Frosted glass spray paint
STEP 1: Clean the glass.
Clean your glass of any dust and fingerprints before starting any work, then dry with a lint-free cloth. To see whether your glass has been cleaned sufficiently, hold it up to a bright light. If there are tiny bits of debris clinging to the glass, It may come off after painting, leaving an imperfection in your design. This glass is your canvas; you want it clean and dry before proceeding.
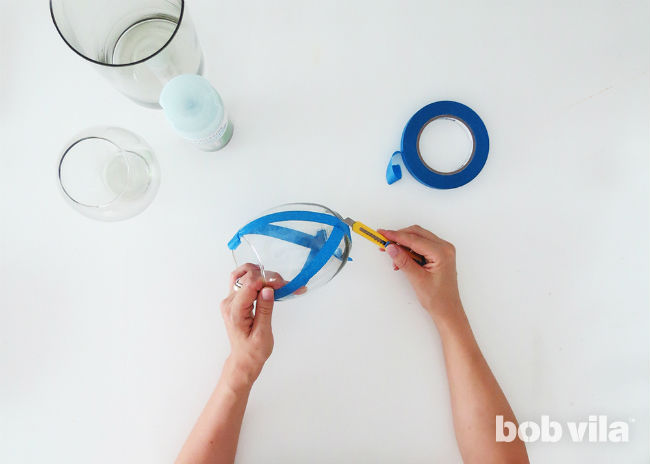
STEP 2: Design your stencil.
Now, on to the design! You don’t need special glass etching stencils, though these are easy to find online. Freestyle a design on the glass using the painter’s tape. Once you have a basic design on your glass, you can slice the strips lengthwise to make thinner, more detailed lines.
RELATED: 19 Cool Projects You Can Do with Leftover Paint
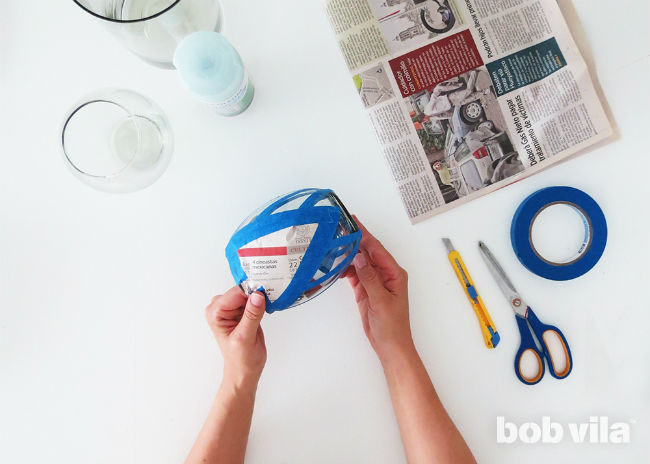
STEP 3: Cover any areas that you don’t want to paint.
You must cover all the areas that you want to keep clear. Fill in blank areas with more painter’s tape or washi tape. Tape a piece of newspaper over larger areas you don’t want to cover with the etched effect for protection. Just like with the etching cream method, keep the glass under the stencil pristine.
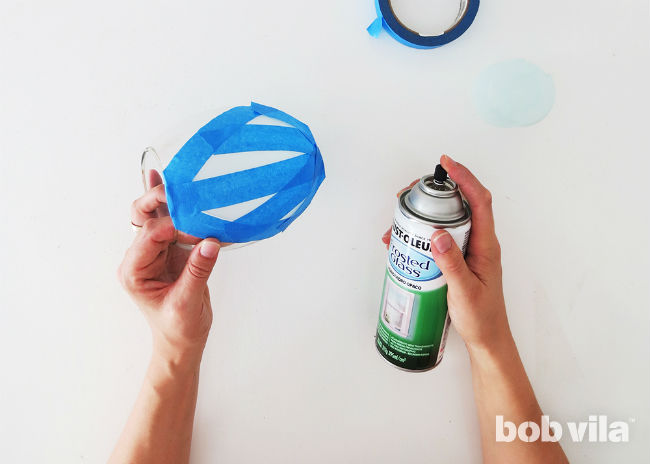
STEP 4: Evenly spray on the frosted-glass paint and let dry.
Outside or in a well-ventilated place, apply a thin coat of frosted glass spray paint to your glass container. At first, the paint is almost invisible, but it will appear as it starts drying in the following 10 minutes. Spray two or three thin coats (following the manufacturer’s recommendations for dry time between passes) until you are satisfied with the result.
RELATED: The Dos and Don’ts of Spray Painting
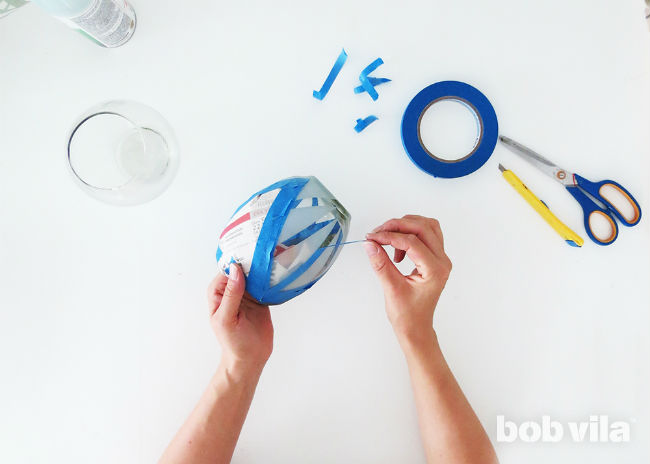
STEP 5: Once dry, remove the stencil.
Once the paint has dried, remove the tape. At this point, you can create an even more detailed design by applying new tape in several layers of painter’s tape. Don’t be afraid to overlap the dried paint; it shouldn’t flake when you take it off. Instead, after you repeat Steps 1 through 4, you’ll unwrap to reveal a new finished design with two levels of etching: The glass will be most opaque where it was etched twice and only lightly frosted where you’ve only etched once.
STEP 6: Enjoy your look-alike DIY etched glassware!
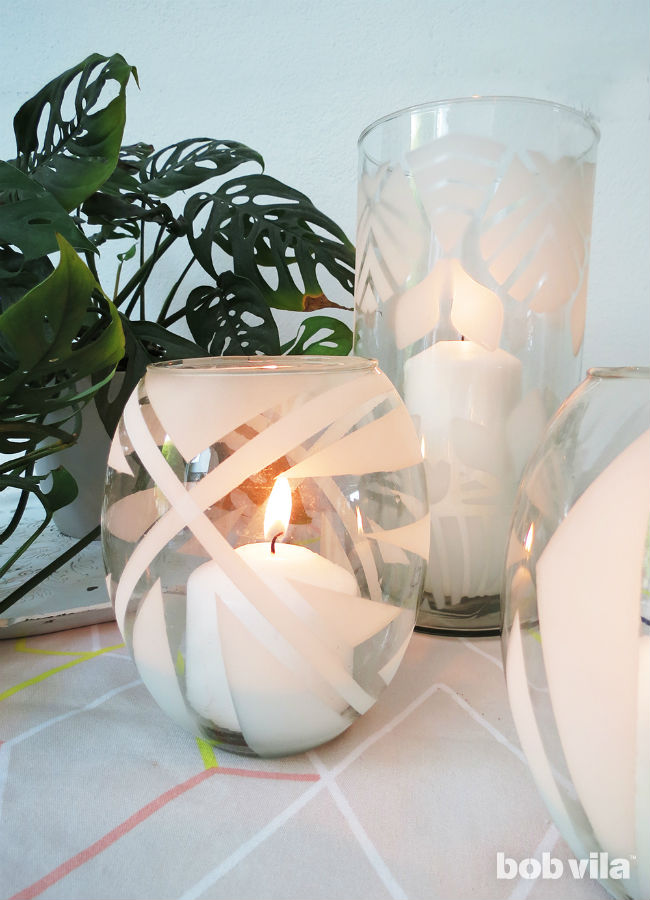
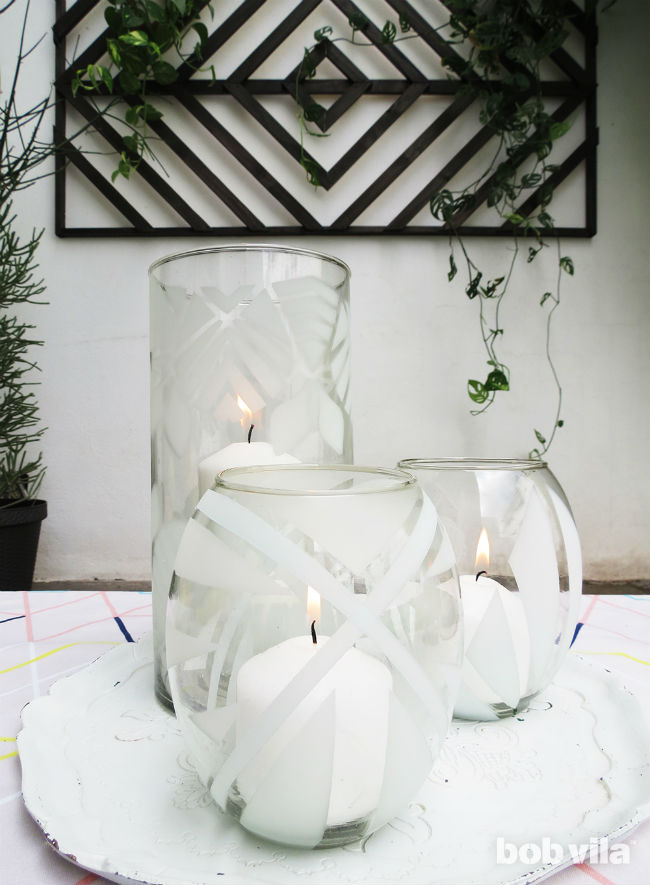
After you’re finished, put the remade etched glass cups to work. We placed some candles in these vases to light our cozy patio corner. If you use citronella candles, you’ll also keep bugs away during summer nights outside.
Etched glass tumblers and candle holders filled with citronella lights can help transform your outdoor entertaining area. You know what else will transform the patio space? A DIY cooler table for refreshments and a geometric wall trellis. You can see them come together in the photo below and get their tutorials here.
Final Thoughts
Etched glass personalizes any number of items throughout a home, and it makes a terrific personalized gift. The two methods of etching glass outlined above both produce sensational results, but it’s important to consider the function of the item you’re etching before you decide which method to use.
Etching cream doesn’t work on all types of glass, however, chemical etching makes household goods retain their function. This method can be used on glasses from which you drink and is a dishwasher-safe way to etch. Though it’s relatively simple, use of glass etching cream requires diligent safety.
Using paint to create an etching effect enhances your decor, and can be used on most glass items quite easily. Projects where you intend to store food or drinks, or wet environments, like shower doors, are not recommended for this method of etching.
FAQs
Q. How do you make a stencil for glass etching?
There are a few different ways to make a stencil for etching glass. If you have a Cricut or Silhouette machine at home, you can choose an image from their design libraries or create your own, and the machine will cut the stencil into adhesive vinyl. Otherwise, you can cut out an image on contact paper, using either one you find online, or one you draw yourself.
Q. Can you use a Dremel on glass?
You can use a Dremel on glass, and there are a few different glass projects that can benefit from it. You need to use the correct Dremel bit, and the method you use to cut the glass depends on how you want to shape the glass, whether that means boring a hole, cutting a bottle in half, reshaping a mirror, or something else.
Q. How do you etch words on glass?
The best way to etch words onto glass and achieve a glass engraving effect is by using a stencil with adhesive vinyl. Use computer software to find a font you like, and have your Cricut or Silhouette machine precisely cut out the words. Otherwise, you’ll have to cut out the word on your contact paper using a utility knife or scissors. Letter stencils have small pieces for the centers of letters like A, O, P, R, etc. Make sure you stick these tiny pieces to the glass to accurately form the letter.

