
We may earn revenue from the products available on this page and participate in affiliate programs. Learn More ›
Installing a new kitchen sink is an excellent way to update the look of an outdated kitchen. While so many elements in kitchen design have remained common throughout the decades, others have lost their luster. For example, popular cabinets still have raised panels, many countertops are still made of plastic laminate, and tile is still a preferred surface for backsplashes and floors. But an ugly steel band running around an almond- or avocado-color sink? That says ’80s faster than big hair.
Unfortunately, it’s not so easy to replace an old sink (and its supporting hudee ring) without destroying your countertop, but a do-it-yourselfer with average skills can complete the replacement in about 4 hours. By following the guide below, you can learn how to install a kitchen sink like a pro. As with any plumbing job, begin early in the day. If something takes longer than expected, you may still be able to finish by dinnertime.
Kitchen Sink Installation in 10 Easy Steps
The toughest part of installing a new kitchen sink is making the connection between the drain pipe and the sink drain. Aligning the tailpiece that extends from the drain and the P trap with the drain pipe coming out of the wall just below the sink can take a bit of trial and error. Unless you happen to be replacing the old one with an identical model, the alignment won’t be the same with the new sink.
Avoid any problems with this connection (and additional trips back to the home improvement store) by planning ahead. Purchase a trap adapter that will allow you to swivel the P trap on the tailpiece to align it with the drain pipe. Also, buy a section of 1 1/2-inch schedule 40 PVC pipe that you can cut to size to make the connection between the P trap and the sink’s tailpipe.
Tools & Materials
Bobvila.com may earn a commission from purchases made through these links.
STEP 1: Buy a sink that will fit the existing opening.
It’s easiest to buy a sink that fits inside the existing countertop opening. While you can install a sink that’s slightly bigger than the opening, it may be difficult to enlarge the hole.
Make sure you have the rest of the supplies you’ll need and prepare everything so it’s ready to use. If you’re replacing a cast-iron sink, be sure to have some extra muscle on hand to help manage the weight and enough support in the countertop for the extra weight.

STEP 2: Clear out the sink cabinet and crawl in there with a flashlight.
Locate the clips that secure the sink and its rim to the countertop. Remove them and disconnect the supply and drain plumbing.
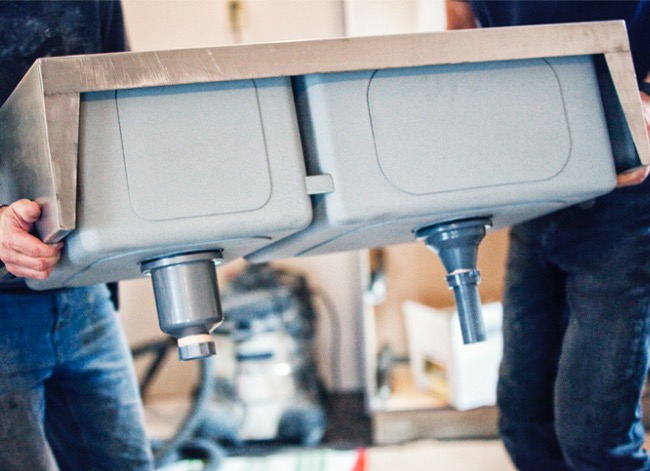
STEP 3: With your helper holding the sink from above, push up on the old sink from underneath.
You may have to run a putty knife around the perimeter to loosen the old caulk seal. After the old sink is removed, test-fit the new one.
Related: Solved! What to Do When Your Kitchen Sink Is Clogged
STEP 4: Prepare the new sink by installing the faucet according to the manufacturer’s directions.
Two common mistakes with a kitchen sink install are forgetting to clean the new sink thoroughly before installing and forgetting to install the new faucet before installing the new sink.
Factory-fresh stainless steel sinks smell awful, so it’s best to scrub them down outdoors. And it’s a lot easier to install the faucet before you install the sink, for at this stage, the mounting nuts are more accessible. While you’re installing the faucet, install all of the accessories, including the sprayer and detergent dispenser mounts.
STEP 5: When installing the faucet and sprayer bases, apply a ribbon of plumber’s putty first.
Before the faucet and sprayer are ready to be installed, they need plumber’s putty to keep the connection water-tight. It’s easier to work with plumber’s putty after warming it up with your hands. Roll the putty to form a rope shape and then press the putty around the faucet and sprayer bases.
Related: The 10 Biggest Mistakes You Could Make at Your Kitchen Sink
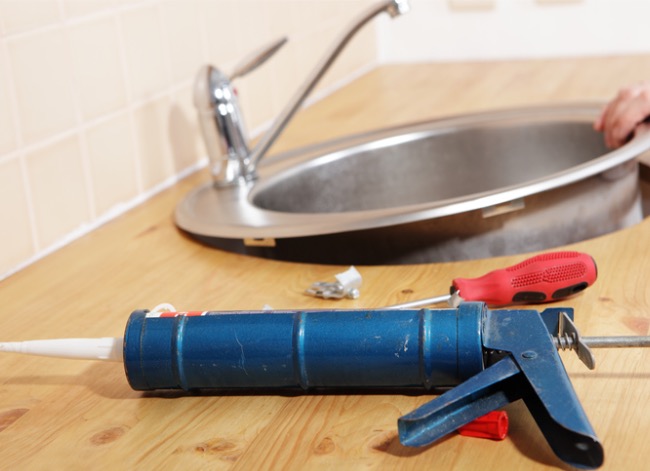
STEP 6: Apply caulk under the sink rim and seat it in the opening.
Make sure the counter surface around the sink hole is clean and free of any dust. Then, run a bead of caulk around the hole about a1/2-inch away from the opening using a caulk gun. Make sure to use a caulk that inhibits the growth of mold and bacteria.
Once the sink is in place, run a bead of caulk around the edge between the countertop and the sink. The caulk will hold the sink in place and create a watertight barrier that prevents moisture on the counter from leaking between the sink and the counter. Finally, attach any clips holding the sink in place.

STEP 7: Install the drain and tailpipe, seating it in caulk and using the supplied gasket and nut.
Run a bead of caulk around the rim of the basket strainer, then place it into the drain hole in the sink.
Push the gasket over the threaded part of the drain under the sink, then screw the nut on and tighten it with a sink drain wrench or channel lock pliers. Clean off any excess caulk that squeezes out from the basket drainer into the sink.
STEP 8: Install the tailpiece and connect it to the drain.
Push the tailpiece into the sink drain, making sure to position the tailpiece’s gasket so the angled end is facing upward. Handscrew the tailpiece nut onto the threaded end of the sink drain pipe.
Cut the piece of schedule 40 PVC pipe so that the tailpiece lines up with the drain pipe. Attach the pipe to the tailpiece. Connect the P trap to the tailpiece and the drain pipe. Once all the connections are made, tighten each nut with locking pliers.
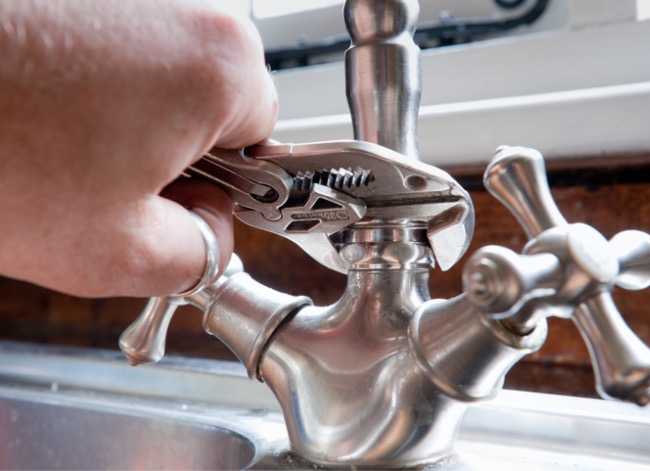
STEP 9: Attach the supply hoses to the supply lines.
Reattach the supply lines extending from the faucet to the valves under the sink using a crescent wrench. If using flexible supply hoses (recommended), don’t reuse the old gaskets. The rubber gasket that seals the connection may have hardened over the years and may not seat properly to the new faucet’s tailpiece.
STEP 10: Turn on the water and run it for several minutes.
Check for leaks at all connections, especially at the tubing, around the drain, and around the trap.
Related: The Best Dish Soap Dispensers for the Kitchen Sink
Pro Tips for Kitchen Sink Installation
While installing a new kitchen sink is not a complicated task, there are few tips to keep in mind that make the process go more smoothly and ensure you don’t have to deal with problems later.
Many newbies learning how to install a new kitchen sink will often install the sink before the faucet. Save yourself a headache and install the faucet when the sink is out and the faucet’s nuts are much more accessible.
Make sure all the old caulk is cleaned off of the countertop before installing a new sink. Any caulk or putty that’s left behind prevents the sink from sitting flush to the countertop, creating tiny gaps that water can pass through.
Many people use plumber’s putty instead to seal the connections between the drain basket and sink and the sink and countertop. Plumber’s putty dries out over time, allowing water to leak between these seams and cause damage. Use caulk, which won’t dry out.

Working on plumbing often releases sediment in the pipes, clogging your new faucet. Flush this sediment by purging the lines into a bucket before attaching them to the faucet.
Once the sink is installed, place a paper towel under the drain pipe and leave it there for a few days. Check it daily for signs of moisture to make sure there are no leaks coming from the newly installed drain.
- Install the new faucet before installing the sink.
- Clean off any old caulk to make sure the new sink sits properly.
- Use caulk instead of the plumber’s putty to seal the sink and drain.
- Flush the supply lines to clear any sediment.
- Use a paper towel to check for leaks.
Expected Costs When Installing a New Kitchen Sink
When estimating the cost of your new kitchen sink installation, you need to factor in not only the cost of the sink and faucet but also the supplies. (Pro tip: Buying a prepackaged sink and faucet combination can save you about $100 over purchasing them separately.) Different types of sinks range in price based on the material type. Expect to pay about $8 to $12 for a new 1 1/2-inch PVC P-trap and about $4 for a length of schedule 40 PVC pipe to make your connections.
While it is possible to reuse the supply lines for your faucet, it’s a good idea to replace them to maximize flow rate and minimize the chances of a leak. Expect to pay about $15 for a set of new supply lines. You’ll also need caulk, which costs about $7 a tube, to attach and seal the sink to the countertop and install the drain basket. Overall, expect to spend about $30 in supplies to install your new faucet and sink.
Related: 10 Things Always to Keep Near Your Kitchen Sink
Final Thoughts
While many people call a plumber to complete the installation of a new sink, installing a sink can be completed in a couple of hours with just a few basic tools and supplies, saving you hundreds of dollars. Put your checkbook away, strap on a tool belt and knock out this sink installation on your own with our guide detailing how to change a kitchen sink.
FAQs About How to Install a Kitchen Sink
If you still have questions about how to install a sink, this section may help. Below are answers to some of the most popular questions asked about installing kitchen sinks. For more specific questions about a particular sink, reach out to the sink’s manufacturer.
Q. Do you need a plumber to install a kitchen sink?
No. Installing a kitchen sink is something most DIYers can handle with basic tools and a few supplies. More complicated installations that involve relocating plumbing may require a plumber’s expertise.
Q. Can I install a deeper kitchen sink?
You can install a deeper kitchen sink, but keep in mind that International Building Code specifies that you need at least a 1/4-inch drop from the sink tailpiece to the drain. If your deeper kitchen sink, like a farmhouse style, doesn’t allow for this, you’ll need to relocate the drainpipe and that’s a job for a plumber.
Q. What is the best depth for a kitchen sink?
Most kitchen sinks range between 8 and 10 inches in depth. While a deeper sink may make it easier to soak (and pile up) dishes, it can make it harder for shorter family members to use.
Q. How do you install a kitchen sink with a new countertop?
If you’re installing a kitchen sink with a new countertop, you’ll need to cut a hole in the countertop to accommodate the sink. Luckily, most sinks come with a paper template that you can tape onto the counter to use as a cutting guide. Trace the shape using the paper then use a drill with a 3/8-inch bit and drill a hole in each corner. Use a jigsaw to drill along the line from corner to corner.

Q: Are kitchen double sinks outdated?
Although some people still like double sinks, they were designed for a time when few people had dishwashers. The double sink’s design allowed people to both soak and rinse dishes in the sink. Now that most homes have dishwashers, single sinks are more popular.