
We may earn revenue from the products available on this page and participate in affiliate programs. Learn More ›
Uh oh! You turn on the tap, flick the switch, and after a groan your garbage disposal goes silent, leaving you with a sink full of scraps. Before calling a plumber to install a new one, consider replacing the unit yourself—a fairly easy DIY project for anyone with some experience using basic tools such as screwdrivers, pliers, and putty. Here’s what you need to know before heading down under the kitchen sink.
RELATED: 15 Things You Should Never Put Down a Garbage Disposal
1. Make sure the garbage disposal is truly broken.
Often, when a garbage disposal stops working, it isn’t actually on the fritz. There are two troubleshooting avenues to try, depending on how the unit is malfunctioning:
- If you flick the power switch and nothing happens, check the outlet, usually located underneath the sink, where it’s easy for the plug to be accidentally dislodged while accessing supplies stored in this space. If the device is securely plugged in, it’s possible that the built-in circuit has tripped. Locate the little red button on the bottom of the unit and push it to reset the circuit. Turn on the disposal; if it’s still silent and still, it’s time for a replacement.
- If, when you flick the switch, the disposal’s motor hums, but the blades don’t turn, chances are the blades are jammed. Use a flashlight to look down into the unit. If you spot a stray utensil, peach pit, or another blockage, or there is a lot of fibrous waste, such as celery, wrapped around the blades, cut the power to the appliance and use a long fork or pair of pliers to retrieve the offending item. Never stick your fingers into a garbage disposal: Those blades are sharp! After unclogging the garbage disposal, turn it on and give it a try; if it still only hums, it requires a replacement.
2. Save money by replacing it yourself.
A new garbage disposal can cost as little as $50—although at that low a price, you’ll get a small, low-powered device likely to struggle grinding up much beyond the softest of scraps. At the high end, about $200, you’ll get a powerful, reasonably quiet appliance with stainless-steel components, that has a several-year warranty and, often, an auto-reverse start, which means that the blades first whirl in one direction, and then reverse, to avoid most problems with jams. For most folks, a garbage disposal in the $75 to $100 range has sufficient power and longevity to handle typical kitchen demands.
The big savings come from not hiring a plumber to handle the installation. Typically, the job takes a couple of hours, at an average cost of $100 per hour. Keep in mind, however, that most installation time will be spent crouching down to access the small area underneath your kitchen sink, so if your back isn’t up to a lengthy and uncomfortable lean, you might be better off paying a professional.
RELATED: How to Clean a Garbage Disposal

3. The job requires basic tools.
To replace a defunct garbage disposal, you’ll need a new unit (here’s everything you need to know about buying a new garbage disposal) and some basic tools. While install specifics can vary depending on the model, the most common required tools include:
- Flat-headed screwdriver
- Philips-head screwdriver
- Needle-nose pliers
- Hammer
- Plumber’s putty
- Putty knife
- Flashlight
4. Shut off the electricity before getting started.
As with any repair or replacement of an appliance powered by electricity, don’t do a thing until you’ve shut off the power. First, unplug the garbage disposal (the outlet is most likely underneath the kitchen sink but may be on the wall by the countertop). Then switch off the electricity to the garbage disposal head to your home’s main circuit-breaker box (often, the appliance shares a circuit with the dishwasher). If you aren’t sure which circuit breaker powers your garbage disposal, turn on the disposal (or the dishwasher, if the disposal is completely nonfunctional) and flip the circuits one by one until you hit the one that shuts off the disposal.
5. Understand the basic process of replacing a garbage disposal.
While the process can vary depending on the existing model and the replacement, it’s generally a fairly straightforward procedure. Clear out the space underneath your kitchen sink and lay down an old towel to catch any water drips. Set a flashlight in place to provide sufficient light while you work. Then, follow the instructions below to remove the old unit to prep for installing a new garbage disposal:
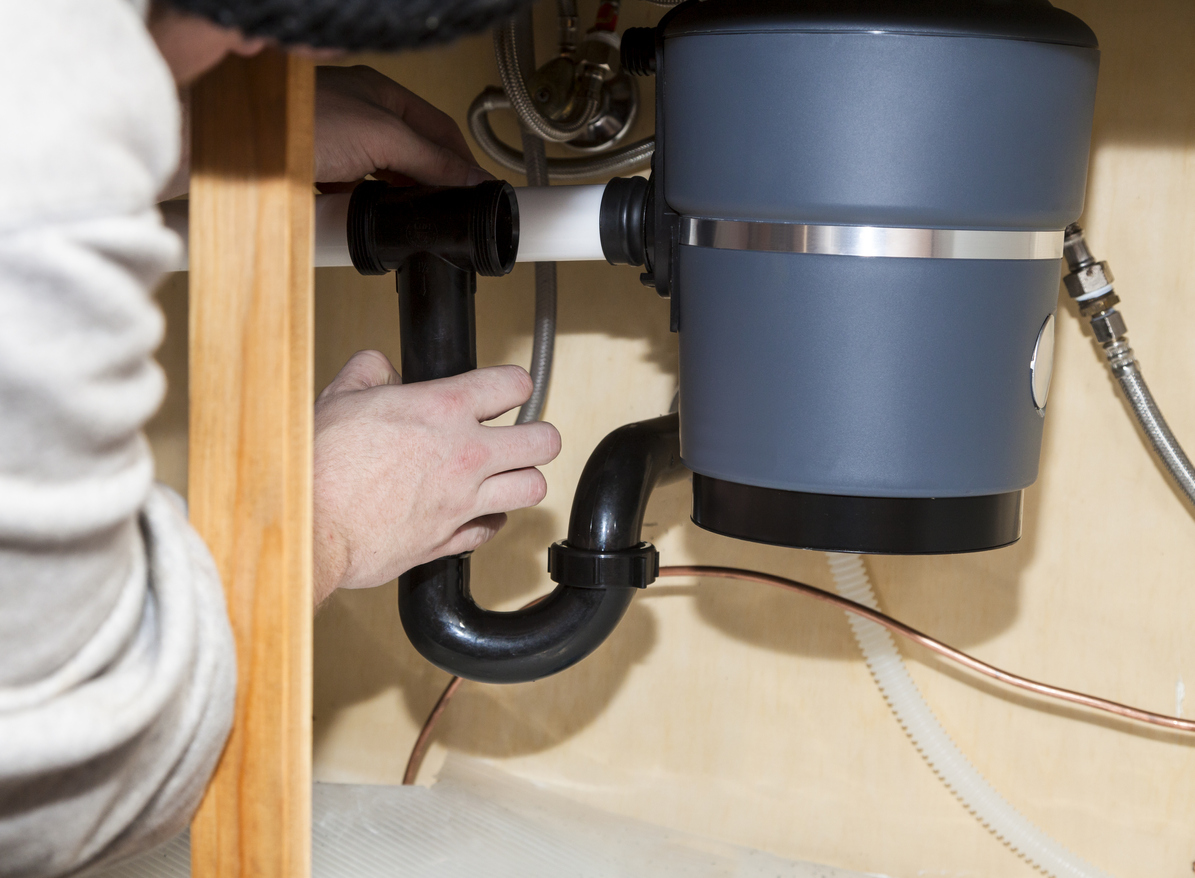
- Unscrew the discharge tube–the rigid PVC or metal pipe that carries water and ground-up waste from the disposal into your home’s plumbing system–and then give the tube a gentle tug to separate it from the garbage disposal.
- Older kitchens often have a dishwasher drain connection running into the garbage disposal, as well. If so, this will be a flexible hose usually positioned above the discharge tube. Unscrew or unclip the dishwasher drain connection (use pliers if the tube is clipped in place) and give it a tug to disconnect it from the garbage disposal.
- Locate the mounting ring, a thin metal ring with three extending grips at the top of the garbage disposal. With one hand, grasp the grips and rotate the ring counterclockwise while supporting the garbage disposal with the other hand. Be prepared: Once the mounting ring is loosened, the disposal will come free, and these appliances can weigh as much as 15 pounds.
- Unscrew the metal faceplate from the bottom of the garbage disposal.
- Slip the copper grounding wire out from underneath the green screw holding it in place, and then unclip the two electrical wires that connect your home’s electrical system to the disposal. You might need your needle-nose pliers to squeeze the clips. Set the old garbage disposal aside.
- Remove the rubber snap ring from inside the old mounting bracket’s flange. You might need to wedge a screwdriver between the rubber ring and the mounting bracket to displace it.
- Remove the old mounting bracket; you might need to unscrew this, but often, it will simply slide off.
- Push up the sink flange (the metal ring inside your kitchen sink that encircles the opening to the drain and garbage disposal) to loosen it. If necessary, give it a couple of light taps with a hammer. Remove it by pulling it up and out of the sink from above.
- Step out from under the sink and, standing in front, scrape away any old putty still remaining around the sink’s drain with your putty knife.
Now you’re ready to install the new disposal.
- While standing in front of the sink, apply plumber’s putty to the underside of the new sink flange, and then press the flange into place so its ring covers the opening to the kitchen sink drain. Set something heavy on top of the flange—such as the old garbage disposal—to keep it secured while the putty hardens.
- Slide the rubber gasket that came with your new garbage disposal onto the new mounting bracket, and then screw the bracket into place underneath the sink.
- Attach the new mounting ring to the mounting bracket. This might screw in place or might simply slide into position on the mounting bracket.
- Unscrew the metal faceplate on the bottom of the new garbage disposal. Hook the appliance to your home’s electrical system by securing the copper grounding wire underneath the green screw on the bottom of the garbage disposal, and then clip the electrical wires to the new disposal, matching the colors of the wires to the color-coded wire nuts on the disposal. Generally, the colors will be red and black, or black and white.
- If your new disposal will connect to the dishwasher, use your hammer to gently knock out the plastic plug where the dishwasher hose connects. If your garbage disposal will not connect to the dishwasher, leave the plug in place.
- Lift the new garbage disposal into position on the mounting ring, and then turn the ring clockwise until it clicks into position and the garbage disposal is secured.
- Reconnect the discharge tube, and secure it with its screws. Reconnect the dishwasher drain hose, if your setup uses one.
- Standing in front of the sink, remove the weight from the kitchen sink flange, and turn on the water. Peek underneath the sink to check that no water is leaking from the new garbage disposal. This is rarely a problem if you took care to tighten all screws firmly during the installation.
- Plug in the new garbage disposal, and flip the circuit breaker back to the “On” position. The new unit should power right up and run smoothly. Congratulations!
