We may earn revenue from the products available on this page and participate in affiliate programs. Learn More ›
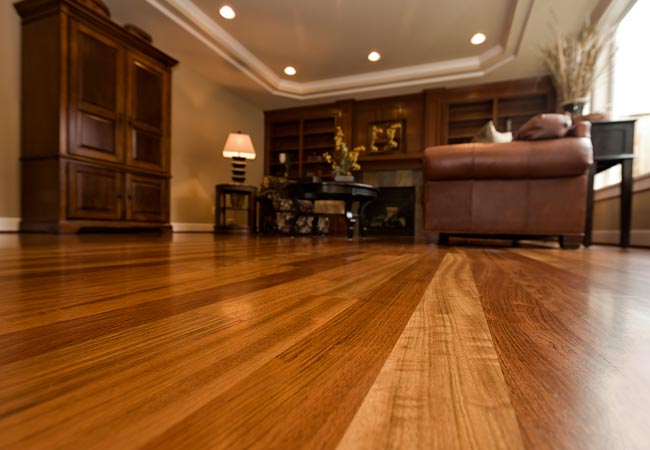
Think about the beating your wood floors endure on a daily basis: high heels, pet nails, children’s toys, and shifting furniture, to name a few! Tough as wood floors may be, their finish is still susceptible to scratches and scuffs. Refinishing wood floors, the process of sanding floors down entirely to apply a new surface finish, is costly and really only necessary every few decades. But polishing with a product specifically formulated for your floors is an easy, inexpensive way to regain shine, even out imperfections, and extend the life of your handsome hardwood. All it takes is a flat-head mop with a microfiber cleaning pad and commercial wood floor polish, which comes in low- or high-gloss sheens to achieve your desired look.
Whether or not you should polish your floors, however, depends on their finish. Those with a protective surface—a waterproof barrier such as urethane, for example—will benefit from polish, but floors with penetrating finishes like tung oil or unsealed wood require wax instead of polish. Using the wrong product can cause a host of problems, from making floors too slick to dulling the finish, and impair proper refinishing down the road. It’s important to determine which kind of floor you have (our Step 1 in this guide on how to polish wood floors) before you dive in and cause damage.
Tools & Materials
Bobvila.com may earn a commission from purchases made through these links.
Step 1: Test the finish on your wood floors.
If you’re not sure what type of finish is on your floor, use a sharp knife blade to scrape off a tiny bit from an inconspicuous area.
- If the finish is smudged but no clear material is scraped up, your floor probably has a penetrating finish. Stop here, and do not polish these wood floors; these should only be waxed.
- If you see a clear material, your flooring likely has a surface finish. It’s safe to polish these wood floors. Still, be sure to test out the polish in a small hidden or inconspicuous location on the wood before tackling the entire floor.
Step 2: Clear and clean your wood floors of dust and dirt.
Empty the room, removing as much furniture as possible, then clean the wood floor thoroughly to remove dust and dirt. Sweep or vacuum, then mop with a commercial wood floor cleaner or solution of a 1/4 cup of dish soap and 1 gallon of warm water to lift any lingering grime. Give the floors a final pass with a clean, water-dampened mop to remove any cleaner residue. Dry completely with a soft, clean towel.
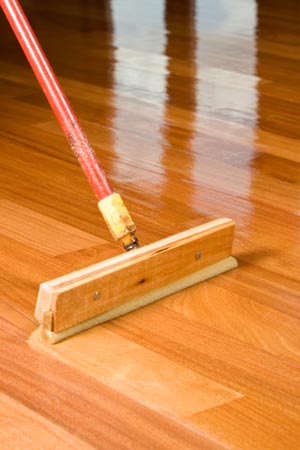
Step 3: Polish the wood to a shine.
Begin in a back corner of the room, plotting a path that will have you end up near an exit, pour a small S-shaped amount of wood floor polish onto the floor.
Using a flat-surface mop, work the solution back and forth in the direction of the wood grain, smoothing out any air bubbles. Work in small areas (about 3 to 5 feet wide in either direction) to best control the amount of polish you’ve applied.
While you must make sure to completely coat the floor, thin layers will dry more quickly than thick ones, and you can always apply another coat if needed.
Note: Polish can stain drywall and baseboards, so take care not to make contact with these areas.
Step 4: Wait a day before replacing furniture.
Wait at least one hour before allowing light traffic through the room and a full day before moving your belongings back in and resuming normal use. To avoid scratching, take care not to drag or slide furniture; pick up each piece up and place them where they belong. Attach felt furniture pads underneath heavy pieces for extra protection.

Tried-and-True Advice
“Most of us focus on the type of product we put on our floors when preparing to polish them but the quality of the mop is just as important. Choosing the wrong mop leaves streaks on your floors or, at worse, causes scratches if the brush is too abrasive. I get the best results by using a high-quality microfiber mop. It’s soft enough that it won’t damage the floors and does a good job of spreading polish evenly without streaks. Also, don’t forget to clean the mop head in between polishings.”
—Tony Carrick, Contributing Writer
Step 5: Follow a few precautions to keep wood floors looking great, and you can put off your next polishing job.
Now that your floors look like new, maintain them by placing rugs at entry doors to prevent dirt from being tracked inside. If your kitchen has wood flooring, also place a rug at the sink to catch stray drops of water.
Stick to a regular cleaning routine, vacuuming weekly and giving the floors a deep clean monthly. Skip any homemade cleaning solutions that include diluted vinegar or ammonia on wood floors—all they’ll do is dull a surface-finished floor. Instead, for an all-natural approach, make a homemade wood floor cleaner, which features castile soap.
These measures will go a way to make preserve your wood floor’s shine. You may still want to repeat the polishing process a few times annually, as needed, but don’t exceed four applications per year.
