
We may earn revenue from the products available on this page and participate in affiliate programs. Learn More ›
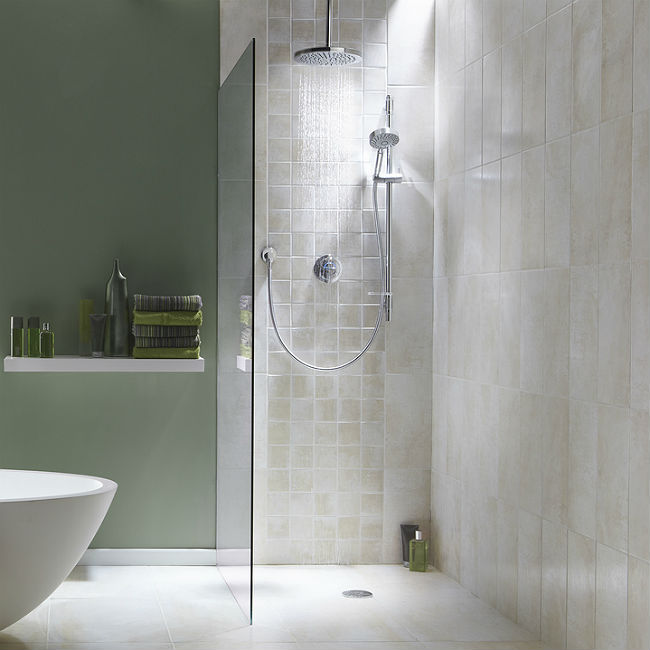
If you notice a cloudiness suddenly appear across your tiled surfaces only days after a bathroom renovation, it’s probably not a thick layer of soap scum that has accumulated in the very short time its been in use. More likely, this was left over from the day the tile was put in. Oh, you don’t remember planning this detail into your design scheme? Well, that’s because it’s often an unintentional one—and it won’t appear until a few days after you’ve installed your grout.
Grout haze is a byproduct of tile installation, during which the entire surface gets covered with grout. When the excess has not been properly cleared from the tile surface, what little that remains will eventually dry out, leaving behind a dull white film of just minerals.
Unlike dirt and grime that coats your bathroom floor from everyday use, this discoloration is not quite so simple to wipe up. Sure, some new grout haze can be removed with a damp towel; other instances, though, may be stubborn enough to require special products. Your best means of cleanup depends on the type of grout and tile you’ve used. So, refresh yourself on your renovation materials, then follow our guide on how to remove grout haze to clear up the cloudiness as quickly as possible.
How to Remove Grout Haze
You have four main tools at your disposal to get the job done. The methods ahead outline how to remove grout haze using:
- water and cheesecloth,
- a rubber grout float,
- diluted vinegar (on porcelain or ceramic tile only) and a nylon scrub pad,
- and a commercial grout haze remover.
Before you start removing grout haze…
- Allow grout to harden fully. Make sure your tile surface is completely dry before you attempt to remove any haze. This typically takes about 24 hours. Consult your installation professional—or, if you DIY-ed it, your grout’s packaging—for the exact amount of time.
- But do not wait more than 10 days to remove grout haze. If you do, harsher, full-strength removers may be required.
- Determine if your grout is epoxy-based or not. This type of grout is designed for maximum strength and stain-repellence, so the haze that forms will be harder to remove. You’ll likely require a commercial cleaning product (see Method 4). Contact the grout manufacturer if you have any questions about what type of cleaner would be best.
- Determine the material of your tile. This will also influence what type of cleaner you can use. Smooth ceramic and porcelain tiles can be exposed to acidic cleaners like vinegar, but porous stone and slate tiles should not. This makes haze removal a bit more difficult, but not impossible. You’ll have the best luck using a special cleaner.
METHOD 1: Remove grout haze with water and cheesecloth.
Protect your hands with rubber gloves, and dip your cheesecloth (or terry cloth) in water. Wring thoroughly, as too much water can damage grout. Then, wipe tile surface with the damp cheesecloth/towel. This method will help “reactivate” the grout haze, lifting it off the surface.
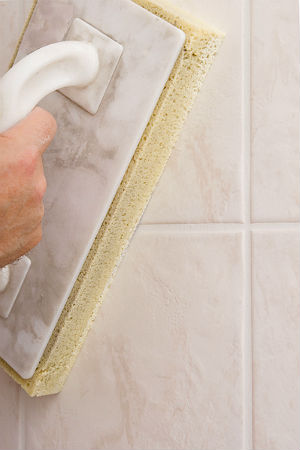
METHOD 2: If the damp cloth fails to lift the grout haze, break out the rubber grout float.
Homeowners who installed grout themselves can reach into their toolbag once more: The rubber grout float used for pushing grout into cracks between tile can come in handy when wiping away haze, too. Like a specialized squeegee (view on Amazon), it features a flat and mostly-firm rubber pad at the end of a paddle-shaped handle. Pull the edge of the float towards you across the tile surface, and its soft edge should drag those stuck-on grout minerals without scratching the tile or gouging the fresh grout. Repeat until all the haze is removed.
Go over the surface again with a damp tiling sponge (a larger, denser version of what you’d normally use on dishes).
Buff entire area with cheesecloth or terry cloth. Finally, check your work: Shine a flashlight on the tile surface to see if any dull, streaky residue remains. If you have yet to remove all the grout haze, continue to Method 3.
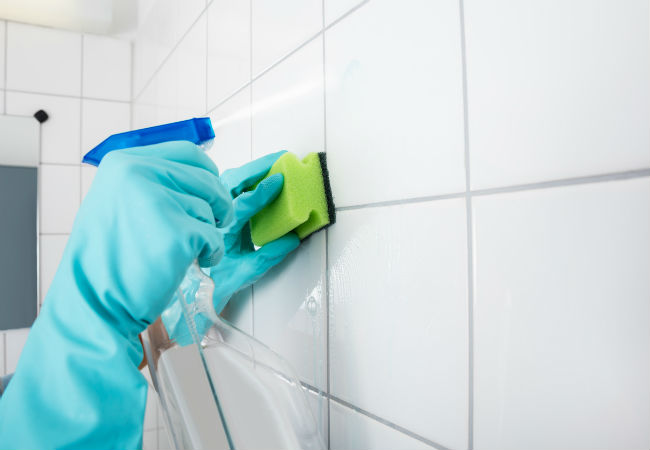
METHOD 3: In some cases, you can enlist vinegar.
If your tile is porcelain or ceramic, try a vinegar solution to remove grout haze. (With slate or stone, this is a no-no! Its acidity—which comes in handy when cutting through grease and mineral deposits—can damage these porous surfaces. Skip to Method 4.) Mix 1-part white vinegar to 4-parts water in a bucket or large spray bottle. Additional vinegar can be added for extra strength.
Depending on the surface area you must cover, use a mop or soft nylon pad. Clean the area with pure water following the vinegar-water solution.
If this doesn’t remove all the haze, you can move on to a commercial cleaner.
METHOD 4: Choose and use the right commercial product.
First, keep these two things in mind before you choose a product:
- If your grout is epoxy-based, pick up a product designed to handle its more stubborn grout haze (view on Amazon). Heck, even if your grout was not epoxy-based, you may benefit from enlisting a commercial product to help remove grout haze that won’t budge.
- If your tile is slate or stone, always choose a product specially formulated for those surfaces.
Whenever using a chemical cleaner, cover your face with a protective mask and wear rubber gloves. Read and follow the directions of your chosen product carefully. You may wish to dilute the product with water (50/50) before applying it to your tile surface: Spray the tile surface lightly with water, then apply your commercial cleaner. Leave for several minutes.
Use a nylon scrub pad to swirl the cleaner over the surface and loosen the grout haze. Lift the excess cleaner with a mop, then rinse the surface with clean water. Dry off with a soft towel or terry cloth and double-check your job with a flashlight.