
We may earn revenue from the products available on this page and participate in affiliate programs. Learn More ›
Because they’re built below grade, basements tend to take on water. You may notice moist basement walls from time to time, water puddles here and there, or—worst case scenario—flooding during the rainy season. Humid, damp, or downright wet basements can result in peeling paint, mold and mildew growth, rotted wood, and damage to stored items.
While builders take steps to waterproof basements during construction, over time a house can settle, creating cracks in the basement walls. When the soil outside becomes saturated, water can seep through these cracks. Even structurally sound basement walls can absorb water from the soil and transfer it to the basement interior, making the walls feel wet. As the water from the walls evaporates, the air in the basement becomes more humid. A high-quality dehumidifier will help remove excess basement humidity, but the best long-term solution is to waterproof the walls.
Depending on the reason for the moisture problem, the fix could be a simple do-it-yourself remedy, or it could require the assistance of a foundation contractor. We tapped Shane McClintic, sales and service trainer for Thrasher Foundation Repair, which offers basement waterproofing, for advice. If you’re looking at waterproofing basement walls, the following tips will get you started on the right foot.

DO determine where the water is coming from before learning how to waterproof basement walls.
Since concrete is porous, you can often see wet streaks that let you know where the water is coming in. Look for streaks along cracks, at the corners of windows, between mortar joints (for cement block walls), and around pipes where they enter or exit, such as a water-supply line or a sewer pipe.
If entire wall surfaces are wet, however, you’ll need to do further sleuthing. To conduct a simple condensation test, dry an area of the wall with a rag and then attach a 1-foot square piece of aluminum foil to the wall with duct tape. Peel off the foil after 24 hours and check how the underside of the foil feels. If it is wet, water is seeping through the wall from the outside. If dry, the moisture is originating elsewhere in the basement, most likely from condensation caused by high humidity in the basement. In that case, the problem is easily remedied by adding a dehumidifier.
DON’T make wall repairs when there’s standing water in the basement.
During a rainy season, a crack in a basement wall can allow an inch or two of water in. Before you do anything to repair the crack, remove all the water from the floor. Working in a flooding basement increases the risk of electrical shock or electrocution. Turn off the power to the basement, and then use a utility pump (with an extension cord that reaches an upstairs outlet) to get rid of the water. The pump will discharge the water to the surface of your yard via a garden hose.
Once the standing water is removed, create air circulation to dry the walls and floor by opening windows (if there are any) and running fans. You can also use a dehumidifier to accelerate the drying process.
When the basement is water-free, proceed with inspecting, fixing, and effectively waterproofing the basement walls.
Tool Tip
Supported by Craftsman
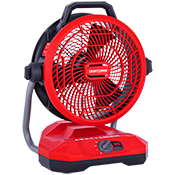
Speed up drying times and stay cool while you work with the Craftsman 20V AC/DC fan. It features three different air speeds and a 130-degree tilting head, so you can direct the right amount of breeze where you need it. In addition, the 12-inch fan operates at 55 decibels, which is about the sound level of a normal conversation, making it a handy helper for any interior DIY project.
DO fill cracks with hydraulic cement.
Another area where cracks are commonly found is at the bottom of the basement walls. When a foundation is poured, its footing—a wide flat base made from concrete and reinforced steel, designed to support the walls—is poured first, and then the walls are poured on top after footings harden. Although this is standard construction procedure, it can create what’s known as a “cold joint,” a weak spot in the foundation between the wall and the footing where cracks can develop with the shifting and settling of a foundation, along with lateral pressure from the soil.
Fortunately, sealing cracks is a relatively simple DIY task that involves filling them with hydraulic cement, such as QUIKRETE’s Hydraulic Water-Stop Cement. Hydraulic cement, which contains additives that cause the cement to expand and set rapidly, is mixed with water to form a heavy putty consistency; it’s then pressed into cracks with gloved fingers or with a putty knife (follow mixing and application directions on the product packaging). As hydraulic cement expands, it pushes deep into cracks and crevices to form a watertight bond. Mix only as much as you can use within 3 minutes, though, because that’s how quickly it begins to set.
While hydraulic cement is an effective quick fix, McClintic warns it’s probably only a temporary one. “There are so many seams and cracks in every foundation that even if you ‘plug’ one, the water pressure is building on the other side and will eventually find another weak point,” he says.
DON’T forget to address window well leaks.
Window wells are a common source of basement wall leaks because they tend to retain water if a proper drainage system wasn’t installed beneath the well when the house was built. “The bottom of the well should have enough gravel and space for water to drain away from the window, not toward it,” McClintic says. This can lead to water pooling around the bottom of a basement window and then seeping into the house.
While it’s difficult to install a window well drainage system after the fact, consider digging approximately 2 feet lower in the well area, and then filling the space with gravel to help rainwater disperse rather than collect in the window well. Then, caulk around the window with a caulk suitable for use on masonry, such as GE Silicone 1 All Purpose Caulk. In addition, install a sloped window well cover such as the Polyethylene Reversible Bubble window well cover over the window well to direct rainwater away.
McClintic also suggests checking your outdoor drainage. “It’s important to make sure you have good outdoor drainage that directs water away from the window well,” he says. “That means checking the slope of the ground around the house, making sure gutters aren’t overflowing into the well, and extending any downspouts that dump water too close.”

DO apply a masonry waterproofing product to bare interior basement walls.
If your foil test showed that water is soaking through your basement walls and leaving them wet, you’ll want to get on with waterproofing basement walls from the inside: Seal the interior of the walls with a high-quality waterproof paint, such as KILZ Basement and Masonry Waterproofer. This type of interior basement sealer comes premixed and is applied just like a coat of paint. When waterproofing basement walls with it, brush or roll the paint on thickly enough to fill all the little surface holes, then allow it to dry fully before applying a second coat. When completely dry, the sealant forms a watertight bond to keep any more moisture from seeping through. A 5-gallon container covers about 500 square feet of wall.
Keep in mind that, as with hydraulic cement, sealants may not be a permanent fix. “Water is usually pushed in by groundwater pressure when the soil outside gets saturated,” McClintic says. “All of that pressure will cause sealants to bubble, flake, and peel right off.”
DON’T apply sealer over painted walls or efflorescence.
If you or a previous owner painted the basement walls, you’ll have to remove the paint before applying sealer, which only adheres well to bare masonry. It’s common to find several coats of paint in older homes, which is best removed with a sandblaster by pros known as blasting contractors. Alternatively, it can be removed by wire brushing, a tedious but inexpensive DIY task.
It’s also necessary to remove efflorescence, or white deposits that form on the surface of concrete walls that are subject to constant moisture, before applying sealer. You can do so with muriatic acid (be sure to follow the manufacturer’s instructions).

DO take steps to keep water away from your basement.
Taking measures on the exterior of your home can also help keep your basement dry.
“One of the first things you should do is walk around your house the next time it rains. You’ll learn a lot just by watching where water flows and where it pools,” McClintic says. “From there, you can identify your problem areas and work to fix them.”
Here are some common solutions:
- Grade around the foundation. If water is pooling around the foundation, then it’s a good idea to grade your yard away from the foundation at a 6-inch drop over 10 feet.
- Clean Gutters. Clean the gutters once or twice a year. If the gutters are clogged, they can cause water to spill over and collect around the foundation.
- Extend Downspouts: Extend downspouts 10 feet from the foundation to prevent water from flowing back to the foundation.
- Remove plantings: Remove foundation plantings and flowerbeds that require watering, because that water could subsequently seep into the basement. Also inspect and, if needed, repair gutters and downspouts to ensure that they’re directing water away from your home
In addition to the above steps, consider having an exterior drain tile system installed. This is usually a last-ditch effort because it’s pricey—the job can easily run $10,000 or more. It requires excavating the soil from around the outside of your basement in order to install a perforated drain at the footing level. A waterproof membrane is often installed on the outside of the basement wall, and the system also requires putting in a buried sump pump where water will collect and then be pumped to the surface. This is strictly a job for a foundation contractor, but it could greatly reduce basement water problems.
DON’T forget interior drainage solutions.
While covering cracks with sealant or hydraulic cement can serve as a stopgap, theses stopgap measures often don’t last, according to McClintic. A long-term solution is to manage moisture by adding a vapor barrier and drainage system and an interior drainage system that captures water as it enters the wall and channels it to a sump pump, which then removes it entirely from the home.
“This approach controls the water and redirects it to where it belongs,” he says. “In our 50 years of experience, this is the best option for long-term results.”
