We may earn revenue from the products available on this page and participate in affiliate programs. Learn More ›
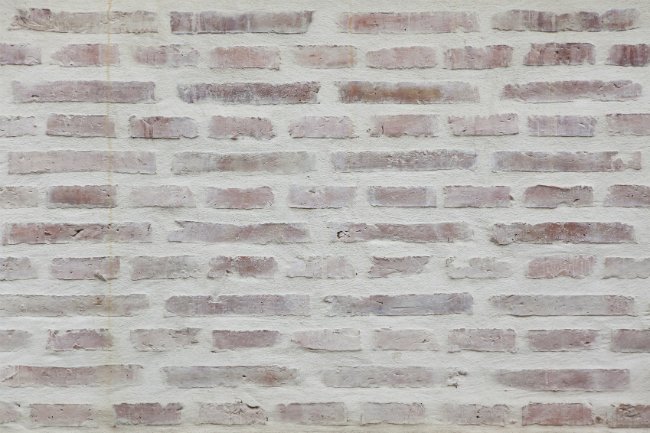
Seems like just yesterday that the red brick in your family room looked perfect, but tastes change with time. Now you think it’s a little too dark and a little too red for the space. Your gut tells you it’s time for a change, but you’re intimidated by the thought of demolition and renovation. Rather than reach for the sledgehammer, grab a rag and a brush instead, and give your room a bright new look by following these instructions for whitewashing brick. While painting over brick with 100 percent latex paint will give the brick a solid, opaque color, whitewashing mutes the brick’s natural color with a translucent finish. The technique preserves the bricks’ natural, random variations, depending on how much paint is applied and how each individual brick absorbs it.
Start with a fireplace or an interior brick wall that needs updating. Once you get the hang of it, there is no limit to the brick you can tackle, indoors or out.
Project Summary
- Clean the brick gently and thoroughly.
- Remove all lingering paint from the paint surface.
- Tape and cover any surfaces you wish to protect.
- Prepare the whitewash—a 50/50 solution of water and white latex paint.
- Apply the whitewash via brush or rag.
Read on for full instructions!
Tools & Materials
Bobvila.com may earn a commission from purchases made through these links.
- Dish soap
- Salt
- Cotton rags
- Scrub brush
- Boric acid powder
- 1-gallon bucket
- Rubber gloves
- Ammonia
- Pumice powder
- Trisodium phosphate
- Protective eyewear
- Drop cloths
- Garbage bags
- Face mask
- Putty knife
- Painter's tape
- Kraft paper
- Latex paint (white)
- 5-gallon bucket
- 4-inch paintbrush
- Paint grate
- Paper towels
- Spray bottle
- Sash brush
How to Whitewash Brick
STEP 1: Clean the brick gently and thoroughly
Whitewashing over dirty brick will not achieve the desired effect, so cleaning your brick and grout is the first order of business—and possibly the most intricate. Though brick is hardly a delicate-looking material, it can be easily damaged by harsh cleaning. Try the mildest method of cleaning first, and graduate step by step to more aggressive approaches until you find one that adequately addresses the dirt and soot.
Below, listed from mildest to harshest, are several cleaning options to consider. Whichever you use, apply the cleaning solution according to the instructions and then rinse it off with a clean rag dipped in warm water.
- Dish soap: Mix one part mild grease-cutting dish soap and one part salt with just enough water to make a loose paste. Apply to the brick with a clean rag and, using a scrub brush, work the paste into the surface. Let sit for 10 minutes before you rinse.
- Boric acid: Add about one tablespoon of boric acid powder to one gallon of warm water. Wearing rubber gloves, dip the scrub brush into the solution and scrub the surface of the brick.
- Ammonia: Create a loose paste with one part ammonia, two parts mild grease-cutting dish soap, and one part pumice powder—which can be found in either beauty supply or arts-and-crafts stores. Wearing rubber gloves, use a clean rag to spread the mixture on the brick. Allow to sit for at least 10 minutes before rinsing.
- Trisodium phosphate: Wearing gloves and protective eyewear, mix about ½ cup trisodium phosphate (TSP) into a gallon of hot water. Dip your scrub brush in the solution and scrub the brick. If stains remain after rinsing, you can scrub again, increasing the TSP to one cup per gallon of hot water. Exercise extreme caution as this is a very strong, abrasive solution.
STEP 2: Remove all lingering paint (optional)
If your brick has ever been painted, there may still be chipping, flaking, or blistering paint left over on the brick that could cause your whitewashing to crackle. If you suspect that the paint has been there for decades, it is possible that you are dealing with toxic lead paint, which needs to be removed by a professional. If, however, you’re sure that’s not the case, move on to protecting the floor with a drop cloth—and yourself with goggles and a face mask—then prep a garbage bag to receive the old, dried paint you’re about to strip. Using a putty knife, wire brush, or paint scraper, carefully remove all the chipped or peeling paint from the brick.
STEP 3: Protect the work area
Tape and cover the surrounding areas so you don’t get paint on anything but the brick surface you intend to whitewash. For brick walls, that would include adjacent drywall and floors. If you’re lightening brick around a fireplace, protect the mantel, floor, and other furnishings by taping kraft paper around the mantel’s edges. Also tape around and over the firebox or fireplace insert, and lay drop cloths over the flooring. If you have fireplace doors, tape them shut. Whitewashing bricks inside the fireplace itself is not recommended.
The importance of painter’s tape to this project cannot be overstated. Whitewashing may be easy, but nobody ever said it wasn’t going to be messy!
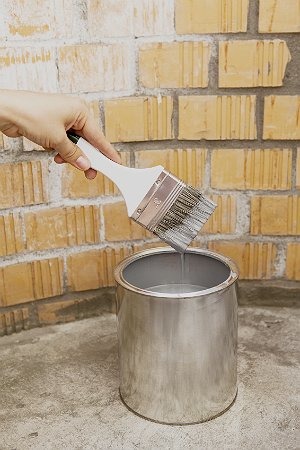
STEP 4: Prepare the whitewash
Prepare your whitewash: a 50/50 solution of water to white latex paint, stirred to an even consistency. If you find as you are working that you want the brick to be less white, add more water to further dilute the white paint. Conversely, if you want a whiter look, try a higher paint-to-water ratio. Take a moment to test a small, inconspicuous area with whitewash of several different paint-to-water ratios until you get the desired effect. (It might be a good idea to let the test area dry before you continue, so you’ll know what the dried whitewash will really look like.)
STEP 5: Apply whitewash
It’s time to whiten, brighten, and lighten! Techniques for whitewashing brick vary greatly, but these two tried-and-true methods work for even beginner DIYers:
- Dip a brush into the thinned paint, and remove excess paint on a grate before applying so you don’t end up with a wall covered in drips. Begin to whitewash the brick in small sections, starting with the grout lines and then working your way to the faces of the bricks. Keep to one manageable two-foot-square patch at a time, because you’ll want to be able to quickly blot the bricks with a wadded-up paper towel so the surface looks washed, not painted. (Blotting or dabbing the paint instead of simply wiping creates a more natural texture.) Continue working in small sections until whitewashing is complete.
- Fill a spray bottle with water and, without leaving drips, lightly mist the brick area to be whitewashed. While the bricks are moist, lightly load a wadded cotton cloth with thinned paint and wipe it on the damp surface. If the mortar is deeply recessed from the brick, load a sash brush with a small amount of thinned paint and use a dry-brushing technique to reach both the mortar and the edges and ends of the bricks. After you’ve whitewashed all the bricks that can be painted with a rag, use a dry brush to fill in hard-to reach places. If a spot has too much color, mist it thoroughly and blot up the moisture along with some of the paint.
No matter which method you choose to whitewash brick, keep in mind that brick is a very porous material that will soak up the wash. It’s possible that after the first coat the paint will appear more opaque than you would like. Don’t be concerned about this. Over the next few hours, the bricks will absorb the paint and begin to show through.
Let your handiwork dry overnight, then return to bask in your whiter, brighter living space the next day. Any lingering paint smell from your diluted whitewash solution can be erased with an onion—more info here.
