
We may earn revenue from the products available on this page and participate in affiliate programs. Learn More ›
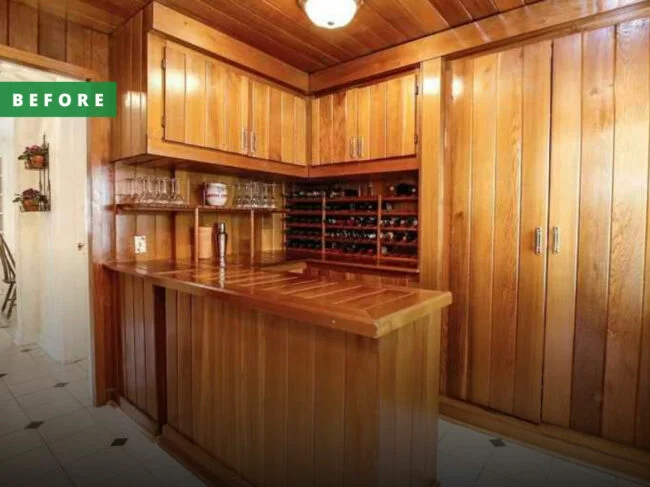
My favorite bit of trivia about our old home is that the idea for Arizona Iced Tea was born here. Well, at least that’s how I imagine it. One of the founders lived in the house when the company was started, so I always envision him testing teas at the ‘70s-style bar off the entryway. There’s something beautiful about an old home—the history and stories held in its bones. However, what’s not always beautiful is what awaits you inside. My house was built in 1939 and 1940, but the inside was frozen in the mid-’80s, adorned in pastels and fanciful wallpapers. However, we instantly knew it could be magical once again with a bit of love and hard work.
Our renovation included removing one wall, renovating a kitchen, two bathrooms, the sunroom, a small playroom, and the beloved wood-paneled bar mentioned above. We also did cosmetic updates, such as painting, wallpapering, adding wall moldings, and replacing windows. Like all renovations, we had some surprises along the way. As we consider more updates on our second floor, I’ve spent some time reflecting on the lessons I’ve learned along the way. Let me ruin the surprise for you by sharing what to expect when embarking on a remodel.
RELATED: Solved! Is It Better to Remodel Your Home, or Move to a New One?
1. Live with it first.

It took a lot of patience to wait until we had saved enough money to update our home, but looking back, I’m glad we did. We lived in our house as it was for a couple of years before tackling the renovation. By doing this, we better understood how our family used the space and what our needs would be in the future.
Also, renovations don’t have to be done all at one time. We remodeled our home over the course of five years with lots of breaks. By doing this, you won’t be constantly living in a construction zone, and you’ll have time to be more intentional about changes.
2. Choose what you love over what’s trendy.
White is boring! Farmhouse sinks are out of vogue! I didn’t listen, and I don’t think you should either. I have three items in my kitchen that I could easily find in an out-of-style roundup—white cabinets, a farmhouse sink, and barnwood doors. We completed the renovation five years ago, and I’m still just as happy with those choices as I was at the time we made them. The reason is because we love them. The most important thing is to choose what you love, regardless of trends; you’re the only one who has to look at the space each day, so it should reflect your family’s sense of style. And don’t be afraid to pause and reassess if something isn’t feeling right as you go. Speak up instead of going along for the ride.
RELATED: Experts Predict These 5 Home Improvements Will Have the Highest ROI in 2025
3. There are always hidden costs.
Leaving some wiggle room in the budget for unexpected costs is essential. It’s not uncommon for surprises to pop up along the way, especially in older homes. You’ve undoubtedly heard about unexpected faulty wiring or pipes that need replacing once exposed. We had picked out and ordered kitchen cabinets that would reach ceiling level, but when we removed the old ones, we discovered a soffit that housed structural support and would interfere with our planned design. We had to pay our contractor to relocate the support into the ceiling, anchoring the wall beams with a steel plate instead.
RELATED: How Much Does a Kitchen Remodel Cost?
4. Old houses have odd features.
Multiple homeowners equal multiple layers of edits over the years—Band-Aid fixes, quick cosmetic coverups, and odd additions. For instance, when we redid our kitchen and entryway floors, we discovered three layers of flooring beneath the surface, though I loved the black and white checkered laminate. Worse yet, our bathroom floor had no support surface, so the tile was actually resting on mud.
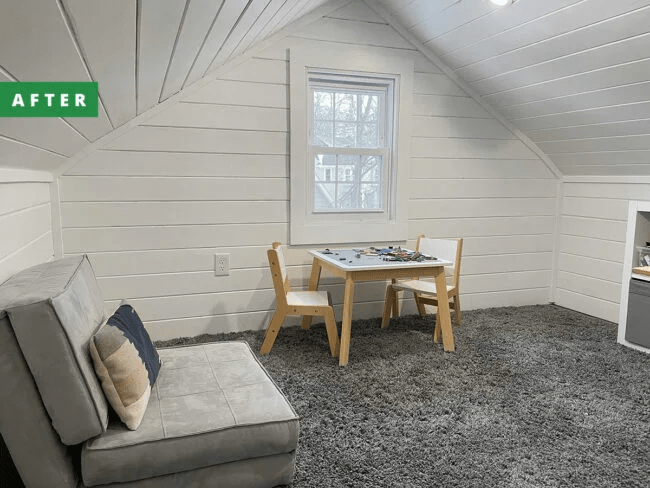
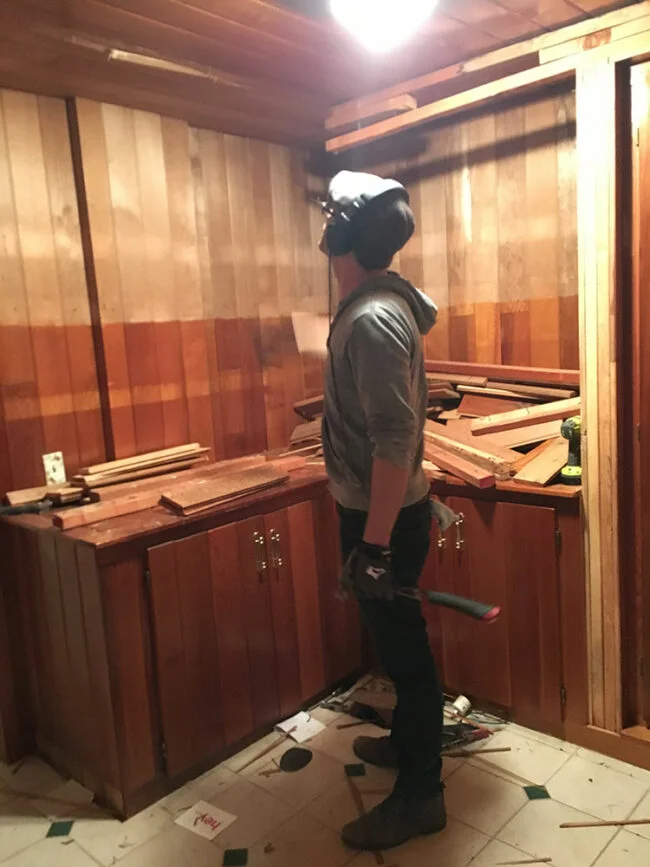
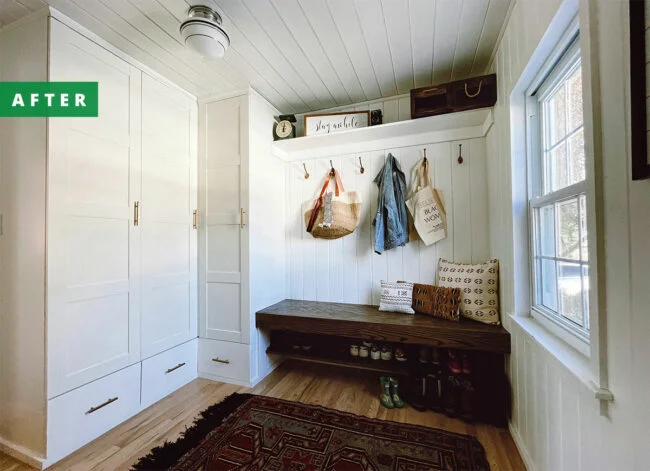
There were also quirky features like the “Mad Men”-style bar to the right of our entryway. When we renovated it into a much more useful mudroom, we discovered this later addition had no insulation and let a lot of cold air into the downstairs area.
RELATED: The Best Home Design Software
5. Finishing touches matter.
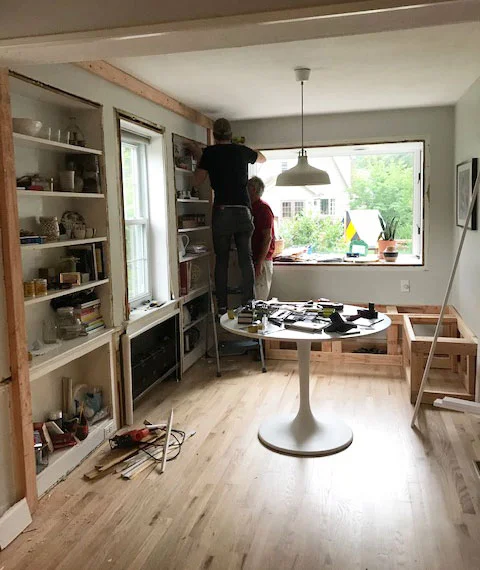
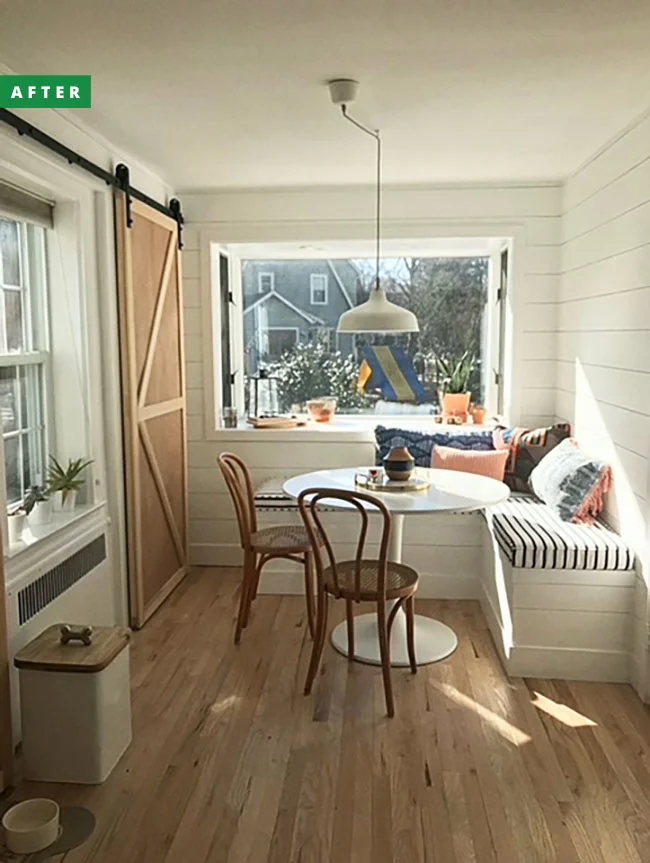
Though we gutted multiple rooms and reconfigured built-ins, the items in my house that get the most compliments are the artwork, lighting fixtures, and textiles. Those things matter. That’s what gives the space personality. For instance, in my mudroom makeover, I included a schoolhouse light that offers a slightly retro vibe, and in my white kitchen, I chose colorful textiles for the breakfast nook—certainly the kitchen’s wow factor.
RELATED: 26 Tiny Bathroom Ideas That Make a Big Impression
6. Wallpaper is (really) a pain to remove.
When we toured our house initially, the first thing I noticed was the ‘80s-style wallpaper throughout. What seemed like an easy cosmetic fix took many hours and a lot of elbow grease—not to mention sweat from the steamer—to remove, especially in the areas where more-recent wallpaper was layered on top of an older version. However, during our renovation, we did add wallpaper to the design, so I guess the hard work wasn’t enough to deter me from doing it all over again.
RELATED: What Happens if You Remodel a Home Without a Permit?
7. Choosing the cheapest option is a risk.
Our old home had wood floors everywhere except the kitchen and entryway, where dated green tiles graced the surface. When it came time to replace those with hardwoods, our budget had been pushed to the limit. After getting quotes, we decided to go with the cheapest, even though other companies had better reviews. I realized it was a mistake when I came home to dust everywhere, including our new couch, which they moved, but didn’t bother to cover. Some years later, those same floors aren’t wearing great and will probably need refinishing sooner rather than later. Do research and heed the reviews; they’ll save you in the long run.
RELATED: 17 Design Inspirations for Mudrooms and Entryways
8. Something always gets delayed.
Take your timeline and throw it out the window. While I say that partially in jest, it is true that something always gets delayed. I have a friend who is currently renovating her kitchen and just found out her refrigerator, which she was told was in stock, won’t arrive for another four months. For us, it was windows for our sunroom. The ones that came in on time were the wrong size, and we had to wait six months to get the right ones. Flexibility is a quality that will come in handy when taking on a multi-room renovation.
9. Expect moments of stress.
Renovating can be stressful, between the costs and the discomfort of living in a messy environment. So, don’t be surprised if you’re snapping at your partner or children more often. Develop compassion by allowing everyone in the house to weigh in on how the remodel affects their daily life. Also, learn to negotiate design decisions with these tips.
10. Ikea is sometimes a good option.
People have strong feelings about the quality of Ikea products, so this is controversial. For us, we’ve had very good experiences using certain items. For our mudroom, we utilized their wardrobe cabinets, adding moldings to create a built-in look. We also used Ikea boxes for our kitchen cabinets, finished with custom doors, and their farmhouse sink. Integrated with forethought, planning, and awareness of limitations, these choices saved us a great deal of money, and five years later, we have nothing to complain about.
RELATED: Thinking of Installing an IKEA Kitchen? Here’s What You Need to Know.
11. Putting in sweat equity will pay off.
My husband, father, and I DIYed about 70 percent of our home renovation. I love the satisfaction that comes from building something that looks beautiful or painting a room and seeing how it changes the whole vibe of the house. Don’t be afraid to roll up your sleeves, but also know when to call in the experts for projects above your skill level.