We may earn revenue from the products available on this page and participate in affiliate programs. Learn More ›
After spending so much careful energy and time measuring and cutting boards so they will fit together as you imagine, it can be frustrating if fastening those boards together causes damage to the project.
That’s why it’s often important to take a moment to pre-drill a pilot hole with a drill bit before fastening a screw or nail. The guide hole that a drill bit creates helps prevent splitting or stripping, making it easier to secure materials together. It can also provide an insertion point so there’s no worry of a screw accidentally walking along the surface, creating unsightly scratches on your work.
Here’s what you need to know in order to successfully drill a pilot hole in wood.
Safety Precautions
Before drilling into wood, always make sure the board is secure and unable to move. And it’s a good idea to put on protective eyewear so that you aren’t irritated by sawdust that flies out of the pilot hole.
Tools & Materials
Bobvila.com may earn a commission from purchases made through these links.
How to Drill a Pilot Hole in Wood
Creating a pilot hole not only helps prevent your wood boards—solid or MDF—from splitting or cracking when you drive a nail or screw through them, the small holes also mean you’ll use less force when nailing or screwing into hardwoods, like maple and oak, and keep the fastener from bending or angling out of line during insertion. Here’s how to drill a pilot hole into wood.
Step 1: Choose the right drill bit.

The key to drilling a good pilot hole, one that’s wide enough for you to insert a fastener with ease but not so wide that it wiggles, is choosing the right size drill bit.
Best Drill Bit Set

Milwaukee 29-Pc Shockwave Red Helix Titanium Bit Set
This set of 29 titanium-coated bits drill into aluminum, wood, and PVC with ease and make dust-free holes. Read the review.
See ItPilot hole drill bit sizes
In order to create a pilot hole for a nail, the correct drill bit is slightly smaller than the nail’s shank. However, when working with hardwood, make sure the shank diameter of the drill bit is equal to the shank diameter of the screw. If you need to create pilot holes for screws in softwood, the drill bit diameter should be about 80 percent as big as the body of the screw, not including the threads. When in doubt and you don’t have an exact match, go with the pilot hole drill bit that’s slightly smaller than the screw’s body.
Pilot hole size chart
| Hardwood | Softwood | |
| #6 Screw | 3/32” | 5/64” |
| #8 Screw | 7/64” to ⅛” | 3/32” |
| #10 Screw | ⅛” | 7/64” |
| #12 Screw | 9/64” to 5/32” | ⅛” |
Step 2: Mark the pilot hole location.

As the old saying goes, “Measure twice, cut once.” That truism can apply, too, to drilling pilot holes: Before touching drill bit to wood, take the time to measure carefully and mark the spot where the pilot hole belongs. (Don’t try to simply eyeball it or measure and rely on your finger to mark the right spot—either of these methods is likely to leave you misaligned.)
Mark the spot in pencil. Or, better yet, create an “X” with painter’s tape over the location for your nail or screw. The tape will reinforce the wood and offer extra protection against possible cracking.
Step 3: Clamp the boards together.
To prevent the top board from slipping or shifting ever so slightly as you drill, you may want to clamp them together, or even squeeze a bit of wood glue between the two boards (bonus: this strengthens the joint) and then clamp. This extra tool leaves both of your hands free to make sure that your drill is completely perpendicular to the wood.
Step 4: Create an indent with a scratch awl.

Once you’ve determined where your pilot hole will go, use the tip of a nail or a scratch awl to create a slight indentation over the spot. First, pierce the surface with the scratch awl tip and then tap the head of the scratch awl with a hammer to create an indent. This indent will keep your drill from slipping out of place once you begin to drill the hole.
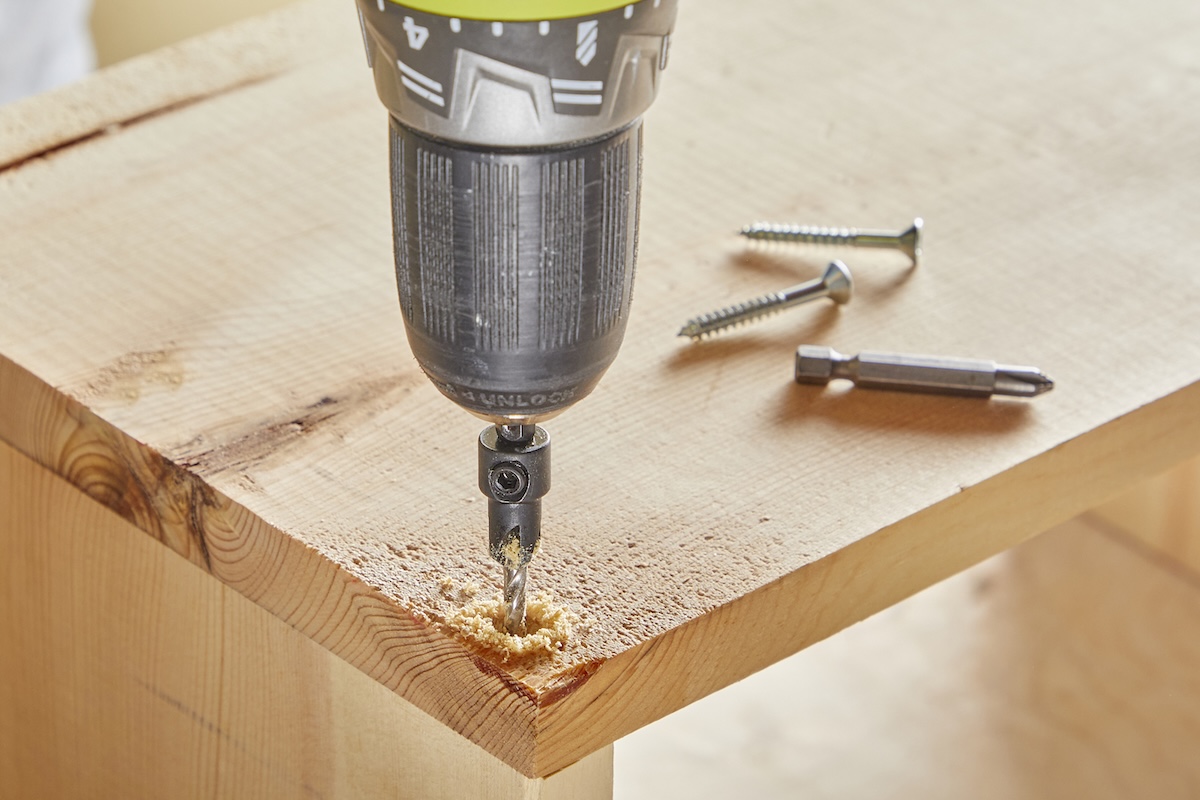
Step 5: Drill the pilot hole.

Place the tip of your drill bit into the indentation you created, holding the drill so the bit is perpendicular to the wood. Start off with your drill set to low speed. Accelerate slightly if you feel confident you can control the drill; otherwise, stay on a low speed.
Drill until your pilot hole is the same depth as the length of your screw or nail. Once you hit the right depth, slowly back the drill bit out of the hole while continuing to keep the drill perpendicular to the wood. Now you can go ahead and fasten your nail or screw.
Tip: Many experienced DIYers can eyeball the depth of a pilot hole, but if you aren’t yet that experienced, you can use a drill stop to mark the appropriate depth. In a pinch, you can even use a bit of tape or a twist-tie to mark off the screw’s length on the drill bit.
How to Make a Pilot Hole Without a Drill

While a power drill/driver makes quick work of both drilling pilot holes and inserting screws, not everyone has one handy. In a pinch, you can still make a pilot hole by choosing a nail that’s the same size as your screw’s body, and then carefully hammering it straight into the wood to the appropriate depth before pulling it back out. Then, use a manual or powered screwdriver to complete the rest of the project.
When to Drill Pilot Holes

Pilot holes make many home improvement projects easier. While they aren’t always necessary for every screw or nail and softwoods, it’s usually a good idea to use a pilot hole whenever the finished surface will be visible after the project is completed. Here are a few examples.
- When working with hardwoods
- When working with thin materials
- Before attaching a long fastener
- If you want the boards to be perfectly aligned
- If you want to be sure the boards will be less likely to loosen over time
- When the fastener will be within about 1 inch of the edge of a board
- If you are concerned about splitting or cracking
- If you are concerned about potentially stripping a screw
Final Thoughts
Drilling a pilot hole takes just a few minutes, but it can save you so much time and money from having to replace boards that have split or cracked. In order to be successful, it’s essential to choose the correct size drill bit for the type of material and fastener so that the fastener attaches the boards securely. While it only takes a moment to drill a pilot hole, that guide hole can make it so much easier to nail or screw your project together.
