We may earn revenue from the products available on this page and participate in affiliate programs. Learn More ›
Plank flooring has come a long way from the frontier days when rough-hewn boards were nailed to floor joists, resulting in rugged, and somewhat uneven, walking surfaces. Today’s hard-surface flooring is smooth and level, due in large part to the way it’s installed. Tongue and groove, a method of connecting board planks, is attractive and creates a uniform floor that’s even durable enough for homes with dogs. Whether you’re considering a new floor or you’re just curious about tongue and groove construction, read on to learn more about it, including tried-and-true installation tips for laying your new floor yourself.
What is Tongue and Groove Flooring?
Developed in the late 1800s, tongue and groove flooring took off as manufacturers began mass-producing interlocking hardwood planks that eliminated the need for the exposed nail heads that had been a mainstay in wood flooring. Tongue and groove flooring technology has expanded to include different types of flooring, yet tongue and groove wood floors remain very popular.
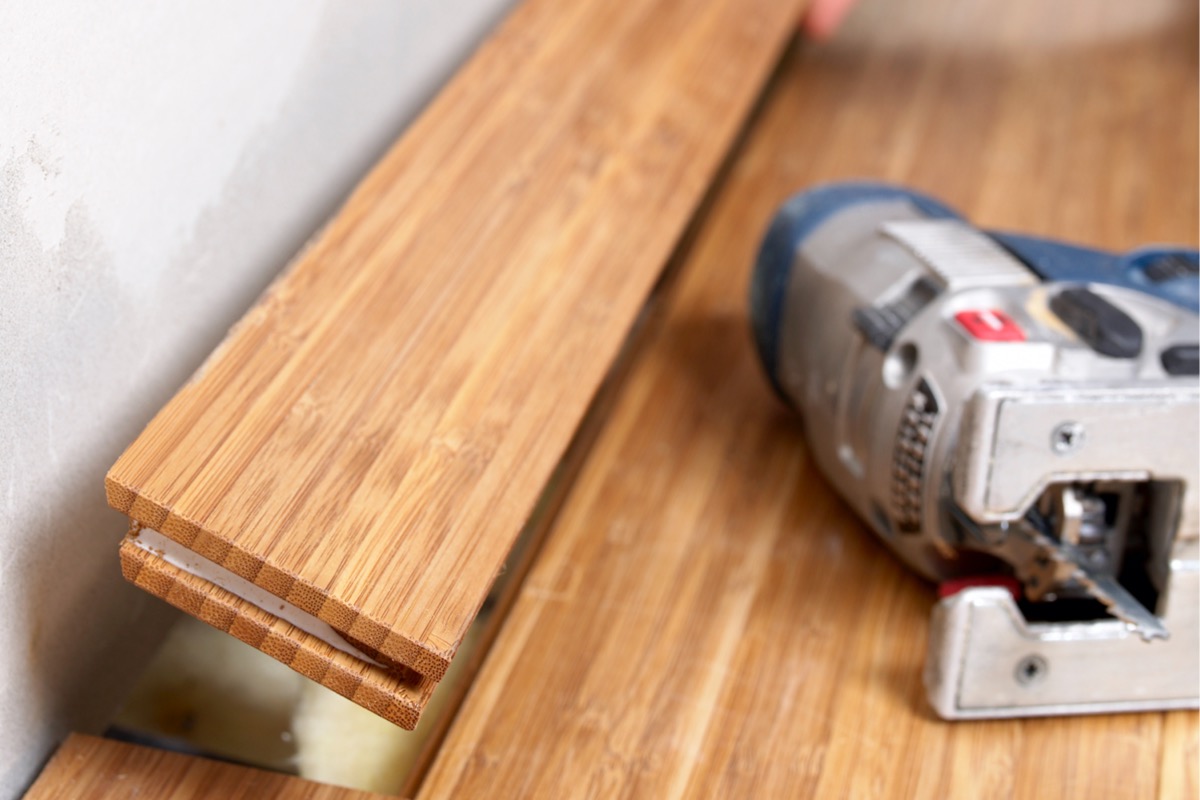
Here’s how it works: One side of a tongue and groove board has a protruding ridge (the tongue) that runs the entire length of the board, while the other side of the board has a groove from end to end. During installation, the ridge side of one board is fitted into the groove side of an adjacent board, creating a snug seam. The short-width sides of tongue and groove flooring planks also feature either a ridge or a groove, which creates a fully interconnecting floor when installed.

Carpet, hardwood, vinyl, and tile flooring.
Bob Vila has partnered with Empire Today to help you easily get beautiful new floors at a great price.
Free In-Home Estimates
Tongue and Groove Plank vs. Non-Groove Planks
Nearly all hardwood flooring today is tongue and groove because it solves the pesky problems—such as shrinking, warping, and working loose—commonly experienced by face-nailing planks to floor joists. Because tongue and groove boards interlock, they’re less likely to heave or show gaps between the planks if the flooring swells or shrinks, which wood has a tendency to do over time and as humidity levels change. The grooved wood is cut deep enough to allow the tongue to expand and contract within it, keeping the planks tight.
While smooth, level tongue and groove flooring is popular, you can still find plain board planks to recreate the look and feel of an old-time, rustic floor. Non-groove planks are rarely seen in interior residential flooring today, unless they’re used to restore historical homes. These planks are better suited to exterior decking applications where a space between the planks is desirable for drainage.

Tongue and Groove Flooring Materials
In the past few decades, tongue and groove flooring assembly expanded from hardwood to engineered flooring, which opened up a wide world of flooring boards available to consumers. Engineered flooring features planks made from layers of compressed wood fibers, resins, and polymers, which are then topped with a thin layer of surface veneer. Consumers can choose from tongue and groove flooring boards in dozens of textures, patterns, and colors, including veneers made from real hardwood and bamboo, in addition to styles made from other laminate products designed to mimic the look of wood, cobblestone, or tile. Unlike hardwood flooring, engineered flooring can be installed over concrete or existing flooring, such as tile or linoleum.
RELATED: The Best Engineered Wood Flooring
How to Install Tongue and Groove Flooring
Although tongue and groove solid hardwood flooring does fit together, it must still be nailed to a subfloor (note that tongue and groove subflooring is one of the many types of subflooring out there). Engineered tongue and groove planks, however, snap together to create a “floating” floor that is not physically attached to the floor below. This results in engineered tongue and groove flooring being more DIY-friendly than tongue and groove hardwood flooring.
Engineered flooring comes with installation instructions in every box of planks, but solid hardwood flooring, often installed by flooring professionals, does not. If you plan to install your own solid hardwood, it’s a good idea to observe the installation process in person (or at least watch videos on how to install tongue and groove flooring) before attempting to lay your own floor.
Tips for Installing Tongue and Groove Hardwood Flooring
- To prevent squeaky floors, use a sound-absorbing underlayment between the subfloor and the hardwood flooring. The most common underlayment is 15-pound felt paper, which effectively muffles sounds that occur when wood rubs against wood. Skip the underlayment and you’re bound to hear loud squeaks and creaks when someone crosses the room!
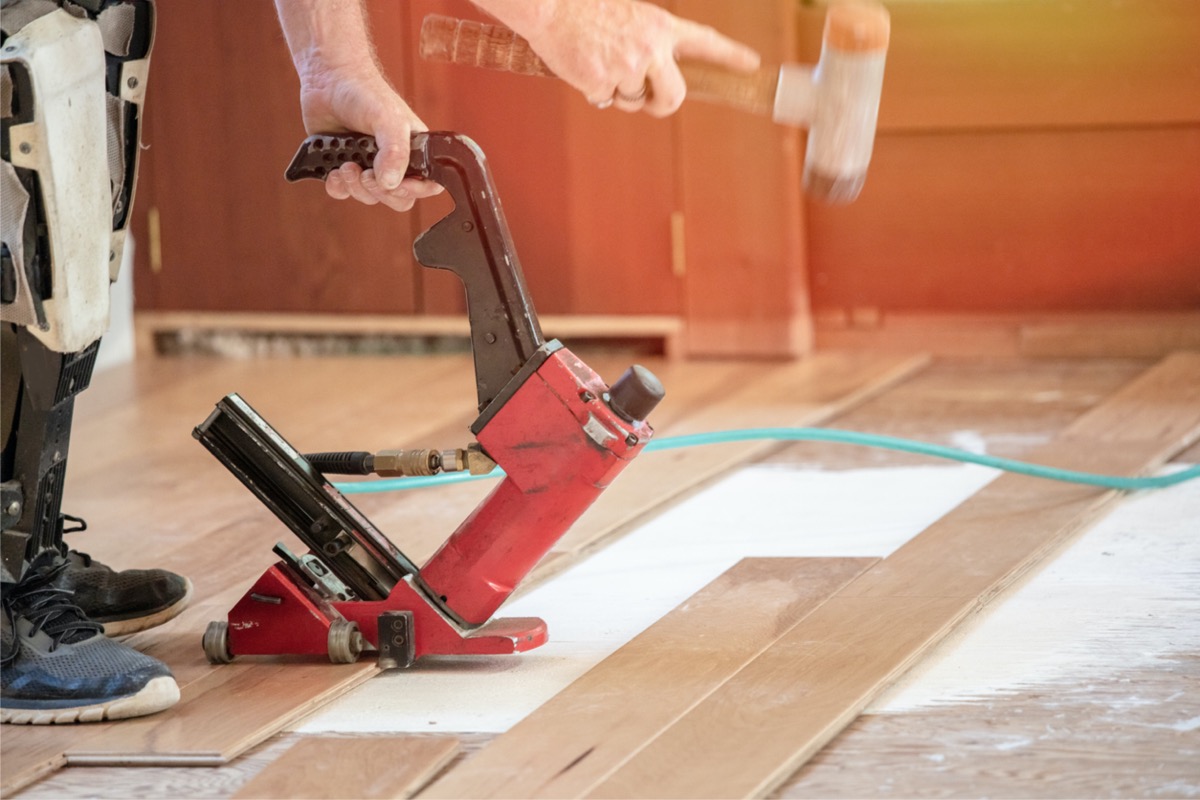
- Rent a hardwood flooring nailer from a construction rental store to make installation easier. The traditional method of nailing hardwood tongue and groove flooring is to drive nails at an angle through the tongue of a plank and into the subfloor below, but this process is time consuming and can result in poorly inserted nails. Instead, consider using a hardwood flooring nailer, which is a power tool that shoots nails through the tongue at the correct angle while driving the hardwood plank snugly against the previous plank. DIYers can rent hardwood flooring nailers for $40 to $60 per day—the tool is well worth the cost.
Tips for Installing Tongue and Groove Engineered Flooring
- Use the underlayment specified by the flooring manufacturer. Like solid hardwood, engineered flooring requires sound-absorbing underlayment, but because engineered flooring can be installed over concrete or existing flooring, the manufacturer may recommend a cushioned polyethylene-type barrier that also resists moisture.
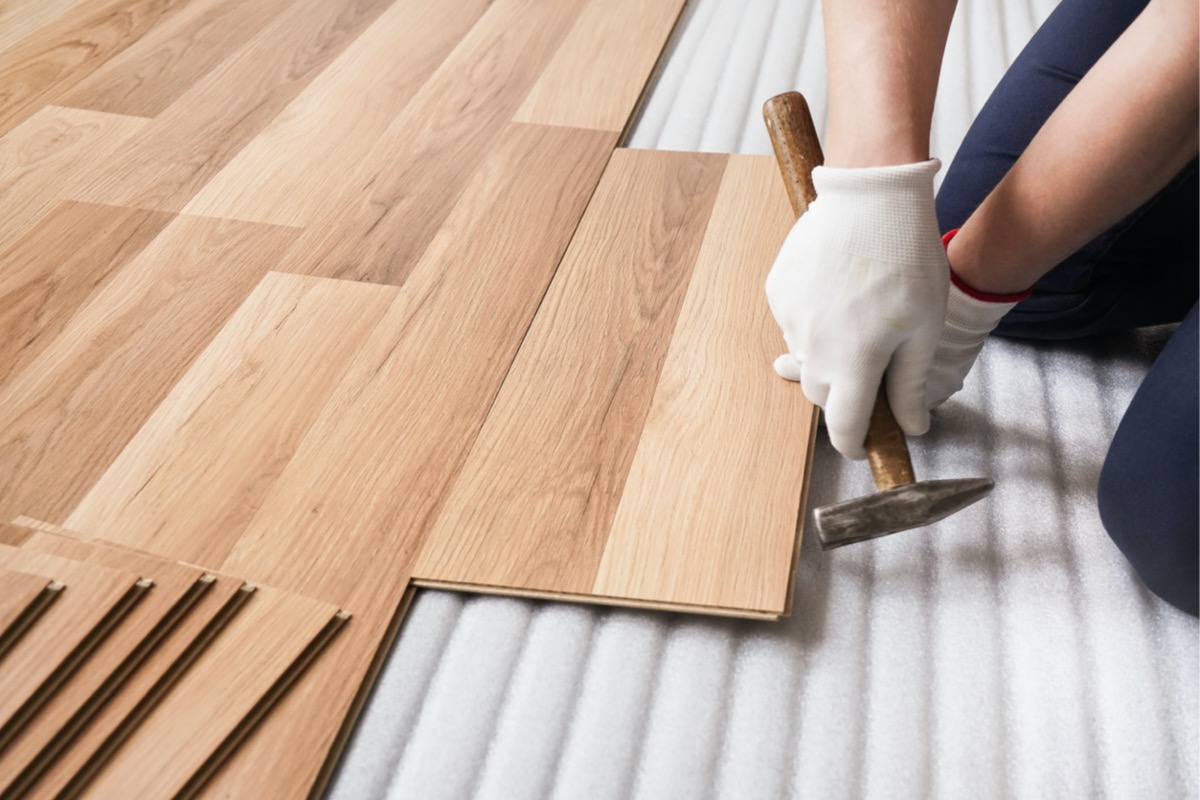
- Snap, don’t force, the planks together. The tongue ridges and groove channels are narrower and deeper in engineered flooring than they are in solid hardwood flooring. The sides of the planks fit together by positioning the tongue of one plank against the groove of the previously installed plank at an angle and then pushing downward and inward at the same time, which causes the planks to snap together.
- Tap the ends of the planks together using only an installation block approved by the manufacturer. Installation blocks are sold separately, and they’re designed to protect the ends of engineered and laminate flooring planks. Attempting to tap the planks with a mallet (which is done when installing hardwood) is likely to result in damaging the end of an engineered plank.
- Keep in mind that installing engineered flooring over existing flooring will raise the level of the floor between ⅜ inch and ⅝ inch. If this makes it difficult to open the room’s interior doors properly, you may need to trim the bottom off the door. If the floor in an adjoining room is lower, it’s a good idea to install a transition floor threshold between the rooms. A transition threshold acts as a gentle ramp down to the lower floor to eliminate a “lip” that can cause tripping.
RELATED: How To: Plane a Door
FAQs About Tongue and Groove Flooring
Still have questions about tongue and groove flooring, or how to install it? Read on for more information about this sleek, interlocking type of flooring.
Q. Should wood floors be horizontal or vertical when installed?
The best practice is to lay wood flooring parallel to the longest wall in the room. However, there are no hard and fast rules about the direction in which the planks are installed, and if laying your flooring in a different direction makes more sense to you, go for it. Some experts, for example, recommend laying your planks in the same direction as sunlight streaming in from a large window, which avoids highlighting any height differences in the boards.
Q. What is the difference between shiplap and tongue and groove?
Besides the fact that shiplap is typically used on walls and not on floors, shiplap boards are designed differently. Shiplap boards have an L-shaped notch running the length of the boards, as opposed to the inset groove and protruding “tongue” of the other type of boards.
Q. Do you need underlayment for tongue and groove flooring?
While you could maybe get away without underlayment, it’s in your long-term best interest to use it. Underlayment serves to minimize floor noises, acts as a moisture barrier, and smoothes the surface upon which you’re laying the flooring. You’re going to the trouble of laying the floor, so you may as well do it correctly in order to get the best results.
