We may earn revenue from the products available on this page and participate in affiliate programs. Learn More ›
If you’re a fan of modern farmhouse style or simply watch a lot of decorating shows on TV, you’re undoubtedly aware of the resurgence of wall paneling. Unlike the dark and dreary look of the 1960s and ‘70s—big sheets of plywood with a laminate surface—today’s paneling is often painted white and is typically real wood, or at least wood veneer, for a more natural effect. And instead of the vertical floor-to-ceiling paneling that was ubiquitous way back when, these days paneling is more commonly installed horizontally.
Two varieties of paneling that have been especially popular in recent years are shiplap and tongue and groove. While they share similarities, each has distinct characteristics. Read on to learn what separates shiplap from tongue and groove so you can pick the paneling that’s best suited to your home’s style and your needs.
Differences Between Shiplap and Tongue and Groove Panels
Profile
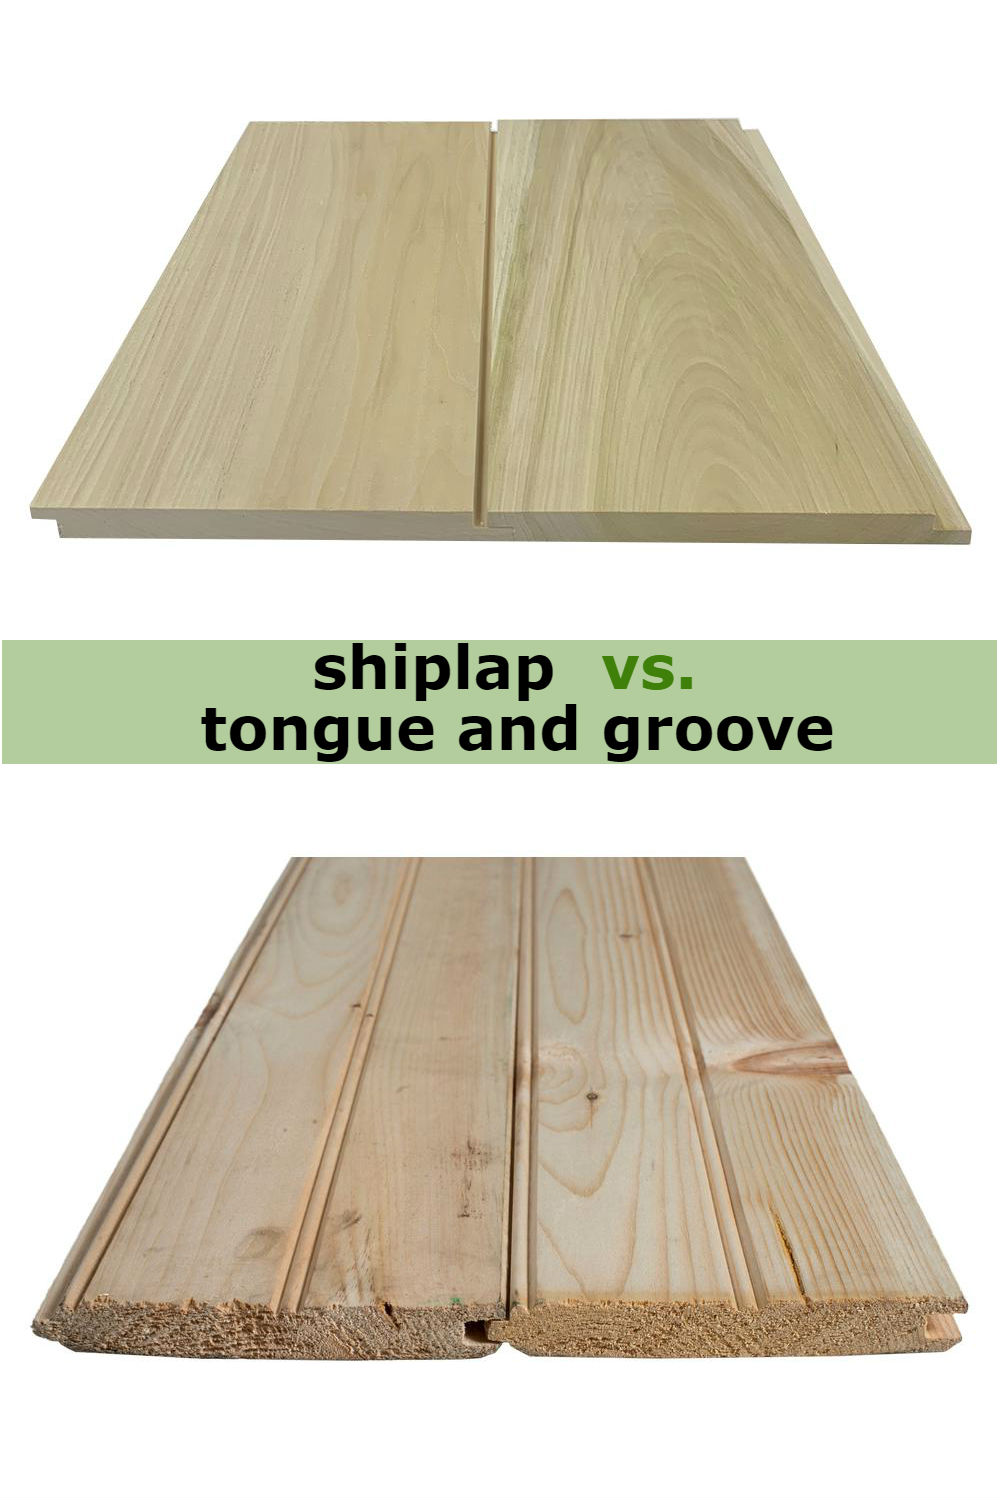
Once installed, shiplap and tongue and groove can look very similar. But if you examine the planks before installation, you’ll spot the biggest difference between them right away.
Each edge of a shiplap plank has a small L-shaped notch (or rabbet) running down its full length. The notches allow each plank to lap over the notch in the adjacent plank. During installation, these notches fit together like little steps, forming what is called a rabbet joint. Often, shiplap planks have a “V” groove, a gentle bevel along the edges, giving the appearance of a slight valley between planks in the finished shiplap wall paneling.
Tongue and groove planks, in contrast, have a small projection sticking out of the center of one edge and a corresponding indentation along the other edge. During installation, the tongue of one plank fits into the groove of its neighbor. Like shiplap, tongue and groove planks are available beveled along the lengthwise edge (V-groove) or unbeveled (known as flush joint or square edge), resulting in a somewhat tighter appearance than shiplap. It’s this snug fit and seamless look that makes tongue and groove the industry standard for hardwood flooring.
Materials

Most shiplap and tongue and groove planks are wood. If you plan to paint the finished paneling, you’ll save money by using inexpensive pine planks or MDF, both of which are available primed. If you’re on a really tight budget, you can even use plywood. But if you plan to leave the paneling unpainted, you may be happier with a more attractive (and pricier) type of wood, such as oak or cedar.
You’ll also find shiplap and tongue and groove planks made from fiber cement, vinyl, and even metal, although these are most often used for exterior siding rather than for decorative treatments.
Cost
The cost of installing either shiplap or tongue and groove varies greatly depending on the material, room size, the area you live in, and whether you’re planning to do the job yourself. Even so, you can typically expect to pay more for tongue and groove paneling than for shiplap. Including installation, expect tongue and groove to cost about 50 percent more than shiplap.
Shiplap boards: $2.50 to $7 and up per square foot
Shiplap with professional installation (200 sq. ft. room): $1,000 to $1,700
Tongue and groove boards: $2.50 to $8 and up per square foot
Tongue and groove with professional installation (200 sq. ft. room): $1,400 to $2,200
Installation

As a general rule, it’s a little easier to install shiplap paneling than tongue and groove paneling because you don’t need to fit the planks together. Instead, you simply match the notches on neighboring boards and then pound a nail straight through the overlap. Installing tongue and groove requires more precise nailing, as you’ll need to hammer the nail through the planks’ “tongues” for secure results.
Durability
While both shiplap and tongue and groove can be used indoors or out, it’s important to take climate conditions into account before selecting one of these paneling styles for the exterior of your house, backyard shed, or garage. As a general rule, shiplap is the better choice for a very rainy climate, as its overlapping planks shed water quite well. Tongue and groove, on the other hand, can deteriorate in wet climates if water gets trapped inside the interlocking connections.
Shiplap is also the superior choice if you live in a high-heat, low-humidity climate, where the dry air tends to encourage slight shrinkage of wood. This can lead to gaps between the tongue and groove boards but isn’t likely to show in shiplap’s overlapping connections. If cold weather is an issue where you live, note that tongue and groove has slightly better insulating ability than shiplap.
Tongue and groove, however, may have the edge in indoor durability. Drew Mansur, director of TileCloud, a tile and renovation shop in Rosebery, New South Wales, Australia, says “The interlocking design of tongue-and-groove tends to make it more durable and resistant to shifting or warping over time.” Mansur, who has years of experience in home renovation, adds, “While shiplap will still hold up well, it will be more susceptible to forming gaps if the material shifts.”
Best Uses for Shiplap and Tongue and Groove Paneling

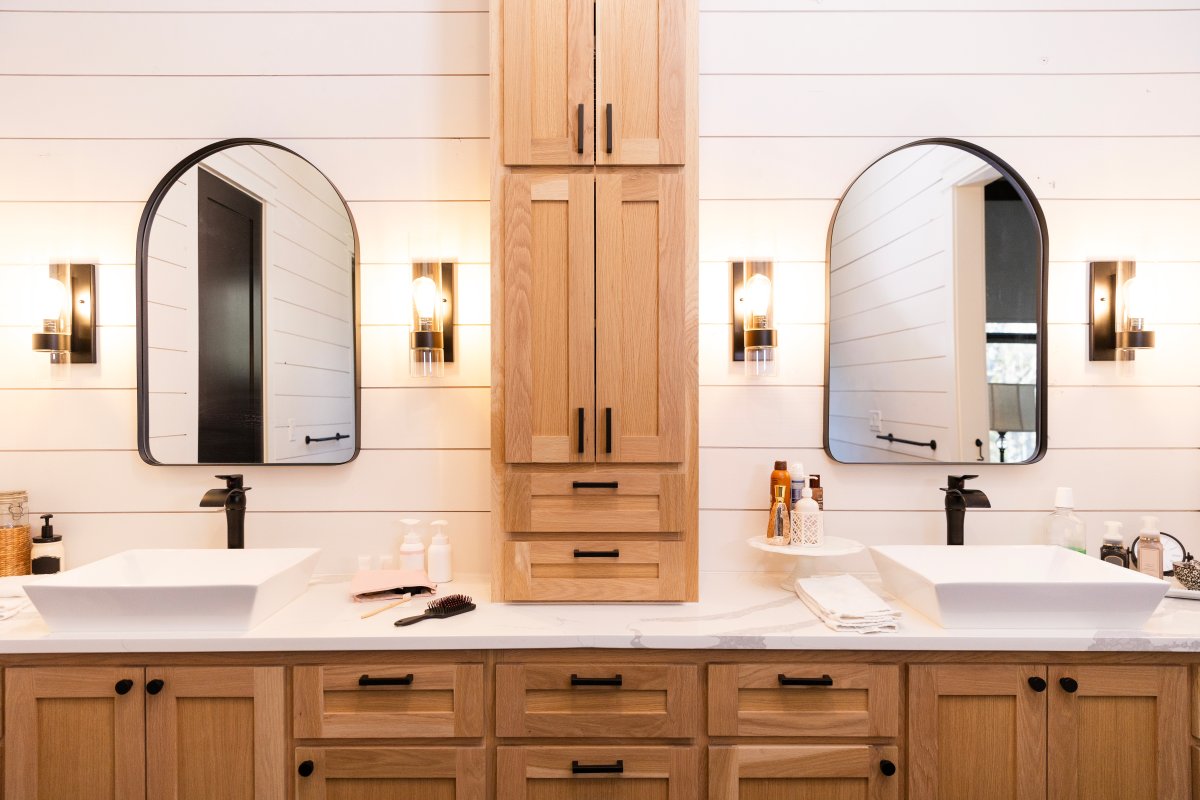
Both shiplap and tongue and groove paneling have been trending decorative finishes in recent years, especially in modern farmhouse, cottage, coastal, and rustic interiors. While they’re often used to panel entire walls, particularly in the kitchen or bathroom, either style can be used for an accent wall or even a backsplash or fireplace surround.
Another option is to panel only the lower portion of the walls, as with wainscoting. If you really love the modern farmhouse or coastal decorating styles, you might even choose to use shiplap or tongue and groove on the ceiling. In fact, tongue and groove is a classic ceiling choice for porches.
If you’re installing wood paneling in a bathroom, don’t install it where it can come in direct contact with water (say, in a shower enclosure), make sure the paneling is properly sealed, and take precautions to control bathroom humidity. Avoid using MDF shiplap or tongue and groove boards in the bathroom, as MDF can swell or warp when exposed to moisture.
Final Thoughts
While shiplap and tongue and groove have been very popular in recent years, there are actually many other wall paneling styles, including beadboard and board and batten, as well as variations on shiplap, such as nickel gap, which has thin spaces between adjoining boards. As interior designer Danielle Perdue, founder of design firm DK Home in Westport, Connecticut, notes, “Wood paneling is extremely versatile and can be customized. For example, you may choose a narrower board with smaller gaps in between to create a more modern feel…. Reeded or fluted panels have also become extremely popular and add that touch of sophistication.”
If you’re worried about committing to shiplap or tongue and groove paneling, Perdue says, “I don’t think shiplap or tongue and groove paneling will ever go out of style. It’s simply too good and, in my opinion, timeless.” That said, if you already have paneled walls and are beginning to tire of the look, she recommends updating them with paint: “Have fun with a pop of color or go with a high gloss for maximum impact.”