We may earn revenue from the products available on this page and participate in affiliate programs. Learn More ›
Converting an old bathtub to a walk-in shower—be it a prefab unit or custom job—is high on many a homeowner’s remodeling wish list. A walk-in shower can create the illusion of more space and give the bathroom a clean-lined look. And for folks that prefer a quick shower to long soak, this conversion is sure to suit your active lifestyle. But before you tear out that old tub, read up on the design, installation, and costs of such a project. These logistical considerations and design ideas for walk-in showers will set you up for success.
Remodeling your bathroom with a walk-in shower?
Get free, no-commitment project estimates from pros near you.
What Are the Advantages of Walk-in Showers?
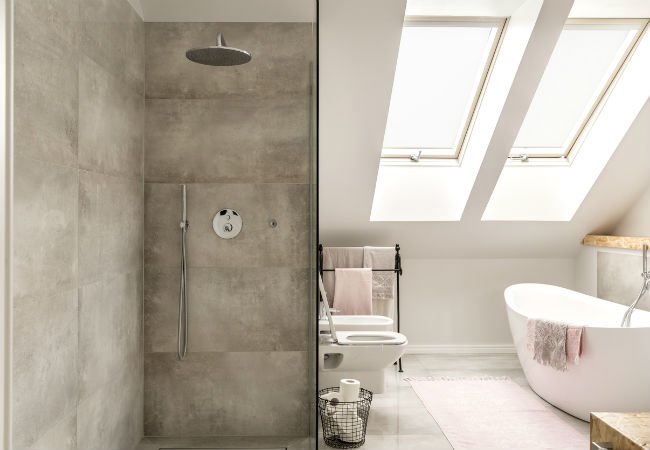
Unlike standard stalls, walk-in showers don’t require a curtain or door to block the spray of water, resulting in a spacious, open look. While prefab units have shallow curbs to keep excess water from running onto the bathroom floor, many custom walk-ins are designed with no curbs, just a gently sloping floor—which means greater accessibility, a big benefit for those with joint injuries or mobility issues.
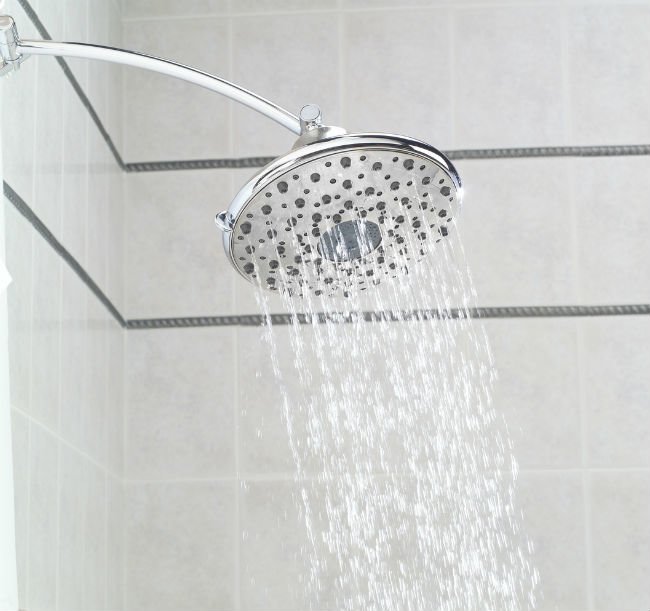
Another asset is multi-nozzle spray, a standard feature in many walk-in showers. Depending on your individual preference, you can have as many as 10 spray nozzles directing water to all sides of your body.
What Are the Drawbacks?
Keep in mind home resale value before converting all of your tubs to walk-in showers. Optimally, your home should have at least one bathroom with a full-size tub. Appraisers and real estate agents classify bathrooms by fixtures, and, in order to qualify as a “full bath,” there must be a tub. A bathroom with a shower but no tub is deemed a “three-quarter bath.”
Other concepts to keep in mind prior to conversion:
- Bathing small children is usually easier in a tub than in a shower.
- An open shower offers less privacy than a standard shower stall with a door.
- The lack of a shower door can create a drafty feel during showering.
How Much Freedom Do I Have with Design?
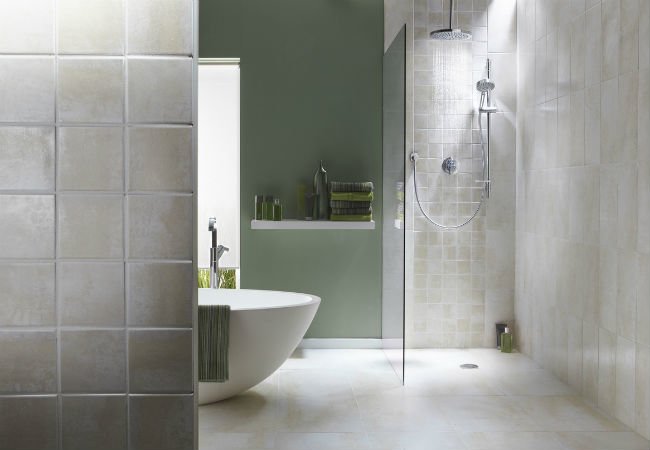
While the size of your walk-in shower will be determined by the amount of the bathroom’s available floor space, homeowners have lots of decorative leeway in custom design. You can:
- Select the color and type of tile for the floor, walls, and accents like a shower niche.
- Opt to install glass panels or even glass blocks on one or more sides.
- Select the shape. Geometrics, such as squares, rectangles, and hexagonal lines, are popular, but you can opt for virtually any wall shape—even a curved wall—if you have adequate floor space. Standard building code recommends a minimum of 30 inches of walking space between bathroom fixtures, so leave adequate room to walk between the new shower and the vanity or commode.
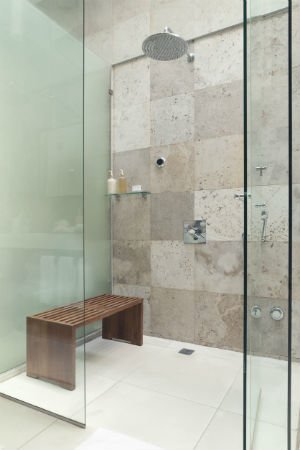
- Create a shower that meets the Americans with Disabilities Act (ADA) recommendations to accommodate a person with mobility issues. In addition, check with your local building authority to see if any supplementary codes apply. The ADA suggests a minimum size of 36 inches by 36 inches for a walk-in shower, which features a bench attached to one wall for sitting. Even if you eschew the bench, 36 inches by 36 inches is a good minimum size for ease of showering. If the shower will accommodate a roll-in shower chair, the ADA recommends a minimum size of 30 inches by 60 inches to permit easy in-and-out access.
How Much Does a Walk-In Shower Cost?
The least expensive option—a prefab walk-in shower kit—costs between $800 and $2,500, based on size and quality. Installing the shower pan and any doors included yourself is a money-saving option if you’re knowledgeable in plumbing and framing, while professional installation will add another $750 to $2,500, depending on the layout of your bathroom and plumbing requirements.
A custom walk-in shower is strictly a job for the pros, and substantially more expensive than a prefab kit. The shower pan is formed by hand from concrete, which is then covered by a waterproof membrane, followed by tile. Additional plumbing is necessary for directional nozzles. Wall construction includes the installation of concrete-backer boards to hold the tile. Adding glass sidewalls, which are thicker than standard sheet glass, further increases the cost. Depending on the final size and the materials chosen, a professionally installed custom shower can run $6,500 to $15,000 or more.

What Can I Expect During Installation?
Here’s a general idea of what a walk-in shower project entails:
- Demolition and disposal of the old tub and wallboard.
- New wall framing, if necessary, to accommodate the shower configuration.
- Mechanical rough-in, which involves installing new water supply lines for a showerhead and faucets, and/or multiple nozzles, as well as the positioning of the drain. If you’re including an overhead shower light, an electrician will wire it during this phase.
- Installation of moisture-resistant wallboard (often concrete fiberboard) over the wall studs. (This step isn’t mandatory with a prefab unit.)
- Shower pan installation. A prefab shower pan needs only to be set in place and attached to the framing, but a custom shower pan must be hand-formed from concrete to achieve the correct drain slope. Then a waterproof membrane will be installed to prevent leakage.
- Installation of tile on custom shower walls. If you’ve chosen a prefab unit, this is the time to position the wall surround.
- Installation of fixtures includes attaching nozzle spray heads, a showerhead, faucet handles, and the drain cover.
- If adding glass wall panels, they’ll go on last to reduce the risk of chips or breaks that are more likely to occur if they’re installed earlier.
How Should I Care for a Walk-in Shower?
Congrats! You’ve got a new updated bathroom. The following care and maintenance steps will keep your new shower looking and smelling great.
- Turn on a top-notch bathroom exhaust fan to remove excess humidity from the room prior to taking a shower.
- Use an open-bottom shower caddy to hold containers of bath gel, shampoo, conditioner, and bar soap. Leaving these items on tile shelves or the floor can lead to sticky, slimy residue and mildew growth.
- After every shower, use a daily shower spray (which you can make yourself or find in your supermarket cleaning supply aisle), which breaks down soap residue. Spray lightly on tile walls and floors to help shed water and keep soap scum and hard water deposits from forming.
- After using a daily shower spray, remove excess water from tile walls rubber squeegee if desired. This helps walls dry faster, a good idea if you’ve experienced mildew problems in the bathroom.
- Spray tile walls once a week with an all-purpose bathroom cleaner, using a brush with stiff nylon bristles to scrub tile and grout lines. Rinse with plain water.
- Clean glass panels with commercial glass cleaner and soft clean cloths (or absorbent paper towels) after each shower to keep glass sparkling clean.
- Seal the grout lines every six months, or as recommended by your tile setter, to prevent hard water stains and mildew from forming.
