We may earn revenue from the products available on this page and participate in affiliate programs. Learn More ›
As any New Englander can tell you, growing crops in an area with a short growing season is challenging without a cold frame. Not only is the growing season in New England notoriously short, but unexpected frosts, freezes, and snow can strike long after the last frost date of spring.
When I first moved to New England, I attempted to work around the growing season by starting most of my veggies, herbs, and flowers in a basement grow room. But not only did this take up tons of space, but it also required a lot of energy to power my grow lights. Plus, a number of my plants still succumbed to damping off and edema, two diseases that are particularly common with indoor growing. There had to be a better way!
How I Discovered Cold Frames
I encountered the concept of cold frames when I began searching for ways to extend my growing season. These simple structures have been used for generations and function like mini greenhouses to trap the warmth of the winter sun and shelter plants against the cold. Best of all, they appeared to be easy to make and could be created inexpensively using upcycled materials.
While cold frames and kits are available for purchase, I decided I wanted to make my own DIY cold frame and began researching the tools and materials I’d need to get started. Lucky for me, I already had an old window frame that would make the perfect “greenhouse top.”
Here is the step-by-step process I used to transform an old 2-foot-by-3-foot window frame, a bit of wood, and a few screws into a fully customizable cold frame.

What should the temperature be inside a cold frame?
Spring and fall plants do best at about 60 degrees Fahrenheit, while summer plants thrive at around 75 degrees Fahrenheit. Invest in a pair of simple outdoor thermometers, placing one inside and one outside of the DIY cold frame to help you keep tabs on the growing conditions inside.
Plants will wither if they get too hot, though, so you’ll want to start monitoring temperatures in early spring.
- Once the outdoor temperature goes above 40 degrees Fahrenheit, prop the lid open about 6 inches.
- When the temperature reaches a consistent 50 degrees Fahrenheit, you can remove the lid altogether during the sunny hours and replace it on those chilly spring nights.
—Steph Coehlo
Before You Begin
If you’re lucky, you may already have an old window, but you can also source windows from yard sales, secondhand shops, and organizations like Habitat for Humanity. I found that wood-framed windows that are at least 2 feet wide by 3 feet long are easiest to work with, and are a perfect size for a roomy cold frame that fits plenty of plants and is easy to work in.
However, it’s important to make sure that any window you use is not painted with lead paint which can be hazardous in food gardens. If you aren’t sure if an older window has lead paint, test the existing paint with a lead paint test kit.
This how-to is for a 3-foot-by-2-foot window with two layers of 6-by-8. If you want to make a larger cold frame, attach several window frames together with hinges or lay them out side-by-side and lift them up individually when needed. Make sure the cold frame is not too heavy or cumbersome—you want to be able to move your cold frame if needed.
Tools & Materials
Bobvila.com may earn a commission from purchases made through these links.
- Sandpaper (or orbital sander)
- Tape measure
- Circular saw
- Safety glasses
- Power drill
- Straight edge
- Pencil
- Clamps
- Outdoor-grade hinges
- An old wood window
- Exterior-grade paint or stain
- Mild soap
- Silicone sealer
- Wood filler
- 6” x 8’ cedar boards
- 3-inch deck screws
How to Build a Cold Frame

These steps are based on the first cold frame I made with a 3-foot-by-2-foot window frame. However, you can create a larger or smaller cold frame to accommodate the window frames you have.
Cold frames can have either a flat or angled lid. I chose an angled lid design as it maximizes sun exposure and allows rain to run off with ease. Note that this design requires a little extra measuring and effort to create the angled sides and lid.
Step 1: Clean and position the window.
Old windows can get pretty grimy, so remove the old hinges from the window frame, then clean the frame and glass with a mild soap, and repaint the frame with exterior paint. If your window frame is in worse shape than mine was, you may need to reseal the glass with silicone sealant, patch old holes, and sand away the old paint before repainting it.
Note: It’s a good idea to test old windows for lead paint—you don’t want lead around food you’re growing.
Step 2: Cut the base of the cold frame to size.
The frame base’s side, front, and back pieces need to fit your window frame precisely so measure the length and width of your window and cut the boards to size. Measure, mark, and cut a 6-by with a circular saw to form the back and front of the cold frame base. For a window that’s 2 feet x 3 feet, cut two pieces at 3 feet long and two side pieces to 2 feet long.
Since one board is just 6 inches wide, you’ll likely want to add another layer of 6-by to the base to get your desired height. Frames can be one or multiple boards high, but I recommend keeping the entire frame under 30 inches high so it’s easy to reach inside. I made my frame three 6-by boards high at the back and two 6-by-8 boards high at the front to achieve an angled lid (more on that later).
Pro Tips
-
- Cold frames are the perfect spot for starting cold-tolerant crops, like root veggies and leafy greens, as well as native plants and perennial flowers that require cold stratification. Heat-loving plants like tomatoes should not be started in cold frames because they’ll get too chilly.
-
- To create a pest-proof cold frame, attach hardware cloth across the base with staples. Add more cloth over the top of the frame if you continue to use it when the lid is up in summer. I use rocks to keep the metal mesh in place when the lid is open.
-
- Cold frames are the perfect spot for starting cold-tolerant crops, like root veggies and leafy greens, as well as native plants and perennial flowers that require cold stratification. Heat-loving plants like tomatoes should not be started in cold frames because they’ll get too chilly.
Step 3: Secure the base pieces to form a box.
After you’ve measured and cut all your side, back, and front pieces to size with a circular saw, position the cut end of one side piece against the edge of one back piece at a right angle and screw the pieces together from the rear with three 3-inch deck screws. (Drilling pilot holes can be helpful.)
Repeat this connection on the opposite side and front of the frame to form a box, and then repeat this entire process for each layer of the frame you’re making until you reach the top layer.
Step 4: Create angled side pieces (optional).
To create the angled side pieces, place a board on top of a cold frame layer that you’ve already made so that the back of the board is flush to the back of the cold frame layer. Then, use a straight edge to draw a diagonal line from the top rear corner of the board to the lower front corner of the board to map out the shape of two angled side pieces.
When you’re ready to cut, clamp the wood board to your work surface and slowly cut along the diagonal line with a circular saw to create two angled side sections. Smooth the cut sides with sandpaper and attach the rear of the side pieces to the final back board with screws.
Step 5: Install braces.
Measure the height of the inside corners in the front and back of your cold frame and cut four braces to secure inside the frame using the leftover scrap wood. Because my lid was on an angle, I cut two of the braces to 11 inches and two to 16 inches, but the height of your braces may vary.
To form the frame, stack the frame boxes atop each other and secure a brace inside each corner with deck screws. If your lid is on an angle, add an additional screw to the front of each angled side piece for strength. Then, sand down any rough or uneven edges on the exterior of the cold frame with sandpaper.
Step 5: Attach the window and finish.
If you’re using a ledger board, paint or stain all sides of the frame to seal out moisture. Painting the interior of the frame white helps the frame reflect more light. There’s no need to seal cedar boards as they’re naturally water-resistant and can last up to 15 years outdoors.
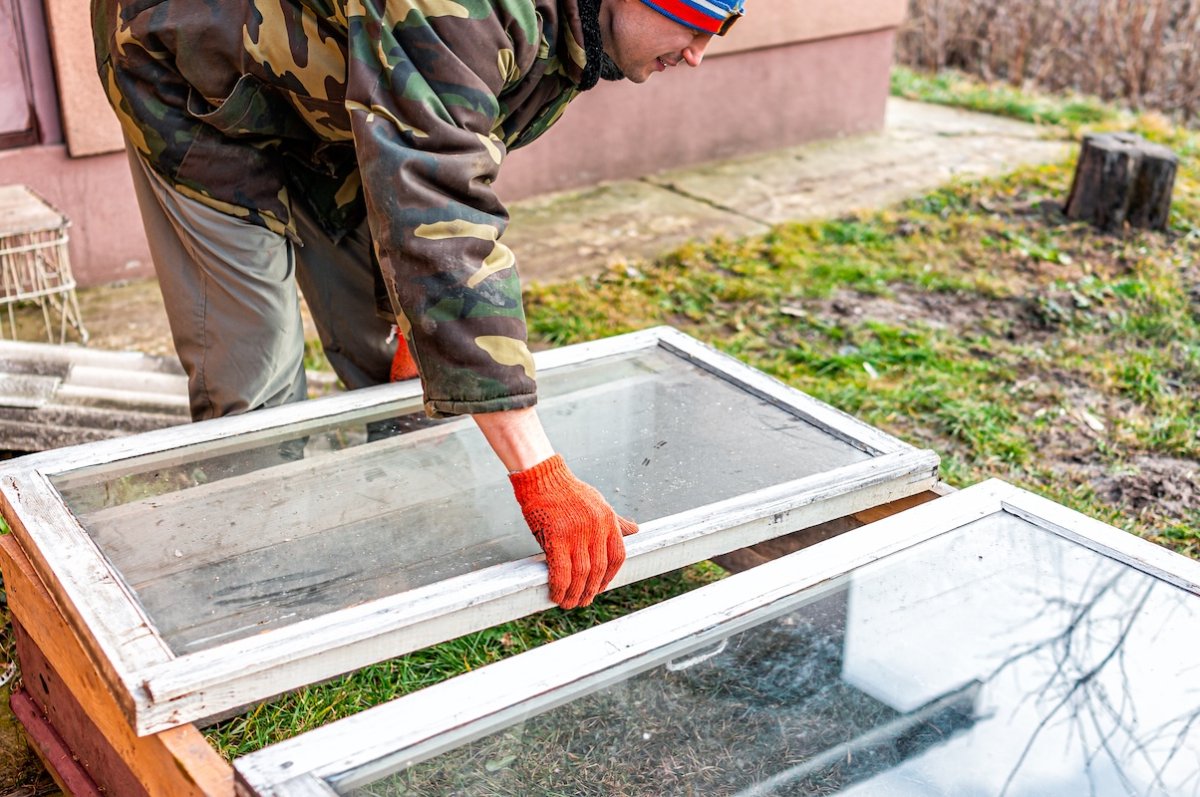
Once the frame is done, position the window on top of the frame box and secure the rear of the window to the frame box with two outdoor-grade hinges and mounting screws. I recommend drilling pilot holes in the window frame first to avoid splitting the wood and drilling a few drainage holes on the bottom edge of the window frame so water doesn’t pool and cause rot.
If you don’t want to create a hinged lid, you can forgo the hinges altogether and just lift the window on and off the frame, or permanently secure the window with screws and lift the entire frame up as needed.
Final Thoughts
Adding cold frames to my setup has extended my growing season by at least a month, and allows me to harden off indoor seedlings much easier, too. If you’re into plant propagation or want to grow native plants, cold frames can also be used to house cuttings while they’re rooting or overwintering seeds that require cold stratification.
I place my cold frames in a level, sunny, and south-facing location to maximize light exposure and prop the lid up with a block of wood as needed to keep the frames from overheating. Even in the depths of winter, cold frames trap an incredible amount of heat and can potentially overheat if you leave the window lid closed 24/7.
