We may earn revenue from the products available on this page and participate in affiliate programs. Learn More ›
Type Face
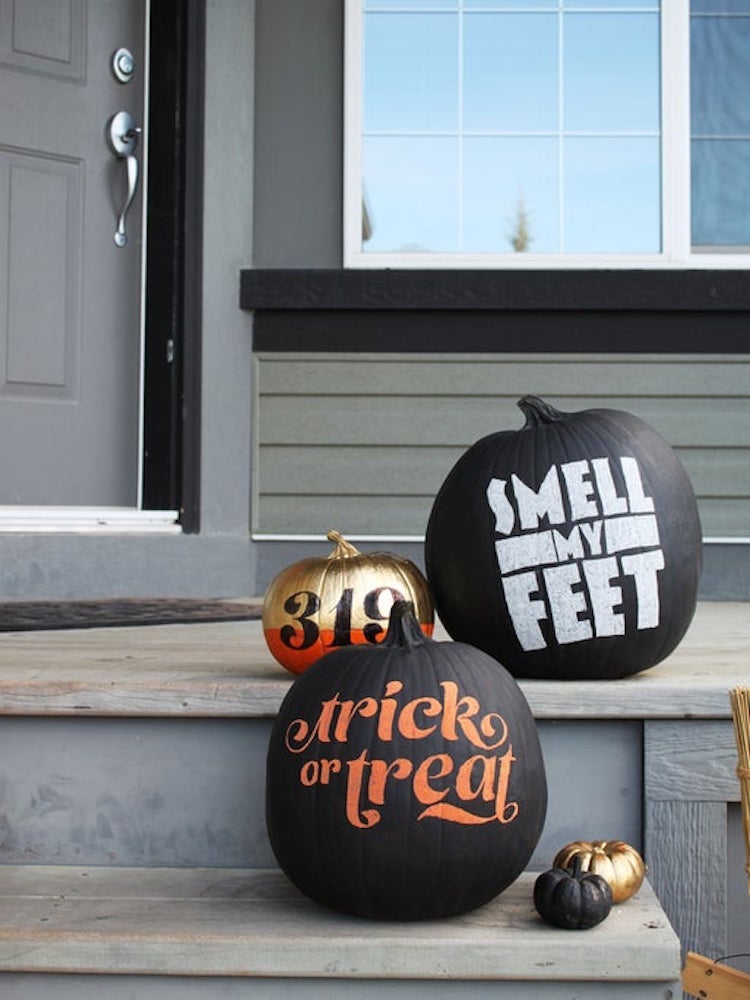
Make a statement with some signage on your front porch. This no-carve creation requires nothing more than spray paint, chalk or a silver Sharpie marker, and your favorite font. (Don’t worry, you get to trace it! No hand-lettering skills required.) After you color your pumpkin and let it dry, lay a print-out of your choice phrase over the rind; then trace around each letter, pressing hard enough so that there’s a clear indent to outline wherever you need to fill in.
Pin-terest Worthy
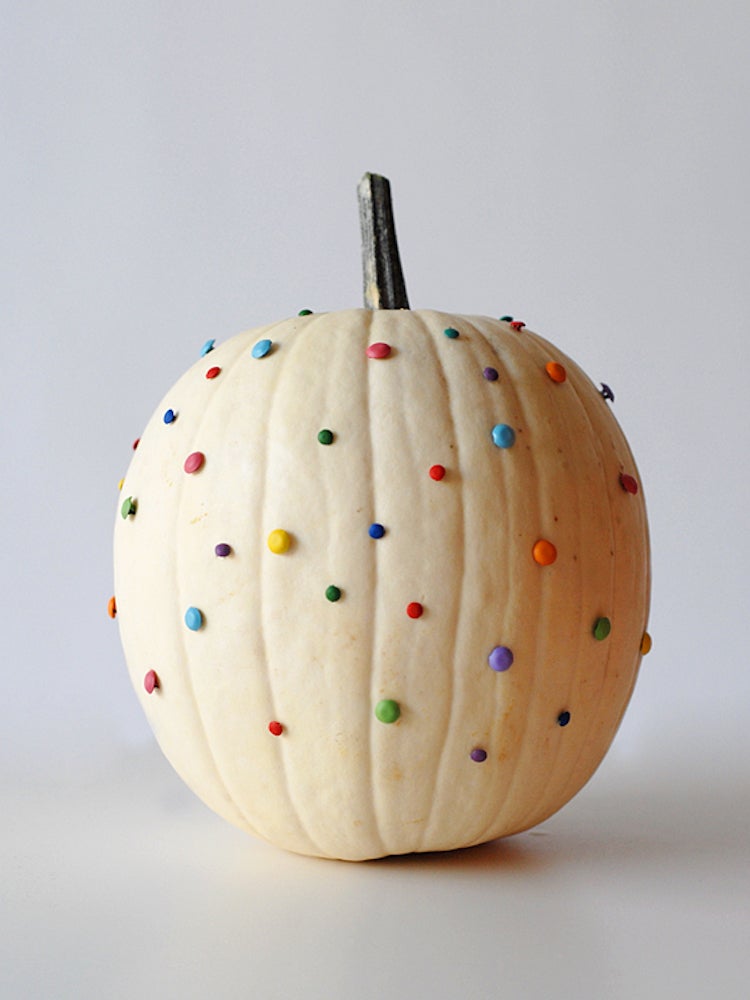
Who said Halloween had to be all orange and black? Stray from the norm with a festive centerpiece made from a white pumpkin and colorful confetti brads. Tough enough to pierce the pumpkin’s skin, these brads can be pressed into a pattern of your choosing for a no-carve, one-of-a-kind design.
Go Ombré
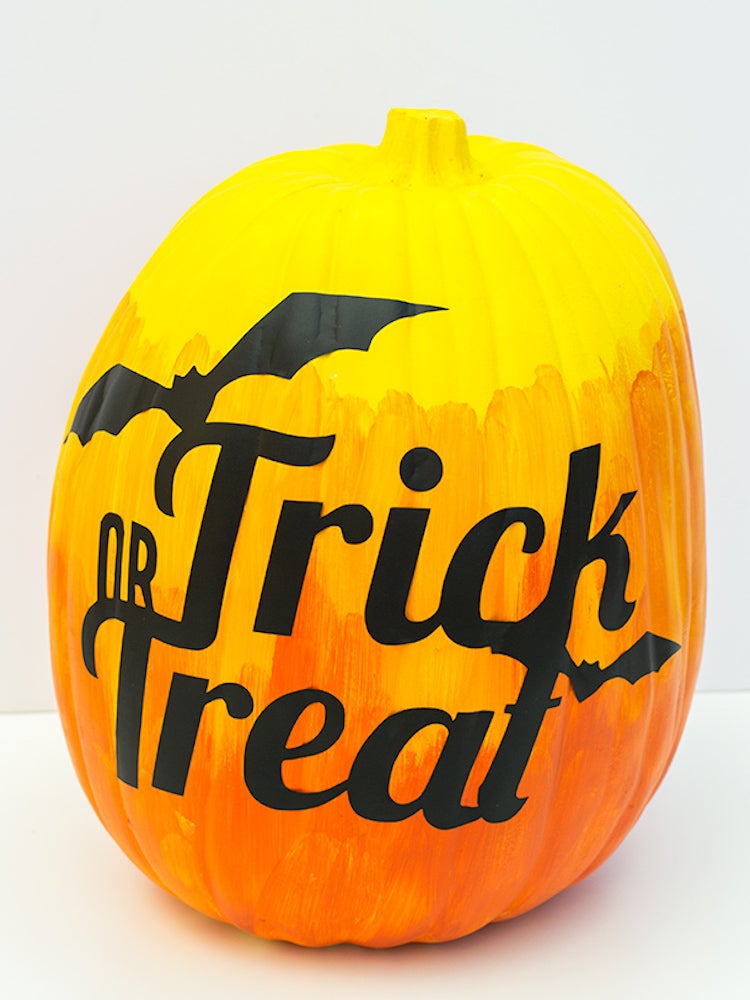
Well isn’t this a treat: A candy corn–inspired paint job
! The key to the ombre is working quickly. Paint the lightest color on the upper third of your pumpkin, and progressively go darker with each of the other sections. Then, before it all dries, use a fresh paintbrush to blend the colors together. Script your sentiment by hand or, as this clever designer did, cut your words out of adhesive vinyl to stick on when the paint dries for an even, matte black finish.
Related: Personalize Your Home with 10 Foolproof Stencil Projects
A Little Sparkle
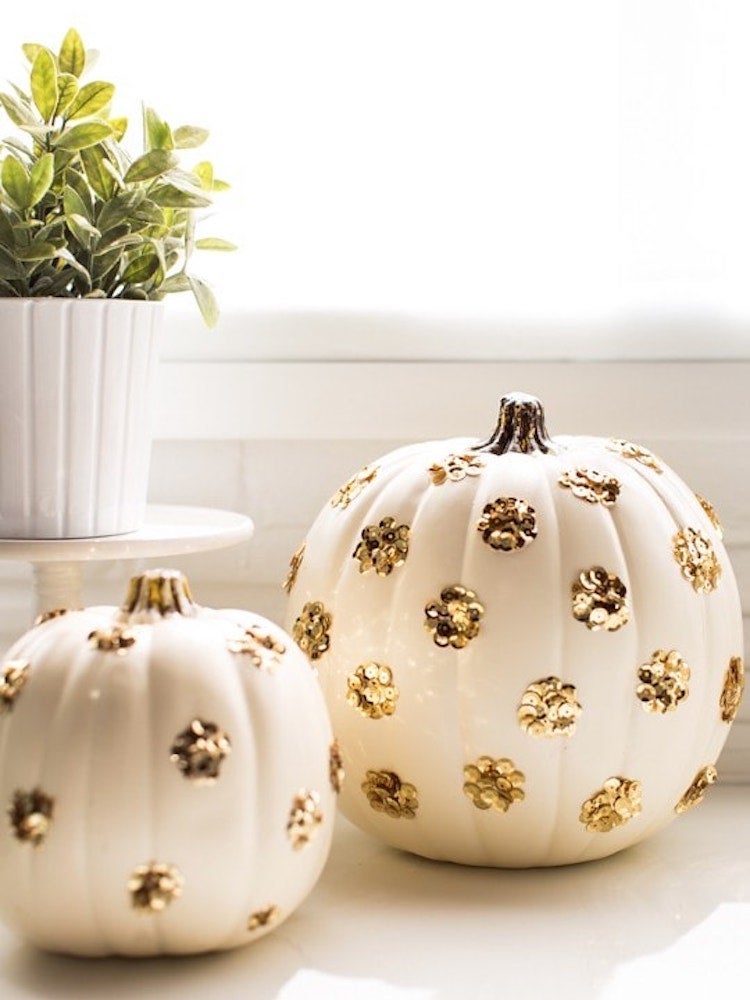
This ritzy no-carve idea requires little more than sequins. Sugar and Cloth shares the tips for creating these chic and shimmery pumpkins.
Black and White
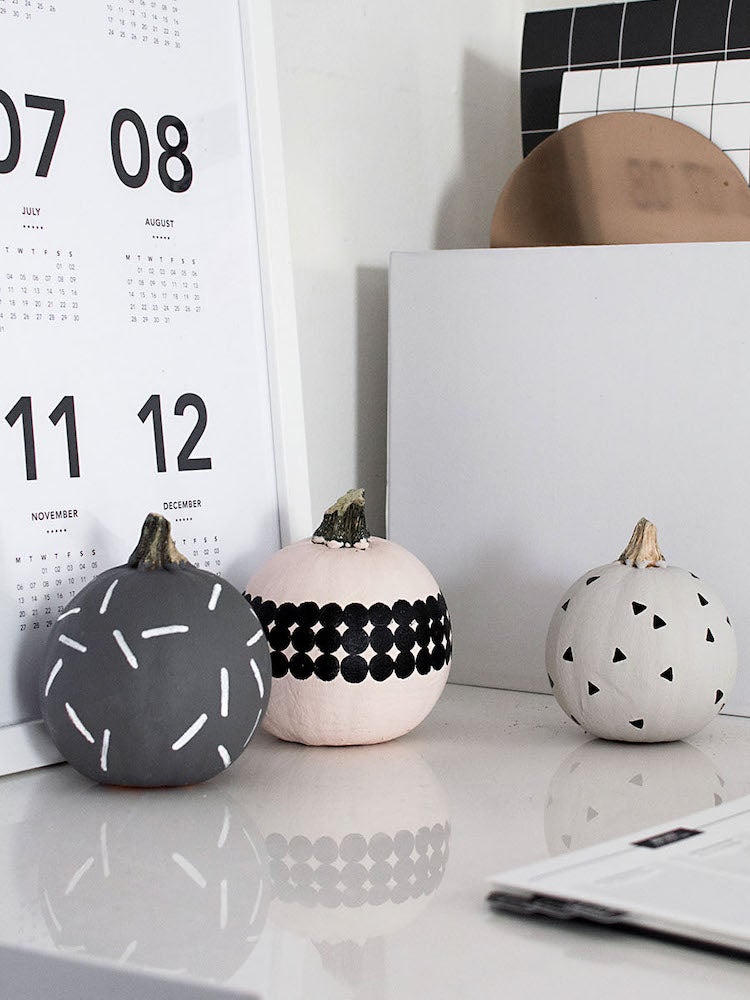
Keep your entryway table decor on trend with a small patch of no-carve pumpkins like these by Homey Oh My. The designs are easy enough to freehand, you won’t have to worry about making any mistakes.
Starry Night
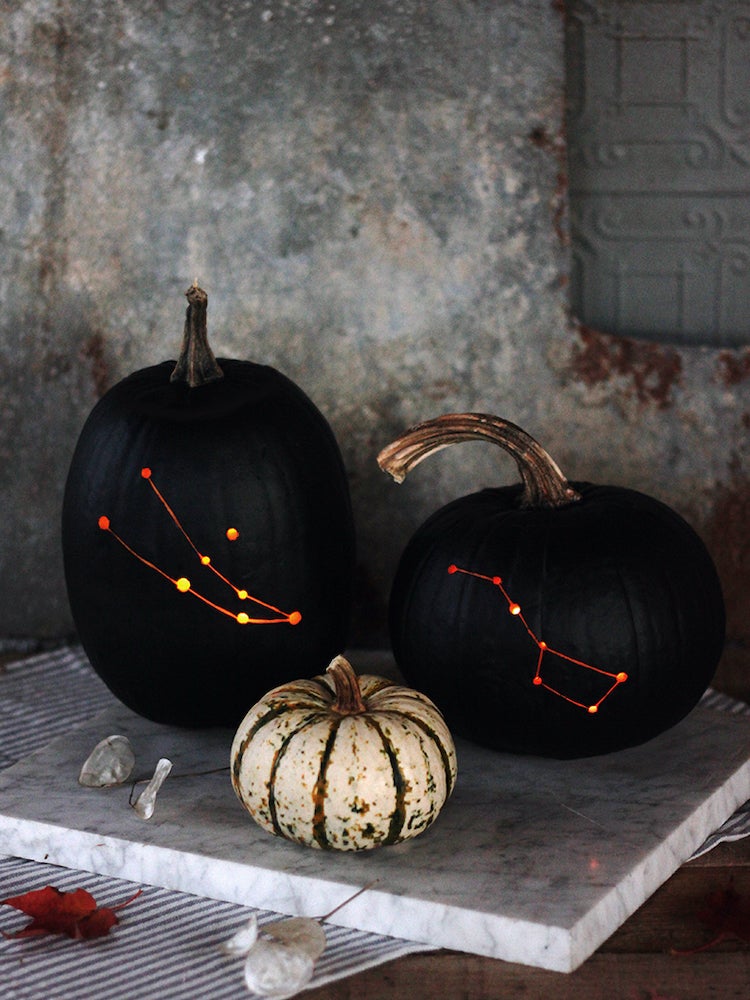
Nothing beats looking up at a star-filled sky on an October night! Bring that view down to earth by carving it into your pumpkin. Remove the seeds, coat your pumpkin in black spray paint, then use a drill recreate your favorite constellations on the front of your gourd. Once a candle is in place, the flickering dots of light will mimic the skies above.
Related: 6 Pumpkin Carving Tools to Put the ‘Jack’ in Your Lantern
Nice in Neon
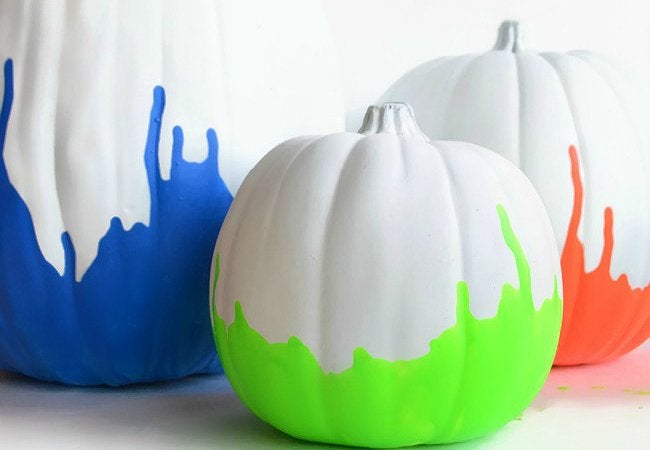
Colorful and easy? That’s music to the ears of most DIYers. For your own set of brightly decorated
pumpkins, first spray paint them in a solid black or white base. Then dip and flip: Brush on an excessive amount of neon craft paint, and turn the gourd upside down so it drips down the side toward the stem. Once you’re happy with where the paint lands, let your pumpkin dry.
All-a-Glitter
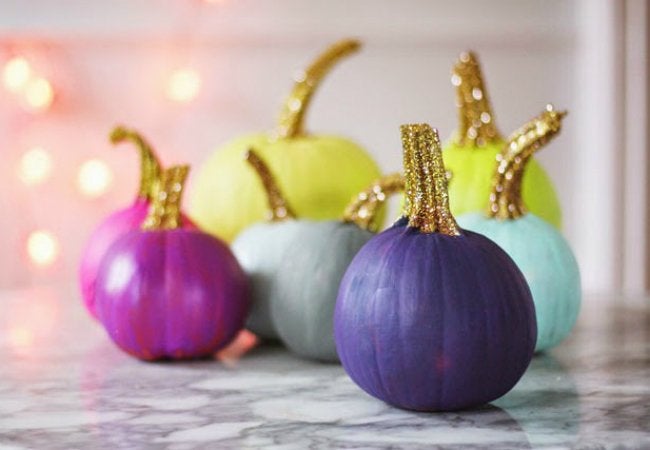
You can’t be afraid to get your hands glittery to partake in this dazzling DIY. Paint your pumpkin in your favorite color, coat its stem in tacky glue, then sprinkle on all of the sparkles. When dry, you can brush off the excess glitter and move to whichever room or space could use a punch of color.
Happy Henna
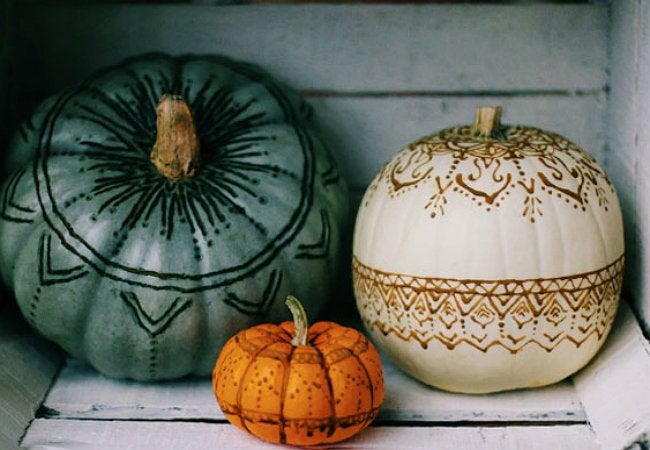
This of-the-earth pumpkin project adds a real rustic quality to the home when placed near your front door. To achieve the faux wood-burned effect, sketch your desired design in pencil and trace carefully over the pattern in henna paint. The finished look appears best on a natural, unpainted pumpkins, especially the ones like the blue or white.
Related: 5 Paints You Can Make Yourself
Creature Comfort
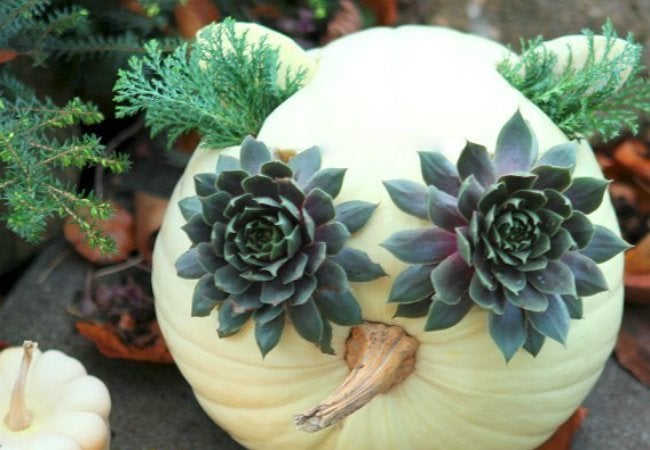
Inspired by majestic snow owls, this fresh idea turns white pumpkin with a bent stem into the beaked face of a woodland creature. To make your own, flip a gourd on its side, carve out two holes for eyes and fill each with a large Sempervivum rosette. Extra pumpkin cut-out pieces can create the owl’s horns; dress them with evergreen clippings to add a winter camouflage to your finished look.
Preppy Pumpkin
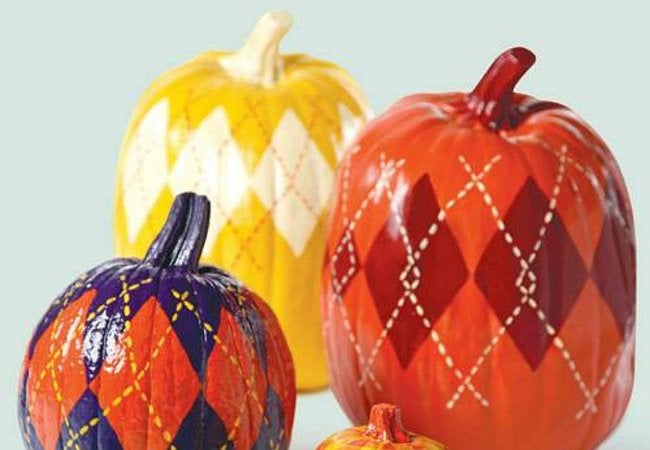
What’s fall without an argyle sweater? Just because you don’t have one in your closet doesn’t mean you can’t have one on your porch. You’ll want to factor in extra dry time between layers of paint: first the base color, then your large diamonds, and finally dashed diamond lines with a detail brush.
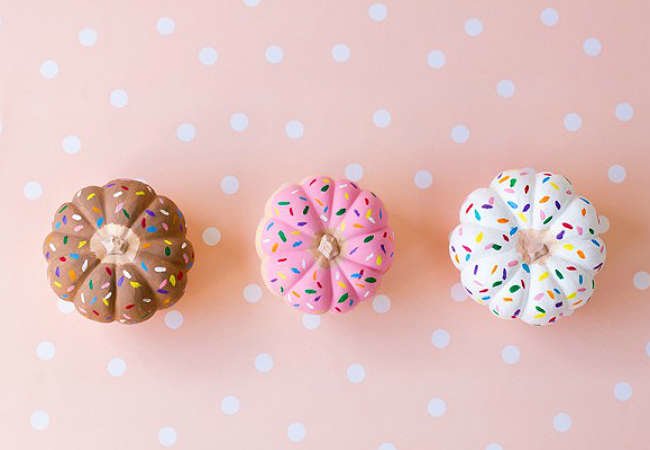
Sweet Treat

Calling all donut lovers: We’ve found a design rivals the real deal. To turn your gourds into real treats, paint the bottom halves the color of your donut and cover the tops with white paint (or the creamy pastel color of your choice). Once the first layer dries, a tiny paint brush can detail the multi-colored sprinkles. Yum!
Related: 5 Minutes Flat: 7 Upgrades You Can Do in Under 300 Seconds
Wrap Job

You’ll need plenty of patience—and baker’s twine—to recreate this clever craft. Brush on a layer of Mod Podge, then carefully wrap a spool of multi-color twine around and around your pumpkin. The key to the perfect wrap is to go slowly, making sure the twine wraps tightly and without any gaps.
Related: Celebrate Fall with 11 Thrifty DIY Projects for the Home
Lined and Defined
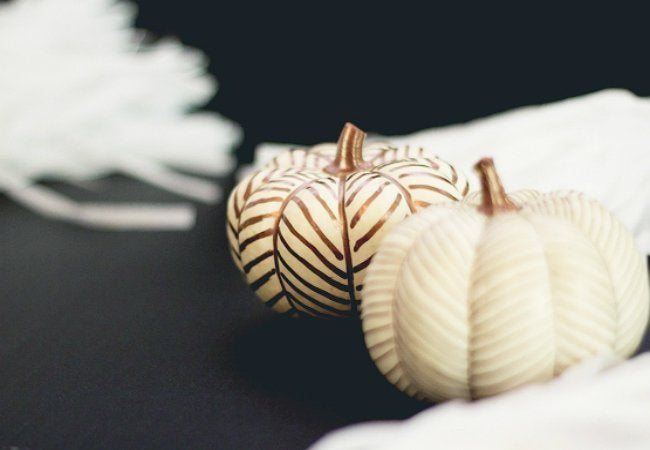
This decorative pumpkin idea takes no more than five minutes of your time—perfect when your short on time for centerpieces at the holidays. Using a copper paint pen or metallic permanent marker, trace the vertical lines along your white mini-pumpkins. Then, draw diagonal ones in each panel to create a herringbone pattern. Got one more minute to spare? Color the stem with the paint pen, too, for a finishing touch.
Splatter Effect
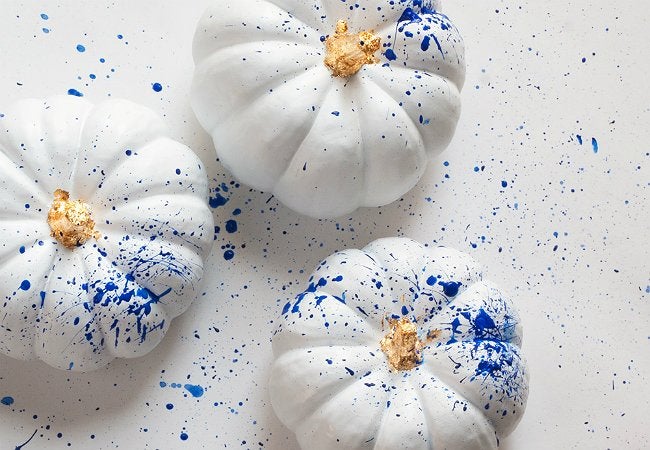
Prepared to make a mess this Halloween? No, we don’t mean with a pile of trashed candy wrappers—we’re talking splatter paint. To start, you’ll need to spray paint your orange pumpkin (stem included) with white paint. Let it dry, carefully cover the stem in gold leaf, and save the best saved for last: splattering a pop of color with the flick of the brush.
Related: 8 Ways to Age, Distress, Gild, and Add Shine to Your Next Project
Bean Baby
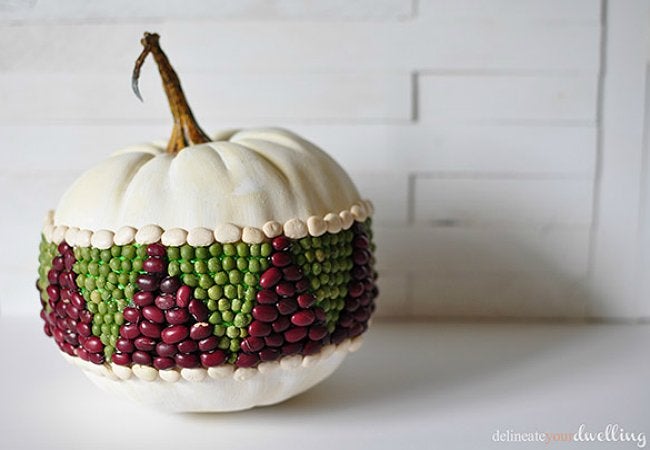
Embrace the colors of fall’s harvest
with a design that includes green lentils and red and white kidney beans. You can create any geometric pattern by drawing it out first with a pencil and then filling in with beans hot-glued into place. If you’re worried about any patches of orange or white pumpkin peeking through, paint the over the area you plant to fill before sticking on any beans.
Paint by Numbers
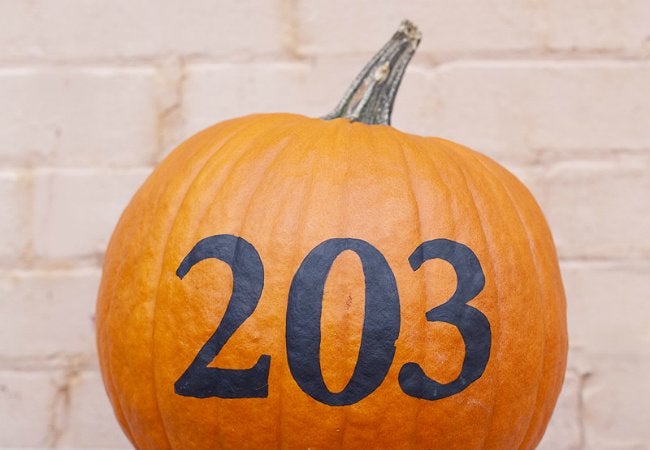
Trick-or-treaters won’t miss your door when you label your porch pumpkins with house numbers. Using a black Sharpie marker, simply trace your house number onto your orange pumpkin. Fill in the lines carefully using a paintbrush and black paint and let dry.
Picture Perfect
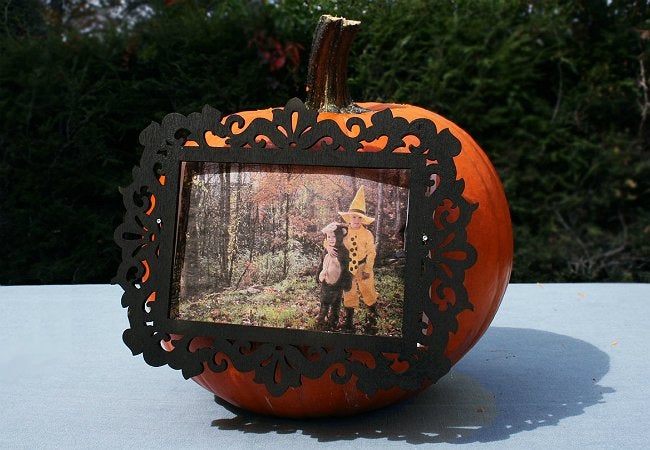
Turn your favorite Halloween throwback photograph into a spooky luminary. Remove the guts of your pumpkin and carve a rectangle the size of a 5×7 photograph out of the front. Then attach a flat wooden frame filled with a Halloween pic from your past, printed on either tracing paper or scrapbooking vellum. When you set a flameless candle inside at night, the photo will light up with an eery glow.
Darling Design
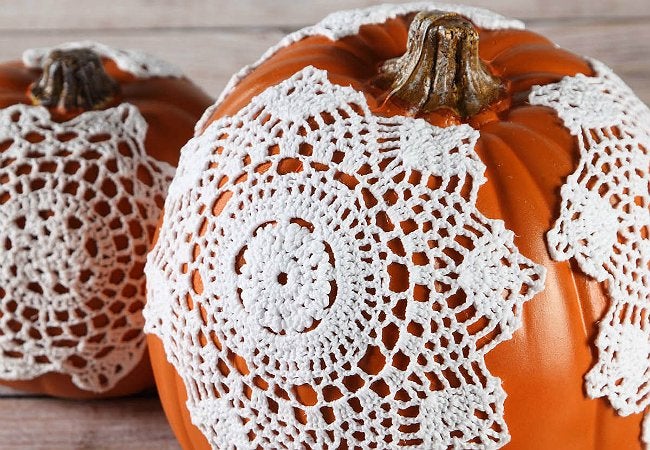
For a delicate touch reminiscent of the intricate spiderwebs, adhere thin white doilies to your otherwise all-natural pumpkin picks. (Orange pumpkins work best for the contrast, but you can reverse the scheme this with black lace doilies on white pumpkins, too!) Spread a light layer of the tacky glue onto the back side of the crochet work, then press onto the gourd’s skin, holding it in place for a minute until it sets.
Drill Down
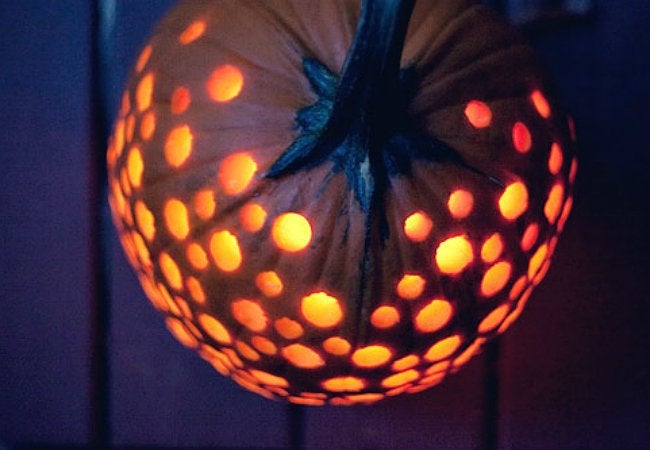
Your deck will be all a-glow with this easy carving technique. After you scrape out all the seeds for roasting, use an electric drill and variety of bits to create holes of all sizes throughout your pumpkin. Try to space them a few inches a part if you can so that the rind still maintains its structure. Put a candle inside, and the polka-dotted design will be seen flickering from all the way down the street.
Golden Glow
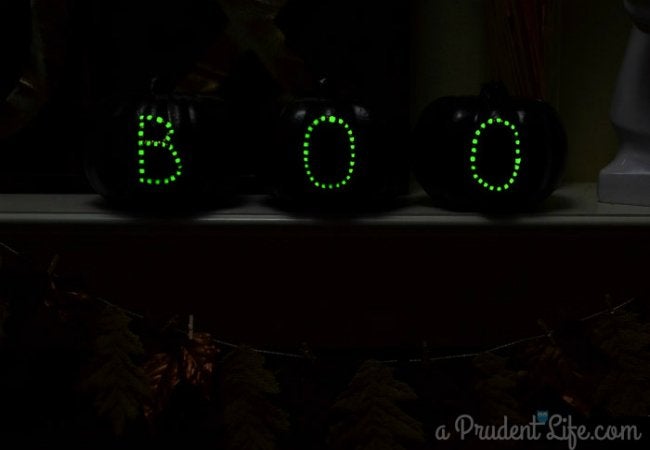
For festive decorations at all hours, mix in the magic of glow-in-the-dark paint. First black out your pumpkins with spray paint, then use stencils to trace a letter on each. (This DIYer spelled out, “boo,” but you can get lengthier—like “spooky” or “ghoulish”— if you have access to an entire pumpkin patch!) Alternate polka dots in metallic and a glowing white around the outlined letter for a message that reads well both day and night.
Related: 10 Unexpected Uses for Spray Paint
Easy Emojis
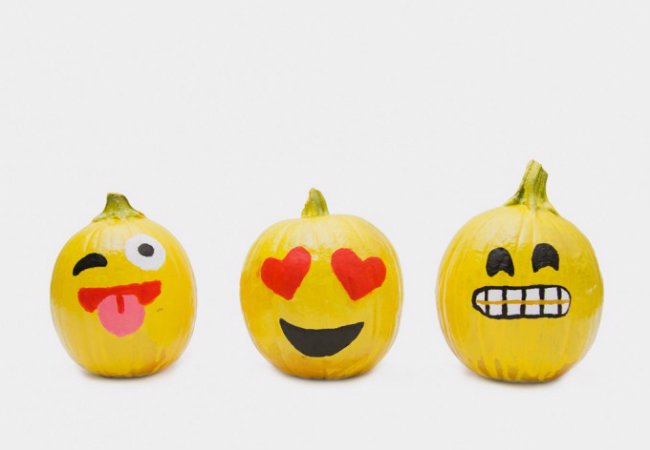
You don’t need to be tech savvy to recreate this pop culture reference with your pumpkins. To successfully fashion your favorite (or your kids’ favorite) emoticons, first cover your round pumpkin with yellow spray paint. Then, refer to your phone to paint on an emoji expression. Worried about freehanding it? Try these templates instead—and don’t forget to add a hashtag when you share the final result online.
Related: Home Office Ideas to Steal from 9 Creative Companies
Back to Biology
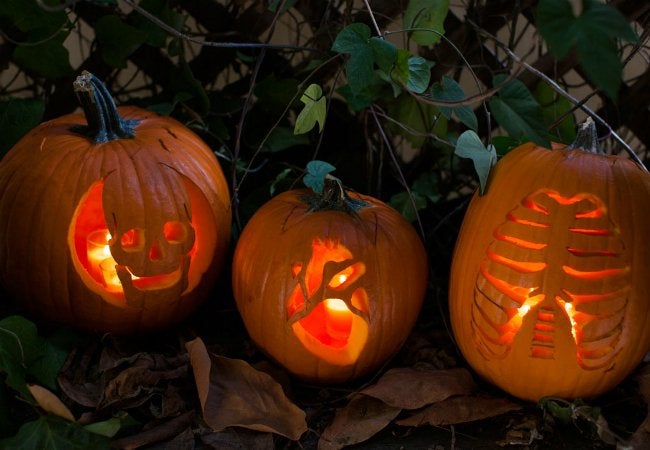
Nothing says Halloween like a skull cut-out flickering in the moonlight. Print these anatomy-inspired templates from Brit+Co (there’s everything from a heart to rib-cage) on sturdy cardstock and use them to trace your design onto a gourd of your choice. Then carve out the guts, make careful cuts along the stenciled lines with an X-Acto knife, and pop an LED light inside.
Laser Focus
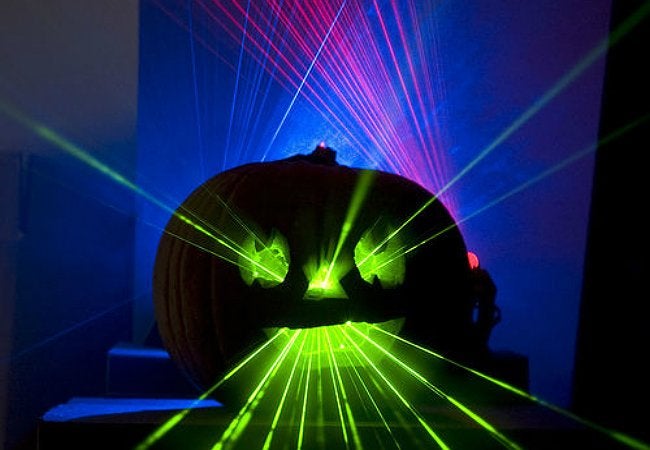
To up your pumpkin game, go big or go home with the special effects. Just a handheld laser can recreate this techno-ish glow at home. Layer in an extra attachment, a diffraction grating, so that the light splits. The more lasers you have shooting out through your jack-o’-lantern’s eyes and mouth, the better your chance at winning the decorating contest.
Wicked Workshop
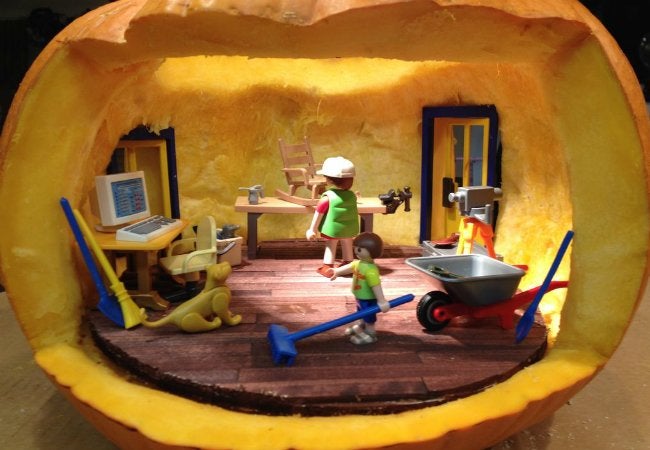
Lovers of pumpkins and playing house, meet the diorama that is strung out on candy corn. For this idea, you’ll need to raid the toy box in your kids’ closets. Once you’ve cut a stage-like hole in the front, use craft sticks and wood stain to construct a platform floor. From there, small toys (like dollhouse piece and Legos) will allow you to build your very own Halloween-inspired scene.
What’s In a Name
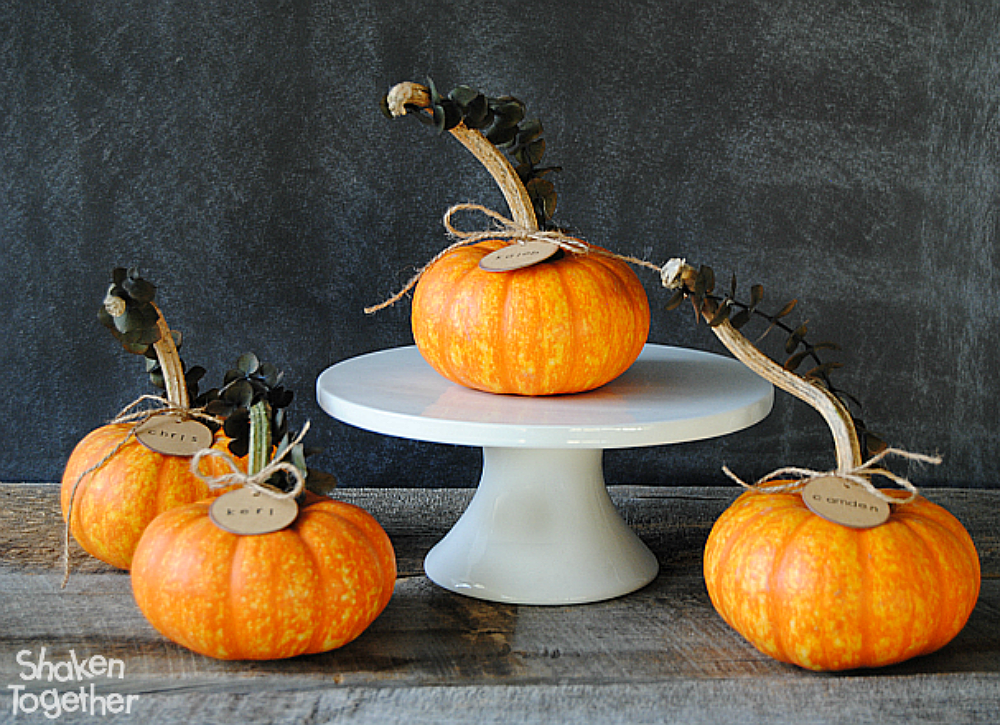
Too dainty for the doorstep, these miniature pumpkin place card holders are sure to be a conversation starter at the dinner table. Stamp your guests’ names onto kraft paper tags, and then tie the tags with twine around each pumpkin stem. Hot-glue eucalyptus around the length of each stem to make these tiny table toppers as sweet to smell as they are to behold.
Memorable Monogram
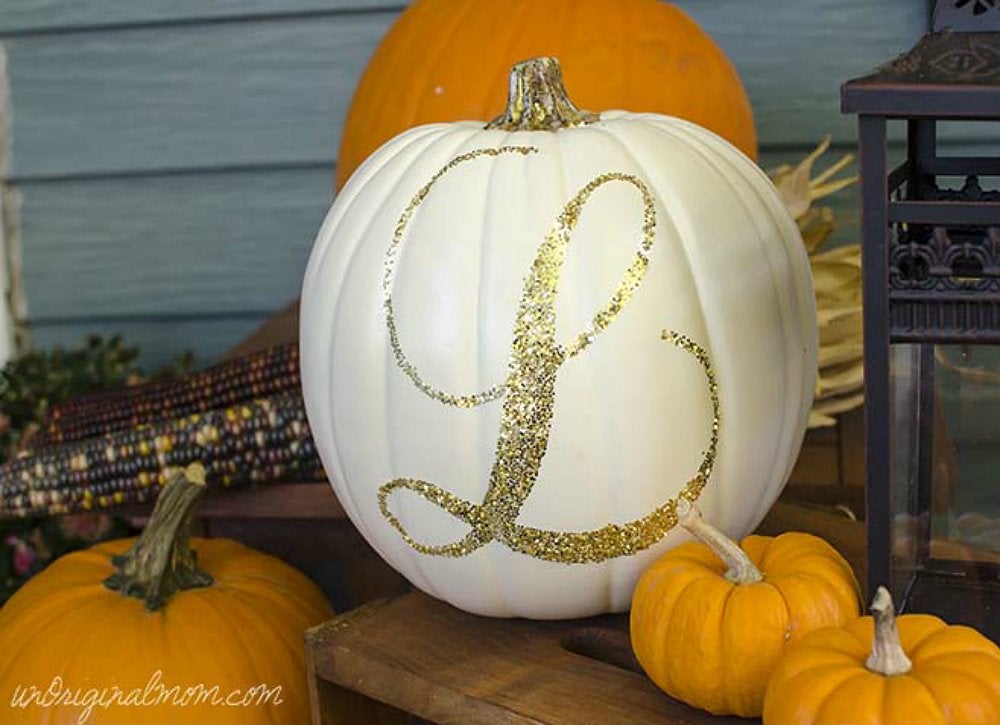
Fit for Cinderella’s fairy-tale evening, this monogrammed pumpkin is bound to be a hit among trick-or-treaters and glamour-loving DIYers, too. Paint a plain pumpkin in your favorite hue, and when dry, adhere a pre-printed letter cut from double-sided adhesive. Once the adhesive is peeled back, go wild with glitter, sprinkling it over the letter to let your creation shine.
Encased In Lace
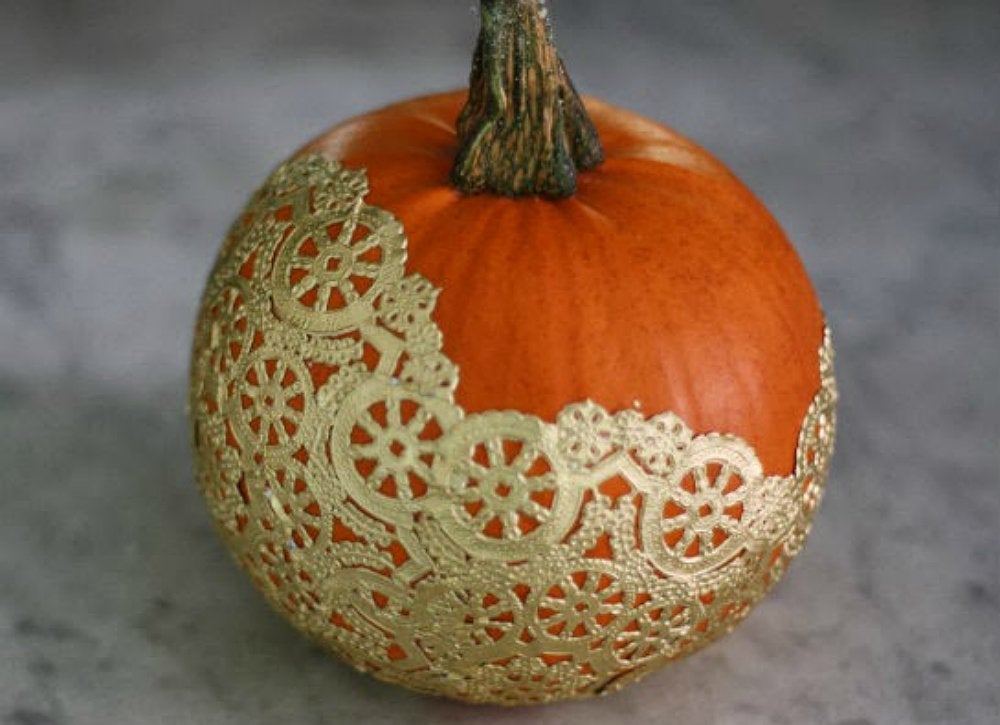
Who said doilies are only for fancy dinner parties? These gold paper doilies are the perfect costume for pumpkins on Halloween night. Wrap the doilies around each pumpkin, cutting the excess at the folds. When the doilies cover the pumpkin completely, coat them with spray adhesive to complete this no-frills DIY.
Copper Topper
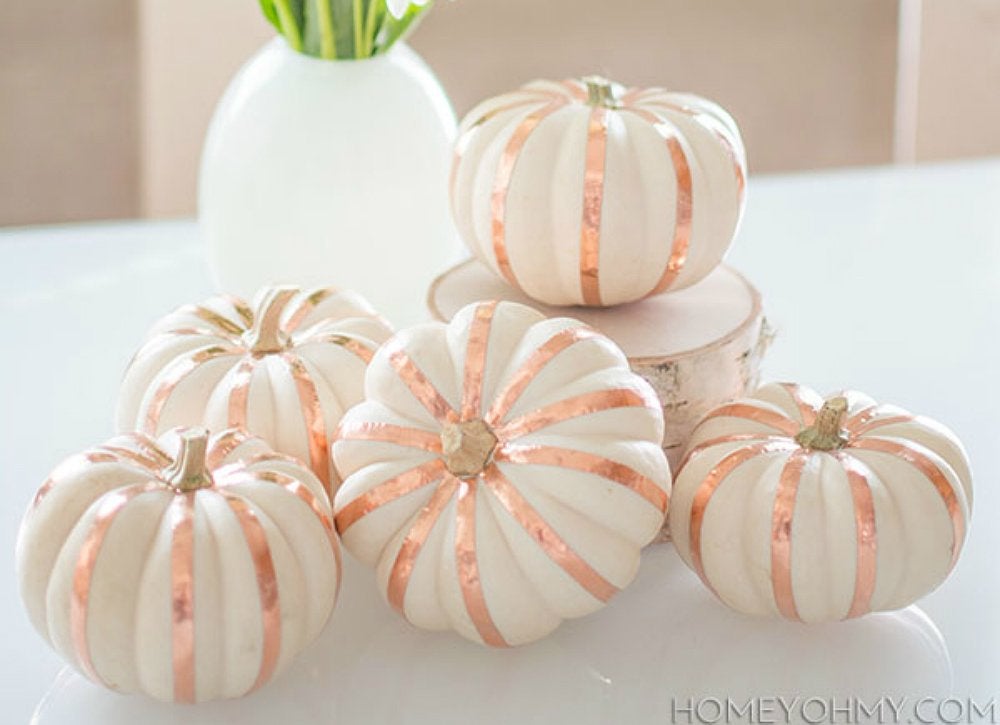
If you swear by copper in the kitchen, why not put the marvelous metal to work decorating and cooking this Halloween? Deck out a drab pumpkin in neutral paint topped with strips of copper tape adhered along the grooves. For a seamless finish, peel the backing of the tape with one hand as you smooth the tape down onto the pumpkin with the other hand.
No Carving Necessary
Paint, pens, and power drills can all help you decorate your next pumpkin.